21
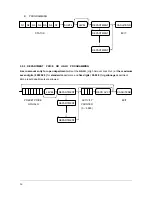
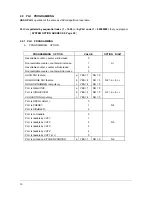
2.5 DEFAULT LEVEL PROGRAMMING
The default level programming is
the “top”
or
“surface” level
returned to after each department when
options are set for
pop-up levels
. ( Refer to
SYSTEM OPTION ADDRESS 57
,
Page 42
)
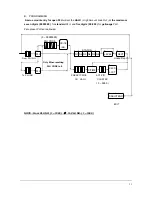
EX )
2.6 CLERK SECRET CODE & DRAWER ASSIGNMENT PROGRAMMING
NOTE : If you want to use 15 clerks system, you should set the SYSTEM OPTION ADDRESS 28 to 4
( Page 40 ).
When you want to use the
CLERK CODE SYSTEM
, you should set the
SYSTEM OPTION ADDRESS 28
.
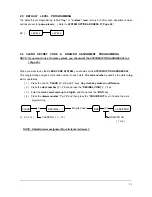
This programming assigns a clerk code number to each clerk.
The code number
is used by the clerk to
log
on
for operations.
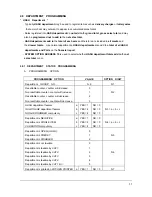
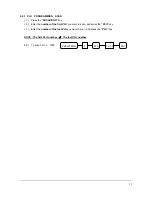
( 1 ) Press the one of
“CLERK ( 1, 2, 3 or 4 )”
keys.
Any clerk key makes no difference.
( 2 ) Press the
clerk number ( 1 ~ 15 )
and press the
“DECIMAL POINT ( . )”
key.
( 3 ) Enter the
clerk secret code up to 6 digits
, and then press the
“#/NS”
key.
( 4 ) Press the
drawer number ‘1’ or ‘2’
and then press the
“CASH/TEND”
key to finalize the clerk
programming.
( X ) ( 6 Digits Code ) ( X )
( 1, 2, 3 or 4 ) CLERK NO. ( 1 ~ 15 ) DRAWER NO.
( 1 or 2 )
NOTE : Default drawer assignment for all clerks is drawer 1.
#/NS
CLERK
DECIMAL ( . )
LEVEL 2
LEVEL 2
CASH/TEND
Summary of Contents for ER-5100? SERIES
Page 11: ...10 KEYBOARD LAYOUT...
Page 25: ...24 2 7 3 DESCRIPTOR PROGRAMMING SCAN PAID OUT CASH TEND...
Page 44: ...43 2 19 PARAMETERS PROGRAM SCAN SUBTL CASH TEND...
Page 68: ...67 STEP 3 STEP 4 STEP 5 STEP 6 SLIP PRINTING STEP 7 STEP 8 SLIP PRINTING...
Page 71: ...70 STEP 1 STEP 2 STEP 3 STEP 4 SLIP PRINTING STEP 5 STEP 6 SLIP PRINTING...
Page 79: ...78...
Page 80: ...79...
Page 85: ...84 OPTIONAL FULL CLERK REPORT SYSTEM OPTION 8...

