3 Installation and Operation
SAM4S ER-900/SPS-300 SERIES
3-5
3-3 Installation
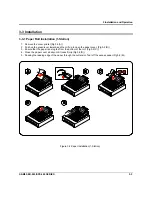
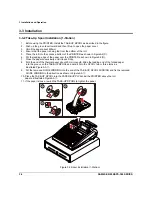
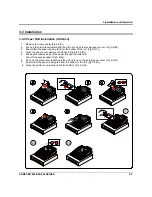
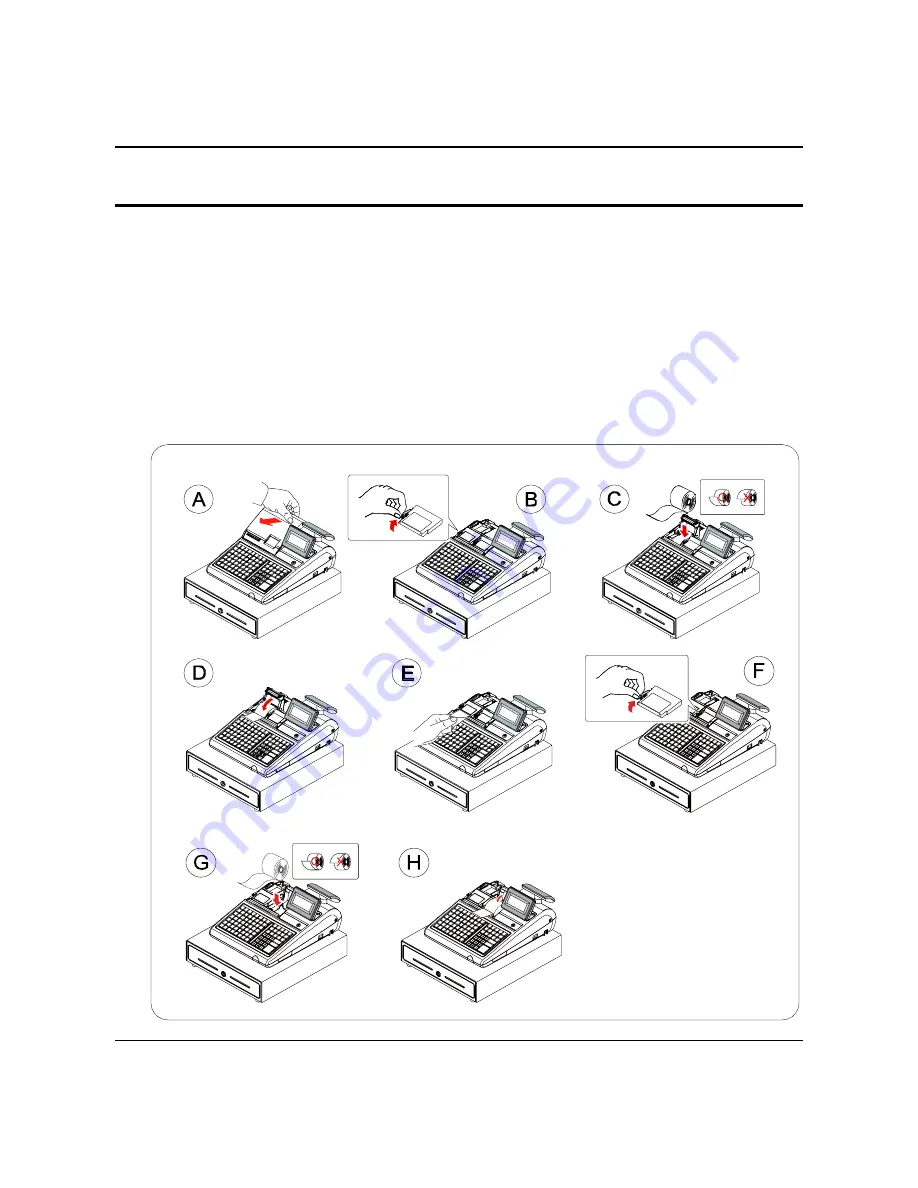
3-3-3 Paper Roll Installation (2-Station)
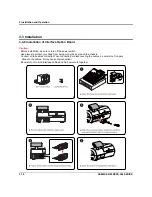
1. Remove the cover printer.(Fig 3-4(A))
2. Push up the green lever toward and then lift up to open the receipt paper cover. (Fig 3-4(B))
3. Ensure that the paper is being fed from the bottom of the roll. (Fig 3-4(C))
4. Close the paper cover slowly until it locks firmly.(Fig 3-4(D))
5. Passing the leading edge of the paper through the cutter slot.
Tear off the excess paper.(Fig 3-4(E))
6. Push up the green lever toward and then lift up to open the journal paper cover. (Fig 3-4(F))
7. Ensure that the paper is being fed from the bottom of the roll. (Fig 3-4(G))
8. Close the printer cover slowly until it locks firmly. (Fig 3-4(H))
Summary of Contents for ER-900 Series
Page 38: ...5 Maintenance and Adjustment 5 2 SAM4S ER 900 SPS 300 SERIES MEMO ...
Page 78: ...7 Exploded View and Parts List 7 34 SAM4S ER 900 SPS 300 SERIES MEMO ...
Page 79: ...SAM4S ER 900 SPS 300 SERIES 8 1 8 PCB Layout and Parts List 8 1 Main PCB ...
Page 84: ...8 PCB Layout and Parts List 8 6 SAM4S ER 900 SPS 300 SERIES 8 2 I F PCB ...
Page 90: ...8 PCB Layout and Parts List 8 12 SAM4S ER 900 SPS 300 SERIES 8 7 OPTION I F 232 USB PCB ...
Page 94: ...8 PCB Layout and Parts List 8 16 SAM4S ER 900 SPS 300 SERIES MEMO ...
Page 95: ...SAM4S ER 900 SPS 300 SERIES 9 1 9 Wiring Diagram 9 1 Main PBA Block Diagram ...
Page 108: ...10 Block Diagram 10 2 SAM4S ER 900 SPS 300 SERIES MEMO ...
Page 130: ...11 22 SAM4S ER 900 SPS 300 SERIES MEMO ...
Page 132: ...ⓒ Shin Heung Precision MAY 2011 Printed in KOREA V1 0 Code No JK68 XXXXXA ...

