6 Troubleshooting
6-4
SAM4S ER-900/SPS-300 SERIES
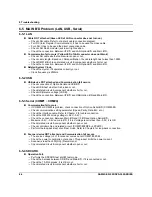
6-5 MAIN B’D Problem (LAN, USB, Serial)
6-5-1 LAN
Cable NOT attached (Green LED of LAN connector does not turn on).
→
Check LAN cable. Refer to chapter 2 cable connection diagram.
→
For IRC (Inter Register Communication), It has to be used the cross cable.
→
For LAN, It has to be used the direct connection cable.
→
Check LAN RJ-45 modular jack insert right position..
→
Check the connection. Between I/F B’D and LAN Option B’D and Main B’D.,
Communication fail occurs (Yellow LED of LAN connector does not blank).
→
Check LAN cable whether cable wire is open or not.
→
Check cable length. Based on LAN specification, the cable length has to less than 100M.
→
Check DM9161B chip and related circuit & component whether short or not.
→
Check the connection. Between I/F B’D and LAN Option B’D and Main B’D.,,
Related System Clock.
→
Check the crystal, if it operates correctly or not.
→
Clock frequency is 25MHz.
6-5-2 USB
USB device NOT attached and Communication fail occurs.
→
Check connection of Option Serial and USB B’D.
→
Check USB host whether it is broken or not.
→
Check related circuit & component whether short or not.
→
Check USB source voltage (VUSB).
→
Check the connection. Between I/F B’D and USB Option B’D and Main B’D.,
6-5-3 Serial (COM#1 ~ COM#4)
Communication fail occurs.
→
If COM#3 or COM#4 is problem, check connection of Option Serial B’D (COM#3,#4).
→
Check communication setting parameter (Speed, Parity, Data Bit…etc,.)
→
Check the interface cable. Refer to Chapter 2 for cable connection.
→
Check the RS3232 driving voltage (+5.4V, -5.4V).
→
Check the connection. Between Main B’D and I/F B’D and Option Serial B’D.,
→
M5.4V, -5.4V on main B’D. If -5.4V voltage level is less than -5.0V, it is OK.
→
Check related circuit & component whether open or not.
→
Check controller chip and related circuit. (COM#1/#2#3/#4
→
LPC2470)
→
Perform the loop-back test at self test mode. Refer to Chapter3 for loop-back connection.
Scanner device NOT attached and Communication fail occurs.
→
The source voltage (+5V) for scanner comes out at COM#1,#2,#3,#4..
→
Check the power consumption of scanner. This product limits the power current;
→
Scanner is less than 300[mA]. (Recommend)
→
Check related circuit & component whether open or not.
6-5-4 SDCARD
Operation Fail.
→
Performs the SDCARD test at H/W test mode.
→
Check the harness between SD B’D and Main B’D, if it is connected or not.
→
Check the 10-Pin harness, it is OK or not.
→
Check related circuit & component whether short or not.
Summary of Contents for ER-900 Series
Page 38: ...5 Maintenance and Adjustment 5 2 SAM4S ER 900 SPS 300 SERIES MEMO ...
Page 78: ...7 Exploded View and Parts List 7 34 SAM4S ER 900 SPS 300 SERIES MEMO ...
Page 79: ...SAM4S ER 900 SPS 300 SERIES 8 1 8 PCB Layout and Parts List 8 1 Main PCB ...
Page 84: ...8 PCB Layout and Parts List 8 6 SAM4S ER 900 SPS 300 SERIES 8 2 I F PCB ...
Page 90: ...8 PCB Layout and Parts List 8 12 SAM4S ER 900 SPS 300 SERIES 8 7 OPTION I F 232 USB PCB ...
Page 94: ...8 PCB Layout and Parts List 8 16 SAM4S ER 900 SPS 300 SERIES MEMO ...
Page 95: ...SAM4S ER 900 SPS 300 SERIES 9 1 9 Wiring Diagram 9 1 Main PBA Block Diagram ...
Page 108: ...10 Block Diagram 10 2 SAM4S ER 900 SPS 300 SERIES MEMO ...
Page 130: ...11 22 SAM4S ER 900 SPS 300 SERIES MEMO ...
Page 132: ...ⓒ Shin Heung Precision MAY 2011 Printed in KOREA V1 0 Code No JK68 XXXXXA ...

