


Operator's manual
DITCH CLEANER
OR 080 (L)
-
14
-
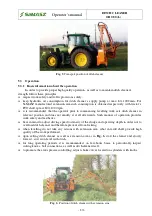
5.3.2
Initial adjustment and preparing for operation
Ditch cleaner is factory adjusted and requires no additional adjustments.
In case of improper operation of the cleaner, please contact the Manufacturer's service.
Prior to commencing operation with ditch cleaner perform the following:
thoroughly examine the cleaner, whether it is in operating condition and has no plays and
damages. Pay particular attention to condition of bolt connections on cutting knives,
take off any guards, locks and safety devices mounted on aggregation of extension arm and
ditch cleaner,
connect PTO shaft to tractor,
upon making sure, there is no unauthorized personnel around, start ditch cleaner with no loading
and reach the provided PTO rpm, and then shut down and inspect for oil leaks,
if the cleaner's condition and its idle operation raise no doubts, start operating.
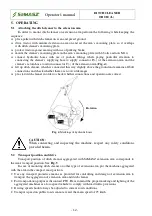
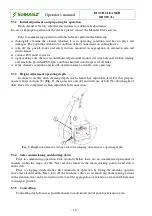
5.3.3
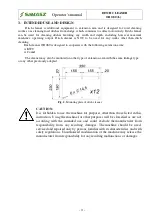
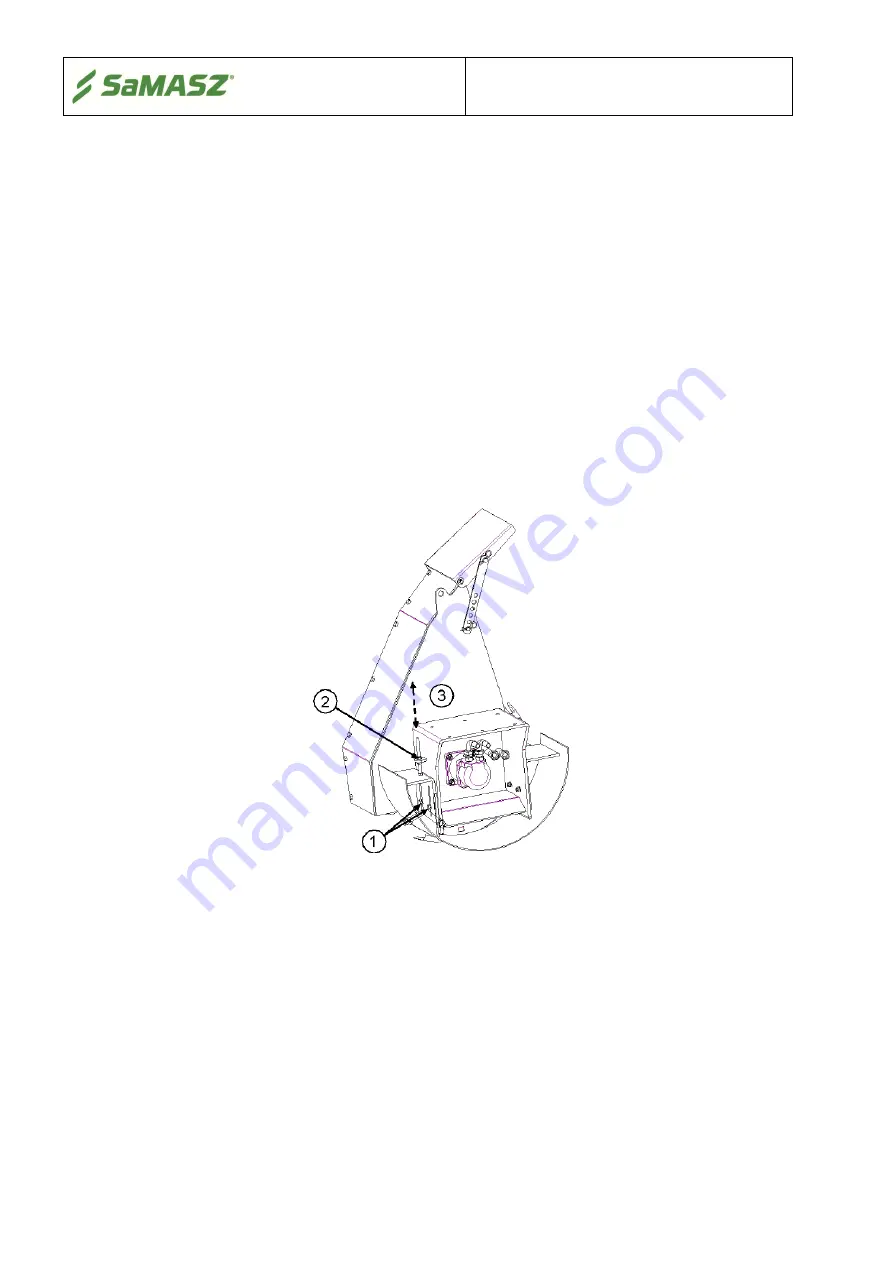
Height adjustment operating depth
In order to modify ditch cleaning depth, ditch cleaner has adjustable skid. For this purpose
unscrew bolts and nuts (
1
) (
Fig. 7
), then unscrew nuts (
2)
and with use of bolt (
3)
adjust height of
skid. Once it is completed, tighten adjustable bolt connection.
Fig. 7.
Height adjustment for setting of skid for adjusting ditch cleaner’s operating
depth
5.3.4
Safe commissioning and shutting down
Prior to commencing operation look around whether there are no unauthorized personnel or
animals within the range of 10m. Next set the cleaner in the mean working position and start it
afterwards.
Prior to stopping ditch cleaner, first terminate its operation by lifting the machine upwards
above the cleaned ditch. Next, turn off the machine’s drive so in result any maneuvering actions
with extension arm can be started in order to set the aggregation of extension arm and ditch cleaner
to transport position.
5.3.5
Controlling
Controlling ditch cleaner is possible thanks to individual control panel of extension arm.


