8
EN
CAUTION: to clean the blade, wear metal
gloves and use a damp cloth.
*N.B.: optional and only if you there is a
guard to safely remove the blade.
To clean the surface opposite the blade and
ring, you need to remove the blade (see Fig.18)
from the meat slicer. The procedure is as
follows:
·unscrew the blade cover (Figure 16)
·remove the sharpener (a) and use the
graduated handle to open the gauge plate far
enough to fit the guard (b) on the blade
·rest the Plexiglas guard on the blade so that
the guard groove slots into the ring (c);
·line up the centre of both holes in the blade (d)
with both guard bolts (e). To do so, turn the
blade to the desired position;
·screw in both knobs (e) without tightening
excessively;
·loosen the four screws (f) holding the blade in
place;
CLEANING THE SHARPENER
Use a cloth to clean the sharpener cover and a
dry brush to clean the teeth.
CLEANING THE SLICE DEFLECTOR
(Figure 19)
To remove the slice deflector, loosen the four
screws (a) holding it in place. Clean it using
water and a neutral detergent.
IMPORTANT ADDITIONAL
INFORMATION
This machine is not designed for use by
children or persons with physical, sensory or
mental disabilities, or by inexperienced or
unskilled persons, unless they have been
supervised or trained in using these machines
by a person responsible for their safety.
MAINTENANCE
GENERAL COMMENTS
Before any maintenance task, you must:
·unplug from the mains to completely isolate the
slicer from the system;
·put the graduated handle that regulates the
gauge plate in the “0” position;
MAINTENANCE
DRIVE BELT
The drive belt requires no adjustment. In
general it should be replaced after 3 to 4 years.
To do so, call the “SUPPORT CENTRE”.
LEGS
Over time the legs may wear down and lose
their elasticity, causing the appliance to become
unstable. Replace them in this case.
POWER CABLE
Regularly check the condition of the cable and
if necessary call the “SUPPORT CENTRE” to
replace it.
BLADE
After the blade has been sharpened several
times, check that its diameter has not reduced
by more than 10 mm compared to the original
diameter. To replace it call the “SUPPORT
CENTRE”.
TEETH
Check that the teeth remain abrasive during
sharpening. If not, they need to be replaced to
avoid damaging the blade. To do so, contact the
“SUPPORT CENTRE”.
LUBRICATING THE GUIDE RAILS
The carriage guide rail needs to be lubricated
regularly using the oil supplied with the
appliance. Pour a few drops of oil into the hole
on the side of the graduated handle bearing the
OIL nameplate. Occasionally, lift the appliance
(Figure 20) and lubricate the points identified by
arrows 1 and 2.
DRAINING AND DISPOSAL
INFORMATION FOR THE USER.
In accordance with article 13 of
Italian legislative decree, 25 July
2005, number 151 «Application of
Directives 2002/95/EC, 2002/96/EC and
2003/108/EC, relating to limiting the use of
hazardous substances in electrical and
electronic appliances, and waste disposal».
The crossed out container symbol on the meat
slicer shows that the appliance must not be
mixed with other waste at the end of its service
life.
When the meat slicer reaches the end of its
service life, the user must take it to a suitable
electronic and electrotechnical waste sorting
centre, or hand it over to the distributor when
he/she buys a similar new meat slicer, on a one-
for-one basis.
Properly separating the meat slicer for
environmentally-friendly recycling, treatment
and disposal helps to avoid possible harm to
the environment and health and allows the
meat slicer parts to be recycled.
Improper disposal results in fines for the user in
accordance with legislation in force.
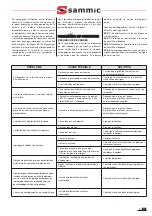
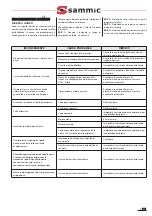
PROBLEMS AND SOLUTIONS
TROUBLESHOOTING
The most common problems that arise while
using the meat slicer are listed below, along
with the most likely causes and solutions. If the
problem persists, contact the authorised
support service.
Control panel: display 3 (Figure 8) shows the
following message:
ERR 1:
When the emergency button (if it exists)
is pressed.
ERR 2:
Protection of front carriage if safety time
is exceeded.
ERR 3:
Protection of rear carriage if safety time
is exceeded.
ERR 4:
Occurs when the appliance is switched
on and the carriage is in manual mode.


