15
R. 07/21 854 823
SAMOA Industrial, S.A. · Pol. Ind. Porceyo, I-14 · Camino del Fontán, 831 · 33392 - Gijón - Spain · Tel.: +34 985 381 488 · www.samoaindustrial.com
2021_07_01-08:30
10.
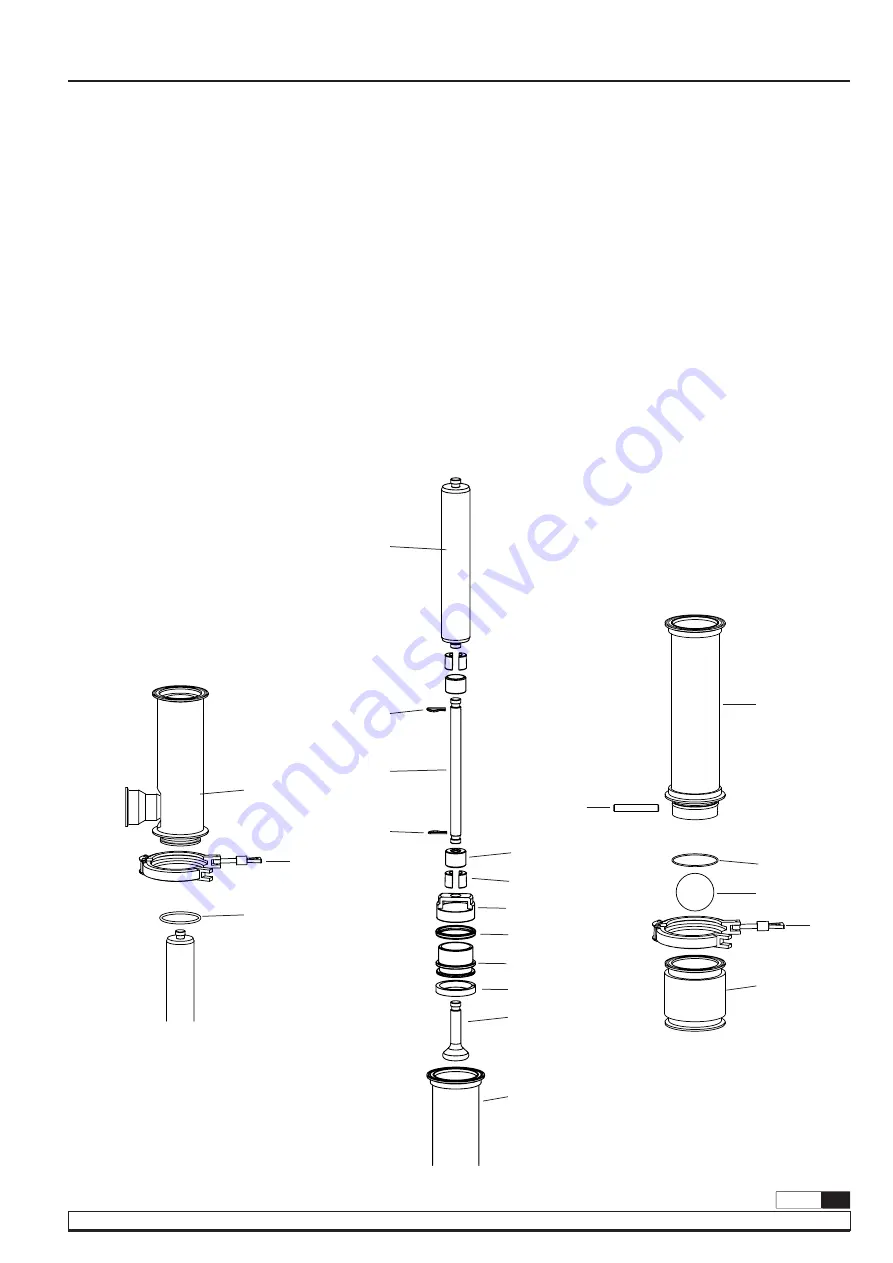
Remove the clamp ring (79) between the outlet body assembly (81)
and the cylinder assembly (89).
11.
Pull the outlet body from the cylinder assembly taking care not to
damage the packing rod.
Remove the seal (75) and also the seal from the pump outlet.
12.
Holding the cylinder assembly (78) in one hand and the packing rod
(78) in the other hand, pull out the piston assembly and coupling
rod from the cylinder.
13.
While still holding the packing rod (78), remove the nearest spring
clip (53) from the coupling rod (10). The coupling cover and
couplings can now be removed so that the packing rod can be
placed down where it will not be damaged.
14.
Remove the spring clip (53) from the other end of the coupling rod
(83) and them remove the coupling cover (79) and couplings (77).
Fig. 12
Fig. 13
Fig. 14
The piston can now be dismantled by pulling the valve (88) away
from the piston so that its stem leaves the hole in the upper piston
(84).
This now leaves the upper piston free to be pulled from the lower
piston (86).
Next remove the seal (85) by sliding it off the lower piston, and the
piston ring (87) by peeling it from its groove.
15
. Separate the cylinder assembly (89) from the foot valve body (93)
by removing the clamp ring and pulling the cylinder from the foot
valve.
16.
Remove the seal (91) and the retaining pin (90) from the end of the
cylinder (89).
Lift out the valve (92) from the foot valve body.
After cleaning and inspecting the pump components for wear (especially
the seals), the pump can now be reassembled.
Reassembly should be carried out in the reverse order to dismantling.
Light lubrication of the seals with food quality grease is recommended.
THE ORDER FOR DISASSEMBLED IS AS FOLLOWS
81
75
79
76
77
84
85
86
87
88
89
78
53
83
53
79
91
92
93
90
89


