www.larius.com
19
L400
REV.
02 - 02/2020 - Cod. 150085
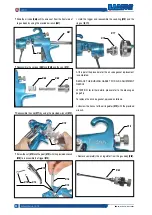
• Use the provided wrench
(R30)
to screw the nut
(R28)
and the
pivot
(R29)
and assemble the trigger
(R27).
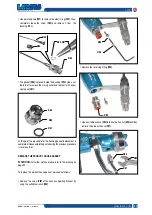
• Hold the trigger
(R31)
with your hand and unscrew the coupling
(R32)
with the provided wrench
(R33)
.
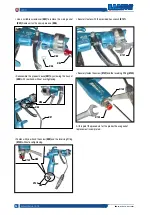
• Reassemble the head
(R34)
and the ring nut with the nozzle
.
At this point the procedure for the gasket replacement is com
-
pleted.
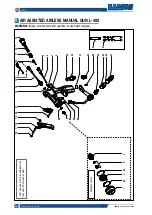
REPLACE THE COUPLING GROUP
ATTENTION: for further details, please refer to the drawing on
page 26
To replace the coupling group, proceed as follows:
• Remove the ring nut
(R35)
.
• Hold the trigger
(R36)
with your hand, unscrew the coupling
group
(R37)
witht he provided wrench
(R38)
and replace with a
new spare part
(R39).
At this point the procedure for the coupling group replacement
is completed.
Reassemble the gun following the previous procedure in reverse
order.
• Fasten the needle
(R25)
by using pointed pliers
(R26)
.
R26
R25
R27
R28
R29
R30
R27
R34
R35
R36
R38
R37
R39
R31
R33
R32


