background image

EB 8046 EN


 15-3

9

10

8

16

11

19

92

21

17

4

5

87

86

12

11

70

1

14

13

85

83

84

81
88

26

82

3

80

81

15

Summary of Contents for 3246

Page 1: ...f original instructions EB 8046 EN Type 3246 as globe and three way valve Edition February 2022 Type 3246 Valve ANSI and DIN versions In combination with an actuator e g a Type 3271 or Type 3277 Pneum...

Page 2: ...st you in mounting and operating the device safely The instructions are binding for handling SAMSON devices The images shown in these instructions are for illustration purposes only The actual product...

Page 3: ...ons 3 4 3 1 1 Globe valve 3 4 3 1 2 Three way valve 3 4 3 2 Versions 3 4 3 3 Additional fittings 3 5 3 4 Valve accessories 3 5 3 5 Technical data 3 5 4 Shipment and on site transport 4 1 4 1 Accepting...

Page 4: ...ling the valve after service work 9 5 9 4 Service work 9 5 9 4 1 Replacing the gasket 9 5 9 4 2 Replacing the circulation inhibitor 9 8 9 4 3 Replacing the packing 9 11 9 4 4 Replacing the seat and pl...

Page 5: ...meplate for limits and fields of application as well as possible uses Reasonably foreseeable misuse The control valve is not suitable for the following applications Use outside the limits defined duri...

Page 6: ...fail safe position of the control valve upon air supply or control signal failure depends on the actuator used see associated actuator documentation When the valve is combined with a SAMSON Type 3271...

Page 7: ...the specified hazard statements warnings and caution notes Furthermore operating personnel must be familiar with the applicable health safety and accident prevention regulations and comply with them...

Page 8: ...ques and lubricant Manual u H 02 Appropriate Machinery Components for SAMSON Pneumatic Control Valves with a Declaration of Conformity of Final Machinery For oxygen service Manual u H 01 The packaging...

Page 9: ...aware of the hazards in applications involving oxygen or cryogenic gases Instructions and information on how to safely handle devices for oxygen service can be found in the Manual u H 01 All SAMSON st...

Page 10: ...can injure hands or fingers if inserted into the valve Do not insert hands or finger into the yoke while the air supply is connected to the actuator Before working on the control valve disconnect and...

Page 11: ...uctions not followed There is a risk of personal injury Keep all relevant markings and inscriptions on the device in a constantly legible state Immediately renew damaged missing or incorrect nameplate...

Page 12: ...being contaminated through the use of unsuitable lubri cants and or contaminated tools and components Keep the valve and the tools used free from solvents and grease Make sure that only suitable lubr...

Page 13: ...Warning Meaning of the warning Location on the device Warning against moving parts There is a risk of injury to hands or fingers through the stroking movement of the actuator and plug stem if they are...

Page 14: ...1 10 EB 8046 EN...

Page 15: ...eal ME metal HA carbide metal ST metal base material with Stellite facing KE ceramic PT PTFE soft seal PK PEEK soft seal 13 Seat code trim material on request 14 Pressure balancing DIN D ANSI JIS B Ve...

Page 16: ...can contact us stating this item number to find out which material is used Additionally a seat code is used to identify the trim material This seat code is specified on the nameplate 2 4 Optional RFI...

Page 17: ...ium flows through the valve in the direction indicated by the arrow A rise in signal pressure causes the force acting on the diaphragm in the actuator to increase The springs are compressed Depending...

Page 18: ...21 Insulating section 25 Plug stem extension 32 Bolt 33 Nut 39 Gasket at the intermediate piece 86 Circulation inhibitor 87 Threaded bushing at the circulation inhibitor 141 Bottom seat Fig 3 1 Type...

Page 19: ...900 PN 100 and 160 4 5 17 14 15 21 3 9 10 8 92 1 86 87 1 Body 3 Yoke 4 Seat 5 Plug 8 Threaded bushing packing nut 9 Stem connector nut 10 Lock nut 14 Body nut 15 Packing 17 Body gasket 21 Insulating s...

Page 20: ...re is reduced or the air supply fails the springs move the actuator stem upwards and open the valve The valve closes when the signal pressure is increased enough to over come the force exerted by the...

Page 21: ...hut off valve both upstream of the strainer and down stream of the valve and installing a bypass line The bypass ensures that the plant does not need to be shut down for service and re pair work on th...

Page 22: ...CI 70 2 or IEC 60534 4 applies Valve Seal 12 on nameplate Leakage class Globe valve Metal ME Stellite facing ST Min IV PTFE 1 PT VI Three way valve Metal ME I 1 Special version Optional RFID tag Appli...

Page 23: ...0 251 286 337 394 508 610 752 822 H4 in 24 02 27 01 32 99 mm 610 686 838 H5 in 28 66 31 10 33 27 38 90 43 86 43 86 mm 728 790 845 988 1091 1141 H8 With Class 150 and 300 PN 16 and 40 For pneumatic act...

Page 24: ...and 160 in 24 27 33 mm 610 686 838 H5 in 31 89 31 93 34 92 35 16 44 92 44 92 mm 810 811 887 893 1141 1141 H8 1 With Class 600 and 900 PN 100 and 160 For pneumatic actuator 750 cm in 9 45 mm 240 1000 1...

Page 25: ...98 7 99 10 0 mm 152 203 254 h in 1 57 mm 40 Table 3 4 Weights for Type 3246 Valve size NPS 1 1 2 3 4 6 8 10 12 DN 15 20 25 40 50 80 100 150 200 250 300 Globe valve Class 150 and 300 PN 16 and 40 Weigh...

Page 26: ...Design and principle of operation Dimensional drawings H8 H5 H4 h L d H8 H5 h d H4 L Type 3246 NPS to 12 DN 15 to 300 Class 150 and 300 PN 16 and 40 Type 3246 NPS to 8 DN 15 to 200 Class 600 and 900...

Page 27: ...s 150 and 300 PN 16 and 40 The associated actuator documentation applies to actuators e g SAMSON pneumatic actu ators u T 8310 1 for Type 3271 or Type 3277 Pneumatic Actuators up to 750 cm actuator ar...

Page 28: ...3 12 EB 8046 EN...

Page 29: ...al data section 4 2 Removing the packaging from the valve Observe the following sequence Do not open or remove the packaging until immediately before lifting to install the valve into the pipeline Lea...

Page 30: ...o not use this lashing point to lift the entire control valve assembly When lifting the control valve make sure that the slings attached to the valve body bear the entire load Do not attach load beari...

Page 31: ...ook with safety latch see Fig 4 1 to secure the slings from slip ping off the hook during lifting and transporting Secure slings against slipping Make sure the slings can be removed from the valve onc...

Page 32: ...ends 1 Attach one sling to each welding end of the body and to the rigging equipment e g hook of the crane or forklift see Fig 4 1 2 Secure the slings attached to the body against slipping using a con...

Page 33: ...EB 8046 EN 4 5 Shipment and on site transport Fig 4 1 Lifting points on the control valve with flanges and insulating section left With welding ends and insulating section right...

Page 34: ...e against moisture and dirt Store it at a relative humidity of less than 75 In damp spaces prevent condensation If necessary use a drying agent or heating Make sure that the ambient air is free of aci...

Page 35: ...eline routing The inlet and outlet lengths see Table 5 1 vary depending on several variables and process conditions and are intended as rec ommendations Contact SAMSON if the Table 5 1 Inlet and outle...

Page 36: ...pended For versions with side mounted handwheel which are installed at an angle of 45 to the horizontal plane the control valve must be supported or suspended Valve accessories During connection of va...

Page 37: ...de of the valve Check any mounted pressure gauges to make sure they function properly When the valve and actuator are al ready assembled check the tightening torques of the bolted joints u AB 0100 Com...

Page 38: ...sses of the clamps 301 as far as they will go Remove any excess material 7 Apply a thin film of lubricant 114 to the threads of the stem 9 and screws 303 Impaired functioning due to incorrectly applie...

Page 39: ...stem connector clamps 3 83 82 82 310 310 92 84 85 255 Legend 3 Yoke 82 Screws 83 Hanger 84 Travel indicator scale 85 Screws 92 Castellated nut 255 Warning label 310 Ball bearing Plug stem Fig 5 1 Ove...

Page 40: ...1 301 309 309 9 303 304 114 Y 1 0 0 5 Y 1 0 0 5 Legend 9 Stem 114 Lubricant Gleitmo 1763 V 301 Clamps 303 Screws 304 Washers 309 Sliding washers Plug stem Fig 5 2 Overview of anti rotation fixture ass...

Page 41: ...ng due to incorrectly ap plied lubricant Do not apply any lubricant to the threads of the clamps 301 or the plug stem 6 Position the clamps 301 and stem 9 on the plug stem according to Table 5 4 and t...

Page 42: ...82 Screws 83 Hanger 84 Travel indicator scale 92 Castellated nut 255 Warning label 302 Holder 306 Screws 308 Washers 83 82 84 92 3 306 308 302 255 Plug stem Fig 5 3 Overview of yoke assembly with trav...

Page 43: ...01 301 309 309 304 303 9 114 Y Y 1 0 0 5 1 0 0 5 Legend 9 Stem 114 Lubricant Gleitmo 1763 V 301 Clamps 303 Screws 304 Washers 309 Sliding washers Plug stem Fig 5 4 Overview of anti rotation fixture as...

Page 44: ...7 5 103 5 82 5 34 5 30 1000 1400 60 15 100 60 136 105 30 75 45 121 120 1400 120 30 75 90 231 195 2800 30 100 120 231 195 DN 125 to 150 NPS 6 Standard version 355 700 750 15 0 0 263 5 67 5 192 87 48 10...

Page 45: ...0 75 90 221 195 61 100 60 0 0 308 255 61 185 60 50 60 191 225 48 76 2800 5600 30 0 0 191 225 48 76 30 100 120 221 195 61 100 60 0 0 308 255 61 185 60 75 90 191 225 48 76 DN 250 NPS 10 seat bore 250 an...

Page 46: ...5 12 EB 8046 EN Installation H G H F H N H O H L H T H K H I Ball bearings standard version only Fig 5 5 Dimensional drawing with mounting dimensions for Types 3271 and 3277 Pneumatic Actuators...

Page 47: ...tor stem and the stem 9 First remove the actuator from the valve or ensure it cannot transmit any forces to the actuator stem before removing the anti rotation fixture on the plug stem Depending on th...

Page 48: ...re mounting the actuator check the hole pattern of the perforated plug and determine which hole is the closest to the seal facing and is uncovered first when the plug is lifted out of the seat On moun...

Page 49: ...Prepare the relevant section of the pipe line for installing the valve 3 Remove the protective caps from the valve ports before installing the valve 4 Lift the valve using suitable lifting equip ment...

Page 50: ...near the valve Crush hazard arising from actuator and plug stem moving Do not insert hands or finger into the yoke while the air supply is connected to the actuator Before working on the control valve...

Page 51: ...medium to the inlet space upstream of the valve A sudden surge in pressure and resulting high flow velocities can damage the valve 3 Open the valve 4 Apply the required test pressure 5 Check the valve...

Page 52: ...5 18 EB 8046 EN Installation Retract the plug stem to open the valve Observe the maximum permissible pres sure for both the valve and plant...

Page 53: ...control valve disconnect and lock the pneumatic air supply as well as the control signal Do not impede the movement of the actu ator and plug stem by inserting objects into the yoke Before unblocking...

Page 54: ...each ambient temperature before start up when the ambient temperature and process medium temperature differ greatly or the medium properties require such a measure 2 Slowly open the shut off valves in...

Page 55: ...on when working near the valve Crush hazard arising from actuator and plug stem moving Do not insert hands or finger into the yoke while the air supply is connected to the actuator Before working on t...

Page 56: ...e handwheel of valves with actuators fitted with a handwheel must be in the neutral po sition during normal operation 7 2 Manual operation Valves with actuators fitted with a handwheel can be manually...

Page 57: ...locking the actuator release any stored energy in the actuator e g spring compression See associated actuator documentation Diaphragm in the actu ator defective See associated actuator documentation S...

Page 58: ...he valve back into operation after a malfunction See the Start up section Malfunction Possible reasons Recommended action The valve leaks to the atmosphere fugitive emissions Defective packing Replace...

Page 59: ...alve components and pipelines may get extremely cold and cause cryogenic burns Allow components and pipelines to reach ambient temperature Wear protective clothing and safety gloves Risk of hearing lo...

Page 60: ...jury e g chemical burns Wear protective clothing safety gloves respiratory protection and eye protec tion Risk of valve damage due to excessively high or low tightening torques Observe the specified t...

Page 61: ...heir readability and completeness Immediately renew damaged missing or incorrect nameplates or labels Clean any inscriptions that are covered with dirt and are illegible Check the pipe connections and...

Page 62: ...umentation Replacing the gasket Replacing the circulation inhibitor Globe valve Class 600 and 900 PN 100 and 160 Replacing the packing Globe valve Class 150 and 300 PN 16 and 40 Replacing the packing...

Page 63: ...the circulation inhibitor see sec tion 9 4 2 Replace the packing see section 9 4 3 Replace the seat and plug see sec tion 9 4 4 9 3 Installing the valve after service work 1 Mount actuator See associa...

Page 64: ...8046 EN Servicing 4 5 17 14 15 21 3 9 10 8 92 1 86 87 17 5 4 1 14 86 30 21 15 2 9 10 8 25 32 33 39 87 Fig 9 1 Type 3246 Globe valve Class 150 and 300 PN 16 and 40 left Class 600 and 900 PN 100 and 160...

Page 65: ...ody 1 Class 600 and 900 PN 100 and 160 place the insulating section 21 together with the yoke 3 and plug 5 onto the body 1 The following points must be observed Version with V port plug align the plug...

Page 66: ...ction 21 together with the intermediate piece 2 plug 5 and plug stem extension 25 off the body 1 3 Undo the grub screw 88 at the thread ed bushing 87 using a hex socket screw Do not completely unscrew...

Page 67: ...te piece 2 plug 5 and plug stem extension 25 on the body 1 The following points must be observed Version with V port plug align the plug 5 making sure that the largest V shaped port of the V port plug...

Page 68: ...the threaded bushing 87 but do not tighten it yet 15 Slide the plug with plug stem 5 into the insulating section 21 16 Tighten the bottom threaded bushing 87 Observe tightening torques 17 Tighten the...

Page 69: ...nd 40 1 Unscrew the stem connector nut 9 and lock nut 10 from the plug stem exten sion 25 2 Unscrew the threaded bushing 8 3 Remove nuts 33 and bolts 32 4 Carefully lift the intermediate piece 2 over...

Page 70: ...ely thread the lock nut 10 and stem connector nut 9 onto the plug stem ex tension 25 b Globe valve Class 600 and 900 PN 100 and 160 1 Unscrew the castellated nut 92 and lift the yoke 3 off the insulat...

Page 71: ...tion 21 together with the plug stem extension 25 plug stem and plug 5 off the body 1 3 Replace the gasket see section 9 4 1 4 Undo the grub screw 88 at the bottom threaded bushing 87 using a hex sock...

Page 72: ...eat 4 Fasten down the insulating section 21 with the body nuts 14 Tighten the nuts gradually in a crisscross pattern Ob serve tightening torques b Globe valve Class 600 and 900 PN 100 and 160 Risk of...

Page 73: ...0 Place the insulating section 21 together with the plug stem and plug 5 onto the body 1 Version with V port plug align the plug 5 making sure that the largest V shaped port of the V port plug faces t...

Page 74: ...nearest SAMSON subsidiary or SAMSON s After sales Service for infor mation on spare parts lubricants and tools Spare parts See Annex for details on spare parts Lubricant See document u AB 0100 for det...

Page 75: ...ety gloves Risk of hearing loss or deafness due to loud noise Noise emission e g cavitation or flashing may occur during operation caused by the process medium and the operating conditions Additionall...

Page 76: ...properties cause personal injury e g chemical burns Wear protective clothing safety gloves respiratory protection and eye protec tion To decommission the control valve for service work or to remove it...

Page 77: ...ored energy in the actuator e g spring compression See associated actuator documentation Risk of personal injury due to residual process medium in the valve While working on the valve residual me dium...

Page 78: ...the pipeline a Version with flanges 1 Support the valve to hold it in place when separated from the pipeline see the Shipment and on site transport sec tion 2 Unbolt the flange joint 3 Remove the valv...

Page 79: ...pport After sales Service 2 Send an e mail u retouren samsongroup com to register the return shipment including the following information Type Article no Configuration ID Original order Completed Decl...

Page 80: ...12 2 EB 8046 EN...

Page 81: ...EB 8046 EN 13 1 Disposal 13 Disposal Observe local national and internation al refuse regulations Do not dispose of components lubricants and hazardous substances together with your household waste...

Page 82: ...13 2 EB 8046 EN...

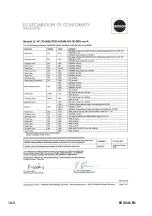
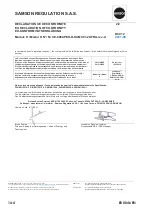
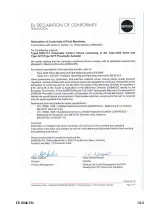
Page 83: ...h Machinery Directive 2006 42 EC for Types 3246 1 and 3246 7 Control Valves on page 14 5 Declaration of incorporation in compli ance with Machinery Directive 2006 42 EC for the Type 3246 Valve with ot...

Page 84: ...14 2 EB 8046 EN...

Page 85: ...PNmax 16 Tous fluides all fluids alle Fluide Vanne querre Angle valve Eckventil 3256 DIN ANSI corps en acier moul body of cast steel Geh use Gussstahl DN 32 200 NPS 1 8 Tous fluides all fluids alle Fl...

Page 86: ...making available on the market of pressure equipment Richtlinie des Europ ischen Parlaments und des Rates zur Harmonisierung der Rechtsvor schriften der Mitgliedstaaten ber die Bereitstellung von Dru...

Page 87: ...EB 8046 EN 14 5...

Page 88: ...14 6 EB 8046 EN...

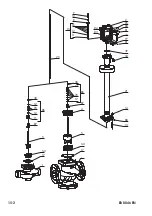
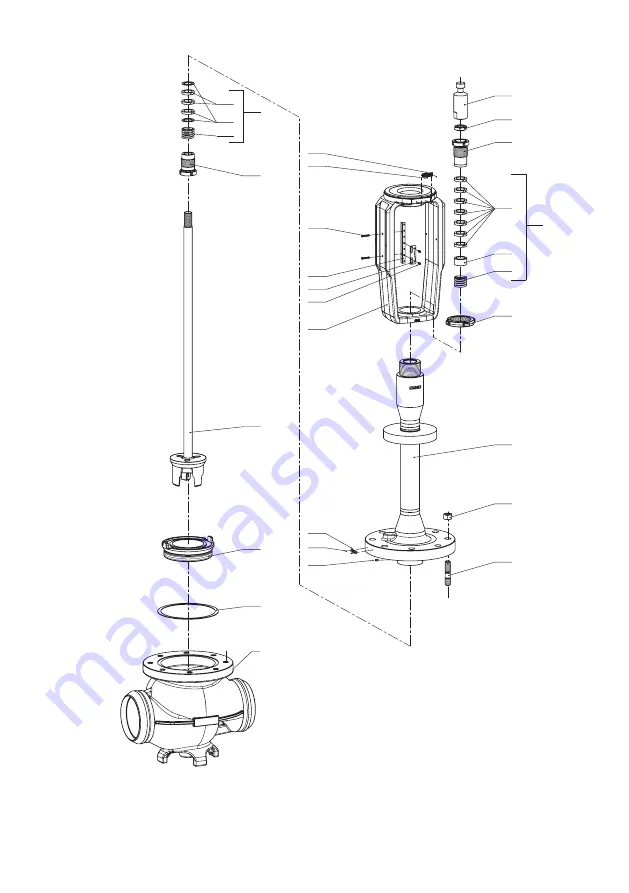
Page 89: ...ing 12 Washer 13 Stud bolt 14 Body nut 15 Packing 16 V ring packing 17 Body gasket 19 Bushing 21 Insulating section 25 Plug stem extension 30 Retaining washers 32 Bolt 33 Nut 39 Gasket at the intermed...

Page 90: ...15 2 EB 8046 EN 1 17 141 5 13 88 14 21 33 39 2 85 80 32 77 81 81 4 87 12 12 25 70 30 86 1 17 141 5 87 11 12 12 70 30 86 9 10 8 84 83 16 12 11 15...

Page 91: ...EB 8046 EN 15 3 9 10 8 16 11 19 92 21 17 4 5 87 86 12 11 70 1 14 13 85 83 84 81 88 26 82 3 80 81 15...

Page 92: ...he addresses of SAMSON AG its subsid iaries representatives and service facilities worldwide can be found on our website www samsongroup com or in all SAMSON product catalogs Required specifications P...

Page 93: ......

Page 94: ......

Page 95: ......

Page 96: ...2022 02 15 English SAMSON AKTIENGESELLSCHAFT Weism llerstra e 3 60314 Frankfurt am Main Germany Phone 49 69 4009 0 Fax 49 69 4009 1507 samson samsongroup com www samsongroup com EB 8046 EN...

Reviews: