6
Converting the positioner
The positioner can be converted from a
pneumatic to an electropneumatic positioner
and vice versa using a conversion kit.
In addition to the conversion kit listed in the
table on page 21, an i/p module may be
required.
6.1 Conversion from pneumatic
p/p to electropneumatic i/p
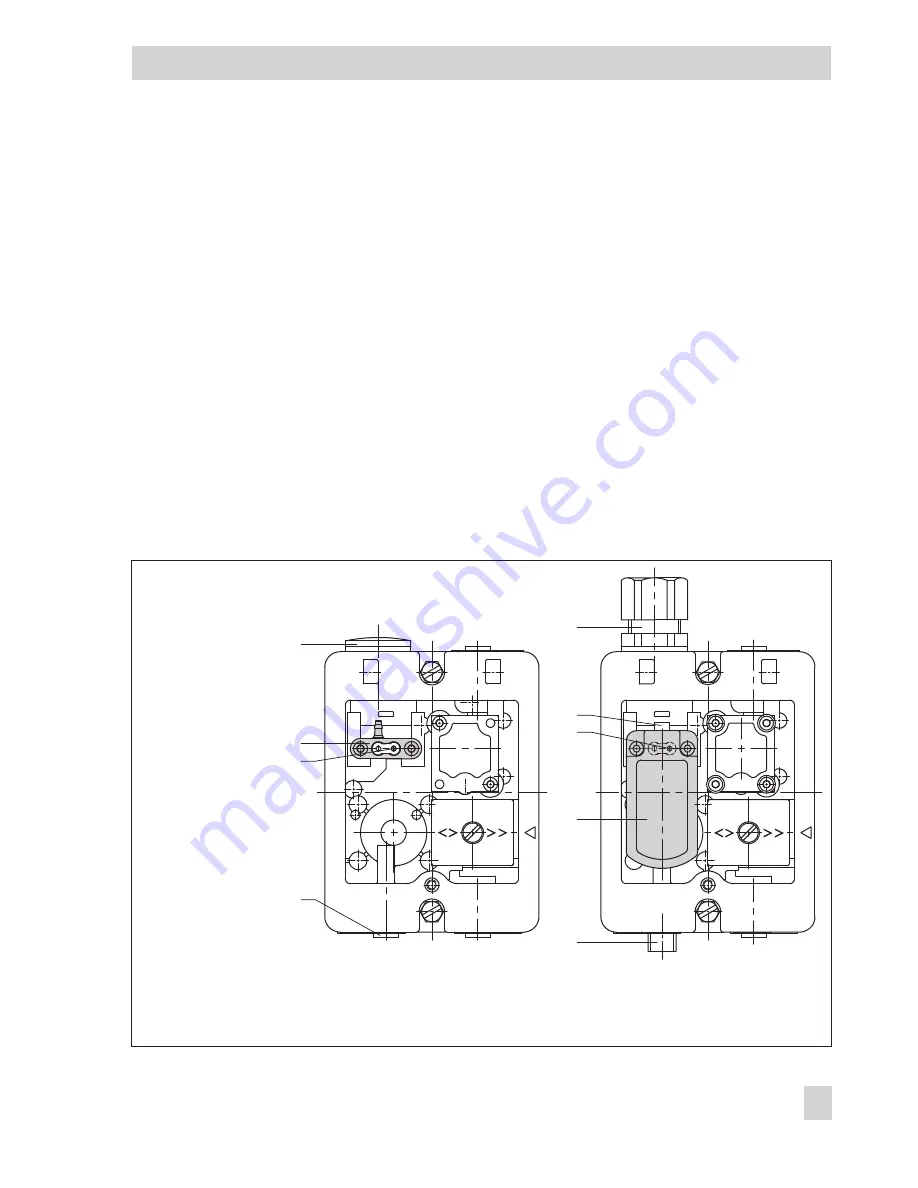
1. Remove screw joint (4) installed in the
control signal input (IN SIGNAL 27). Re-
place it with the plug with seal included
in the retrofit kit.
2.
Remove plug (1) from the housing and
replace it with a cable gland or plug
connector.
3. Undo both mounting screws in the
housing. Remove connecting plate (2)
with seal (3).
4. Unscrew PCB from the terminal base.
5. Insert connecting cable included in the
retrofit kit through the terminal base into
the housing.
6. Push blue connector into the middle con-
nection. Connect other end to the i/p
module (for i/p module 6109, connec-
tor with blue – and green +; for i/p
module 6112, terminal with blue – and
green +).
EB 8385 EN
21
Converting the positioner
1
2
3
4
5
6
3
7
8
Fig. 8 · Converting the positioner
1
Plug
2
Connecting plate
3
Seal
4
Screw joint
5
Cable gland
6
Connector with
6109 i/p module
7
i/p module
8
Plug
Summary of Contents for 3760
Page 24: ...24 EB 8385 EN ...
Page 25: ...EB 8385 EN 25 ...
Page 26: ...26 EB 8385 EN ...
Page 27: ...EB 8385 EN 27 ...
Page 28: ...28 EB 8385 EN ...
Page 29: ...EB 8385 EN 29 ...
Page 30: ...30 EB 8385 EN ...
Page 31: ...EB 8385 EN 31 ...
Page 32: ...32 EB 8385 EN ...
Page 33: ...EB 8385 EN 33 ...
Page 34: ...34 EB 8385 EN ...
Page 35: ...EB 8385 EN 35 ...


