background image

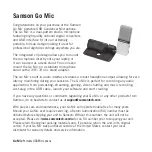
Go Mic 

Portable USB Microphone

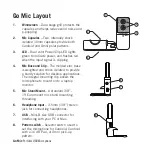
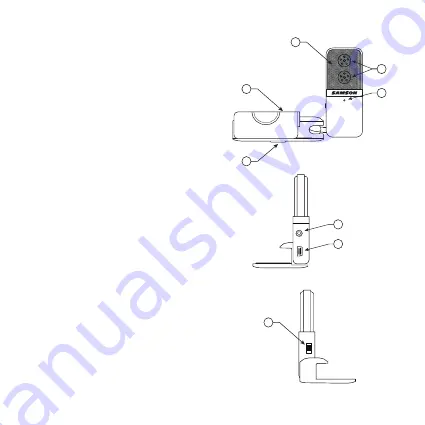
Go Mic Layout

1. 

Windscreen – Dual stage grill protects the 
capsules and helps reduce wind noise and 
p-popping.

2. 

Mic Capsules – Two, internally shock 
isolated 10mm capsules provide both 
Cardioid and Omni polar patterns.

3. 

 LED  – Dual color Power/Clip LED lights 
green to indicate power, and flashes red 
when the input signal is clipping.

4. 

Mic Base and Clip – The molded zinc base 
is weighted and shock isolated to provide 
a sturdy solution for desktop applications. 
The integral mounting clip allows the 
microphone to mount on to a laptop 
monitor.

5. 

Mic Stand Mount – A standard 3/8”-
19 Euro mount mic stand mounting 
threading. 

6. 

Headphone Input – 3.5mm (1/8”) stereo 
jack for connecting headphones.

7. 

USB – Mini-B size USB connector for 
interfacing with your PC or Mac.

8. 

 Pattern  switch – Selector switch used to 
set the microphone for Cardioid, Cardioid 
with a 10 dB Pad, or Omni pick-up 
pattern.

1

4

5

2

3

7

8

Summary of Contents for Go Mic

Page 1: ...Owner s Manual...

Page 2: ......

Page 3: ...ct for recording any audio application from podcasting streaming gaming video chatting and music recording Just plug in the USB cable launch your software and start creating If you have any questions...

Page 4: ...ional pick up microphone patterns Unique fold up design with integral clip makes the microphone extremely portable and ideal for most recording solutions especially for mobile laptop recording Onboard...

Page 5: ...4 Mic Base and Clip The molded zinc base is weighted and shock isolated to provide a sturdy solution for desktop applications The integral mounting clip allows the microphone to mount on to a laptop...

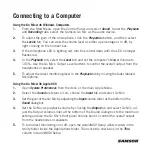
Page 6: ...adphones or speaker 5 To adjust the direct monitoring level in the Playback tab by moving the fader labeled Microphone Using the Go Mic with Apple OSX 1 Open System Preferences from the dock or the ma...

Page 7: ...ultiple subjects set the switch to the Omni position 3 Connect headphones to the Headphone output located on the side of the microphone 4 Plug the mini B small end of the USB cable to the Go Mic and p...

Page 8: ...h frequency response dropping off and the microphone will start to sound like it has more bass and less highs For most vocal applications you ll want to position the microphone directly in front of th...

Page 9: ...an also set the pattern to Omni mode and have a group of vocalist in a circle around the microphone Acoustic Guitar The microphone placement will depend on the type of instrument and what kind of soun...

Page 10: ...ve to twenty feet in front of the instrument For a more contemporary ensemble sound place the Go Mic as close to or inside the piano Full Band Because of its wide frequency response and fast transient...

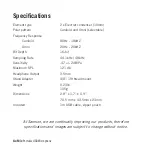
Page 11: ...20kHZ Bit Depth 16 bit Sampling Rate 44 1kHz 48kHz Sensitivity 47 2dB Pa Maximum SPL 121 db Headphone Output 3 5mm Stand Adapter 3 8 19 thread mount Weight 0 23lb 105g Dimensions 2 8 x 1 7 x 0 9 70 5...

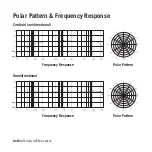
Page 12: ...al When set to the cardioid setting the microphone captures sound in front of the microphone and rejects sound from the sides and back This allows for better separation of performers or instruments in...

Page 13: ...Go Mic Portable USB Microphone Polar Pattern Frequency Response Polar Pattern Polar Pattern Frequency Response Frequency Response Cardioid unidirectional Omnidirectional...

Page 14: ...ures Reorient or relocate the receiving antenna Increase the separation between the equipment and receiver Connect the equipment into an outlet on a circuit different from that of the receiver Consult...

Page 15: ...and reduce the amount of time listening at high levels Please use the following guidelines established by the Occupational Safety Health Ad ministration OSHA on maximum time exposure to sound pressur...

Page 16: ...Samson Technologies Corp Copyright 2017 278 B Duffy Ave Hicksville New York 11801 1 800 3 SAMSON www samsontech com v2 3...

Reviews: