64
EB 8384-6S EN
Mounting and start-up
5.7
Attachment to Type 3510
Micro-flow Valve
Î
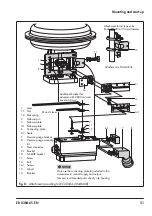
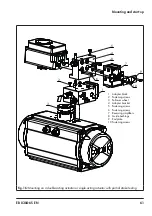
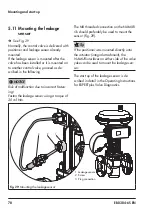
Refer to Fig. 19
Î
Required mounting parts and accesso
-
ries: Table 4
Î
Observe the travel table on page 28.
The positioner is attached to the valve yoke
using a bracket.
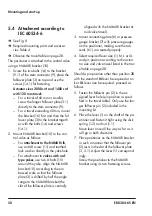
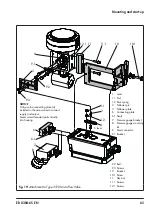
1. Fasten the bracket (9.1) to the stem con-
nector.
2. Screw the two bolts (9.2) to the bracket
(9.1) of the stem connector (9), place the
follower plate (3) on top and use the
screws (9.3) for fastening.
3. Mount the travel indication scale (acces-
sories) to the outer side of the yoke using
the hex screws (12.1), ensuring that the
scale is aligned with the stem connector.
4. Fasten the hex bar (11) onto the outer
side of yoke by screwing the M8 screws
(11.1) directly into the holes on the yoke.
5. Fasten the bracket (10) to the hex bar
(11) using the hex screw (10.1), shim
and tooth lock washer.
6. Mount connecting plate (6) or pressure
gauge bracket (7) with pressure gauges
on the positioner, making sure the two
seals are seated properly.
7. Unscrew the standard M lever (1) includ-
ing follower pin (2) from the positioner
shaft.
8. Take the S lever (1) and screw the follow-
er pin (2) in the hole for pin position 17.
9. Place the S lever on the positioner shaft
and screw tight using the disk spring
(1.2) and nut (1.1).
Move lever once all the way as far as it
will go in both directions.
10. Place positioner on the bracket (10) in
such a manner that the follower pin
slides into the groove of the follower pin
(3). Adjust the lever (1) correspondingly.
Screw the positioner to the bracket (10)
using both its screws.
5.8 Attachment to rotary
actuators
Î
Î
Required mounting parts and accesso
-
ries: Table 7
Î
Observe the travel table on page 28.
The positioner is mounted to the rotary actu-
ator using two pairs of brackets.
Prior to attaching the positioner to the
SAMSON Type 3278 Rotary Actuator,
mount the associated adapter (5) to the free
end of the rotary actuator shaft.
On attaching the positioner as described be
-
low, it is imperative that the actuator's direc
-
tion of rotation is observed.
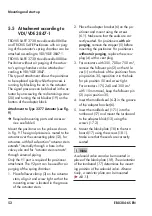
1. Place follower clamp (3) on the slotted ac-
tuator shaft or adapter (5).
Fig. 19:
Attachment to Type 3510 Micro-flow Valve
Note
Summary of Contents for TROVIS SAFE 3730-6
Page 12: ...12 EB 8384 6S EN...
Page 16: ...16 EB 8384 6S EN...
Page 22: ...22 EB 8384 6S EN...
Page 40: ...40 EB 8384 6S EN...
Page 42: ...42 EB 8384 6S EN...
Page 82: ...82 EB 8384 6S EN...
Page 90: ...90 EB 8384 6S EN...
Page 96: ...96 EB 8384 6S EN...
Page 132: ...132 EB 8384 6S EN...
Page 152: ...152 EB 8384 6S EN...
Page 155: ...EB 8384 6S EN 155...
Page 156: ...156 EB 8384 6S EN...
Page 157: ...EB 8384 6S EN 157...
Page 158: ...158 EB 8384 6S EN...
Page 159: ...EB 8384 6S EN 159...
Page 160: ...160 EB 8384 6S EN...
Page 161: ...EB 8384 6S EN 161...
Page 162: ...162 EB 8384 6S EN...
Page 163: ...EB 8384 6S EN 163...
Page 164: ...164 EB 8384 6S EN...
Page 165: ...EB 8384 6S EN 165...
Page 166: ...166 EB 8384 6S EN...
Page 167: ...EB 8384 6S EN 167...
Page 182: ...182 EB 8384 6S EN...
Page 183: ...EB 8384 6S EN 183...

