advanced recording
HANDLING MENUS AND QUICK MENUS
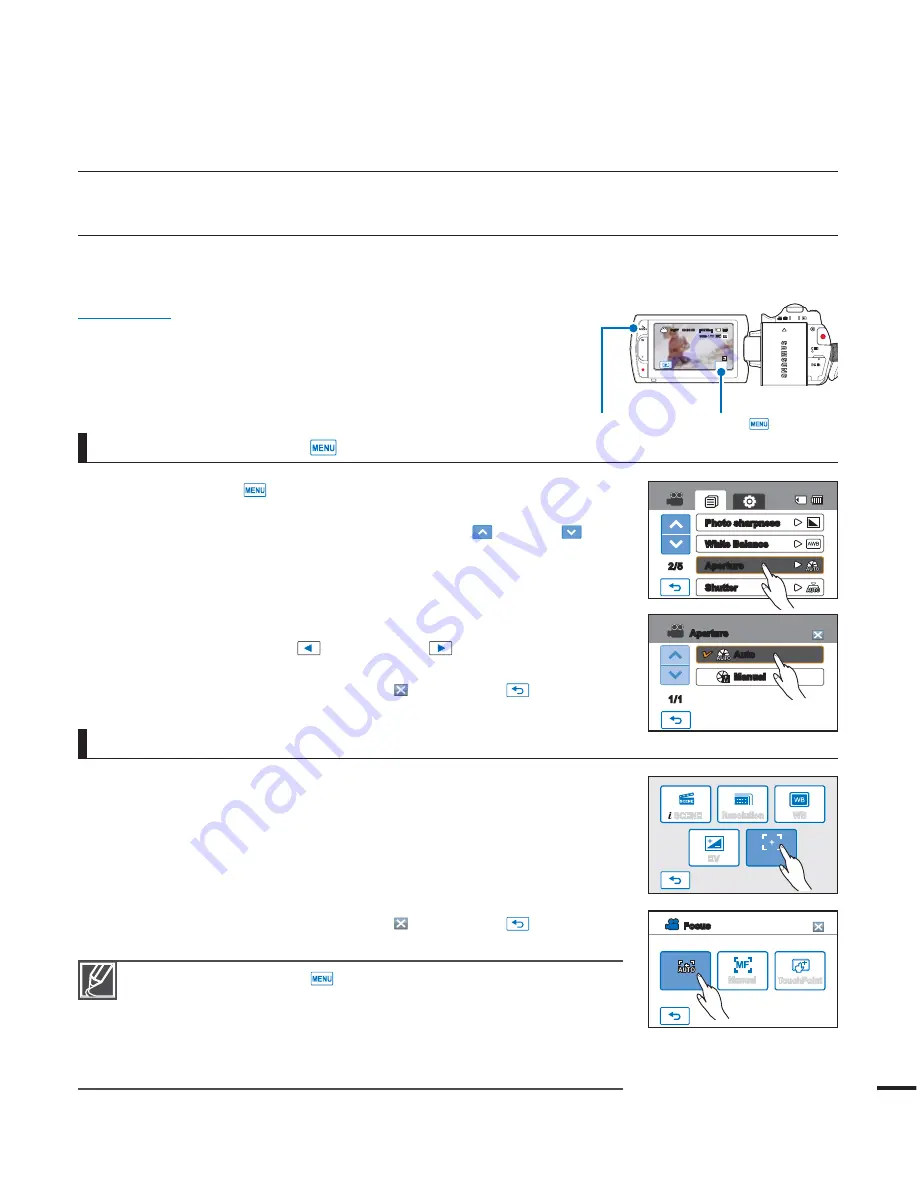
The instructions below are examples of how to access and use menu items using the Menu Tab and the
2.&/6
Button. When you access and use other menu items, use these examples as guides.
PRECHECK!
Open the LCD screen to turn on the camcorder.
t
Your camcorder turns on automatically when you open the
t
LCD screen.
Select the record mode by pressing the
t
MODE
button.
page 23
1.
Touch the Menu (
) tab on the touch panel.
t 5IFNFOVTDSFFOBQQFBST
t 5PDIBOHFUIFDVSSFOUQBHFUPVDIUIFVQ
)/down (
) tab.
2.
Touch “
"QFSUVSF
” (The Aperture function is used here as an
example.)
3.
Touch the desired option.
t
Adjust the setting values accordingly.
t 5PVDIUIFEFDSFBTF
) or increase (
) tab to adjust the
aperture.
t 5PFYJUUIFNFOVUPVDIUIF&YJU
) or Return (
) tab.
Using the Menu (
) tab
1.
Press the
2.&/6
button on your camcorder to see the available
menu options.
t 5IFRVJDLNFOVTDSFFOBQQFBST
2.
Touch “
'PDVT
” (The Focus function is used here as an example.)
3.
Touch the desired option.
t "EKVTUUIFTFUUJOHWBMVFT
t 5PFYJUUIFNFOVUPVDIUIF&YJU
) or Return (
) tab.
Using the Q.MENU button
t 8IFOVTJOHUIF.FOV
) or Quick menu items, some menu items
can not be used at the same time, or may be grayed out. For more
information on this, see Troubleshooting on page 127.
t 'PSFBTZVOEFSTUBOEJOHUIFNFOVTFUUJOHQSPDFEVSFTPOUIJTQBHF
are explained using the simplest methods. Menu setting methods can
differ depending on the menu options you choose.
49
2.&/6CVUUPO
Menu (
) tab
STBY
00:00:00 [307Min]
MENU
9999
2/5
White Balance
Aperture
Shutter
Photo sharpness
SCENE
Resolution
WB
EV
Focus
Focus
Auto
TouchPoint
Manual
Auto
Manual
1/1
Aperture


