background image

Summary of Contents for 18-200mm F3.5-6.3 ED OIS

Page 1: ... 1 1 I I II I I I 0 1 3 5 6 3 ED 0 67 18 200 OIS SAMSUNG 18 200mm ...

Page 2: ... cameras or other 35 mm film cameras Check model compatibility first before use Please read this manual carefully before using the lens to ensure safe and correct use The illustrations used in this manual may differ from the actual items To use this device with NX5 NX10 NX100 or NX11 cameras you must update the camera firmware Please visit www samsung com to download the new firmware 2 I ...

Page 3: ... devices 11 waming Do not stare at the sun through the lens or camera This may cause severe damage to your eyes Keep your lens or camera away from small children and pets I caution Do not store the lens in direct sunlight without the lens cap Direct sunlight that passes through the lens may combust if it comes into contact with flammable materials Use only sturdy tripods Lightweight or unstable tr...

Page 4: ...t The lens is a precise optical product Avoid using the lens anywhere there is a sudden temperature change Keep the lens in a plastic bag or a camera case to prevent condensation from forming on the inside or outside of the lens VVhen not using the lens place the lens cap and lens mount cover on the lens to prevent contamination from foreign particles and protect the lens Do not keep the camera mo...

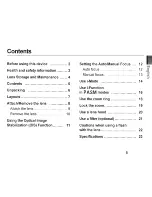
Page 5: ...Attach the lens 9 Remove the lens 10 Using the Optical Image Stabilization 015 Function 11 Setting the Auto Manual Focus 12 Auto focus 12 Manual focus 13 Use i Mode 14 Use i Function in PASM modes 16 Use the zoom ring 18 Lock the zoom 19 Use a lens hood 20 Use a filter optional 21 Cautions when using a flash with the lens 22 Specifications 23 5 m l tO fJl r ...

Page 6: ...Check the product box for the following items OptionaI Item Lens Lens cap Lens mount cover Filter Hood Leather case User manual The specifications of the lens or its components may differ depending on the model 6 ...

Page 7: ...Layouts Lens mount index Zoom ring Lens ___ i Function button 7 II r ...

Page 8: ...Attach Remove the lens Before mounting the lens remove the lens cap lens mount cover and body cap 0 8 II ...

Page 9: ...Attach Remove the lens Attach the lens t Align the red mark on the lens with the red mark on the camera body Y Rotate the lens clockwise until it locks into space 9 r ...

Page 10: ... using other manufacturers lenses 10 When not using the lens attach the lens cap and lens mount cover to protect the lens from dust and scratches Make sure to only change lenses in a clean environment Foreign particles may cause malfunction if they enter into the camera body or the lens Be careful not to put your fingers into the lens mount when mounting the lens Dust or foreign particles may affe...

Page 11: ...r can minimize the shaking of camera by using the OIS function Set the OIS switch on the lens to ON Set the OIS switch to ON to select OIS functions in Menu When using a tripod set the OIS switch to OFF to reduce vibration that may result in blurred images 11 ...

Page 12: ...se automatic or manual focus Auto focus Set the AF MF switch on the lens to AF The focus is adjusted automatically when you half press Shutter Do not apply excessive force to the front of the camera while the camera is using auto focus Doing so may cause the lens to malfunction 12 ...

Page 13: ... Manual Focus Manual focus Set the AF MF switch to MF The focus can be adjusted manually by rotating the focus ring Set the MF Assist function to aid with manual focusing Refer to your camera manual for more details 13 ...

Page 14: ...se i Mode You can choose a preset i Mode optimized for the lens Available scenes may vary by a camera you use t Rotate the mode dial to i l tx Press i Function 14 3 Rotate the focus ring to select a mode ...

Page 15: ...Use i Mode i 4 Press i Function 0 Half press Shutter to save io Rotate the focus ring to f l Fully press Shutter to take a shot select a scene 15 ...

Page 16: ...ure value ISO sensitivity and white balance on the lens This feature is available only when your camera supports it 1 Press i Function on the lens to select a setting 16 II ISO Available settings may differ depending on the shooting mode Shooting mode l P A S M Shutter speed 0 0 Aperture value 0 0 ...

Page 17: ...ASM modes Shooting mode l P A S M Exposure value i 0 0 0 ISO i O 0 0 0 White balance 0 0 0 0 f Rotate the focus ring to select an option ISO 1 Half press Shutter to save options 4 Fully press Shutter to take a photo 17 r ...

Page 18: ...Use the zoom ring Rotate the zoom ring to adjust the viewing angle of the lens Rotate the zoom ring clockwise to take a telephoto shot or anticlockwise to take a wide shot _ Zoom out 18 _ Zoom in ...

Page 19: ...oom lock to keep the viewing angle of the lens constant To set the zoom lock turn the zoom ring until the focal length reaches 18 mm and then push the switch left Set the zoom lock to prevent the zoom ring from moving 19 tn r ...

Page 20: ...tion of image quality due to internal reflection of light use a lens hood 1 Align the mount indexes on the lens hood and lens 2 Rotate the lens hood clockwise rEJ When installing the lens hood be careful not to rotate the focus ring 20 I ...

Page 21: ...rs at the same time Doing so may deteriorate the image quality and cause vignetting In case of a thick framed filter the vignetting can occur with a wide angle lens What is vignetting Vignetting refers to when the edges or outer parts of an image get dark or are hidden in black due to the reduced intensity of light in surroundings of the screen It can also occur when accessories such as converters...

Page 22: ...ens causing some parts of the photo appear dark Check the distance between the camera and subjects when taking photos Distance interrupted by the flash light may vary depending on the type of lens Light from the flash may be blocked by the lens body or a lens hood To ensure proper lighting remove the lens hood and adjust the lens as appropriate for the subject and surroundings 22 ...

Page 23: ...c c Elements in Group 18 elements in 13 groups 3 aspheric lens 2 low dispersive lens included Angle of View Aperture F3 5 6 3 minimum F22 Number of Blades 7 Circular Aperture Diaphragm Mount Type Samsung NX mount Optical Image Stabilizer Included Minimum Focus Distance 0 50 m infinity Maximum Magnification Approx 0 28X 23 II n r ...

Page 24: ...ht Landscape Sunset Dawn Night i Setting Supported i Function button Included Lens Hood Included Filter Size 67mm Max Diameter X Length 72 X 105 5 mm Weight Approx 549 g without hood Operating Temperature 0 40 oc Operating Humidity 5 85 o EJ Specifications may change without notice for better performance 24 II ...

Page 25: ... from other types ofwaste and recycle them responsibly to promote the sustainable reuse of material resources Household users should contact either the retailer where they purchased this product or their local government office for details of where and how they can take these items for environmentally safe recycling Business users should contact their supplier and check the terms and conditions of...

Page 26: ...ease refer to the warranty that came with your product or visit our website www samsung com for after sales service or inquiries CE 11111111 111111111111111111111111111111111111111 1111111 AD68 06479A 1 2 ...

Page 27: ...selezionare il paese di appartenenza http www samsung com http www samsungimaging com Guia de post venta El periodo de asistencia tecnica gratuita para este producto es de 12 meses a partir de Ia fecha de compra Vaya a Ia pagina que se indica a continuaci6n y seleccione su pais http www samsung com http www samsungimaging com PyKOBOACTBO no nocnenpQAalKHOMY o6cnylKIIB3HMIO a nep Q Q 6ecnnaTHOrO ce...

Page 28: ...T Ift EVF Eleelfonic vitw fincier 0 0 0 0 t II OVF Optitll vitw findetJ 0 0 0 0 tllf JLens mou lt dilpter 0 0 0 0 i U Adapttr 0 0 0 0 t Cable 0 0 0 0 flAI1 5tM Manua 0 0 0 0 0 0 O iF i ill liW IIJJilll lli fPJi fjj J Ji f I II J Jlj J i sJIT 11363 2006 lEII JR Jll oi UT X 0 iF Ii liW IIJIJt 1 l ill 1 fii J i J li f I II J tili JsJIT 11363 2006 1lEII J Illi l ol il liB1m IIIoi II Jlill1 Fil lll l31...

Reviews: