3-3
3. Disassembly and Reassemble
Part
Description
Picture Description
Screws
Function Wire
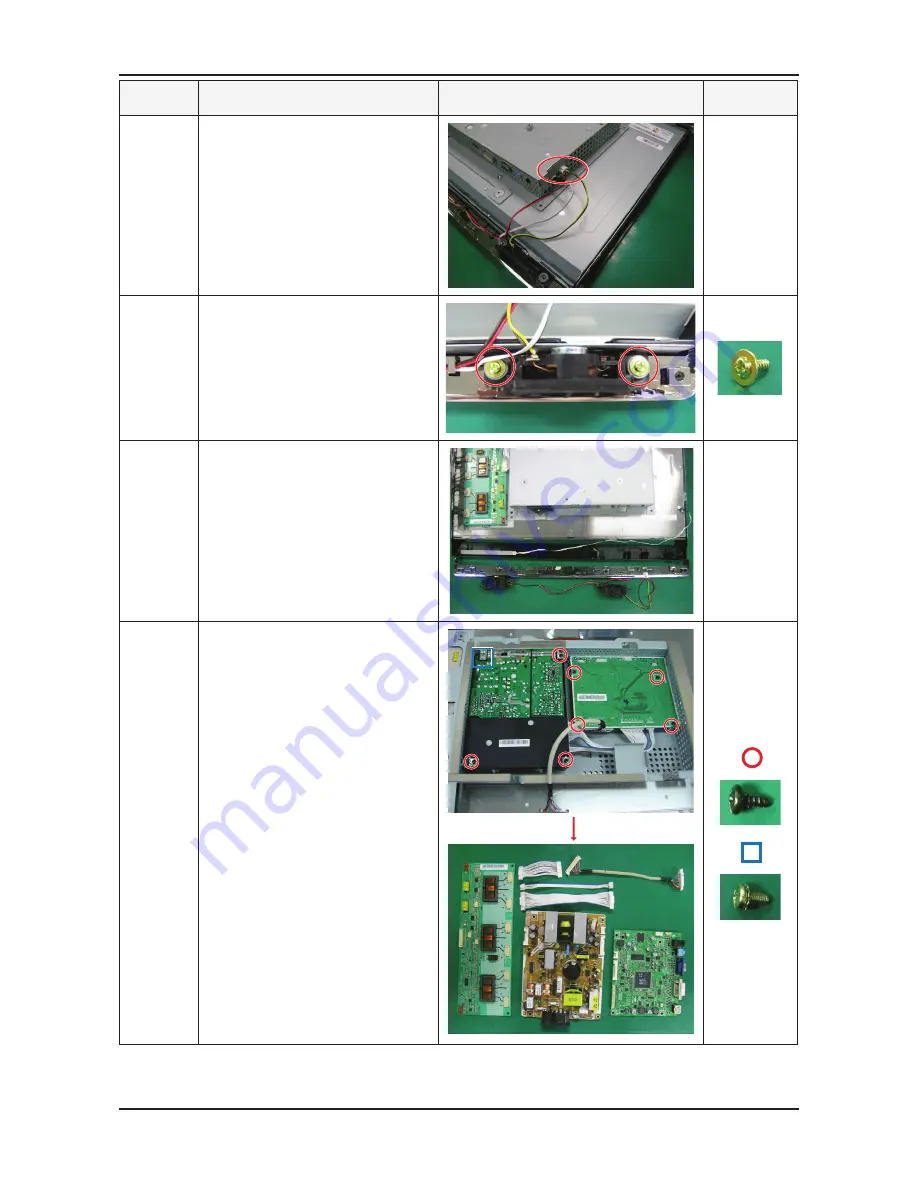
8. Seperate the Function Cable and the
Speaker Cable from the Main Board.
Speaker
9.
Remove the four (4) screws from both
sides of the speakers.
Decoration
10.
Remove the Panel and Chassis,
separate the Speaker and Function
wire from the Decoration and then
separate the Decoration.
Main Board
SMPS
11 Remove the 9 screws, lift the board,
and seperate the cable.
Summary of Contents for 2493HM - SyncMaster - 24" LCD Monitor
Page 23: ...5 16 5 Exploded View Part List Memo ...
Page 27: ...1 4 1 Precautions Memo ...
Page 31: ...2 4 2 Product specifications Memo ...
Page 39: ...4 3 4 Troubleshooting 4 2 1 Circuit Diagram and Waveform for Power Failures ...
Page 42: ...4 6 4 Troubleshooting ...
Page 45: ...4 9 4 Troubleshooting ...
Page 54: ...4 18 4 Troubleshooting Memo ...
Page 56: ...6 2 6 Wiring Diagram 6 2 Wiring Diagram Main CN703 CN702 ...
Page 57: ...6 3 6 Wiring Diagram 6 3 Wiring Diagram SMPS ...
Page 58: ...6 4 6 Wiring Diagram 6 4 Wiring Diagram PANEL ...
Page 60: ...6 6 6 Wiring Diagram Memo ...


