16
Installation Procedure
English
Installation Pr
oc
edur
e
Step 12 Connecting the power and
communication cables
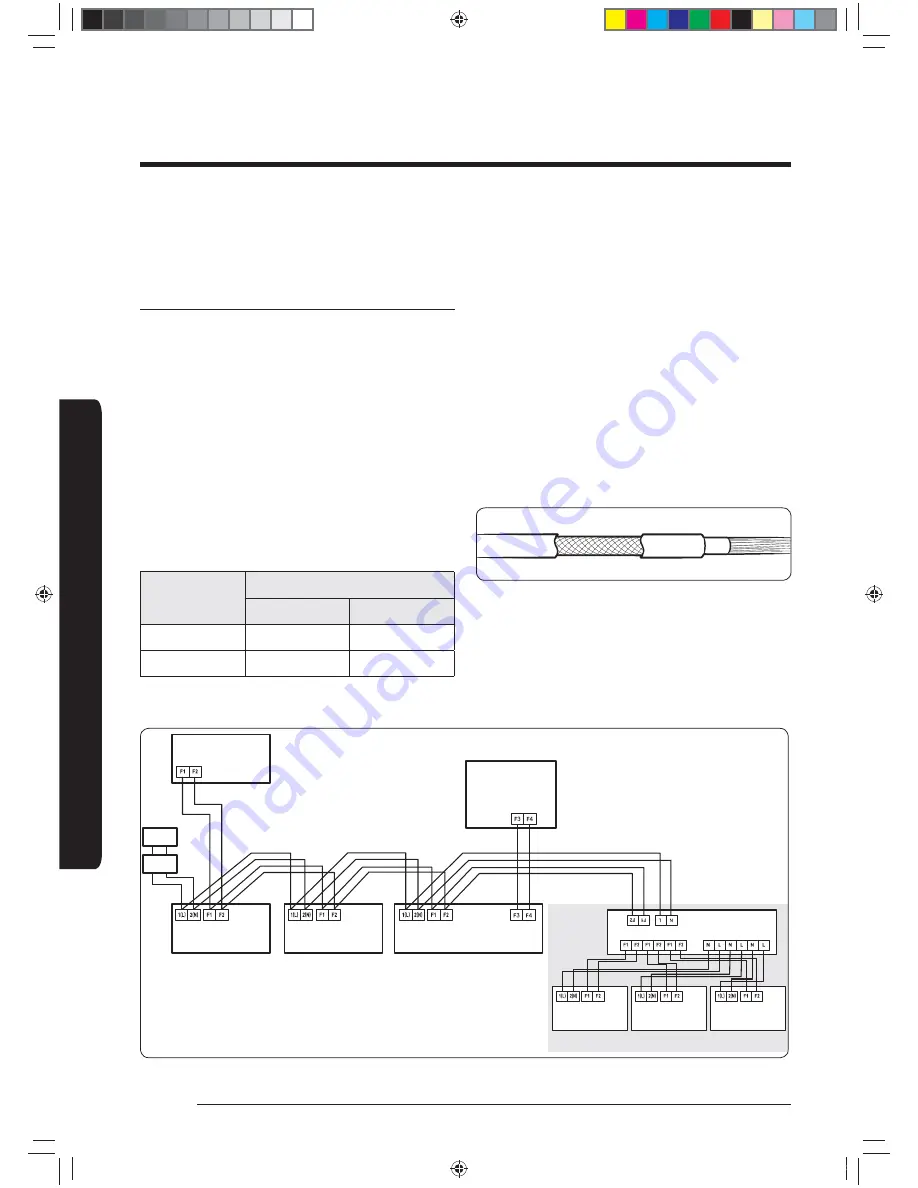
Power and communication cable connection
• Before wiring work, you must turn off all power source.
• Connect the power and communication cable among
the units within maximum length to set the voltage
drop under 10%.
• The auxiliary circuit breaker (ELCB, MCCB, ELB) should
be considered more capacity if many indoor units are
connected from one breaker.
• Connect F3, F4(for communication) to the
communication cable of the wired remote control.
• Tighten the electric wires with a proper tool within the
torque limit to connect and fix them firmly, and then
organize the wires to prevent outside pressure being
exerted on the covers and other parts. Failure to do so
may result in overheating, electric shock, and fire.
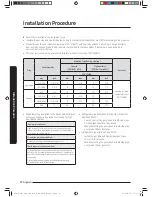
Tightening torque
Ęࡷ͔
lbf.ft
M3.5
0.8 to 1.2
0.59 to 0.89
M4
1.2 to 1.8
0.89 to 1.1
࣍ߢĘࡷ͔ॉߢߡ̧˝˙ࡷʀ͔࣎
• To protect the product from water and possible shock,
you should keep the power and the communication
cables of the indoor and outdoor units in the iron pipe.
• Connect the power cable to the auxiliary circuit
breaker (ELCB, MCCB, ELB).
• Keep distances of 50 mm (1-15/16 inch) or more
between power cable and communication cables.
• Power supply cords of parts of appliances for outdoor
use shall not be lighter than polychloroprene sheathed
flexible cord. (Code designation IEC:60245 IEC 57 /
CENELEC: H05RN-F or IEC:60245 IEC 66 / CENELEC:
H07RN-F)
• Screws on terminal block must not be unscrewed with
the torque less than 12 kgf•cm (0.87 lbf·ft).
• When installing the indoor unit in a computer room,
use the double shielded (tape aluminum / polyester
braid + copper) cable of FROHH2R type.
208-230V
Outdoor Unit
ELB
MCCB
Indoor Unit 1
Indoor Unit 2
Indoor Unit 3
Indoor Unit 4
Indoor Unit 5
Indoor Unit 6
࢜
ELB : Essential Installation
࢜
Ceiling, wall-mounted indoor unit.
EEV kit
Wired Remote
Control
k}t㨰䛙~TmGX ptluki]_TW^\\WhTWXUGGGX]
YWX_TWYTY_GGG㝘㤸GXXaXXa[\


