background image

English - 13

03

  O

VEN FEA

TURES

ACCESSORIES

Depending on the model that you have purchased, you are supplied with several 

accessories that can be used in a variety of ways.

1.  Roller ring

, to be placed in the centre of the oven.

Purpose:

  The roller ring supports the turntable.

2. Turntable

, to be placed on the roller ring with the centre 

fitting to the coupler.

Purpose:

  The turntable serves as the main cooking 

surface; it can be easily removed for cleaning.

DO NOT 

operate the microwave oven without the roller ring and turntable.

oven use

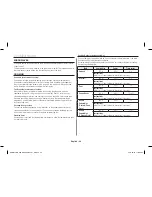
HOW A MICROWAVE OVEN WORKS

Microwaves are high-frequency electromagnetic waves; the energy released enables 

food to be cooked or reheated without the foods form or colour changing.
You can use your microwave oven to:

• 

Defrost (manual & auto)

• 

Cook

• 

Reheat

Cooking Principle.

1. 

The microwaves generated by the magnetron are distributed 

uniformly as the food rotates on the turntable. The food is 

thus cooked evenly.

2. 

The microwaves are absorbed by the food up to a depth of 

about 1 inch (2.5 cm). Cooking then continues as the heat is 

dissipated within the food.

3. 

Cooking times vary according to the recipient used and the 

properties of the food:

• 

Quantity and density

• 

Water content

• 

Initial temperature (refrigerated or not)

As the centre of the food is cooked by heat dissipation, cooking continues even 

when you have taken the food out of the oven. Standing times specified in recipes 

and in this booklet must therefore be respected to ensure:

• 

Even cooking of the food right to the centre.

• 

The same temperature throughout the food.

AME0114MB_XAP_DE68-03752U-01_EN.indd   13

2014-06-19   �� 10:09:30

Summary of Contents for AME0114MB

Page 1: ...k you for purchasing this Samsung product This manual is made with 100 recycled paper Please be advised that the Samsung warranty does NOT cover service calls to explain product operation correct impr...

Page 2: ...elp Note Important contents Safety information 2 Quick look up guide 11 Oven features 12 Oven 12 Control panel 12 Accessories 13 Oven use 13 How a microwave oven works 13 Checking that your oven is op...

Page 3: ...ldren to use the oven without supervision when adequate instructions have been given so that the child is able to use the oven in a safe way and understands the hazards of improper use WARNING This ap...

Page 4: ...and any food deposites removed Failure to maintain the oven in a clean conditioin could lead to deterioration of the surface that could adversely affect the life of the appliance and possibly result...

Page 5: ...mode children should only use the oven under adult supervision due to the temperatures generated During use the appliance becomes hot Care should be taken to avoid touching heating elements inside the...

Page 6: ...NG YOUR MICROWAVE OVEN Place the oven on a flat level surface 85 cm above the floor The surface should be strong enough to safety bear the weight of the oven 1 When you install your oven make sure the...

Page 7: ...clean condition could lead to deterioration of the surface that could adversely affect the life of the appliance and possibly result in a hazardous situation 1 Clean the outside surfaces with a soft...

Page 8: ...sely affect the working parts in the oven This microwave oven is not intended for commercial use The Light bulb should not be replaced in person for safety reasons Please contact nearest authorised Sa...

Page 9: ...t your nearest service centre Do not pour or directly spray water onto the oven Do not place objects on the oven inside or on the door of the oven Do not spray volatile material such as insecticide on...

Page 10: ...icrowave oven will automatically shut down for 30 minutes for safety purposes We recommend placing a glass of water inside the oven at all times to absorb microwave energy in case the microwave oven i...

Page 11: ...ons or concerns contact your nearest service centre or find help and information online at www samsung com This microwave oven is supposed for heating food It is intended for domestic home use only Do...

Page 12: ...10 TIMER BUTTON 11 CLOCK BUTTON 12 ECO BUTTON 13 SOUND BUTTON 14 STOP CANCEL BUTTON 15 30S BUTTON 16 START BUTTON oven features OVEN 1 DOOR 2 VENTILATION HOLES 3 LIGHT 4 DISPLAY 5 DOOR LATCHES 6 TURN...

Page 13: ...hanging You can use your microwave oven to Defrost manual auto Cook Reheat Cooking Principle 1 The microwaves generated by the magnetron are distributed uniformly as the food rotates on the turntable...

Page 14: ...n the maximum is used the water takes longer to boil SETTING THE TIME Your microwave oven has an inbuilt clock When power is supplied 0 88 88 or 12 00 is automatically displayed on the display Please...

Page 15: ...nter all of the instructions Some recipes require different stages of cooking at different temperatures You can set multiple stages of cooking with your microwave MULTI STAGE COOKING 1 Follow steps 1...

Page 16: ...t either the cooking times or the power level You can select the food servings by pressing Vegetables Grains Poultry Fish buttons First place the food in the centre of the turntable and close the door...

Page 17: ...ctions 3 Quinoa 250 g Use a large glass ovenware dish with lid Add double quantity of cold water 500 ml Cook covered Stir before standing time and add salt and herbs Stand for 1 3 minutes 4 Bulgur 250...

Page 18: ...ctions Potato 1 6 ea Pierce each potato several times with a fork Place on the turntable in a spoke like fashion After cooking let the potatoes stand for 3 5 minutes 3 Snack Code Food Serving Size Ins...

Page 19: ...ke out carefully use oven gloves Use spoon or fork and pour caramel decorations on baking paper Let stand for 10 minutes until dry and remove from paper 4 Soften Butter 50 g 100 g Cut butter into 3 or...

Page 20: ...THE AUTO REHEAT FEATURES Heating leftovers and precooked foods is easy with your new microwave You do not need to set either the cooking times or the power level You can select the food servings by p...

Page 21: ...puff pastry It is not suitable for short crust pastry fruit and cream cakes as well as for cake with chocolate topping Stand for 5 20 minutes Select the manual defrosting function with a power level o...

Page 22: ...EN TIMER You can use the Timer button 1 Press the Timer button to enter the timer setting 2 Using the Number buttons to set the time period 3 Press Start to begin Kitchen Timer The display counts down...

Page 23: ...food Overheating may cause the polystyrene to melt Paper bags or newspaper May catch fire Recycled paper or metal trims May cause arcing Cookware Microwave safe Comments Glassware Oven to tableware C...

Page 24: ...ng cooking To cover the food during cooking is very important as the evaporated water rises as steam and contributes to cooking process Food can be covered in different ways e g with a ceramic plate p...

Page 25: ...to halves Arrange stems to the centre Stand for 3 minutes Courgettes 250 g 90 4 4 Instructions Cut courgettes into slices Add 30 ml 2 tbsp water or a knob of butter Cook until just tender Stand for 3...

Page 26: ...l be more successful Power levels and stirring Some foods can be reheated using 90 power while others should be reheated using 60 50 or even 30 Check the tables for guidance In general it is better to...

Page 27: ...ime and stir well Stand for 1 2 minutes Soup Chilled 250 g 350 g 450 g 550 g 90 2 3 3 3 3 4 4 5 Instructions Pour into a deep ceramic plate or deep ceramic bowl Cover with plastic lid Stir well after...

Page 28: ...e any metal ties and take it out of any wrapping to allow thawed liquid to drain away Put the frozen food on a dish without cover Turn over half way drain off any liquid and remove any giblets as soon...

Page 29: ...0 g crystallized honey into a small deep glass dish Heat for 20 30 seconds using 30 until honey is melted MELTING GELATINE Lay dry gelatine sheets 10 g for 5 minutes into cold water Put drained gelati...

Page 30: ...s microprocessor the display may be reset To solve this problem disconnect the power plug and reconnect it Reset the time Smoke and bad smell when initial operating It s a temporary condition by new...

Page 31: ...identification in case of theft or loss and a copy of your sales receipt as a proof of purchase if warranty service is needed Model Number Serial Number Date Purchased Purchased From Warranty service...

Page 32: ...ICA 0 800 507 7267 www samsung com latin support Spanish 00 800 1 SAMSUNG 726 7864 www samsung com latin_en support English DOMINICA 1 800 751 2676 ECUADOR 1 800 10 72670 1 800 SAMSUNG 72 6786 EL SALV...

Reviews: