DELAY TIMED COOKING
Delay Timed Cooking feature is controlled by the oven timer. The timer turns
the oven on and off at the time that the customer had selected in advance.
•
Delay Timed Cooking can be set before setting other cooking operations.
•
The clock must be set for the correct time of day.
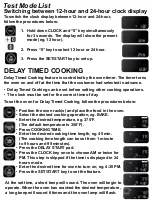
Switching between 12-hour and 24-hour clock display
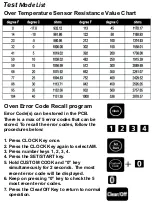
Test Mode List
To switch the clock display between 12-hour and 24-hour,
follow the procedures below:
1.
Hold down CLOCK and “0” key simultaneously
for 3 seconds. The display will show the present
mode (eg. 12 hour).
2.
Press “0” key to select 12 hour or 24 hour.
3. Press the SET/START key to set up.
To set the oven for Delay Timed Cooking, follow the procedures below:
•
Position the oven rack(s) and place the food in the oven.
•
Select the desired cooking operation, eg. BAKE.
•
Enter the desired temperature, eg. 375
°F.
(The default temperature is 350
°F).
•
Press COOKING TIME.
•
Enter the desired cooking time length, eg. 45 min.
(The cooking time length can be set from 1 minute
to 9 hours and 99 minutes).
•
Press the DELAY START pad.
•
Press the CLOCK key once to choose AM or twice for
PM. This step is skipped if the time is displayed in 24
hours mode.
•
Enter the desired time for oven to turn on, eg. 4:30 PM.
•
Press the SET/START key to set the feature.
At the set time, a short beep will sound. The oven will begin to
operate. When the oven has reached the desired temperature,
a long beep will sound 6 times and the oven lamp will flash.


