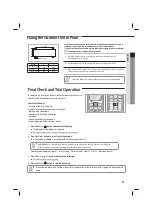
background image

28

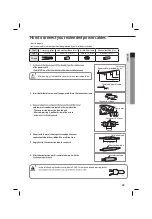
Fixing the installation plate

B

A

D

C

D

You can select the direction of the drain hose depending on where you want to 

install the indoor unit. Therefore before  xing the installation plate to a wall or a 

window frame, you must determine the position of the 65mm hole through which 

the cable, pipe and hose pass to connect the indoor unit to the outdoor unit. 
When facing the wall, the pipe and cable can be connected from the: 


-


Right (A)


-  

Left (B)


-  

Underside_right (C)


-  

Rear_right or left (D)

1

Determine the position of the pipe and drain hose hole as seen in the picture 

and drill the hole with an inner diameter of 65mm so that it slants slightly 

downwards. 

CAUTION

   Make sure to drill only one hole after choosing the direction of 

the pipe. 

2

Fix the indoor unit.

If y

x the indoor unit on a wall

(1) Fix the installation plate to the wall giving attention to the weight of the 

indoor unit. 

Note


 If you mount the plate to a concrete wall using plastic 

anchors, make sure that gaps between the wall and the plate, 

created by projected anchor, is less than 20 mm. 

Wall

<20 mm

Plastic Anchor

If y

x the indoor unit on a window frame

(1) Determine the positions of the wooden uprights to be attached to the 

window frame. 

(2) Attach the wooden uprights to the window frame giving attention to 

the weight of the indoor unit.

(3) Attach the installation plate to the wooden upright using tapping 

screws.

Direction of pipe

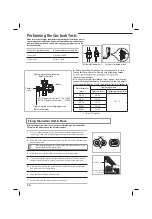
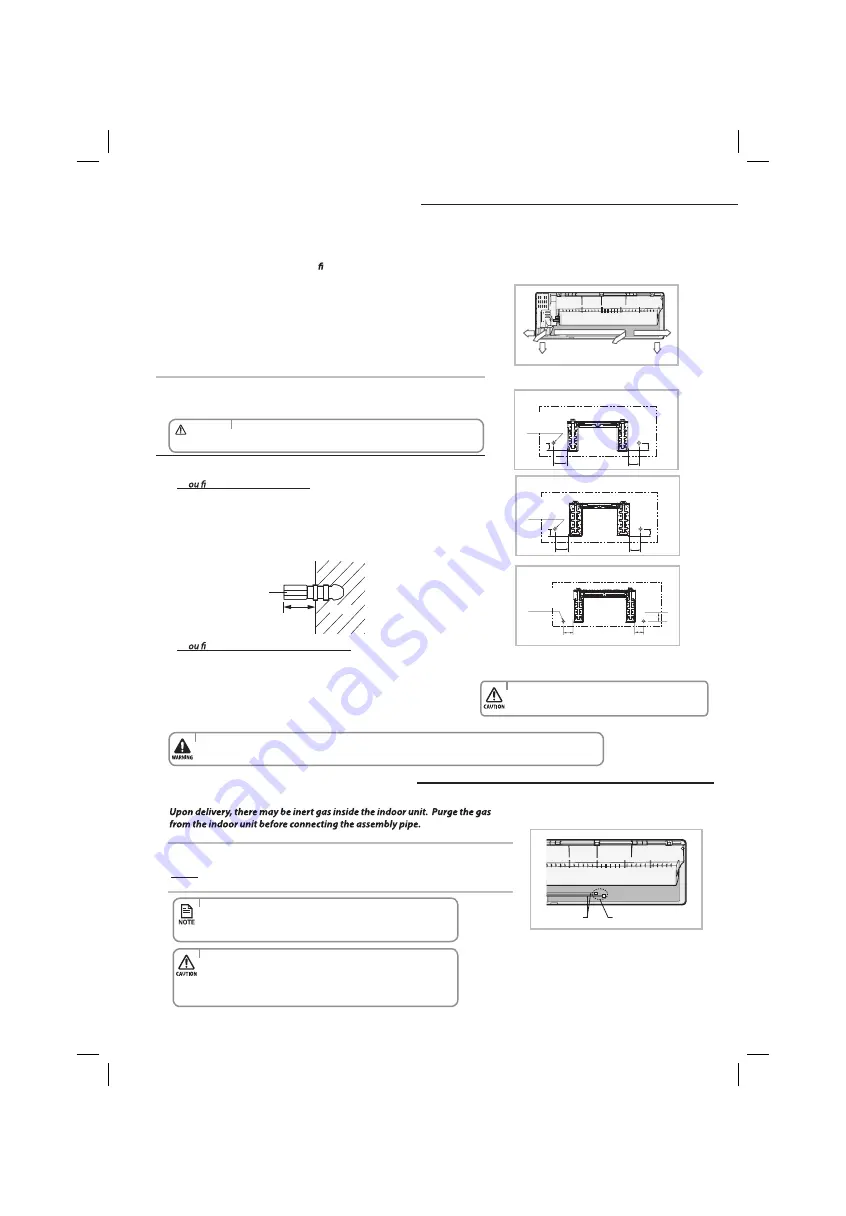
Unscrew the caps at the end of each pipe.

Result

:

All inert gas exhausts from the indoor unit.

Unscrew the caps

Pipes

Purging the Indoor Unit

  Fix the installation plate without inclining to one side.

   Make sure that a wall can withstand the weight of the product. If you install the product in a place where it is not 

strong enough to withstand the product weight, the unit could fall and cause injury.

   The remaining air in the Refrigeration cycle, which contains moisture, 

may cause malfunction on the compressor.

   Always contact the service center or a professional installation agency 

for product installation.

   To prevent dirt or foreign substances from getting into the pipes during 

installation, do NOT remove the caps completely until you are ready to 

connect the pipes.

170

85

47

(Unit : mm)

Pipe hole 

(Ø65mm)

120

72

68

72

(Unit : mm)

Pipe hole 

(Ø65mm)

**18U*P , **24 **

75

72

55

72

(Unit : mm)

Pipe hole 

(Ø65mm)

**09U*P ,**12** ,**18U**Q

**09U**Q

Summary of Contents for AS24UUQ

Page 1: ...AS24U Series DB98 33397A 6 FR EN PT Air Conditioner user installation manual imagine the possibilities Thank you for purchasing this Samsung product To receive more complete service please register yo...

Page 2: ...s summer Look for Everywhere The elegant and harmonious design gives priority to the esthetics of your space and complements any of your existing interior d cor With its soft color and rounded edge sh...

Page 3: ...direct sunlight and water rain drops Do not install this appliance in a location where gas may leak This may result in electric shock or re Never install the outdoor unit in a location suchas on a hi...

Page 4: ...o so may result in electric shock or fire In the event of a gas leak such as propane gas LP gas etc ventilate immediately without touching the power plug Do not touch the appliance or power cord Do no...

Page 5: ...problems with the product Do not drink the water from the air conditioner The water may be harmful to humans Do not apply a strong impact to the remote controller and do not disassemble the remote con...

Page 6: ...rature Outdoortemperature Indoorhumidity Cooling Relative humidity 80 or less Dry Internal protections via the unit control system This internal protection operates if an internal fault occurs in the...

Page 7: ...Air intake up and down ENGLISH 7 Main parts Display Checking the name ofthe parts Room temperature sensor Timer Auto Clean indicator below...

Page 8: ...matically up and down Mode Set one of the 5 operating modes see pages 10 11 for instructions Auto Clean Auto clean function Dry inside of the indoor unit to get rid of odor Power Temp Increase Decreas...

Page 9: ...ver as arrow indicates on the rear side ofthe remote controllerand pull up 2 Insert two AAA batteries Check and match the and signs accordingly Make sure you have inserted the batteries in correct pos...

Page 10: ...rature and the fan speed to feel cooler in hot season If current outside temperaturesare much higher than the selected indoor temperature it may take time to bring the inner temperature to the desired...

Page 11: ...uto Fan Low Med High Heat Auto Low Med High Auto You can adjust the desired temperature by 1 C within the range of 16 C 30 C Cool You can adjust the desired temperature by 1 C within the range of 16 C...

Page 12: ...ction for 30 minutes position you prefer Blade pin lever Be extremely careful with your while adjusting the Horizontal There is a potential risk of personal injury when the unit is mishandled Using th...

Page 13: ...set too short or long because the default is set to 8 hour operation If the mode is set less than 4 hours the operation will stop at the same time If the mode is set over 5 hours it will run asWake u...

Page 14: ...you don t pressSet button within 10 seconds after selecting the time the air indicator on the indoor unit AdditionaloptionsavailableinOntimermode You can select from Auto Cool Dry Fan Heat You can adj...

Page 15: ...erature range limit to help you save energy while the air conditioner is operating in Cool mode Press theSmartSaver button on theremote controllerwhile the air conditioneris operating in Cool mode Sma...

Page 16: ...runs after stopping the air conditioner operation The Auto clean indicator on the indoor unit display appears and the Auto cleaning function runs Whentheairconditioneristurnedon The Auto clean indica...

Page 17: ...and pull it down to open Then slightly lift the panel up Do not clean the display using alkaline detergent Do not use Benzene Thinner or CloroxTM They may damage the surface of the air conditioner an...

Page 18: ...area Clean theA ter with a vacuum cleaneror soft brush If dust istoo heavy rinse it with running water Clean the Air every 2 weeks or when the clean reminder lights up Cleaning term may depending on t...

Page 19: ...er properly Type Description Every2 weeks Every3 months Every4 months Onceayear Indoor unit 1 O Clean the condensate drain pan 2 O Thoroughly clean the heat exchanger 2 O Clean the condensate drain pi...

Page 20: ...low the air conditioner operates in De ice mode automatically In De ice mode indoor fan stops and cool air does not come out If the doors or windows are open it may cause bad cooling heating performan...

Page 21: ...s generated Depending on the status of the air conditioner usage noise can be heard when refrigerant Smoke is generated from the outdoor unit If may not be a but it can be a steam generatedby the defr...

Page 22: ...nd requirements set forth in the Operating limits table included in the manual shall immediately invalidate the warranty The air conditioner should be used only for the applications for which it has b...

Page 23: ...afety either for people or things For this reason where it is not observed as indicated into the Installation Manual the cost necessary to reach and repair the won t be considered in warranty and char...

Page 24: ...ances and maximum lengths as seenin the picture below when installing the air conditioner Avoid the following places to prevent malfunction of the unit Where there is machine oil Salty environment suc...

Page 25: ...air outlet is towards the wall Minimum Installation Space 500 or more 300 or more The upper part of the outdoor unit and the air outlet is opposite the wall Unit mm Space Requirements for Outdoor Unit...

Page 26: ...l When the walls are blocking front and the rear side of the outdoor units When front and rear side of the outdoor unit is towards the wall When installing more than 1 outdoor unit 500 or more 300 or...

Page 27: ...necting the pipes he T wire assemblycable is optional If it isnot supplied use the standard cable The drain plug and rubber leg areonly included when the air conditioner is supplied without the assemb...

Page 28: ...hor If y x the indoor unit on a window frame 1 Determine the positions of the wooden uprights to be attached to the window frame 2 Attach the wooden uprights to the window frame giving attention to th...

Page 29: ...refer to page 35 The smaller one is forthe liquid refrigerant The larger one is forthe gas refrigerant need to extend the pipe using the assembly pipe optional The connection procedure for the refrige...

Page 30: ...reamer 4 Put a are nut slightly into the pipe and modify the are 5 Check if you ared the pipe correctly see examples of incorrectly ared pipes below Uneven Thickness Cracked Damaged Surface Inclined...

Page 31: ...Drain hose connection must be easy accessible and serviceable 1 If necessary connect the 2 meter extension drain hose to the drain hose 2 If you usethe extension drain hose insulate theinside of thee...

Page 32: ...pan 4 Attach the rubbercap with a screwdriver by turning it to the right until it 5 Checkfor leakage on both side of the drain outlet Changing direction of the drain hose Drain hose Screw hole Screw R...

Page 33: ...ring terminal socket only ng work The terminal socket or there is a space between the screw and the ring terminal is upside down CAUTION 1 Extend the assembly cable if necessary 2 Open the front grill...

Page 34: ...the power cable to the indoor unit Indoor unit Outdoor unit Indoor unit Outdoor unit AS09 12 18 Indoor unit Outdoor unit GroundWire Green Yellow GroundWire Green Yellow AS24 Each wire is labeled with...

Page 35: ...connected pipes using the vacuum pump for about 15 minutes Close the valve of the low pressure side of manifold gauge clockwise t u o b a r e t f a g H m c 6 7 a P M 1 0 s w o h s e g u a g e r u s s...

Page 36: ...rear of the indoor unit 5 Hook the indoor unit to the installation plate and move the unit to the right and left until it is securely in place 6 Wrap the rest of the pipe with vinyl tape 7 Attach the...

Page 37: ...ollowing checks and tests to ensure that the air conditioner operates correctly Check thefollowings Strength ofthe installation site Tightness of pipe connection to detect gas leak Electricwiring conn...

Page 38: ...ction 5 How to set the timers 6 How to clean and replace the filters 1 Turn on the air conditioner and select Cool mode to run the compressor for 3 minutes 2 Release the valve caps on High and Low pre...

Page 39: ...n your contraction tube in the middle ofthe insulation tape 5 Apply heat to the contraction tubeto contract it 6 After tubecontraction workis completed wrap it with the Tools Crimping plier Connection...

Page 40: ...255 800 CALL www samsung com BAHRAIN 8000 4726 800 SAMSUNG 726 7864 OMAN 800 22273 065777444 JORDAN EGYPT 08000 726786 SYRIA 18252273 0800 726 7864 www samsung com www samsung com www samsung com www...

Reviews: