background image


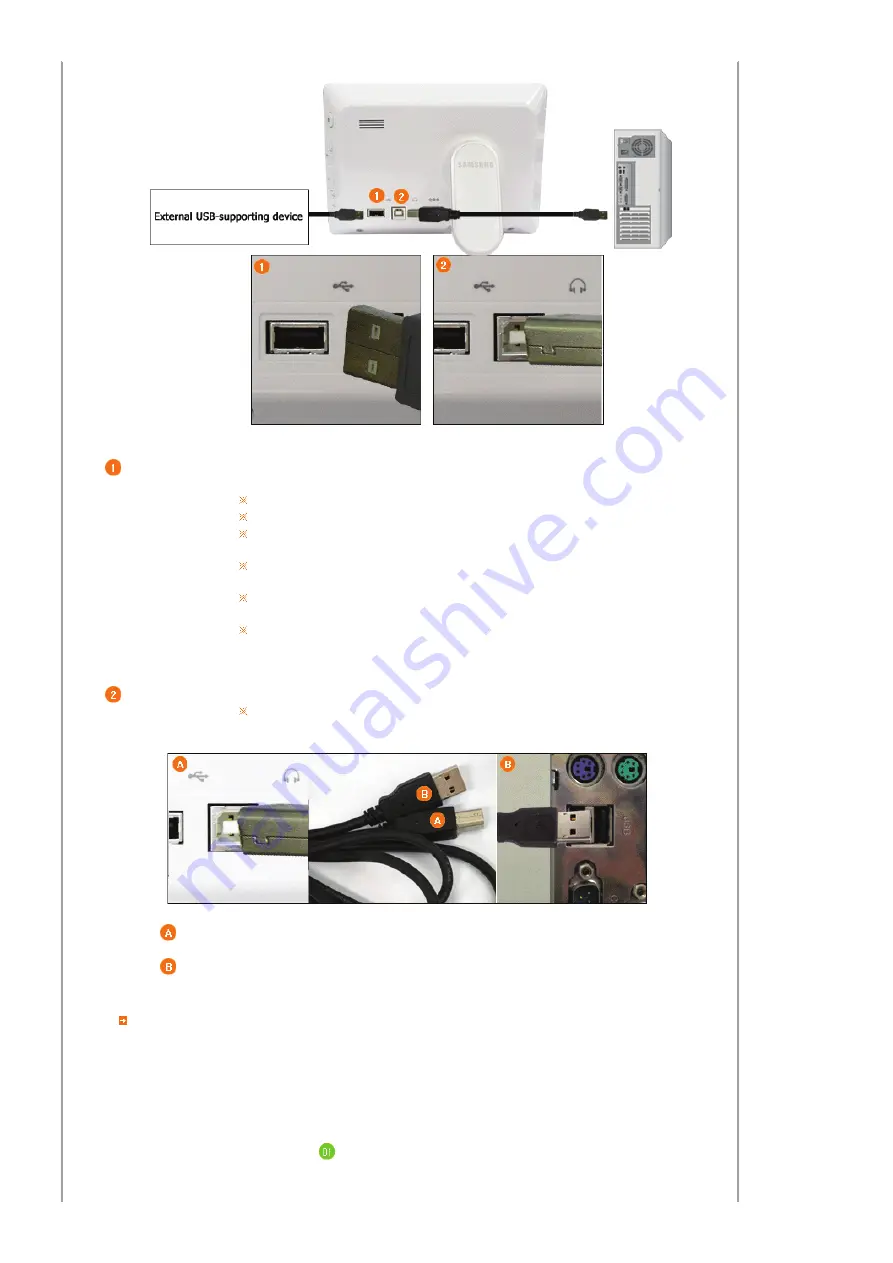
Down Stream 
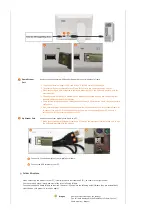
Port

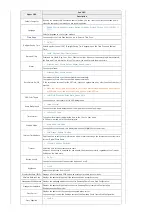
Used to connect an external USB-supporting device to your digital photo frame.


This product does not support USB card readers. Only USB storage is supported.
The external devices connected to your Digital Photo Frame are not recognized by your PC.
When connecting an external device to the down stream port, use the USB cable provided with the 
external device.
Samsung carries no liability for external device malfunctions caused by using any cable except the 
standard cables specified for each device.
Some external products provide a cable that does not meet USB standards. Hence, they may cause a 
malfunction.
If an external storage device does not work normally when connected to your digital photo frame, try 
to connect it to your PC. If it still does not work normally when connected to your PC, contact a 
service center for that external device or your PC. 

Up Stream Port

Used to connect your digital photo frame to a PC. 

When connecting your digital photo frame to a PC through the up stream terminal, make sure to use 
the USB cable provided with the product.


Connect to the upstream jack of your digital photo frame.


Connect the USB terminal of your PC.


Folder Structure


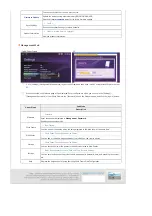
When connecting this product to your PC, it is displayed as a removable disk (E:), as shown in the figure below.  
You can save and play all music and movie files in the following folders.  
You can also add and delete folders as required. (However, if you delete the following default folders, they are automatically 
created when your product is turned on again.)


images


A default folder created by the product 
(The full path displayed in the Digital Photo Frame: Photos / 
frame memory / images)

Summary of Contents for BT07PS

Page 1: ...BT07PS ...

Page 2: ...ing directions may lead to minor personal injury or property damage Safety Symbols Power Installation Using and Cleaning Power The images here are for reference only and are not applicable in all cases or countries Insert the power plug correctly until it is firmly in place z Failing to do so may cause fire Do not use a damaged power plug cord or outlet as this may cause electric shock or fire Do ...

Page 3: ...electric shock or fire Hold and pull out the plug by its body when disconnecting it from the outlet as pulling the plug out by the cord may cause it to be damaged z Failing to do so may cause fire or the product may not turn on normally Ensure that the power plug is disconnected before cleaning the product z Failing to do so may cause electric shock or fire Keep the product away from places expose...

Page 4: ...l the product in a car or a location exposed to oil smoke moisture water or rainwater z Any contact of these materials with the product may cause electric shock or fire Disconnect the power plug when there is thunder or lightning z Failing to do so may cause electric shock or fire Place the product down gently when installing it z Failing to do so may cause product damage or personal injury Avoid ...

Page 5: ... or fire Always remove dust and water from the pins and connections of the power plug z Failing to do so may cause electric shock or fire When cleaning the product first disconnect the power plug and clean it with a soft dry cloth z Do not use any chemicals such as benzene alcohol thinners mosquito repellant aromatic lubricant detergent or wax When not using the product for a long time make sure t...

Page 6: ...d waste at the end of its working life To prevent possible harm to the environment or damage to health from uncontrolled waste disposal please separate this from other types of waste and recycle it responsibly to promote the sustainable reuse of material resources Household users should contact either the retailer where they purchased this product or their local government office for details of wh...

Page 7: ...esign With its sleek and clean high class design your digital photo frame doubles as an ornament for your desk or table A 90 degree rotating stand allows both horizontal and vertical installation Features Components Front Back Side Buttons Please check that all components are contained in the delivered package If anything is omitted contact the local distributor where the product was purchased For...

Page 8: ... product Manual Quick Start Warranty Not available in all locations User Manual Cables Power cord USB cable A B type Power Adapter Features Components Front Back Side Buttons Front Features Components Front Back Side Buttons Back ...

Page 9: ... photo frame to a PC through the upstream port Headphone connection jack Connect your headphones to the Headphone connection jack DC In Jack Connect the power adapter to this jack Connect the power cord to the power jack of the power adapter Stand A 45 90 degree rotating stand allows both horizontal and vertical installations If your digital photo frame is installed vertically you can rotate your ...

Page 10: ...at the bottom left corner of the screen VOL Volume Button Adjusts the sound volume when playing music files or movies Up Button Used for moving up Left Button Used for moving left Right Button Used for moving right VOL Volume Button Adjusts the sound volume when playing music files or movies Down Button Used for moving down ENTER Enter Button Used for selection ll Play Pause Button Play Pause duri...

Page 11: ...r adapter to the terminal at the back of the product Connect the power cord to the power adapter Plug the power cord for the product into a nearby outlet Press the button on the side of the product to turn the product on Power USB Memory Card Connecting via USB ...

Page 12: ...onnect it to your PC If it still does not work normally when connected to your PC contact a service center for that external device or your PC Up Stream Port Used to connect your digital photo frame to a PC When connecting your digital photo frame to a PC through the up stream terminal make sure to use the USB cable provided with the product Connect to the upstream jack of your digital photo frame...

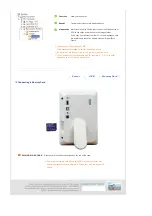
Page 13: ...acity of this product is 64 MB If the capacity is exceeded no further files can be stored Do not turn off the product while saving playing or deleting a file The volume name of the removable disk for example E F G may differ depending on your computer environment Power USB Memory Card Connecting a Memory Card SD MMC MS XD CARD Slide the card in the direction marked on the top of the card Removing ...

Page 14: ...buttons allow you to adjust items in the menu ENTER Activates a highlighted menu item BACK Use this button to step one step back in the menu Buttons Photos Web Photos Music Video Settings Photos Web photos List Menu Only Photos When pressing the MENU button the on screen menu is displayed on the screen Upper OSD Sub OSD Description Show Pictures From Memory Card USB Frame Memory default value Sele...

Page 15: ...by pressing the Menu button again and selecting the music you want from among the music files saved on the Frame Memory or the connected external memory Slideshow Menu Upper OSD Sub OSD Detail OSD Description Pause Slide Show Resume Slide Show Pause Slide Show Resume Slide Show Slide Show Settings Transition Fade Wipe Slide Blind Checker Random None Select an effect for your slide show when transi...

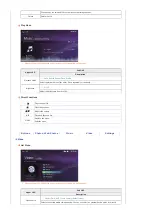
Page 16: ... to play You can adjust the volume using the buttons to the right of your digital photo frame Direct Functions Slide Show Button Description Play the next file in the list Play the previous file in the list ll Pressing the ll button alternately plays and pauses the file MENU Opens the on screen menu and exits from the menu Buttons Photos Web Photos Music Video Settings Music List Menu When pressin...

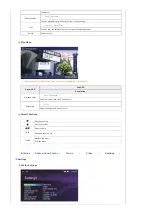
Page 17: ...y Brightness 0 100 Adjust the brightness from 0 to 100 Direct Functions Plays the next file Plays the previous Adjusts the volume ll Plays and Pauses a file MENU Displays the menu Exits the menu Buttons Photos Web Photos Music Video Settings Video List Menu When pressing the MENU button the on screen menu is displayed on the screen Upper OSD Sub OSD Description Video Source Memory Card USB Frame M...

Page 18: ...hen pressing the MENU button the on screen menu is displayed on the screen Upper OSD Sub OSD Description Playback Mode Once Continuous Select a mode among Once Continuous Brightness 0 100 Adjust the brightness from 0 to 100 Direct Functions Play the next file Play the previous Adjust volume ll Plays and Pauses a file MENU Displays the menu Exits the menu Buttons Photos Web Photos Music Video Setti...

Page 19: ... select a color theme for the OSD background Home Background Default Custom You can reset the Home Background of the main menu to the default image Time Format 12 hours 24 hours You can select whether to display the time in the 12 or 24 hour mode In 24 hours am and pm will not be displayed Starting Mode Home Menu Last Mode You can select the menu which is displayed when your Digital Photo Frame st...

Page 20: ...me in the Password box on the Welcome page and click the sign in button Upper Menu Sub Menu Description Welcome Password Enter the password displayed in Management Password Enables case sensitive mode Photo Frame Now Playing You can monitor the photos which are being displayed in the slide show at the same time Web Photos Photo Feeds Photos Windows Live Spaces You can add or remove a website addre...

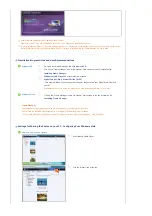
Page 21: ...indows Media Player 11 is required and must be installed on your PC 1 Choose Your Language Turn on your Digital Photo Frame and select a language The selected language is used as the OSD language and for the Samsung Photo Frame Web Confi guration which is embedded in your Digital Photo Frame You can change the language via Settings Language 2 Choose Your WiFi Network A list of APs is displayed If ...

Page 22: ...layer 11 or later must be installed Digital Image Library Starter Edition DISE This program allows you to change the ratings for the photos on your Digital Photo Frame via your PC Recommendations when using the Digital Photo Frame Internet Explorer 7 0 or higher Windows Vista Click on the Frame Manager icon in the Manual Main screen to run the installation file Installing Frame Manager Frame Manag...

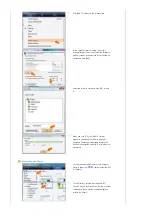
Page 23: ... you click OK the Add To Library window is closed and the Add to Library by Searching Computer is displayed Wait until it finishes the operation and click Close when it is completed Checking Shared Photos In the Windows Media Player set the Category which is under the symbol at the top left to Picture In the Library select Recently added All Pictures Keywords Date Taken Rating or Folder settings a...

Page 24: ...ings If no Available device is displayed in the Media Sharing window proceed to steps 4 If displayed proceed to step 5 In the Media Sharing window click Networking and check whether the current network is set to Private network If not set it to Private Network If your network is a Private network the Available Device list and the Settings button are displayed in the Media Sharing window ...

Page 25: ...hoto Frame Checking Network Connections Check whether the Network icon is displayed at the left top of the Main screen If the Network icon is displayed proceed to the Checking Computer Connections section described below If it is not displayed move to Settings Wireless Network SSID SSID Service Set Identifier In the Wireless Network SSID window select the SSID to which you want to connect your Dig...

Reviews: