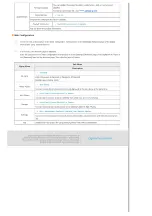
Do not remove the USB, memory card during the update operation.
Do not press any key during the update operation.
Do not insert any other card during the update operation.
Do not turn your Digital Photo Frame off during the update operation.
You can identify whether the update operation has finished successfully or not by checking the
firmware version of your Digital Photo Frame is changed to the version of the firmware update.
I want to connect to a monitor by using Mini-Monitor program.
The Digital Photo Frame not only allows you to appreciate photos but also provides an additional
Mini-Monitor function. The Mini-Monitor is a function for using the Digital Photo Frame as an
auxiliary monitor. Its usage is simple as the Digital Photo Frame connects to your PC via a USB cable.
This function allows you to work more efficiently at your PC by using an additional monitor. To use
your digital photo frame as a Mini-Monitor, first install the Frame Manager program. (However,
please note that you can use only one digital photo frame as a Mini-Monitor.)
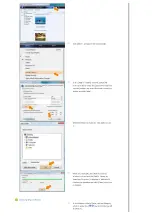
Installing Frame Manager
Frame Manager User's Manual
Using your digital photo frame as a Mini-Monitor.
Using your digital photo frame as Mass Storage.
Changing the current mode to another mode
Adjusting the brightness
Updating the firmware
System Requirements
z
OS
: Windows XP SP2, Vista (32bit)
z
System Processor Speed : 1.5 GHz
z
USB
: Extended Host Controller (EHCT) for USB 2.0
z
RAM
: 256 MB or above
Caution
1. When using Windows XP, Service Pack 2 must be installed.
It might not operate with any operating systems other than Windows XP SP2. We are not liable for problems that may
occur when installing it on an operating system other than Windows XP SP2.
2. We recommend a CPU speed of 2.4 GHz or higher.
Your digital photo frame might not operate normally if the performance specifications of your PC are lower than the
recommendations.
3. Make sure to install it correctly as directed in the Installation Guide.
4. Do not use your Mini-Monitor as a primary monitor.
We are not liable for any problems that may occur if you do not follow the directions. If it is used as a primary monitor,
the screen may be blank.
5. Make sure to use the provided USB cable.
6. If it operates as a Mini-Monitor, none of the buttons will operate except for the power button and the
Ÿ
/
ź
buttons.
7. Move the programs displayed and used on the Mini-Monitor to the primary monitor after you have finished using it.
8. For some video cards, the Mini-Monitor may not operate normally. In this case, set Hardware acceleration to None.
9. You cannot use the Aero effect of Windows Vista while using the Mini-Monitor.
10. When using Windows Vista, some movies cannot be played using the Mini-Monitor.
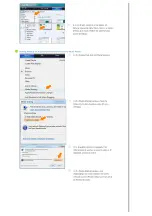
To set Hardware acceleration to None: Right-click on the Windows Desktop and select Properties from the displayed
menu. The Display Properties window appears. Click Settings > Advanced > Troubleshoot tab. Move the Hardware
acceleration slide to None.
Limitation and Recommendation
z
Limitation
: Hardware graphics acceleration such as DirectX or OpenGL is not supported on the Mini-MonitorDisplay as it
would require the emulation of a graphics processor by your standard CPU which would not be favourable. Media
players which are using DirectX will not work properly on Mini-Monitor Display.
> Example: GOM player,VLC Player
z
Recommedation
: Do not use/run directX or openGL application on Mini-Monitor display.

