background image

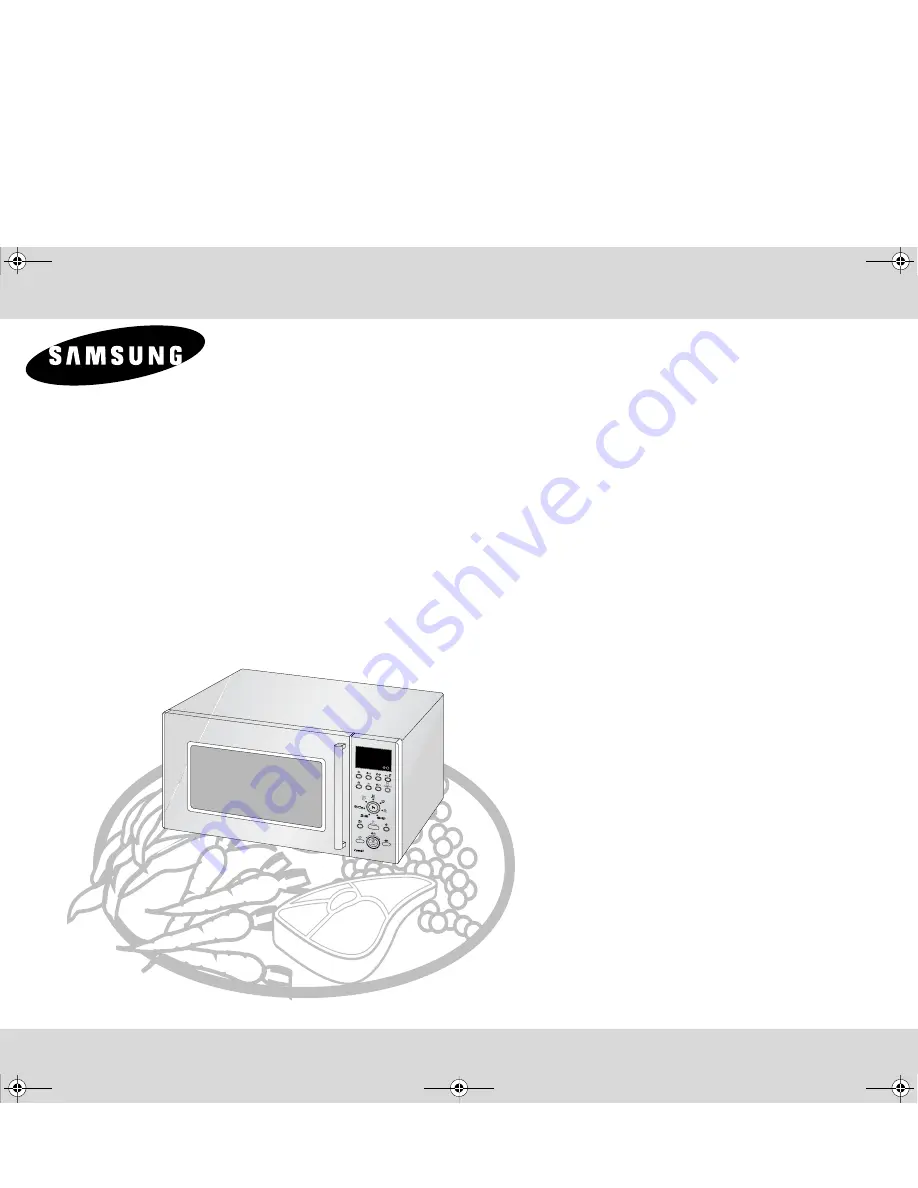
MICROWAVE OVEN

Owner’s Instructions and Cooking Guide

CE1150 / CE1151T 
CE1152M / CE1153F

“Quick” Look-up Guide ................................................................................ 2
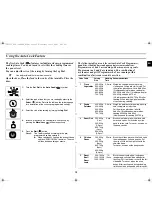
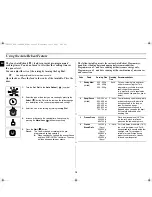
Using the Steam Cleaning ........................................................................... 3
Control Panel  .............................................................................................. 4
Oven ............................................................................................................ 4
Accessories ................................................................................................. 5
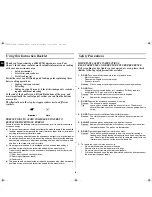
Using this Instruction Booklet ...................................................................... 6
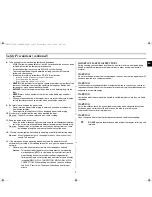
Safety Precautions ...................................................................................... 6
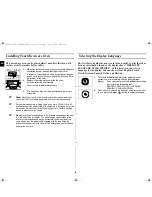
Installing Your Microwave Oven .................................................................. 8
Selecting the Display Language .................................................................. 8
Setting the Time .......................................................................................... 9
Checking that Your Oven is Operating Correctly......................................... 9
How a Microwave Oven Works ................................................................. 10
What to Do if You are in Doubt or You have a Problem ............................ 10
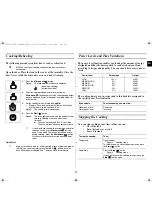
Cooking/Reheating .................................................................................... 11
Power Levels and Time Variations ............................................................ 11
Stopping the Cooking ................................................................................ 11
Adjusting the Cooking Time....................................................................... 12
Using the Steam Cook Feature ................................................................. 12
Using the Auto Cook Feature .................................................................... 13
Using the Auto Reheat Feature ................................................................. 14
Using the Power Defrost Feature .............................................................. 15
Using the Junior/Snacks Feature .............................................................. 16
Using the Auto Steam Feature .................................................................. 17
Using the Cafeteria Feature ...................................................................... 18
Cafeteria Settings ...................................................................................... 19
Using the Fermentation Feature ................................................................ 19
Fermentation Settings ............................................................................... 20
Using Crust Plate....................................................................................... 21
Crust Plate Setting..................................................................................... 22
Multistage Cooking .................................................................................... 23
Fast Preheating the Oven.......................................................................... 24
Cooking by Convection.............................................................................. 24
Grilling ....................................................................................................... 25
Choosing the Heating Element Position .................................................... 25
Choosing the Accessories ......................................................................... 26
Spit-Roasting ............................................................................................. 26
Spit Roasting and Barbecuer Setting ........................................................ 27
Using The Vertical Multi-Spit ..................................................................... 28
Combining Microwaves and Grill ............................................................... 28
Combining Microwaves and Convection ................................................... 29
Combining Convection and Grill ................................................................ 30
Using the Deodorization Feature ............................................................... 30
Manual Stop Turntable Function ............................................................... 31
Safety-locking Your Microwave Oven........................................................ 31
Switching the Beeper Off........................................................................... 32
Selection and Change of Weight Unit........................................................ 32
Cookware Guide........................................................................................ 33
Cooking Guide........................................................................................... 34
Cleaning Your Microwave Oven ................................................................ 45
Storing and Repairing Your Microwave Oven ........................................... 45
Technical Specifications ............................................................................ 46

jlXX\W†hukTWY`]Yi†luU”GGwˆŽŒGXGG~Œ‹•Œš‹ˆ SGqœ•ŒGXSGYWW\GG_a\ZGht

Summary of Contents for CE1150

Page 1: ...ature 16 Using the Auto Steam Feature 17 Using the Cafeteria Feature 18 Cafeteria Settings 19 Using the Fermentation Feature 19 Fermentation Settings 20 Using Crust Plate 21 Crust Plate Setting 22 Multistage Cooking 23 Fast Preheating the Oven 24 Cooking by Convection 24 Grilling 25 Choosing the Heating Element Position 25 Choosing the Accessories 26 Spit Roasting 26 Spit Roasting and Barbecuer Se...

Page 2: ...ep one time per minute Leave the food in the oven Press 30s button one or more times for each extra 30 seconds that you wish to add 30s 1 Place the frozen food in the oven Turn the Set dial to the Power Defrost symbol 2 Select the food category by pressing the Select button until the desired food category is selected 3 Select the weight by turning the Jog Dial as required 4 Press Start button Resu...

Page 3: ...function Warning Water Bowl only can be use during Steam Clean mode When cooking non liquid itensm remove water bowl because It will damage and cause fire to the microwave oven 1 Open the Door 2 Fill with water following guide line inside the water bowl OThe line is about 30ml 3 Please attach the water bowl in right side of the oven 4 Close the door 5 Press the Steam clean button Bulb does work du...

Page 4: ... STOP CANCEL BUTTON 14 CLOCK SETTING BUTTON 15 COMBINED BUTTON MICROWAVE CONVECTION 16 FAST PREHEAT SELECTION BUTTON 17 STEAM COOK BUTTON 18 COMBINED BUTTON MICROWAVE GRILL 19 AUTO COOK FEATURE MODE 20 SET DIAL 21 AUTO REHEAT FEATURE MODE 22 JUNIOR SNACK MODE 23 MORE LESS BUTTON 24 JOG DIAL 25 TURNTABLE ON OFF BUTTON 26 START BUTTON 20 26 VENTILATION HOLES DOOR LATCHES DOOR TURNTABLE COUPLER ROLLE...

Page 5: ...e placed on the roller ring with the center fitting on to the coupler Purpose The turntable serves as the main cooking surface it can be easily removed for cleaning 4 Metal racks High rack Low rack to be placed on the turntable Purpose The metal racks can be used to cook two dishes at the same time A small dish may be placed on the turntable and a second dish on the rack The metal racks can be use...

Page 6: ...alified microwave service technician trained by the manufacturer Safety Precautions IMPORTANT SAFETY INSTRUCTIONS READ CAREFULLY AND KEEP FOR FUTURE REFERENCE Before cooking food or liquids in your microwave oven please check that the following safety precautions are taken 1 DO NOT use any metallic cookware in the microwave oven Metallic containers Dinnerware with gold or silver trimmings Skewers ...

Page 7: ...f the oven 12 Clicking sound might be noticed while operating especially in defrosting mode Reason When the power output is changing electrically you may hear that sound This is normal 13 If the microwave oven is operating without any load the power will cut off automatically for safety After standing for over 30 min you can operate the oven normally Do not worry is the oven continues to work afte...

Page 8: ...g the power cord into an outlet or after there has been an interruption in power the display shows HELLO SET LANGUAGE USING SETDIAL At this point you can select a language for the display You can choose from English French Dutch German Spanish Italian and Russian 1 When you install your oven make sure there is adequate ventilation for your oven by leaving at least 10 cm 4 inches of space behind an...

Page 9: ...sition in the oven If a power level other than the maximum 100 900 W is used the water takes longer to boil Open the oven door by pulling the handle on the right side of the door Place a glass of water on the turntable Close the door 1 To display the time in Then press the Clock the button 12 hour notation Once 24 hour notation Twice 2 Turn the Jog Dial to set the hour 3 Press the Clock button 4 T...

Page 10: ...e you used a dish with metal trimmings Have you left a fork or other metal utensil inside the oven Is aluminium foil too close to the inside walls The oven causes interference with radios or televisions Slight interference may be observed on televisions or radios when the oven is operating This is normal Solution Install the oven away from televisions radios and aerials If interference is detected...

Page 11: ...Microwave button again until the corresponding output power is displayed Refer to the power level table below for further details 3 Set the cooking time by turning the Jog Dial Example For a cooking time of 3 minutes 30 seconds turn the jog dial to the right to set 3 30 Result The cooking time is displayed 4 Press the Start button Result The oven light comes on and the turntable starts rotating Co...

Page 12: ...teamer should be used only in the mode of Steam cook manual and Auto steam cook When you use the Steamer the steam cover and steam plate should be set pefectly right Please refer to the instruction The egges or the chasenut would be exploding without setting the steam cover and steam plaste instructed on the Instruction book 1 To increase the cooking time of your food press the 30s button once for...

Page 13: ...Recommendations 1 Fresh Vegetables 200 250 g 300 350 g 400 450 g 500 550 g 600 650 g 700 750 g 2 3 min Weigh the vegetables after washing cleaning and cutting into similar size Put them into a glass bowl with lid Add 30 ml 2 tablespoons water when cooking for 200 250 g add 45 ml 3 tablespo ons for 300 450 g and add 60 75 ml 4 5 tablespoons for 500 750 g Stir after cooking When cooking higher quant...

Page 14: ...cted When cooking has finished the oven will beep and flash ENJOY MEAL four times The oven will then beep one time per minute Auto Auto Power Auto 30s Code Food Serving Size Standing Time Recommendations 1 Ready Meal chilled 300 350 g 400 450 g 500 550 g 3min Put on a ceramic plate and cover with microwave cling film This programme is suitable for meals consisting of 3 components e g meat with sau...

Page 15: ...will beep and flash ENJOY MEAL four times The oven will then beep one time per minute Auto Auto Power Auto 30s Code Food Serving Size Standing Time Recommendations 1 Meat 200 2000g 20 90 min Shield the edges with aluminium foil Turn the meat over when the oven beeps This programme is suitable for beef lamb pork steaks chops and minced meat 2 Poultry 200 2000g 20 90 min Shield the leg and wing tips...

Page 16: ... minute Auto Auto Power Auto 30s Code Food Serving Size Standing Time Recommendations 1 Hamburger chilled 150 g 1pc 300 g 2pcs 1 2 min Put hamburger bread roll with slice of beef or cheeseburger on kitchen paper Put one hamburger in the centre of turntable put two hamburgers opposite to each other on turntable After reheating garnish with lettuce tomato slice dressing and spices 2 Mini Ravioli chi...

Page 17: ... beep and flash ENJOY MEAL four times The oven will then beep one time per minute Auto Auto Power Auto Code Food Serving Size Quantity of cold water Recommendations 1 Fresh Vegetables small pieces 200 800g 500 ml Rinse and clean the vegetables cut into slices or similiar sized pieces Pour l water into square bowl of steam dish Set stainless steel tray in bowl add vegetables and cover with square s...

Page 18: ...l of steam dish You can add herbs and spices to the water Set stainless steel tray in bowl add chicken breasts side by side and cover with square stainless steel lid Put steam dish on turntable This programme is suitable for chicken breast and turkey breast fillets When steaming drumsticks push more button 1 Turn the Set Dial to the Cafeteria simbol 2 Select the type of food that you are cooking b...

Page 19: ... Stir drinks before and after standing time Be careful while taking the cups out see safety instructions for liquids 2 Frozen Cake 200 300 g 400 500 g 600 700 g 800 900 g 1000 1100 g 1200 1300 g 5 15mins Place frozen cake in the middle of the rack alternatively place frozen cake pieces in a circle on low rack Place the rack in the middle of the turntable This programme is not suitable for cakes wi...

Page 20: ... 200 ml luke warm water 1 tablespoon olive oil and prepare dough using knead function of your kitchen mashine for 5 minutes Code Food Serving Size Standing Time Recommendations 1 Rising Yeast Dough 500 1000g 5 10 min in baking dish Refer to the basic recipes below Put dough in a big glass bowl Ø 18 cm and cover with microwave cling film Put bowl on the low rack The process of rising yeast dough ca...

Page 21: ...crust plate as described above Use oven gloves at all times as the crust plate will become very hot 2 Brush the plate with oil if you are cooking food such as bacon and eggs in order to brown the food nicely 3 Place the food on the crust plate Do not place any recipients on the crust plate that are not heat resistant plastic bowls for example 4 Place the crust plate on the turntable in the microwa...

Page 22: ...t plate on high rack Frozen Wrapwith topping 150 g 2 3 600W G Grill 2 3 Preheat crust plate Put the flat frozen wrap with topping on the crust plate Leave crust plate on turntable After cooking roll wrap Frozen Pizza 300 400g 4 5 600W G Grill 6 8 Preheat crust plate Put the frozen pizza on the crust plate Put crust plate on high rack Mini Pizza Snacks frozen 9 x 30 g 270g 3 4 450W G Grill 6 7 Preh...

Page 23: ...rn the Set Dial to the Power Defrost symbol 2 Select the type of food that you are cooking by pressing the Select button 3 Set the weight by turning the Jog Dial the appropriate number of times 1800 g in the example 4 Press the Microwave button 5 Set the microwave power level by pressing the Microwave button to select the appropriate Power Level 450W in the example 6 Set the cooking time by turnin...

Page 24: ...n the oven as they will be very hot You can get better cooking and browning if you use the low rack Check that the heating element is in the horizontal position and that the turntable is in position Open the door and place the recipient on the low rack and set on turntable You can check the temperature at any time by pressing the Auto Fast Preheat button 1 Press the Auto Fast Preheat button Result...

Page 25: ...is cold and do not apply excessive force when placing it in the vertical position 1 Open the door and place the food on the rack 2 Press the Grill button Result The following indications are displayed one stage cooking grill mode You cannot set the temperature of the grill 3 Set the grilling time by turning the Jog Dial The maximum grilling time is 60 minutes 4 Press the Start button Result Grilli...

Page 26: ...d grill or convection use only recipients that are microwave safe and oven proof Metallic cookware or utensils may damage your oven 1 Push the roasting spit through the centre of the meat Example Push the spit between the backbone and breast of a chicken Place the spit on its upright on the glass bowl the glass bowl and the glass bowl onto the turntable To help brown the meat brush it with and spi...

Page 27: ...9 33 5 10 Brush the rolled turkey with oil and spices Put it on the spit Place the glass bowl with roasting spit in the centre of the turntable After roasting and during standing time it should be wrapped in aluminium foil Roast Beef Roast Lamb 250 g 600W 160 C 29 34 5 15 Brush the beef lamb with oil and spices Put it on the spit Place the glass bowl with roasting spit in the centre of the turntab...

Page 28: ...the dishwasher Therefore clean it with warm water and washing up liquid by hand Remove the vertical multi spit from the oven after use Combining Microwaves and Grill You can also combine microwave cooking with the grill to cook quickly and brown at the same time ALWAYS use microwave safe and oven proof cookware Glass or ceramic dishes are ideal as they allow the microwaves to penetrate the food ev...

Page 29: ...oking and grilling if you use the high rack Open the door Place the food on the turntable or on the low and high rack Which should them be placed on the turntable close the door The heating element must be in the horizontal position 1 Press the Combi MW Convection button Result The following indications are displayed microwave convection combi mode 250 C temperature 2 Select the temperature by pre...

Page 30: ...manual cooking mode The results will be less satisfactory in this case as the cooking is less even We recommend that you turn the dish by hand halfway through the cooking process Warning Never operate the turntable without food in the oven Reason This may cause fire or damage to the unit Do not press the Turntable on off button during the cooking process Cancel the cooking phase before pressing th...

Page 31: ...t The oven can be used normally 1 Press the Auto Fast Preheat and More Less buttons at the same time about one second Result The oven does not beep to indicate the end of a function 2 To switch the beeper back on press the Auto Fast Preheat and More Less buttons again at the same time about one second Result The oven operates normally 1 If you want to change the weight unit to Pounds Press the Com...

Page 32: ...rene cups containers Paper bags or newspaper Recycled paper or metal trims Can be used to warm food Overheating may cause the polystyrene to melt May catch fire May cause arcing Glassware Oven to table ware Fine glassware Glass jars Can be used unless decorated with a metal trim Can be used to warm foods or liquids Delicate glass may break or crack if heated suddenly Must remove the lid Suitable f...

Page 33: ...suitable glass pyrex bowl with lid Cook covered for the minimum time see table Continue cooking to get the result you prefer Stir twice during cooking and once after cooking Add salt herbs or butter after cooking Cover during standing time Cooking Guide for rice and pasta Rice Use a large glass pyrex bowl with lid rice doubles in volume during cooking Cook covered After the cooking time is over st...

Page 34: ... food It is preferable to underestimate cooking time and add extra heating time if necessary Heating and standing times When reheating food for the first time it is helpful to make a note of the time taken for future reference Always make sure that the reheated food is piping hot throughout Allow food to stand for a short time after reheating to let the temperature even out The recommended standin...

Page 35: ...o 1min 10sec 2 3 Stir or shake well and pour into a sterilised glass bottle Place into the centre of turntable Cook uncovered Shake well and stand for at least 3 minutes Before serving shake well and check the temperature carefully Food Portion Power Time min Standing Time min Instructions Drinks coffee tea and water 150ml 1 cup 300ml 2 cups 450ml 3 cups 600ml 4 cups 900W 1 1 2 2 3 3 3 4 1 2 Pour ...

Page 36: ...hile freezing and defrosting food For defrosting of frozen food with a temperature of about 18 to 20 C use the following table as a guide All frozen food should be defrosted using defrosting power level 180 W Food Portion Time min Standing Time min Instructions Meat Minced beef Pork steaks 250g 500g 250g 6 7 10 12 7 8 15 30 Place the meat on a flat ceramic plate Shield thinner edges with aluminium...

Page 37: ...r half way through cooking Please refer to the grill table for further details IMPORTANT REMARK Whenever the combination mode microwave grill is used make sure that the grill heating element is under the ceiling in the horizontal position and not on the back wall in the vertical position The food should be placed on the high rack unless another instruction is recommended Otherwise it has to be pla...

Page 38: ...s and light fruit cakes pies and crumbles roast vegetables scones and breads Fresh Food Portion Power 1 Side Time min 2 Side Time min Instructions Chicken Pieces 500 g 2pcs 900 g 3 4pcs 300W Grill 10 11 12 13 9 10 11 12 Brush chicken pieces with oil and spices Put them in a circle on the high rack Stand for 2 3 minutes LambChops medium 400 g 4pcs Grill only 10 12 8 9 Brush the lamb chops with oil ...

Page 39: ...illed baguette on baking paper on the high rack After baking stand for 2 3 minutes CAKE Hazel nut Cake fresh dough 500g 180 W 220 C without preheating 18 20 Put the fresh dough in a small round black metal baking dish diameter 18 cm Put the cake on the low rack Stand for 5 10 minutes Marble Cake Lemon cake fresh dough 700g 180 W 220 C without preheating 24 26 Put the fresh dough in a rectangular g...

Page 40: ...out preheating 15 17 Put the whole bread on the low rack After baking stand for 5 minutes Cake Pieces ready baked with fruit filling 500 600 g 300 W 160 C without preheating 9 12 Set frozen cake pieces in a circle on the low rack After baking stand for 5 10 minutes Cake ready baked with fruit filling 1200 1300 g 180 W 160 C without preheating 18 22 Put frozen cake on baking paper on the low rack A...

Page 41: ...1300g 600W 160 C 19 21 10 12 Brush beef lamb with oil and spice it with pepper salt and paprika Put it on the low rack first with the fat side down After cooking wrap in aluminium foil and stand for 10 15 minutes Roast Chicken 900g 450W 220 C 13 15 9 10 Brush chicken with oil and spices Put chicken first breast side down second side breast side up on the low rack Stand for 5 minutes Food Portion G...

Page 42: ...ettes 400g 500ml 900W 10 15 Rinse courgettes and cut them into similar slices Distribute evenly on the steam tray Frozen Mixed Vegetables 400g 500ml 900W 18 23 Distribute frozen mixed vegetables 18 ýC e g broccoli cauliflower sliced carrots evenly on stainless steam tray Potatoes small 500g 500ml 900W 18 23 Rinse and clean potatoes and pierce skin with a fork Set whole potatoes evenly on the steam...

Page 43: ...laze icing is transparent Stir twice during cooking COOKING JAM Put 600 g fruits for example mixed berries in a suitable sized glass pyrex bowl with lid Add 300 g preserving sugar and stir well Cook covered for 10 12 minutes using 900 W Stir several times during cooking Empty directly into small jam glasses with twist off lids Stand on lid for 5 minutes COOKING PUDDING Mix pudding powder with suga...

Page 44: ...s or chemical solvents Take particular care when cleaning the door seals to ensure that no particles Accumulate Prevent the door from closing correctly Clean the microwave oven cavity right ofter each use with a mild detergent solution but let the microwave oven cool down before cleaning in order to avoid injury The instructions for cooking ranges hobs and ovens shall state that a steam cleaner is...

Page 45: ...on Maximum power Microwave Grill heating element Convection heating element 3100 W 1400 W 1300 W 1700 W Output power 100 W 900 W 6 levels IEC 705 Operating frequency 2450 MHz Dimensions W x D x H Outside Oven cavity 522 x 539 x 312 mm 355 x 380 6 x 234 mm Volume 1 1 Cubic feet 32 liter Weight Net Shipping 21 0 kg approx 27 0 kg approx CE1150 CE1151T CE1152M 28 0 kg approx CE1153F jlXX W hukTWY Yi ...

Page 46: ...46 EN Note jlXX W hukTWY Yi luU GGw G GG SGq GXSGYWW GG_a ZGht ...

Page 47: ...47 EN Note jlXX W hukTWY Yi luU GGw G GG SGq GXSGYWW GG_a ZGht ...

Page 48: ...jlXX W hukTWY Yi luU GGw G _GG SGq GXSGYWW GG_a ZGht ...

Reviews: