Printing
_ 47
8.
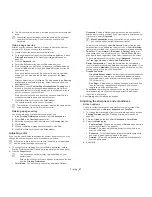
The file is not printed. Instead, it is stored on your computer hard disk
drive.
The overlay document size must be the same as the document
you print with the overlay. Do not create an overlay with a
watermark.
Using a page overlay
After an overlay has been created, it is ready to be printed with your
document. To print an overlay with a document:
1.
Create or open the document you want to print.
2.
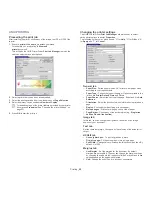
To change the print settings from your software application, access
Printing Preferences
(See "Opening printing preferences" on
page 44).
3.
Click the
Advanced
tab.
4.
Select the desired overlay from the
Text
drop-down list.
5.
If the overlay file you want does not appear in the
Text
drop-down
list, select
Edit
from the list and click
Load
. Select the overlay file
you want to use.
If you have stored the overlay file you want to use in an external
source, you can also load the file when you access the
Open
window.
After you select the file, click
Open
. The file appears in the
Overlay
List
box and is available for printing. Select the overlay from the
Overlay List
box.
6.
If necessary, check
Confirm Page Overlay When Printing
box. If
this box is checked, a message window appears each time you
submit a document for printing, asking you to confirm your wish to
print an overlay on your document.
If this box is not checked and an overlay has been selected, the
overlay automatically prints with your document.
7.
Click
OK
or
until you exit the
window.
The selected overlay prints on your document.
The resolution of the overlay document must be the same as that
of the document you will print with the overlay.
Deleting a page overlay
You can delete page overlays that you no longer use.
1.
In the
Printing Preferences
window, click the
Advanced
tab.
2.
Select
Edit
in the
Overlay
drop down list.
3.
Select the overlay you want to delete from the
Overlay List
box.
4.
Click
Delete
.
5.
When a confirming message window appears, click
Yes
.
6.
Click
OK
or
until you exit the
window.
Adjusting color
If you feel the color difference between the printout and monitor, you may
change the color setting such as color contrast or color level.
If the option is grayed out or not shown, the option is not applicable
with the printer language you are using.
1.
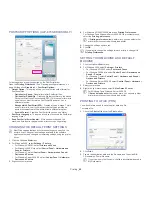
To change the print settings from your software application, access
Printing Preferences (See "Opening printing preferences" on page 44).
2.
Click the
Graphics
tab.
•
This options you can select may vary depending on your
printer model.
•
Refer to the online help for each option’s information provided
from the
Printing Preferences
.
•
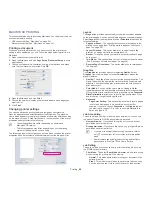
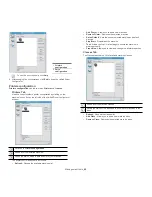
Color Mode:
You can choose color options between
Color
or
Grayscale
. Setting to
Color
typically produces the best possible
print quality for color document. If you want to print a color document
in gray scale, select
Grayscale
.
BlackOptimization
allows you to print in high quality black. If
you use this option, it might take longer to print.
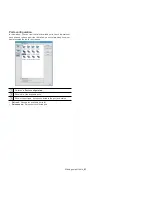
To adjust color manually, select
Advanced
. Simply slide the color
balance slider in the
Levels
tab to adjust color, or select
Matching
tab for driver provided color correction for general image processing.
•
Font/Text:
Select
Normal
or
Maximum
in
Darken Text
to print
texts darker than on a normal document. Check
All Text Black
to
print in solid black, regardless of the color it appears on the screen.
To set more advanced font options, select
Advanced
. Check one of
the
True
G
Type Options
or
check Use Printer Fonts
.
•
Raster Compression:
This option determines the compression
level of images for transferring data from computer to a printer. If you
set this option to
Maximum
, the printing speed will be high, but the
printing quality will be low (PCL driver only).
•
Graphic Controller
-
Grayscale Enhancement:
It allows user to preserve the details
of nature photos, and improve contrast and readability among
grayscaled colors, when printing color documents in grayscale
(PCL driver only).
-
Fine Edge:
It allows user to emphasize edges of texts and fine
lines for improving readability and align each color channel
registration in color printing mode.
•
Toner Save:
Selecting this option extends the life of your toner
cartridge and reduces your cost per page without a significant
reduction in print quality.
3.
Select
Apply
after completing the settings.
Adjusting the sharpness and smoothness
Screen options
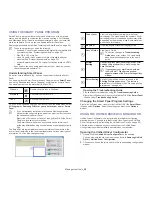
This option affect the resolution and clarity of your color output. The
three screen options are
Normal
,
Enhanced
and
Detailed
.
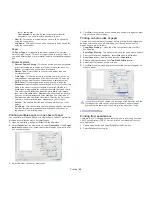
1.
To change the print settings from your software application, access
Printing Preferences
(See "Opening printing preferences" on
page 44).
2.
Click the
Graphics
tab then select
Advanced
in
Color Mode
.
3.
Select the
Matching
tab.
•
Printer default:
Follows the set value of
Screen
mode from the
printer (See "Graphic" on page 55).
•
Normal:
This mode will generate printouts with smooth tone
over the entire page.
•
Enhanced:
This mode will generate printouts with sharp texts
and smooth graphic/photo objects in the page.
•
Detailed:
This mode will generate printouts with sharp details
over the entire page.
4.
Select
OK
.

