background image

Getting started

_ 28

MACHINE'S BASIC SETTINGS

After installation is complete, you may want to set the machine's default 

settings. Refer to the next section if you would like to set or change values.

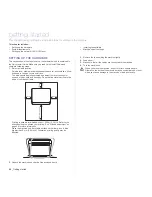
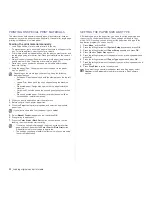
Altitude adjustment

The print quality is affected by atmospheric pressure, which is determined 

by the height of the machine above sea level. The following information will 

guide you on how to set your machine to the best print quality or best quality 

of print.
Before you set the altitude value, find the altitude where you are using the 

machine.

1.

Ensure that you have installed the printer driver with the provided     

Printer Software CD.

2.

Double-click the 

Smart Panel

 icon on the Windows task bar (or 

Notification Area in Linux). 

You can also click 

Smart Panel

 on the status bar in Mac OS X.

3.

Click 

Printer Setting

.

4.

Click 

Setting

 > 

Altitude Adjustment

. Select the appropriate value from 

the dropdown list, and then click 

Apply

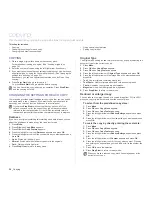
Changing the display language

To change the language that appears on the control panel, follow these 

steps:

1.

Press 

Menu

 and then 

OK

.

2.

Press the left/right arrow until 

System Setup

 appears and press 

OK

.

3.

Press 

OK 

when 

Machine Setup

 appears.

4.

Press the left/right arrow until 

Language

 appears and press 

OK

.

5.

Press the left/right arrow until the language you want appears and press 

OK

.

6.

Press 

Stop/Clear

 to return to ready mode.   

Setting sounds

You can control the following sounds:

Key Sound:

Turns the key sound on or off. With this option set to 

On

,

 a 

tone sounds each time a key is pressed.

Alarm Sound:

Turns the alarm sound on or off. With this option set to 

On

,

 an alarm tone sounds when an error occurs.


Key sound, and alarm sound

1.

Press 

Menu

 and then 

OK

.

2.

Press the left/right arrow until 

System Setup

 appears and press 

OK

.

3.

Press the left/right arrow until 

Sound/Volume

 appears and press 

OK

.

4.

Press the left/right arrow until the sound option you want appears 

and press 

OK

.

5.

Press the left/right arrow until the desired status and press 

OK

.

6.

Press 

Stop/Clear 

to return to ready mode.

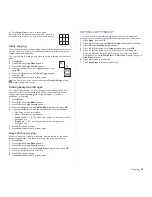
Using the save modes

Power Save mode

Power Save mode allows your machine to reduce power consumption 

when it is not in actual use. You can turn this mode on and select a 

length of time for which the machine waits after a job is printed before it 

switches to a reduced power state.

1.

Press 

Menu

 and then 

OK

.

2.

Press the left/right arrow until 

System Setup

 appears and press 

OK

.

3.

Press 

OK 

when 

Machine Setup

 appears.

4.

Press the left/right arrow until 

Power Save

 appears and press 

OK

.

5.

Press the left/right arrow until the time setting you want appears and 

press 

OK

.

6.

Press 

Stop/Clear

 to return to ready mode.

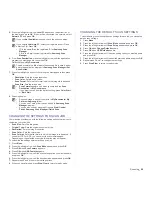
Auto continue

This is the option to set the machine to continue printing or not, in case the 

paper size you have set and the paper within the tray mismatches. 

1.

Press 

Menu

 and then 

OK

.

2.

Press the left/right arrow until 

System Setup

 appears and press 

OK

.

3.

Press 

OK 

when 

Machine Setup

 appears.

4.

Press the left/right arrow until 

Auto Continue

 appears and press 

OK

.

5.

Press the left/right arrow until the binding option you want appears.

On:

Automatically prints after set time passes, when the paper size 

mismatches the tray paper size.

Off: 

Waits until you press 

Black Start

 or 

Color Start

 on the control 

panel, when the paper size mismatches the tray paper size.

6.

Press 

OK

 to save your selection.

7.

Press 

Stop/Clear

 to return to ready mode.

1

Normal

2

High 1

3

High 2

4

High 3 

If your machine is connected to a network, 

SyncThru Web 

Service

 screen appears automatically. Click 

Machine Settings

 > 

Setup

 (or 

Machine Setup

) > 

Adj.

. Select the appropriate altitude 

value, and then click 

Apply

.

0

Summary of Contents for CLX-3170FN series

Page 1: ...CLX 3175FN CLX 3175FW CLX 3175 CLX 3175N Multi Functional Printer User s Guide imagine the possibilities Thank you for purchasing a Samsung product To receive a more complete service please register...

Page 2: ...can use preprinted forms and letterhead with plain paper See Software section Save time and money To save paper you can print multiple pages on one single sheet of paper This machine automatically con...

Page 3: ...he conventions of this guide FEATURES CLX 3170FN CLX 3175FN CLX 3175FW USB 2 0 USB Memory Interface PictBridge ADF Automatic Document Feeder Network Interface Ethernet 10 100 Base TX wired LAN Network...

Page 4: ...for maintaining your machine troubleshooting and installing accessories This user s guide also contains a Software section to provide you with information on how to print documents with your machine i...

Page 5: ...understood the operating instruction If you cannot resolve the conflict contact your sales or service representative for assistance 5 Unplug the machine from the AC wall socket and or telephone jack b...

Page 6: ...plug or connecting cable is damaged or frayed If liquid has been spilled into the machine If the machine has been exposed to rain or water If the machine does not operate properly after instructions h...

Page 7: ...the end of its working life To prevent possible harm to the environment or human health from uncontrolled waste disposal separate this from other types of wastes and recycle it responsibly to promote...

Page 8: ...dict e par l Industrie et Sciences Canada UNITED STATES OF AMERICA Federal Communications Commission FCC Intentional emitter per FCC Part 15 Low power Radio LAN type devices radio frequency RF wireles...

Page 9: ...than five in order to assure proper service from the telephone company In some cases a sum of five may not be usable on your line If any of your telephone equipment is not operating properly you shou...

Page 10: ...ean Union as of the dates indicated January 1 1995 Council Directive 2006 95 EC Approximation of the laws of the member states related to low voltage equipment January 1 1996 Council Directive 2004 10...

Page 11: ...utput of the wireless device or devices that may be embedded in you printer is well below the RF exposure limits as set by the European Commission through the R TTE directive European States qualified...

Page 12: ...r antenna or transmitter Some circumstances require restrictions on wireless devices Examples of common restrictions are listed below Radio frequency wireless communication can interfere with equipmen...

Page 13: ...with Netscapes SSL This library is free for commercial and non commercial use as long as the following conditions are aheared to The following conditions apply to all code found in this distribution b...

Page 14: ...14_Safety information...

Page 15: ...Safety information_15...

Page 16: ...X 3175FW only 29 Checking your Network Environments 29 Printing Configuration report 29 Setting IP address 30 Network parameter setting 31 Restoring factory default settings 31 Configuring the machine...

Page 17: ...to Email 48 Changing the settings for each scan job 48 Changing the default scan settings 48 Setting up Address Book 48 Registering speed email numbers 48 Configuring group email numbers 48 Using Add...

Page 18: ...ting an image file 62 Formatting a USB memory device 62 Viewing the USB memory status 62 Printing directly from a digital camera MAINTENANCE 63 63 Printing reports 63 Printing a report 63 Adjusting th...

Page 19: ...ems 83 Samsung Scan Manager problems 84 Fax problems 84 Common Windows problems 85 Common Linux problems 86 Common Macintosh problems ORDERING SUPPLIES 87 87 Supplies 87 How to purchase SPECIFICATIONS...

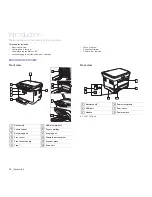
Page 20: ...features MACHINE OVERVIEW Front view Rear view 1 Document width guides 9 Document output tray 2 ADF 10 USB memory port 3 Control panel 11 Toner cartridge 4 Output support 12 Imaging unit 5 Front cover...

Page 21: ...the screen 11 Back Sends you back to the upper menu level 12 Left right arrow Scroll through the options available in the selected menu and increase or decrease values When entering characters use rig...

Page 22: ...s the machine is receiving data from the computer When the green LED rapidly brinks the machine is printing data On The machine is powered on and can be used Blue On Wireless function can be used Red...

Page 23: ...y Setup Change Default Copies Copy Collation Reduce Enlarge Darkness Original Type Scan Feature USB feature Scan Size Original Type Resolution Scan Color Scan Format E mail Feature Scan Size Original...

Page 24: ...to set your machine s TCP IP addresses a Allows you to edit a scanned image in many ways using a powerful image editor and to send the image by email You can also open another image editor program lik...

Page 25: ...ell ventilated and away from direct sunlight or sources of heat cold and humidity Do not set the machine close to the edge of your desk or table Printing is suitable for altitudes under 1 000 m 3 281...

Page 26: ...install the software Windows Terminal Service is compatable with this machine OPERATING SYSTEM REQUIREMENT RECOMMENDED CPU RAM FREE HDD SPACE Mac OS X 10 3 10 4 Intel Processor Power PC G4 G5 128 MB f...

Page 27: ...ontrol panel until you see Network on the bottom line of the display and press OK 2 Press the left right arrow until TCP IP appears and press OK 3 Press the left right arrow until Static appears and p...

Page 28: ...ation If your IP assignment method is DHCP and IP address can be changed whenever machine in turned on we recommend you to use the Bonjour program Go to the http developer apple com networking bonjour...

Page 29: ...it does not have DHCP address assignment or you are required to set a static IP proceed to the Setting IP address part before going to Configuring the machine s wireless network part after reviewing t...

Page 30: ...A8 becomes 0015992951A8 IP Address Enter a new IP address for your printer the same as the computer s IP address except for the last number For example if your computer s IP address is 192 168 1 150...

Page 31: ...ntication is used A device that has a proper WEP Key can access the network Enter the WEP Key using number keypad after selecting SharedKey In case of WPA Enter the WPA Key using number keypad The Key...

Page 32: ...ess in the browser window For example 2 When the SyncThru Web Service window opens click Network Settings 3 Click Wireless and Select Wizard Then click Next 4 Select the one Network Name SSID in the l...

Page 33: ...urself as a user of Samsung machines in order to receive information from Samsung If you wish to do so select the corresponding checkbox es and click Finish Congratulations you have installed your Sam...

Page 34: ...the digit you want to correct and enter a new number 5 To select AM or PM for 12 hour format press the or button or any number button When the cursor is not under the AM or PM indicator pressing the...

Page 35: ...ing numbers or names If you make a mistake while entering a number or name press the left right arrow button to delete the last digit or character Then enter the correct number or character Inserting...

Page 36: ...5 8 inches or larger than 216 x 356 mm 8 5 x 14 inches Do not attempt to load the following types of paper carbon paper or carbon backed paper coated paper onion skin or thin paper wrinkled or creased...

Page 37: ...ed later in this section Desired outcome The print media you choose should be appropriate for your project Brightness Some print media are whiter than others and produce sharper more vibrant images Su...

Page 38: ...he Plain paper section Refer to the Plain paper section 90 to 105 g m2 24 to 28 lb bond 5 sheet for manual feeding in the tray Thin paper Refer to the Plain paper section Refer to the Plain paper sect...

Page 39: ...he fusing temperature see Printer specifications on page 89 The extra flaps and strips might cause wrinkling creasing or jams and may even damage the fuser For the best print quality position margins...

Page 40: ...d unlatch the guide lock in the tray push the tray in manually Adjust the paper length guide and paper width guide 5 Close the paper cover Preprinted paper Letterhead must be printed with heat resista...

Page 41: ...e lever at the back of the tray and rotate the lever clockwise 3 Squeeze the paper width guide and slide it to the edge of the lever Due to insufficient paper in the tray the paper length guide can be...

Page 42: ...he paper size and type using the control panel buttons These settings will apply to Copy and Fax modes For PC printing you need to select the paper size and type in the application program you use on...

Page 43: ...by selecting the document type for the current copy job 1 Press Copy 2 Press Menu until Copy Feature appears on the bottom line of the display and press OK 3 Press the left right arrow until Original...

Page 44: ...indicate as shown Then close the scanner lid 6 Press Color Start to begin color copying Or press Black Start to begin black and white copying USING SPECIAL COPY FEATURES You can use the following copy...

Page 45: ...mizes the background Enhance Lev 1 2 The higher the number is the more vivid the background is Erase Lev 1 4 The higher the number is the lighter the background is 5 Press OK to begin copying 6 Press...

Page 46: ...by network Also with the offered Samsung Scan Manager program scanned documents can be opened with the program you have setup previously Such as Microsoft Paint Email SmarThru 4 OCR can be added to a...

Page 47: ...ork 2 Place a single document face down on the document glass OR load the document s face up into the ADF For details about loading an original See Loading originals on page 36 3 Press Scan Email 4 Pr...

Page 48: ...Web Service and then easily and quickly enter email addresses by entering the location numbers assigned to them in Address Book Registering speed email numbers 1 Enter your machine s IP address as th...

Page 49: ...ntil ID appears and press OK 5 Enter the first few letters of the name you want and press OK 6 Press the left right arrow until the name you want appears and press OK Printing Address Book You can che...

Page 50: ...50 _Scanning...

Page 51: ...e print job is waiting in a print queue or print spooler such as the printer group in Windows delete the job as follows 1 Click the Windows Start menu 2 For Windows 2000 select Settings and then Print...

Page 52: ...the bottom line of the display 3 Press OK when Resolution appears 4 Press the left right arrow until the option you want appears and press OK 5 Press Stop Clear to return to ready mode Recommended res...

Page 53: ...on page 57 Automatic redialing When the number you have dialed is busy or there is no answer when you send a fax the machine automatically redials the number every three minutes up to seven times acco...

Page 54: ...layed fax is set Adding pages to a delayed fax You can add pages to the delayed transmissions previously reserved in your machine s memory 1 Load the originals to be added and adjust document settings...

Page 55: ...e code see Rcv Start Code on page 57 Receiving automatically in Ans Fax mode To use this mode you must attach an answering machine to the EXT socket on the back of your machine If the caller leaves a...

Page 56: ...chine to send copies of all outgoing faxes to a specified destination in addition to the fax numbers you entered 1 Press Fax 2 Press Menu until Fax Feature appears on the bottom line of the display an...

Page 57: ...ore time Send Report You can set your machine to print a confirmation report showing whether a transmission was successful how many pages were sent and more The available options are On Off and On Err...

Page 58: ...to ready mode Using speed dial numbers When you are prompted to enter a destination number while sending a fax enter the speed dial number at which you stored the number you want For a one digit 0 9 s...

Page 59: ...s Fax 2 Press Address Book until Search Dial appears on the bottom line of the display and press OK 3 Press the left right arrow until the number category you want appears and press OK 4 Press OK when...

Page 60: ...st use only an authorized USB memory device with an A plug type connector Use only a metal shielded USB memory device Insert a USB memory device into the USB memory port on the front of your machine S...

Page 61: ...one has already been inserted press Direct USB 2 Press OK when USB Print appears Your machine automatically detects the device and reads data stored on it 3 Press the left right arrow until the folder...

Page 62: ...dy mode Viewing the USB memory status You can check the amount of memory space available for scanning and saving documents 1 Insert the USB memory device into the USB memory port on your machine 2 Pre...

Page 63: ...uality 6 Press Stop Clear to return to ready mode Some reports may not appear in the display depending on options or models If so it is not applicable to your machine REPORT LIST DESCRIPTION Configura...

Page 64: ...completely open the front cover 3 Grasp the handles on the toner cartridge and pull to remove four cartridges from the machine For CLX 3170FN CLX 3175FN CLX 3175FW users before clearing the memory mak...

Page 65: ...and turn the machine on Do not touch the green surface the imaging unit with your hands or any other material Be careful not to scratch the surface of the imaging unit If you leave the front cover ope...

Page 66: ...er 2 Open the scanner lid 3 Wipe the surface of the scanner glass until it is clean and dry 4 Wipe the underside of the scanner lid and white sheet until it is clean and dry 5 Push the ADF sheet with...

Page 67: ...ity by redistributing the toner The toner related message saying that the toner is low may appear on the display 1 Using the handle completely open the front cover 2 Grasp the handles on the toner car...

Page 68: ...e color of the toner cartridge matches the color slot and then grasp the handles on the toner cartridge Insert the cartridge until it clicks into place 8 Close the front cover Make sure the cover is s...

Page 69: ...e using its handle 5 Pull the imaging unit out of the machine using the groove on the front of the imaging unit 6 Take a new imaging unit out of its package Remove the protective devices on both sides...

Page 70: ...nutes for the machine to cool 2 Using the handle completely open the front cover 3 Pull the waste toner container out of the machine using its handle 4 Remove the container s cap from the container as...

Page 71: ...WEBSITE If you have connected your machine to a network and set up TCP IP network parameters correctly you can manage the machine via Samsung s SyncThru Web Service an embedded web server Use SyncThru...

Page 72: ...e creased damp or highly curled paper Do not mix paper types in a tray Use only recommended print media See Setting the paper size and type on page 42 Ensure that the recommended side of the print med...

Page 73: ...in this area check the paper exit area See In the paper exit area on page 74 4 Insert the tray 1 into the machine until it snaps into place Printing automatically resumes In the fuser unit area If pap...

Page 74: ...ine 2 Gently pull the paper out of the output tray If you do not see the jammed paper or if there is any resistance when you pull stop and go to the next step 3 Open the rear cover 4 If you see the ja...

Page 75: ...med paper out of the machine 8 Lowering down the scan unit gently and slowly until it is completely closed Make sure that it is securely latched Be careful not to pinch your fingers 9 Pull down the fu...

Page 76: ...e selected file format is not supported Use the correct file format Group Not Available You have tried to select a group location number where only a single location number can be used such as when ad...

Page 77: ...or service MESSAGE MEANING SUGGESTED SOLUTIONS Paper Jam 0 Open Close Door Paper has jammed in the feeding area of the tray Clear the jam See In the tray 1 on page 73 Paper Jam 1 Check Inside Paper ha...

Page 78: ...rties When you copy the Black Start button will be activated only with this condition If you do not select any the machine will work as Stop is selected Replace the toner cartridge with a new one See...

Page 79: ...y be debris inside the machine Open the front cover and remove the debris If an original does not feed into the machine the ADF rubber pad may require to be replaced Contact a service representative E...

Page 80: ...distributing toner on page 67 If necessary replace the toner cartridge The file may have blank pages Check the file to ensure that it does not contain blank pages Some parts such as the controller or...

Page 81: ...ee Selecting print media on page 37 Remove the toner cartridge and install a new one See Replacing the toner cartridge on page 67 CONDITION SUGGESTED SOLUTIONS AaBbCc AaBbCc AaBbCc AaBbCc AaBbCc Verti...

Page 82: ...surface of the paper Remove the paper and turn it around The paper may not meet paper specifications See Selecting print media on page 37 Horizontal stripes If horizontally aligned black streaks or sm...

Page 83: ...USB cable is not defective Switch the cable with a known good cable If necessary replace the cable Check that the scanner is configured correctly Check scan setting in the SmarThru Configuration or th...

Page 84: ...e 67 Some of the words on an incoming fax are stretched The fax machine sending you the fax had a temporary document jam There are lines on the originals you send Check your scan unit for marks and cl...

Page 85: ...ack This is a known bug in Ghostscript until GNU Ghostscript version 7 05 when the base color space of the document is indexed color space and it is converted through CIE color space Because Postscrip...

Page 86: ...components of MFP printer and scanner share the same I O interface port the situation of simultaneous access of different consumer application to the same port is possible To avoid possible conflicts...

Page 87: ...standard pages Black Average continuous colored cartridge yield 1 000 standard pages Yellow Magenta Cyan CLT K409S Black CLT C409S Cyan CLT M409S Magenta CLT Y409S Yellow Region Ab CLT K4092S Black C...

Page 88: ...conds Operating environment Temperature 10 to 32 C 59 to 89 6 F Humidity 20 to 80 RH Display 16 characters x 2 lines Toner cartridge lifeb Black Average continuous black cartridge yield 1 500 standard...

Page 89: ...Ethernet 10 100 Base TX embedded type 802 11 b g Wireless LAN CLX 3175FW only ITEM DESCRIPTION Compatibility TWAIN standard WIA standard Scanning method Color CIS Resolutiona a Due to the applications...

Page 90: ...6 Kbps Transmission speed Up to 3 seconds pagea a Standard resolution MMR JBIG Maximum modem speed Phase C by ITU T No 1 chart Memory Tx ECM Maximum document length 356 mm 14 inches Resolution Mono S...

Page 91: ...A Duplex Automatic Document Feeder DADF is a mechanism that will automatically feed and flip over an original sheet of paper so that the machine can scan on both sides of the paper Default The value o...

Page 92: ...1284 B refers to a specific connector type on the end of the parallel cable that attaches to the peripheral for example a printer Intranet A private network that uses Internet Protocols network conne...

Page 93: ...O for communications OSI offers a standard modular approach to network design that divides the required set of complex functions into manageable self contained functional layers The layers are from to...

Page 94: ...An industry standard for scanners and software By using a TWAIN compliant scanner with a TWAIN compliant program a scan can be initiated from within the program an image capture API for Microsoft Win...

Page 95: ...e 55 fax number set 52 faxing default settings change 58 54 fax setup 57 56 Multiple Send faxes 53 priority faxes 54 receiving faxes 55 sending faxes 53 forwarding faxes 56 G Group dial numbers set 58...

Page 96: ...to email 47 USB flash memory 60 secure receiving mode 56 sending a fax automatically 53 sounds set 34 speaker sound 35 speaker volume 35 special copy features 44 speed dial numbers set 58 supplies ch...

Page 97: ...UATEMALA 1 800 299 0013 www samsung com latin HONDURAS 800 7919267 HONG KONG 3698 4698 www samsung com hk HUNGARY 06 80 SAMSUNG 726 7864 www samsung com INDIA 3030 8282 1800 110011 www samsung com IND...

Page 98: ...SAMSUNG 726 7864 www samsung com latin TURKEY 444 77 11 www samsung com U A E 800 SAMSUNG 726 7864 8000 4726 www samsung com U K 0845 SAMSUNG 726 7864 www samsung com U S A 1 800 SAMSUNG 726 7864 www...

Page 99: ...fied and printed across the sheet of paper and can then be taped together to form a poster See Software section You can use preprinted forms and letterhead with plain paper See Software section Save t...

Page 100: ...media or print media Following table offers the conventions of this guide FEATURES CLX 3175 CLX 3175N USB 2 0 USB Memory Interface PictBridge Network Interface Ethernet 10 100 Base TX wired LAN CONVEN...

Page 101: ...for maintaining your machine troubleshooting and installing accessories This user s guide also contains a Software section to provide you with information on how to print documents with your machine i...

Page 102: ...5...

Page 103: ...understood the operating instruction If you cannot resolve the conflict contact your sales or service representative for assistance 5 Unplug the machine from the AC wall socket and or telephone jack b...

Page 104: ...plug or connecting cable is damaged or frayed If liquid has been spilled into the machine If the machine has been exposed to rain or water If the machine does not operate properly after instructions h...

Page 105: ...the end of its working life To prevent possible harm to the environment or human health from uncontrolled waste disposal separate this from other types of wastes and recycle it responsibly to promote...

Page 106: ...dict e par l Industrie et Sciences Canada UNITED STATES OF AMERICA Federal Communications Commission FCC Intentional emitter per FCC Part 15 Low power Radio LAN type devices radio frequency RF wireles...

Page 107: ...than five in order to assure proper service from the telephone company In some cases a sum of five may not be usable on your line If any of your telephone equipment is not operating properly you shou...

Page 108: ...ean Union as of the dates indicated January 1 1995 Council Directive 2006 95 EC Approximation of the laws of the member states related to low voltage equipment January 1 1996 Council Directive 2004 10...

Page 109: ...utput of the wireless device or devices that may be embedded in you printer is well below the RF exposure limits as set by the European Commission through the R TTE directive European States qualified...

Page 110: ...r antenna or transmitter Some circumstances require restrictions on wireless devices Examples of common restrictions are listed below Radio frequency wireless communication can interfere with equipmen...

Page 111: ...with Netscapes SSL This library is free for commercial and non commercial use as long as the following conditions are aheared to The following conditions apply to all code found in this distribution b...

Page 112: ...15_Safety information...

Page 113: ...re 28 Machine s basic settings 28 Altitude adjustment 28 Changing the display language 28 Setting sounds 28 Using the save modes 28 Auto continue LOADING ORIGINALS AND PRINT MEDIA 30 30 Loading origin...

Page 114: ...rom a USB memory device 44 Backing up data 44 Backing up data 44 Restoring data 45 Managing USB memory 45 Deleting an image file 45 Formatting a USB memory device 45 Viewing the USB memory status 45 P...

Page 115: ...eeding 59 Printing problems 60 Printing quality problems 63 Copying problems 63 Scanning problems 64 Samsung Scan Manager problems 64 Common Windows problems 64 Common Linux problems 66 Common Macinto...

Page 116: ...r cartridge Menu overview Supplied software Printer driver features MACHINE OVERVIEW Front view Rear view 1 Scanner lid 7 USB memory port 2 Control panel 8 Toner cartridge 3 Output support 9 Imaging u...

Page 117: ...of paper See ID card copying on page 37 9 Scan to Allows you to access a list of your PC software programs that an image can be scanned to You must create the scan list using the Samsung software Prin...

Page 118: ...en LED slowly blinks the machine is receiving data from the computer When the green LED rapidly brinks the machine is printing data On The machine is powered on and can be used Red Blinking A minor er...

Page 119: ...ge Default Copies Copy Collation Reduce Enlarge Darkness Original Type Scan Feature USB feature Scan Size Original Type Resolution Scan Color Scan Format Scan Setup Change Default USB Default System S...

Page 120: ...to set your machine s TCP IP addresses a Allows you to edit a scanned image in many ways using a powerful image editor and to send the image by email You can also open another image editor program lik...

Page 121: ...ed and away from direct sunlight or sources of heat cold and humidity Do not set the machine close to the edge of your desk or table Printing is suitable for altitudes under 1 000 m 3 281 ft Refer to...

Page 122: ...install the software Windows Terminal Service is compatable with this machine OPERATING SYSTEM REQUIREMENT RECOMMENDED CPU RAM FREE HDD SPACE Mac OS X 10 3 10 4 Intel Processor Power PC G4 G5 128 MB f...

Page 123: ...reports on page 46 2 From the Windows Start menu select All Programs Samsung Network Printer Utilities SetIP SetIP 3 Click to open the TCP IP configuration window 4 Enter the network card s MAC addres...

Page 124: ...TCP IP Port to add your machine to the network To add the machine to the network enter the port name and the IP address for the machine To verify your machine s IP address or the MAC address print a...

Page 125: ...t arrow until System Setup appears and press OK 3 Press the left right arrow until Sound Volume appears and press OK 4 Press the left right arrow until the sound option you want appears and press OK 5...

Page 126: ...29 _Getting started...

Page 127: ...int media you choose should be appropriate for your project Brightness Some print media are whiter than others and produce sharper more vibrant images Surface smoothness The smoothness of the print me...

Page 128: ...he Plain paper section Refer to the Plain paper section 90 to 105 g m2 24 to 28 lb bond 5 sheet for manual feeding in the tray Thin paper Refer to the Plain paper section Refer to the Plain paper sect...

Page 129: ...ature see Printer specifications on page 69 The extra flaps and strips might cause wrinkling creasing or jams and may even damage the fuser For the best print quality position margins no closer than 1...

Page 130: ...d unlatch the guide lock in the tray push the tray in manually Adjust the paper length guide and paper width guide 5 Close the paper cover Preprinted paper Letterhead must be printed with heat resista...

Page 131: ...e lever at the back of the tray and rotate the lever clockwise 3 Squeeze the paper width guide and slide it to the edge of the lever Due to insufficient paper in the tray the paper length guide can be...

Page 132: ...the paper size and type using the control panel buttons These settings will apply to Copy mode For PC printing you need to select the paper size and type in the application program you use on your PC...

Page 133: ...ocument type for the current copy job 1 Press Menu 2 Press OK when Copy Menu appears 3 Press OK when Copy Feature appears 4 Press the left right arrow until Original Type appears and press OK 5 Press...

Page 134: ...r glass where arrows indicate as shown Then close the scanner lid 6 Press Color Start to begin color copying Or press Black Start to begin black and white copying USING SPECIAL COPY FEATURES You can u...

Page 135: ...ackground Enhance Lev 1 2 The higher the number is the more vivid the background is Erase Lev 1 4 The higher the number is the lighter the background is 6 Press OK to begin copying 7 Press Stop Clear...

Page 136: ...anned documents can be opened with the program you have setup previously Such as Microsoft Paint Email SmarThru 4 OCR can be added to application program See Setting scan information in Samsung Scan M...

Page 137: ...row until the desired status appears and press OK 7 Repeat steps 5 and 6 to set other setting options 8 When you have finished press Stop Clear to return to ready mode CHANGING THE DEFAULT SCAN SETTIN...

Page 138: ...41 _Scanning...

Page 139: ...e print job is waiting in a print queue or print spooler such as the printer group in Windows delete the job as follows 1 Click the Windows Start menu 2 For Windows 2000 select Settings and then Print...

Page 140: ...orized USB memory device with an A plug type connector Use only a metal shielded USB memory device Insert a USB memory device into the USB memory port on the front of your machine SCANNING TO A USB ME...

Page 141: ...int a document from a USB memory device 1 Insert a USB memory device into the USB memory port on your machine If one has already been inserted press Direct USB 2 Press OK when USB Print appears Your m...

Page 142: ...dy mode Viewing the USB memory status You can check the amount of memory space available for scanning and saving documents 1 Insert the USB memory device into the USB memory port on your machine 2 Pre...

Page 143: ...ntrast for each cartridge Default setting is recommended for getting best color quality 7 Press Stop Clear to return to ready mode CLEARING MEMORY You can selectively clear information stored in your...

Page 144: ...6 With a dry lint free cloth wipe away any dust and spilled toner from the toner cartridges area and their cavities Cleaning the cabinet of the machine with cleaning materials containing large amount...

Page 145: ...the power cord and turn the machine on Cleaning the scan unit Keeping the scan unit clean helps ensure the best possible copies We suggest that you clean the scan unit at the start of each day and du...

Page 146: ...rtridge more often Redistributing toner When a toner is low faded or light areas may appear It is possible that colored images may be printed with incorrect colors due to flawed mixing of toner colors...

Page 147: ...ew toner cartridge out of its package 5 Holding both handles on the toner cartridge thoroughly rock it from side to side to evenly distribute the toner 6 Place the toner cartridge on a flat surface as...

Page 148: ...e using its handle 5 Pull the imaging unit out of the machine using the groove on the front of the imaging unit 6 Take a new imaging unit out of its package Remove the protective devices on both sides...

Page 149: ...nutes for the machine to cool 2 Using the handle completely open the front cover 3 Pull the waste toner container out of the machine using its handle 4 Remove the container s cap from the container as...

Page 150: ...your machine to a network and set up TCP IP network parameters correctly you can manage the machine via Samsung s SyncThru Web Service an embedded web server Use SyncThru Web Service to View the machi...

Page 151: ...he table below to locate and clear the paper jam In the tray 1 1 Open and close the front cover The jammed paper is automatically ejected from the machine If the paper does not exit go to the next ste...

Page 152: ...atically ejected from the machine 2 Gently pull the paper out of the output tray If you do not see the jammed paper or if there is any resistance when you pull stop and go to the next step 3 Open the...

Page 153: ...he jammed paper out of the machine 8 Lowering down the scan unit gently and slowly until it is completely closed Make sure that it is securely latched Be careful not to pinch your fingers 9 Pull down...

Page 154: ...else Check the IP address and reset it if necessary See Setting up the network CLX 3175N only on page 26 Low Heat Error Cycle Power There is a problem in the fuser unit Turn the power switch off and...

Page 155: ...interface card Configure your network interface card correctly Stop Pressed Stop Clear has been pressed during an operation Try again MESSAGE MEANING SUGGESTED SOLUTIONS Toner Empty T The toner cartr...

Page 156: ...y be debris inside the machine Open the front cover and remove the debris Envelopes skew or fail to feed correctly Ensure the paper guides are against both sides of the envelopes CONDITION POSSIBLE CA...

Page 157: ...distributing toner on page 49 If necessary replace the toner cartridge The file may have blank pages Check the file to ensure that it does not contain blank pages Some parts such as the controller or...

Page 158: ...ee Selecting print media on page 30 Remove the toner cartridge and install a new one See Replacing the toner cartridge on page 50 CONDITION SUGGESTED SOLUTIONS AaBbCc AaBbCc AaBbCc AaBbCc AaBbCc Verti...

Page 159: ...white areas within parts of characters that should be solid black If you are using transparencies try another type of transparency Because of the composition of transparencies some character voids are...

Page 160: ...be scanned face down on the scanner glass There may not be enough available memory to hold the document you want to scan Try the Prescan function to see if that works Try lowering the scan resolution...

Page 161: ...ould be restored The stopped status might be activated when some problems in printing occurred For instance this could be an attempt to print document when port is claimed by a scanning application Ch...

Page 162: ...n try to restart the job from the beginning Since Unified Linux Driver locks port while printing the abrupt termination of the driver keeps the port locked and therefore unavailable for subsequent pri...

Page 163: ...ially In the Selected port pane you can see if the port is occupied by some other application If this is the case you should wait for completion of the current job or should press Release port button...

Page 164: ...standard pages Black Average continuous colored cartridge yield 1 000 standard pages Yellow Magenta Cyan CLT K409S Black CLT C409S Cyan CLT M409S Magenta CLT Y409S Yellow Region Ab CLT K4092S Black C...

Page 165: ...H Display 16 characters x 2 lines Toner cartridge lifeb Black Average continuous black cartridge yield 1 500 standard pages Shipped with 1 000 pages Starter toner cartridge Color Yellow Magenta Cyan A...

Page 166: ...WIA standard Scanning method Color CIS Resolutiona a Due to the applications for scanning the maximum resolution might differ TWAIN standard 1 200 x 1 200 dpi Up to 4 800 x 4 800 dpi WIA standard Up t...

Page 167: ...A Duplex Automatic Document Feeder DADF is a mechanism that will automatically feed and flip over an original sheet of paper so that the machine can scan on both sides of the paper Default The value o...

Page 168: ...1284 B refers to a specific connector type on the end of the parallel cable that attaches to the peripheral for example a printer Intranet A private network that uses Internet Protocols network conne...

Page 169: ...O for communications OSI offers a standard modular approach to network design that divides the required set of complex functions into manageable self contained functional layers The layers are from to...

Page 170: ...An industry standard for scanners and software By using a TWAIN compliant scanner with a TWAIN compliant program a scan can be initiated from within the program an image capture API for Microsoft Win...

Page 171: ...dge 49 memory clear 46 N network setting up 26 P paper changing the size 33 54 paper jam clear tray 1 54 paper type setting 35 power save mode 28 print quality problems solve 60 printing reports 46 US...

Page 172: ...UATEMALA 1 800 299 0013 www samsung com latin HONDURAS 800 7919267 HONG KONG 3698 4698 www samsung com hk HUNGARY 06 80 SAMSUNG 726 7864 www samsung com INDIA 3030 8282 1800 110011 www samsung com IND...

Page 173: ...SAMSUNG 726 7864 www samsung com latin TURKEY 444 77 11 www samsung com U A E 800 SAMSUNG 726 7864 8000 4726 www samsung com U K 0845 SAMSUNG 726 7864 www samsung com U S A 1 800 SAMSUNG 726 7864 www...

Page 174: ...ng from or related to use of this user s guide Samsung and Samsung logo are trademarks of Samsung Electronics Co Ltd Microsoft Windows and Windows Vista are either registered trademarks or trademarks...

Page 175: ...REV 1 07...

Page 176: ...Samsung Printer Software section...

Page 177: ...1 Installing mono printer driver 11 Chapter 2 BASIC PRINTING Printing a Document 12 Printing to a file PRN 13 Printer Settings 13 Layout Tab 14 Paper Tab 14 Graphics Tab 15 Extras Tab 16 About Tab 16...

Page 178: ...LOCALLY Setting Up a Host Computer 22 Setting Up a Client Computer 22 Chapter 5 SCANNING Scanning Using Samsung SmarThru 23 Uninstalling Samsung SmarThru 23 Using Samsung SmarThru 23 Using Onscreen H...

Page 179: ...uration 32 Configuring Printer Properties 32 Printing a Document 33 Printing from Applications 33 Printing Files 33 Scanning a Document 34 Using the Image Manager 35 Chapter 8 USING YOUR PRINTER WITH...

Page 180: ...or parallel cable If your printer is attached to a network skip this step and go to Installing Software for Network Printing on page 7 You can install the printer software using the typical or custom...

Page 181: ...ormation from Samsung select the checkbox and click Finish You are now sent to the Samsung web site Otherwise just click Finish NOTE After setup is complete if your printer driver doesn t work properl...

Page 182: ...may differ depending on the printer and interface in use 6 Select the components to be installed and click Next NOTE You can change the desired installation folder by clicking Browse 7 After the insta...

Page 183: ...ied CD ROM into your CD ROM drive The CD ROM should automatically run and an installation window appears If the installation window does not appear click Start and then Run Type X Setup exe replacing...

Page 184: ...trol Panel and start windows firewall and set this option unactivated For other operating system refer to its on line guide 6 After the installation is finished a window appears asking you to print a...

Page 185: ...t find your machine in network please turn off the firewall and click Update For Windows operating system click Start Control Panel and start windows firewall and set this option unactivated For other...

Page 186: ...s 2 From the Start menu select Programs or All Programs your printer driver name Maintenance 3 Select Repair and click Next 4 The list of printers available on the network appears Select the printer y...

Page 187: ...that the printer is connected to your computer and powered on Or your computer and printer are connected to the network 2 Insert the supplied CD ROM into your CD ROM drive The CD ROM should automatica...

Page 188: ...elect that option due to the machine s setting or environment The following procedure describes the general steps required for printing from various Windows applications The exact steps for printing a...

Page 189: ...for Windows XP Your printer driver Properties window that appears in this User s Guide may differ depending on the printer in use NOTES Most Windows applications will override settings you specify in...

Page 190: ...et the basic paper handling specifications when you access the printer properties See Printing a Document on page 12 for more information on accessing printer properties Click the Paper tab to access...

Page 191: ...you want to adjust the color options manually select Manual and click the Color Adjust or Color Matching button Copies Setting In order to use this option first you need to set total number of copies...

Page 192: ...d the version number of the driver If you have an Internet browser you can connect to the Internet by clicking on the web site icon See Printing a Document on page 12 for more information about access...

Page 193: ...Printing Multiple Pages on One Sheet of Paper N Up Printing You can select the number of pages to print on a single sheet of paper To print more than one page per sheet the pages will be reduced in si...

Page 194: ...lick OK and print the document You can complete the poster by pasting the sheets together 0 15 inches 0 15 inches Printing Booklets This printer feature allows you to print your document on both sides...

Page 195: ...the on screen instructions to complete the printing job Long Edge Short Edge 2 5 3 2 5 3 2 5 3 2 5 3 Printing a Reduced or Enlarged Document You can change the size of a page s content to appear large...

Page 196: ...message displays in the preview window When the First Page Only box is checked the watermark prints on the first page only 4 Select watermark options You can select the font name style size or graysca...

Page 197: ...T Dear ABC Regards WORLD BEST Using a Page Overlay After an overlay has been created it is ready to be printed with your document To print an overlay with a document 1 Create or open the document you...

Page 198: ...ROM Setting Up a Host Computer 1 Start Windows 2 From the Start menu select Printers and Faxes 3 Double click your printer driver icon 4 From the Printer menu select Sharing 5 Check the Share this pr...

Page 199: ...what you are scanning you may not be able to scan at certain resolutions especially using enhanced dpi Scanning Using Samsung SmarThru Samsung SmarThru is the accompanying software for your machine Wi...

Page 200: ...ing NOTE To send an image by e mail you must have a mail client program like Outlook Express which has been set up with your e mail account Folder Scanning an image and saving it to a folder Allows yo...

Page 201: ...without using additional software NOTE The WIA driver works only on Windows XP 2003 Vista with USB port Windows XP 1 Place a single document face down on the document glass OR load the document s face...

Page 202: ...r driver name Smart Panel NOTES If you have already installed more than one Samsung printer first select the printer model you want in order to use the corresponding Smart Panel Right click in Windows...

Page 203: ...lity Using the Printer Settings Utility you can configure and check print settings 1 Right click in Windows or Linux or click in Mac OS X the Smart Panel icon and select Printer Setting 2 Change the s...

Page 204: ...am You don t need to search for additional components that might be necessary for the Unified Linux Driver software all required packages will be carried onto your system and installed automatically t...

Page 205: ...llation completes When you wan to uninstall the driver follow the installation instruction above but type root localhost Linux uninstall sh on the terminal screen Uninstalling the Unified Linux Driver...

Page 206: ...gs are correct 7 Close the SetIP program Using the Unified Driver Configurator Unified Linux Driver Configurator is a tool primarily intended for configuring Printer or MFP devices Since an MFP device...

Page 207: ...perties For details see page 32 Shows all of the installed printer Switches to Printer configuration Shows the status model name and URI of your printer Classes Tab The Classes tab shows a list of ava...

Page 208: ...anners I O ports are being chosen by scanner drivers automatically so proper settings are applied by default Switches to ports configuration Shows the port type device connected to the port and status...

Page 209: ...s files such as color options image size or image position Device allows you to set the print resolution paper source and destination 5 Click Apply to apply the changes and close the Properties window...

Page 210: ...ent Feeder or face down on the document glass 6 Click Preview in the Scanner Properties window Click your scanner The document is scanned and the image preview appears in the Preview Pane 7 Change the...

Page 211: ...en the Scanner Properties window the saved setting is automatically selected for the scan job To delete a Job Type setting 1 Select the setting you want to delete from the Job Type drop down list 2 Cl...

Page 212: ...inux 36 For further details about the Image Manager application refer to the onscreen help Allows you to adjust the brightness or contrast of the image or to invert the image Shows the properties of t...

Page 213: ...le click the Installer icon 6 Enter the password and click OK 7 The Samsung Installer window opens Click Continue 8 Select Easy Install and click Install Easy Install is recommended for most users All...

Page 214: ...without colon 7 The machine prints the network information Confirm all the settings are correct 8 Close the SetIP program Setting Up the Printer Set up for your printer will be different depending on...

Page 215: ...OS 10 3 select the USB tab For MAC OS 10 4 click Default Browser and find the USB connection For MAC OS 10 5 click Default and find the USB connection 5 For MAC OS 10 3 if Auto Select does not work p...

Page 216: ...6 Click Print when you finish setting the options Mac OS 10 3 Make sure that your printer is selected Changing Printer Settings You can use advanced printing features when using your printer From your...

Page 217: ...the paper loaded in the tray from which you want to print This will let you get the best quality printout If you load a different type of print material select the corresponding paper type Mac OS 10 4...

Page 218: ...F 3 Start Applications and click Image Capture 4 Click Devices and click Browse Devices 5 For MAC OS X 10 4 select your machine in Twain devices option Make sure that Use TWAIN software checkbox is ch...

Page 219: ...driver install Linux 28 N n up printing Macintosh 41 Windows 17 O orientation print 33 Windows 14 overlay create 21 delete 21 print 21 P Paper properties set 14 paper size set 14 print 33 paper sourc...

Page 220: ...ave 15 true type option 15 software install Macintosh 37 Windows 4 reinstall Windows 10 system requirements Macintosh 37 uninstall Macintosh 37 Windows 11 status monitor use 26 T toner save set 15 TWA...

Reviews: