


Wireless network setup
173
2. Using a Network-Connected Machine
4
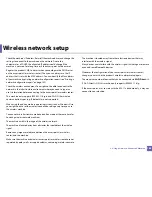
Read and check
The software End User License Agreement
and
Using
Enhanced Features and Participating in Printer Usage Information
Collection Program
(optional). Then, click
Next
.
5
Select
Configure the wireless network connection using USB cable
on the
Printer Connection Type
screen. Then, click
Next
.
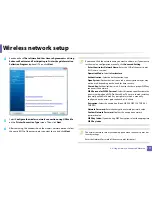
6
After searching the wireless networks, a list of wireless networks your
machine has searched appears. Click
Advanced Setting
.
•
Enter the wireless Network Name:
Enter the SSID name you want (SSID
is case-sensitive).
•
Operation Mode:
Select ad hoc.
•
Channel:
Select the channel. (
Auto Setting
or 2412 MHz to 2467 MHz).
•
Authentication:
Select an authentication type.
Open System:
Authentication is not used, and encryption may or may
not be used, depending on the need for data security.
Shared Key:
Authentication is used. A device that has a proper WEP key
can access the network.
•
Encryption:
Select the encryption (None, WEP64, WEP128).
•
Network Password:
Enter the encryption network password value.
•
Confirm Network Password:
Confirm the encryption network
password value.
•
WEP Key Index:
If you are using WEP Encryption, select the appropriate
WEP Key Index
.
The wireless network security window appears when the ad hoc network
has security enabled.
Select
Open System
or
Shared Key
for the authentication and click
Next
.
•
WEP (Wired Equivalent Privacy) is a security protocol preventing
unauthorized access to your wireless network. WEP encrypts the data
portion of each packet exchanged on a wireless network using a 64-bit
or 128-bit WEP encryption key.
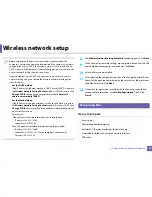
7
The window showing the wireless network setting appears. Check the
settings and click
Next
.
Summary of Contents for CLX-330x/330xW Series
Page 82: ...Redistributing toner 82 3 Maintenance ...
Page 84: ...Replacing the toner cartridge 84 3 Maintenance ...
Page 86: ...Replacing the waste toner container 86 3 Maintenance ...
Page 88: ...Replacing the imaging unit 88 3 Maintenance ...
Page 93: ...Cleaning the machine 93 3 Maintenance 1 2 1 2 ...
Page 102: ...Clearing original document jams 102 4 Troubleshooting ...
Page 105: ...Clearing paper jams 105 4 Troubleshooting ...
Page 109: ...Clearing paper jams 109 4 Troubleshooting ...
Page 126: ...Specifications 126 5 Appendix Free HDD space 1 GB 2 GB Items Requirements ...
Page 140: ...Regulatory information 140 5 Appendix 27 China only ...


