background image

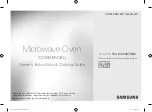
Microwave Oven

(COMMERCIAL)

Owner’s Instructions & Cooking Guide

CM1929/CM1929* (1850 WATT)

imagine 

the possibilities

Thank you for purchasing this Samsung product.

Please be advised that the Samsung warranty does NOT cover service 

calls to explain product operation, correct improper installation, or 

perform normal cleaning or maintenance. 

1850W

CM1929B_XEU_DE68-04030D-02_EN.indd   1

2017-07-03     8:13:29

Summary of Contents for CM1929

Page 1: ...e possibilities Thank you for purchasing this Samsung product Please be advised that the Samsung warranty does NOT cover service calls to explain product operation correct improper installation or perform normal cleaning or maintenance 1850W CM1929B_XEU_DE68 04030D 02_EN indd 1 2017 07 03 8 13 29 ...

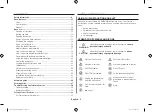
Page 2: ... code 30 Troubleshooting 30 Information codes 32 Technical specifications 33 Wi Fi max transmitter power 33 safety information USING THIS INSTRUCTION BOOKLET You have just purchased a SAMSUNG microwave oven Your Owner s Instructions contain valuable information on cooking with your microwave oven Safety precautions Suitable accessories and cookware Useful cooking tips Cooking tips LEGEND FOR SYMBO...

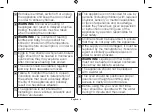
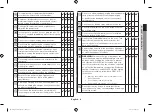
Page 3: ... in a safe way and understands the hazards of improper use WARNING This appliance can be used by children aged from 8 years and above and persons with reduced physical sensory or mental capabilities or lack of experience and knowledge if they have been given supervision or instruction concerning use of the appliance in a safe way and understand the hazards involved Children shall not play with the...

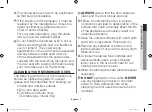
Page 4: ...en should be operated with the water during 10 minute and then used If smoke is emitted switch off or unplug the appliance and keep the door closed in order to stifle any flames WARNING Microwave heating of beverages can result in delayed eruptive boiling therefore care must be taken when handling the container WARNING The contents of feeding bottles and baby food jars shall be stirred or shaken a...

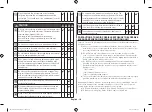
Page 5: ... Care should be taken to avoid touching heating elements inside the oven WARNING Accessible parts may become hot during use Young children should be kept away A steam cleaner is not to be used WARNING Ensure that the appliance is switched off before replacing the lamp to avoid the possibility of electric shock WARNING The appliance and its accessible parts become hot during use Care should be take...

Page 6: ...rntable type model only This appliance can be used by children aged from 8 years and above and persons with reduced physical sensory or mental capabilities or lack of experience and knowledge if they have been given supervision or instruction concerning use of the appliance in a safe way and understand the hazards involved Children shall not play with the appliance Cleaning and user maintenance sh...

Page 7: ...nt grease and food particles from building up Inside and outside surfaces Door and door seals Turntable and Roller rings Turntable type model only ALWAYS ensure that the door seals are clean and the door closes properly Failure to maintain the oven in a clean condition could lead to deterioration of the surface that could adversely affect the life of the appliance and possibly result in a hazardou...

Page 8: ...eaners or steam jet cleaners Do not install this appliance near heater inflammable material in a humid oily or dusty location in a location exposed to direct sunlight and water or where gas may leak on un level ground Accumulate Prevent the door from closing correctly Clean the microwave oven cavity right after each use with a mild detergent solution but let the microwave oven cool down before cle...

Page 9: ...al object insert the power cord between the objects or behind the oven Do not use a damaged power plug damaged power cord or loose wall socket When the power plug or power cord is damaged contact your nearest service centre Do not pour or directly spray water onto the oven Do not place objects on the oven inside or on the door of the oven Do not spray volatile material such as insecticide onto the...

Page 10: ...n accessory or repairing a cosmetic defect if the damage to the unit and or damage to or loss of the accessory was caused by the customer Items this stipulation covers include a A Dented Scratched or Broken Door Handle Out Panel or Control Panel b A Broken or missing Tray Guide Roller Coupler or Wire Rack Do not operate the microwave oven for deep fat frying because the oil temperature cannot be c...

Page 11: ... ELECTRONIC EQUIPMENT Applicable in countries with separate collection systems This marking on the product accessories or literature indicates that the product and its electronic accessories e g charger headset USB cable should not be disposed of with other household waste at the end of their working life To prevent possible harm to the environment or human health from uncontrolled waste disposal ...

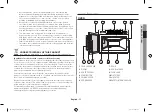
Page 12: ...UTTON 8 DOUBLE QUANTITY BUTTON 9 BLUETOOTH BUTTON 10 20sec BUTTON One Touch Cook Button 11 CANCEL BUTTON 12 START BUTTON DISPLAY 9 4 2 6 5 7 8 3 1 1 PROGRAM INDICATOR 2 TIME DISPLAY 3 AIR FILTER CHECK TIME DISPLAY INDICATOR 4 MEMORY BUTTON NUMBER INDICATOR 5 BLUETOOTH INDICATOR 6 POWER LEVEL INDICATORS 7 DEFROST INDICATORS 8 DOUBLE QUANTITY INDICATOR 9 DATA CHECK INDICATOR CM1929B_XEU_DE68 04030D ...

Page 13: ... on the food package and set your timer accordingly For example If the heating instructions are 3 minutes on HIGH for a D category oven then you will need to set your timer for less than 3 minutes on HIGH for the CM1929 CM1529 CM1329 E category Always remember that cooking instructions are intended only as a guide If you have followed the instructions and the food is still not piping hot throughou...

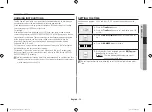
Page 14: ...cycle is completed and you open the door the oven lamp automatically turns on and goes off 5 min later When you open the door whilst in a heating cycle the oven stops operating COOKING REHEATING One stage cooking Make sure the oven is plugged into a properly earthed electrical outlet and ON appears in the display window Open the door The oven lamp will be turned on Put the food into a suitable con...

Page 15: ... on page 15 The NUMBER buttons will not operate or respond when you press a cooking time exceeding the maximum value It is not possible to set a cooking time for longer than the maximum time allowed on the chosen program It is advisable to press CANCEL button and to enter a new power level and cooking time You can not set up the same POWER LEVEL or DEFROST It operates as setting up sequence POWER ...

Page 16: ...any time simply by Opening the door Close the door Increase the remaining cooking time Before operating the oven times can be increased using either the time buttons or 20sec button During the operating time may only be added by using the 20sec button USING THE DEFROST FEATURES The Defrost features enables you to defrost meat poultry or fish Only use containers that are microwave safe Open the doo...

Page 17: ...OR button or DEFROST SELECTOR button one or more times until you get the desired power level The maximum time according to each cooking power level can be referred to in the title Power Levels and Time Variations on page 15 The NUMBER buttons will not operate or respond when you press a cooking time exceeding the maximum value It is not possible to set a cooking time for longer than the maximum ti...

Page 18: ... more times until you get the desired power level The maximum time according to each cooking power level can be referred to in the title Power Levels and Time Variations on page 15 The NUMBER buttons will not operate or respond when you press a cooking time exceeding the maximum value It is not possible to set a cooking time for longer than the maximum time allowed on the chosen program It is advi...

Page 19: ...rts with time digits counting down 2 Press the DOUBLE QUANTITY button And Press the START Button DOUBLE QUANTITY BUTTON PROGRAMMING 1 Press the OK Program 2sec button 2 Select desired program code by using NUMBER buttons 3 Press the DOUBLE QUANTITY button 4 Press NUMBER buttons to set the magnification factor within the range from 1 00 to 9 99 5 Press the START button Default factor is 1 65 preset...

Page 20: ...app 5 Select the microwave oven to pair with Result Available microwave ovens appear on the app with its assigned number 6 The app starts to receive the recipe once the microwave oven is paired Editing the name of recipes 1 Turn on the app 2 Tap the Menu button on the top right of the app s main screen 3 Tap Recipe Editor 4 Select the desired recipe you want to rename 5 Tap RENAME on the top right...

Page 21: ...st you want to delete 6 Tap DONE Sharing downloaded recipes 1 Turn on the app 2 Tap Share Recipe 3 Select the recipe list you want to share 4 Check the details of the recipes and tap SHARE Result Tap on the right of each recipe to check the details 5 Select the method you want to share the selected recipe Result Applications may vary depending on your smartphone environment CM1929B_XEU_DE68 04030D...

Page 22: ...t the microwave oven to pair with Result Available microwave ovens appear on the app with its assigned number 8 The app starts to send the recipe once the microwave oven is paired CONTROLLING BEEP TONE You can select the beep tone you require There are 4 sound levels available Hold down CANCEL button and then press NUMBER 0 button Hold together for 2 seconds Result Beep tone is changed to one leve...

Page 23: ...letes the programming of the air filter clean time 4 Press the START button for set the clean time Default clean time is 500 hours in terms of pure oscillating time not the continuity time You can set up to 999 hours After the clean time has expired you should clean the air filter See page 24 HIDDEN KEYS Note Press Key 1 and then the next one Hold for 2 secs Feature Key Entry Display Remark Key 1 ...

Page 24: ... of the oven cavity 2 Rinse ceiling cover in soapy water or Food Sanitizer Solution 3 Be sure to replace the ceiling cover before using the oven Ceiling cover must be in place securely when you use the oven When you removed the Ceiling Cover for the purpose of cleaning be sure to be extremely careful about the exposed inside components on the top of the oven cavity If any of them are deformed abno...

Page 25: ... 1 Stack two units together 2 Remove 6 screws as shown in the figure 3 Place the Bracket plate to join the two units 4 Attach and tighten 6 screws as shown in the figure here 5 Ensure the top oven is at a safe and workable height Screw Bracket Plate CAUTION REPLACEMENT OF LAMP Important 1 Remove a screw securing the lamp cover 2 Remove the lamp by rotating it clockwise 3 Replace with a new lamp by...

Page 26: ...styrene to melt Paper bags or newspaper May catch fire Recycled paper or metal trims May cause arcing Glassware Oven to tableware Can be used unless decorated with a metal trim Fine glassware Can be used to warm foods or liquids Delicate glass may break or crack if heated suddenly Glass jars Must remove the lid Suitable for warming only continued Cookware Microwave safe Comments Metal Dishes May c...

Page 27: ...5 1 min Recipe Method Power Level Timing Stand Time 1850 W 1500 W 1300 W SNACK STARTERS To cook Bacon rasher C Place on rack HIGH 1 30 1 40 1 50 1 min Eggs poached X 2 C Place in ramekins HIGH 0 30 0 40 0 45 1 min Eggs scrambled X 2 C Beat eggs and place in bowl HIGH 25 30 30 40 35 45 1 min Sausages X 2 Thick C Pierce MED 1 00 1 10 1 20 2 mins To Reheat Sausages Cumberland F Place on plate MED 2 0...

Page 28: ...ace in m w in pierced bag MED 4 30 5 00 5 30 2 mins continued Recipe Method Power Level Timing Stand Time 1850 W 1500 W 1300 W Lasagne 192 g Place in microwave safe dish MED 4 00 4 15 4 30 2 mins Moules Marinieres 466 g F Pierce bag HIGH 2 30 2 45 3 00 2 mins Salmon Avacodo Paupiette C Pierce bag HIGH 2 30 2 45 3 00 2 mins Shepherd s pie 300 g C Place in oven and cover MED 3 00 3 15 3 30 2 mins Su...

Page 29: ...ins Brocolli Florets Cover stir half way HIGH 4 00 4 15 4 30 2 mins Cabbage shredded Cover stir half way HIGH 4 00 4 15 4 30 2 mins Carrot batons Cover stir half way HIGH 4 00 4 15 4 30 2 mins Recipe Method Power Level Timing Stand Time 1850 W 1500 W 1300 W Cauliflower florets Cover stir half way HIGH 4 00 4 15 4 30 2 mins Corn on the Cob Cover HIGH 4 00 4 30 5 00 2 mins Corn whole baby Cover stir...

Page 30: ...ol The cooling fan is not working Listen for the sound of the cooling fan Trying to operate the oven without food inside Put food in the oven There is not sufficient ventilation space for the oven There are intake exhaust outlets on the front and rear of the oven for ventilation Keep the gaps specified in the product installation guide Several power plugs are being used in the same socket Designat...

Page 31: ... is installed on an uneven surface Make sure the oven is installed on flat stable surface There are sparks during cooking Metal containers are used during the oven thawing functions Do not use metal containers When power is connected the oven immediately starts to work The door is not properly closed Close the door and check again Problem Cause Action There is electricity coming from the oven The ...

Page 32: ...ait for 10 seconds Plug the power cord in again and check if the error code C d3 appears again If the symptom persists contact the nearest service centre EEPROM Check C F1 One long beep for 2 sec Memory IC EEPROM IC is not working correctly In this case other features except for memory function work properly You can operate the oven manually Remedy Press CANCEL button one or more times and try to ...

Page 33: ...1780 W Operating frequency 2450 MHz Dimensions W x H x D Outside Oven cavity 464 x 368 x 557 mm 370 x 190 x 370 mm Volume 26 liter Weight Net 32 kg approx Noise level 54 5 dB 514 1000 368 444 10 464 486 530 43 26 557 Hereby Samsung Electronics declares that the radio equipment type appliance is in compliance with Directive 2014 53 EU The full text of the EU declaration of conformity is available a...

Page 34: ...English 34 MEMO MEMO CM1929B_XEU_DE68 04030D 02_EN indd 34 2017 07 03 8 13 45 ...

Page 35: ...English 35 MEMO MEMO CM1929B_XEU_DE68 04030D 02_EN indd 35 2017 07 03 8 13 45 ...

Page 36: ... 4000 only from landline toll free www samsung com gr support GREECE 80111 SAMSUNG 80111 726 7864 only from land line 30 210 6897691 from mobile and land line LUXEMBURG 261 03 710 www samsung com be_fr support NETHERLANDS 088 90 90 100 www samsung com nl support NORWAY 815 56480 www samsung com no support PORTUGAL 808 20 7267 www samsung com pt support SPAIN 0034902172678 www samsung com es suppor...

Reviews: