background image

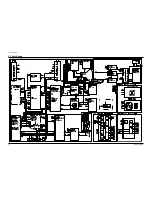
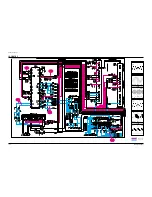
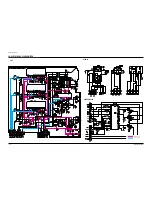
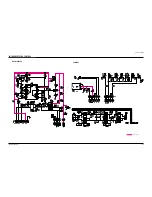
9. Wiring Diagram

Wiring Diagram

Samsung Electronics

9-1

KEY2 KEY1 GND KEY3

TIME

STD

GND

5V

IR

GND

GND

CONTROL PCB

MAIN PCB

DOUBLE FOCUS

PCB

CRT PCB

SIDE AV PCB

L +

L +

L +

R +

R +

R +

L -

L -

L -

R -

R -

R -

VO

GD

VI

GD

LO

RO

LI

RI

SC-1 GND

SY-I

GND SC-O GND

VERT

V2

V1

NC 16.5V GND

VERT

V2

V1

NC

16.5V

GND

B OUT

G OUT

R OUT

SENSE

8V

GND

F/B

TILT

GND

SVM

600V

600V

SY-O

TO SPEAKER

FROM MAIN SOUND AMP

AV2 VIDEO IN-OUT

CN704

CNY01

CN902

CN602

CN302

CN501

CNY02

KEY2 KEY1 GND KEY3

CN901

CNH01

CN701

CN702

CN703

S-VHS IN-OUT

16.5VAC GND DOUBLE

16.5VAC GND DOUBLE

TIME

STD

GND

5V

IR

CN502

B OUT

G OUT

R OUT

SENSE

8V

GND

F/B

TILT

GND

SVM

CN501A

VO

GD

V1

GD

LO

RO

LI

RI

CN702

-16V

ABL

+16V

GND HEAT

NC

200V

CN502A

-16V

ABL

+16V

GND HEAT

NC

200V

CN704

SC-I

GND SY-I

GND SC-O GND

SY-O

Summary of Contents for CW28C75VS8XXEC

Page 1: ...C75VS8XXEC COLOR TELEVISION RECEIVER CONTENTS Precautions Reference Information Specifications Alignment and Adjustments Troubleshooting Exploded Views and Parts List Electrical Parts List Block Diagrams Wiring Diagram Schematic Diagrams 1 2 3 4 5 6 7 8 9 10 ...

Page 2: ...ets metal cabinets screwheads and control shafts The current measured should not exceed 0 5 milliamp Reverse the power plug prongs in the AC outlet and repeat the test Fig 1 1 AC Leakage Test 6 Antenna Cold Check With the unit s AC plug disconnected from the AC source connect an electrical jumper across the two AC prongs Connect one lead of the ohmmeter to an AC prong Connect the other lead to the...

Page 3: ...at appear to have overheated or that are otherwise damaged should be replaced with parts that meet the original specifications Always determine the cause of damage or overheating and correct any potential hazards 15 Observe the original lead dress especially near the following areas Antenna wiring sharp edges and especially the AC and high voltage power supplies Always inspect for pinched out of p...

Page 4: ...ssible conductive parts examples metal panels input terminals and earphone jacks 6 Insulation Checking Procedure Disconnect the power cord from the AC source and turn the power switch ON Connect an insulation resistance meter 500V to the blades of the AC plug The insulation resistance between each blade of the AC plug and accessible conductive parts see above should be greater than 1 megohm 7 Neve...

Page 5: ...trical charges that damage ESDs 5 Use only a grounded tip soldering iron when soldering or unsoldering ESDs 6 Use only an anti static solder removal device Many solder removal devices are not rated as anti static these can accumulate sufficient electrical charge to damage ESDs 7 Do not remove a replacement ESD from its protective package until you are ready to install it Most replacement ESDs are ...

Page 6: ...rtz Hour Inches Per Second Kilowatt hour Kilogram Kilohertz Kilohm Kilometer Kilometer Per Hour Kilovolt Kilovolt ampere Kilowatt Liter Megahertz MV MW MΩ m µA µF µH µm µs µW mA mg mH mI mm ms mV nF Ω pF Ib rpm rps s V VA W Wh Megavolt Megawatt Megohm Meter Microampere Microfarad Microhenry Micrometer Microsecond Microwatt Milliampere Milligram Millihenry Milliliter Millimeter Millisecond Millivol...

Page 7: ...afe Ground Green Y High High Frequency High Fidelity Inductance Capacitance Integrated Circuit Intermediate Frequency I O L L LED LF MOSFET MTS NAB NEC NTSC OSD PCB PLL PWM QIF R RC RF R Y SAP SAW SIF SMPS S N SW TP TTL TV UHF UL UV VCD VCO VCXO VHF VIF VR VTR VTVM TR Input output Left Low Light Emitting Diode Low Frequency Metal Oxide Semiconductor Field Effect Tr Multi channel Television Sound N...

Page 8: ... Information Samsung Electronics 2 3 2 2 IC Line Up LOC NO IC201S IC601 IC901 IC902 IC602 HIC201 HIC202 HIC203 HIC204 HIC401 IC301 Q402 Q401 D414 IC401 Q404 IC801S D801S PC801S IC802 D805 D806 D807 D802 IC201 IC804 IC803 IC903 IC904 Q909 Q910 TU01S TU02S BOARD MAIN SPEC VDP3112B MSP3411G SDA555X KS24L161 TDA7297 DRGB001 DDRI001 LA7845 KSC2073 H2 KSD5703 FMP 3FU KA393 IRF620 3S1265R RBV606 PC123Y K...

Page 9: ...dder Output High end Picture In Picture IC 3 3V Regulator LOC NO T801S T444S IC501 IC502 IC503 QF04 QF05 QG02 QG03 ICG01 ICH01 QH01 ICS01 ICP01 ICP02 SPEC AA26 00046A FUJ 29B001 TDA6111Q 2SC2344 2SA1011 KSA940 KSD2073 H2 KA4558 KA4558 2SC4636RB TEA6425 SDA9489X EZ1086CM REMARK Refer to Table 2 3 6 Refer to Table 2 3 7 Option Option Option Option BOARD MAIN CRT DOUBLE FOCUS V S W PIP Reference Info...

Page 10: ...d A2 Stereo Multistandard A2 Stereo Nicam Multistandard A2 Stereo Nicam Vitual Dolby REMARK SPEC TDA7297 FUNCTION 15W x 2CH 10W x 2CH REMARK SPEC TCLS3101PD09A S TCPS3001PD09D S TCPS3001PD09E S FUNCTION CS with LNA Function CS CS REMARK Main India SPEC TCPS3000PC09B S FUNCTION CS REMARK Sub TCPS3001PD09A S is out of date TCPS3001PD09D S which is up to date has the same function Table 2 3 2 SOUND I...

Page 11: ...Reference Information 2 6 Samsung Electronics SPEC FUJ 29B001 FUH 29A001B FUNCTION 29 21 REMARK Table 2 3 6 TRANS SPEC AA26 00046A AA26 00044C FUNCTION 29 21 REMARK Table 2 3 7 TRANS FLYBACK FBT ...

Page 12: ...Sound Pseudo Stereo RCA Input S VHS Head Phone 2Scart Input Output DVD Input YPbPr AV2 Monitor Audio Output S VHS 75ohms Coaxial Cable Not Present R815 Option Option AV1 Scart I O RGB Input RF Out AV2 Scart I O Monitor Out Option Option Option N P PF PT PW MT NT WT GW Function NICAM 2 TUNER PIP 2 TUNER PIP NICAM TTX 2 TUNER PIP A2 STEREO TTX 2 TUNER PIP A2 STEREO 2 TUNER MULTI PIP A2 STEREO NICAM ...

Page 13: ...3 2 Samsung Electronics MEMO ...

Page 14: ...rmer 4 2 Automatic Degaussing A degaussing coil is mounted around the picture tube so that external degaussing after moving the TV should be unnecessary But the receiver must be properly degaussed upon installation The degaussing coil operates for about 1 second after the power is switched ON If the set is moved or turned in a different direction the power should be OFF for at least 10 minutes If ...

Page 15: ...NDARD in video mode 4 Turn the Dynamic focus VR fully clockwise maximum 5 Turn the Static focus VR fully counterclockwise maximum 6 Slowly turn the static focus VR counterclockwise Adjust until the vertical line in the middle of the screen has maximum clarity 7 Slowly turn the dynamic focus VR clockwise and adjust the 3rd horizontal line for maximum clarity 8 Repeat 4 7 if necessary STATIC FOCUS V...

Page 16: ...Select G2 Adjust 5 Set the values as below IBRM 220 WDRV 35 CDL 220 COLR G B 150 150 150 6 Turn the SCREEN VR until the value of MRCR G B is about 120 Do not mind that the OSD Color is red After completing G2 Adjust follow this procedure Enter the Video Adjust 1 Choose any item in menu ex Select Red Cutoff Change the value of item you select and recover the value For example when the value of Red ...

Page 17: ...oshiba pattern 1 Select STANDARD from the menu 2 Input an 100 White pattern 3 Enter the Service Mode Refer to 4 8 Service Mode 4 Warm up the TV set at least for 30 minutes 5 Input a Toshiba pattern signal 6 Enter the Video Adjust1 Adjust Sub Contrast so that Y luminance becomes 40 ft 3 Use Red Drive and Blue Drive to adjust High Light x 290 y 300 Adjust Sub Bright so that Y luminance becomes 1 3ft...

Page 18: ...just Others 3 Use the Channel Up Down buttons to move the cursor in the adjustment parameters When CRT CRT PCB FBT E 2 PROM sometimes MICOM is replaced the adjustment values should be controlled After the Service adjustment is completed Do not select Reset in the service mode menu After above procedure is done power is on initially and the Plug and Play will be operated PICTURE OFF PICTURE ON DISP...

Page 19: ...7 128 127 128 127 128 127 128 127 0 15 0 63 0 255 0 255 0 255 0 15 Function Adjust Vertical Picture Position Adjust Vertical Picture Size Adjust Vertical Slope Correction Adjust Vertical S Correction Adjust Horizontal Picture Size Adjust Horizontal Trapeziod Adjust Horizontal Parabola Wave Adjust Horizontal Symmetry Adjust Horizontal Corner Adjust Horizontal Position Adjust PIP Contrast Adjust PIP...

Page 20: ...lignment and Adjustments Samsung Electronics 4 7 4 8 2 B SCREEN CHANGE I2C BUS GEOMETRIC ADJUSTMENT 9 H Symmetry 5 H Corner 8 H Trapizium 4 H Parabola 10 H Shift 6 V Amp 3 H EW 2 1 V Shift V Slope 7 V SC ...

Page 21: ...Cutoff Level Adjust Red Output Gain Adjust Green Output Gain Adjust Blue Output Gain Adjust Brightness Level Adjust Contrast Level Adjust Color Level Adjust Tint Adjust Beam Control Limit Refer to Note 3 Adjust OSD TTX Contrast Refer to Table 1 Remark Low Light High Light Low Light High Light Not to be adjusted 50 WDRGB BCL THESHOLD beam 1 8mA 1 6mA MIN IRE BCL GAIN MAX Table 1 YC Delay Adjustment...

Page 22: ... 55 0 15 0 31 10 31 0 255 0 255 0 15 0 255 Initial Value 50 8 4 20 45 15 0 90 Function Black Stretch Threshold Black Stretch Tilt Position Black Stretch Amount Luma Peaking Filter Coring OSD TTX RGB Bright OSD TTX RGB Contrast Electronic High Tension Response Time Electronic High Tension Coefficient Remark Coring The Value of Center Frequency for the active bandwidth 4 8 2 D VIDEO 2 ADJUST Soft Li...

Page 23: ...Stereo 4 3 Wide Q 12 8 9 4 3 16 9 Q 16 9 2Scart 2Scart S 1RCA 2RCA 2RCA S 2RCA D 2RCA S D 1Scart Off On Off On Off On 2 Tuner 1 Tuner Off Arabic Farsi Arab Hebrew West Europe East Europe Russian Greek Turkey Off On Off On Off On Off On Off On Remark OSD Language Depending on IC601 Refer to Note 5 S S VHS D DVD When PIP is 2 Tuner set to ON Without TV VIDEO key in the front panel set to On Sound A2...

Page 24: ...Melody Volumn Remark 4 8 2 F OTHERS Fixed Value Description LANGUAGE SOUND CRT AV MODE X RAY TILT CONTROL AUTO FM PIP TEXT LANGUAGE LNA EQUALIZER HIGH DEVIATE TTX ON OFF AV BY CH KEY OPTION BYTE Note 6 CS29A5WT8X UMG Initial Vaue Arab V Dolby 4 3 2 RCA S OFF ON ON OFF Arabic OFF ON ON ON ON 84 CC D8 CS29A6PF8X HAC Initial Vaue Arab V Dolby 4 3 2 RCA S OFF ON ON 2 Tuner Farsi ON ON ON ON OFF 85 DC ...

Page 25: ...ADC ADC I O I O I O I O I O I O PWM I O I O I O S D A 5 5 5 X Write Protect EEPROM SDA EEPROM SCL Bus Stop Main SDA Main SCL Sound Reset Video Reset VDD 2 5V GND VDD 3 3V CVBS Input VDD 2 5V GND AFT Scart1 Ident Scart2 Ident Key 1 H Sync V Sync Key 3 Key 2 X Ray Protect IR Input Stand By LED Time LED Tilt N C Power Sound Mute N C N C PX Y PX Y VDD 3 3V GND VDD 2 5V CORE OSD B OSD G OSD R VDD 2 5V ...

Page 26: ...t Vertical Sync Input Key3 Input Key2 Input X Ray Protection Remocon Signal Input LED Drive Output Red LED Drive Output Green PIN NO 1 2 3 4 5 6 7 8 9 10 11 12 13 14 15 16 17 18 19 20 21 22 23 24 25 26 FUNCTION I O I O I O I O I O I O I O I O Vdd GND Vdd CVBS Vdd GND ADC ADC ADC ADC HS VS I O I O I O I O I O I O ASSIGN Write Protect ROM SDA ROM SCL Bus Stop Main SDA Main SCL Sound Reset Video Rese...

Page 27: ... Power Tilt IN OUT Out In In Out Out Out Out Out In Out Out Out Out ACTIVE H L Low Low 6MHz 6MHz High Low PWM DESCRIPTION Activate Degausssing Coil Not Used Programmed Gound Level Analog Ground Not Used Programmed Gound Level Not Used Programmed Gound Level Micom Hardware Reset Crystal Oscillation Input Crystal Oscillation Output Analog Ground Analog B OSD TTX Output Red OSD TTX Output Green OSD T...

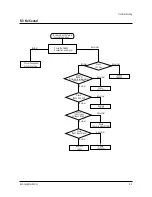
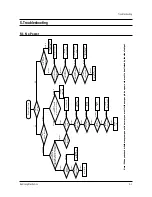
Page 28: ...l Abnormal Abnormal Abnormal Normal Normal Normal Abnormal Check and Replace IC903 Replace D801 or D811 Check and Replace IC804 Check and Replace R828 or D805 Check IC201S VDP H OUT 50 Check Q401 H TR Check 135V Line Check IC802 IC803 Replace IC802 IC803 Replace IC201S Replace Q401 Abnormal Check PC801S IC801S Replace FBT Normal Normal Normal Normal Normal Normal Normal Normal Normal Normal Normal...

Page 29: ...ignal is appeared Check CRT PCB RK BK GK Check IC201S 31 Check Heater Voltage Check HIC202 HIC203 HIC204 Output Check CRT and FBT Check CRT and FBT Check 200V 16 5V Line Check IC201S 63 or 59 Replace IC201S Check Tuner CVBS Output Check IC301 Check IC803 Normal Normal Normal Normal Normal Replace IC201S Replace DZ202 Normal Normal Abnormal Abnormal Abnormal Abnormal Abnormal Abnormal Abnormal Abno...

Page 30: ... IC601 Input Voltages 5V 8V Check IC601 24 25 Check D816 Q906 Normal Normal Replace IC602 Check IC601 Input Signal Replace IC601 Normal Normal Normal Check FA803S Abnormal Abnormal Abnormal Abnormal Abnormal Normal Check IC602 7 If the pin is in low state Sound is mute Check the Speaker Wire Connection Check the coils around IC601 Abnormal Check the Tuner ...

Page 31: ...MEMO 5 4 Samsung Electronics ...

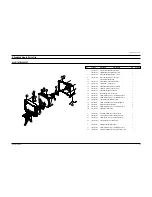
Page 32: ...B GRAY 1 1 9 AA64 00191A INDICATOR LED 28C7 ACRYL CLR 1 1 10 HA60 020003 SCREW TAPPING RH 2 M4 L15 ZPC BLK SWRCH18 1 1 11 HA60 020003 SCREW TAPPING RH 2 M4 L15 ZPC BLK SWRCH18 1 1 12 HA95 900039 ASSY PCB CONTROL 28C7 KS3A 100HZ 1 1 13 6003 001023 SCREW TAPTITE RWH B M3 L10 ZPC YEL SWRCH1 6 1 14 3001 001005 SPEAKER 10W 8OHM 90DB 150HZ 2 1 15 HA60 020003 SCREW TAPPING RH 2 M4 L15 ZPC BLK SWRCH18 8 1...

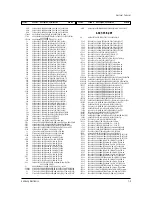
Page 33: ...000204 C FILM MPPF 430nF 5 400V TP 26x20 5x12 3C601 2201 000558 C CERAMIC DISC 470pF 10 50V Y5P TP 5x3 5 C603 2401 002235 C AL 10UF 20 16V GP TP 5X11MM 5MM C604 2401 000603 C AL 1uF 20 50V GP TP 5x11 5 C605 2305 000665 C FILM MPEF 100NF 5 63V TP 7 5X4 0X5 0MM C607 2202 000796 C CERAMIC MLC AXIAL 1nF 10 50V Y5P TP 3 5x19 C608 2202 000796 C CERAMIC MLC AXIAL 1nF 10 50V Y5P TP 3 5x19 C610 2301 000445...

Page 34: ...L G12S 200V 5A D808 0402 000132 DIODE RECTIFIER 1N4004 400V 1A DO 41 TP D810 0402 000132 DIODE RECTIFIER 1N4004 400V 1A DO 41 TP D811 0402 000132 DIODE RECTIFIER 1N4004 400V 1A DO 41 TP D816 0402 001105 DIODE RECTIFIER ERB43 04SV1 400V 1 0A TP D901 0404 000156 DIODE SCHOTTKY RB441Q 10V 100mA DO 34 TP D902 0404 000156 DIODE SCHOTTKY RB441Q 10V 100mA DO 34 TP D903 0404 000156 DIODE SCHOTTKY RB441Q 1...

Page 35: ...0000mW TO 3PL BK 3Q401 AA02 00007AMICA DPM 04 MICA 22x29x0 15mm 3Q401 AA60 30001AWASHER PLATE M3 ID3 5 15X8 5 T1 0 SBHG 3Q401 AA62 00092AHEAT SINK DP AA62 30177A 3Q401 HA60 020004 SCREW TAPTITE RH 2S M3 L6 ZPC YEL SWRCH18 3Q401 HA60 020007 SCREW TAPTITE RH 2S M3 L10 ZPC YEL SWRCH1 2 Q402 0505 001116 FET SILICON BUZ73A N 200V 22A 0 6ohm 40W T 3Q404 0505 000156 FET SILICON IRF620 N 200V 5A 0 8ohm 50...

Page 36: ...3 R CARBON S 47OHM 5 1 2W AA TP 2 4X6 4MM R833 2001 000734 R CARBON 4 7KOHM 5 1 8W AA TP 1 8X3 2M R835 2003 002181 R METAL OXIDE S 68Kohm 5 2W AG TP 3 9x12mm R836 2003 002181 R METAL OXIDE S 68Kohm 5 2W AG TP 3 9x12mm R901 2001 000734 R CARBON 4 7KOHM 5 1 8W AA TP 1 8X3 2M R903 2001 000734 R CARBON 4 7KOHM 5 1 8W AA TP 1 8X3 2M R904 2001 000734 R CARBON 4 7KOHM 5 1 8W AA TP 1 8X3 2M R905 2001 0007...

Page 37: ... 00411APCB SIPADOS BODY CS29A5 FR 4 2L A 1 6T 180x245 ASSY PCB CRT 0 1 HA95 00557GASSY PCB CRT 28C7 AK 100HZ KS3A D C502 2305 000704 C FILM MPEF 100nF 5 250V TP 16 5x10 3x5 7 C503 2201 000599 C CERAMIC DISC 560pF 10 500V Y5P TP 7x4 5 C505 2305 000704 C FILM MPEF 100nF 5 250V TP 16 5x10 3x5 7 C506 2201 000599 C CERAMIC DISC 560pF 10 500V Y5P TP 7x4 5 C508 2305 000704 C FILM MPEF 100nF 5 250V TP 16 ...

Page 38: ...6 2701 000168 INDUCTOR AXIAL 3 3uH 5 2 5x3 4mm L707 3301 000287 CORE FERRITE BEAD AA 3 5x1x6mm 1500 2400G L708 3301 000287 CORE FERRITE BEAD AA 3 5x1x6mm 1500 2400G L709 2701 000114 INDUCTOR AXIAL 10UH 10 2 5X3 4MM 2 LDY01 0601 000198 LED ROUND RED GRN 5 0mm 630 565nm LY01 2701 000114 INDUCTOR AXIAL 10UH 10 2 5X3 4MM 3PCB AA41 00270CPCB CONTROL CW28C7 CEM 1 1L C 1 6T 330x245 R701 2001 000281 R CAR...

Page 39: ...LAMP WIRE NYLON 66 DATL 600 DONG A 2 CB AA63 60002DSPACER FELT FELT T1 0 BLK 330X15 2 AA63 60001P SPACER FELT FELT T1 0 BLK 230X15 2 HA68 500025 LABEL RATING A P 90G T0 2 L55 W55 STANDARD 2 HA68 500021 LABEL QMS T0 1 L135 W35 WHT 2 AA65 30009ACLAMP FBT ABS V0 BLK 2 AA65 30109ACLAMP FBT NYLON 66 V2 BLK 2 AA61 20292BHOLDER CHASSIS DP AA61 20254A ABS V0 GRAY 2 AA65 30105CCLAMP WIRE NYLON 66 V2 NTR 2M...

Page 40: ...8 Block Diagrams Samsung Electronics Schematic Diagrams 8 1 8 1 Power Diagram ...

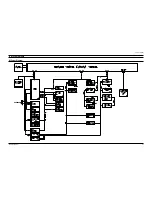
Page 41: ...8 2 Block Diagram Schematic Diagrams 8 2 Samsung Electronics ...

Page 42: ...16 5V GND B OUT G OUT R OUT SENSE 8V GND F B TILT GND SVM 600V 600V SY O TO SPEAKER FROM MAIN SOUND AMP AV2 VIDEO IN OUT CN704 CNY01 CN902 CN602 CN302 CN501 CNY02 KEY2 KEY1 GND KEY3 CN901 CNH01 CN701 CN702 CN703 S VHS IN OUT 16 5VAC GND DOUBLE 16 5VAC GND DOUBLE TIME STD GND 5V IR CN502 B OUT G OUT R OUT SENSE 8V GND F B TILT GND SVM CN501A VO GD V1 GD LO RO LI RI CN702 16V ABL 16V GND HEAT NC 200...

Page 43: ...9 2 Samsung Electronics MEMO ...

Page 44: ...TP01 TP02 TP07 TP03 TP06 TP08 TP09 TP10 TP05 TP04 10 Schematic Diagrams Samsung Electronics Schematic Diagrams 10 1 10 1 MAIN 1 TP07 TP08 TP09 TP10 TP01 TP02 TP03 TP04 TP05 TP06 Power Line Signal Line ...

Page 45: ...TP12 TP13 TP11 TP14 TP25 TP15 10 2 MAIN 2 Schematic Diagrams 10 2 Samsung Electronics Power Line Signal Line TP11 TP12 TP13 TP14 TP15 TP25 ...

Page 46: ...10 3 MAIN3 Samsung Electronics Schematic Diagrams 10 3 TP17 TP16 TP18 TP19 TP20 TP21 TP22 TP23 TP24 Power Line Signal Line TP22 TP23 TP24 TP16 TP17 TP18 TP19 TP20 TP21 ...

Page 47: ...10 4 MAIN 4 Schematic Diagrams 10 4 Samsung Electronics TP26 TP27 TP28 TP29 TP30 TP31 TP33 TP32 TP34 TP35 Power Line Signal Line TP32 TP33 TP34 TP35 TP26 TP27 TP28 TP29 TP30 TP31 ...

Page 48: ...10 5 PIP Samsung Electronics Schematic Diagrams 10 5 Power Line Si l Li ...

Page 49: ...Schematic Diagrams 10 6 Samsung Electronics 10 6 CRT SIDE AV VIDEO SWITCH VIDEO SWITCH CRT Power Line Signal Line SIDE AV ...

Page 50: ...Samsung Electronics Schematic Diagrams 10 7 10 7 DOUBLE FOCUS CONTROL DOUBLE FOCUS CONTROL Power Line Si l Li ...

Page 51: ...ELECTRONICS Samsung Electronics Co Ltd MAY 2001 Printed in Korea 3KS3A SEH28C7 05 ...

Reviews: