
20_
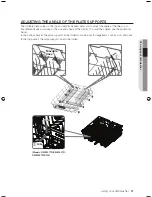
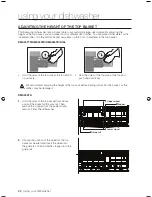
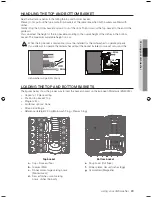
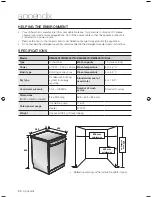
using your dishwasher
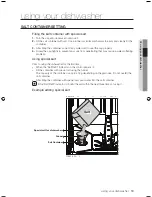
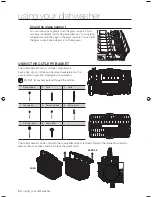
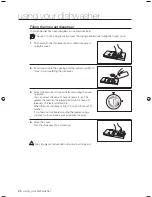
using the salt container
• Your dishwasher is equipped with an adjustable water softening system.
To avoid scale deposits on the dishes and in the dishwasher, the dishes should be washed
with soft water, i.e. water with a low lime content.
The salt container should be adjusted according to the hardness of the water in your area.
Your local Water Authority can advise you on the hardness of the water in your area.
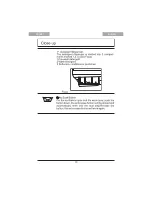
• If you want to change the water softening level, you should set it manually as follows:
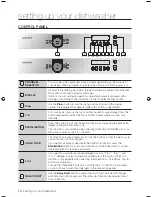
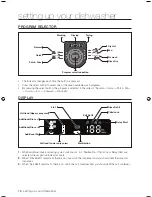
1. Press the
power
button. (The dishwasher should turn off.)
2. Press the buttons sequentially. (At this time a button sound is heard.)
1)
Press the
1/2
button for three seconds.
2)
Press the
Sterilization
button.
3. To change the salt container level, press the
1/2
button.
(To select the new level, refer to the chart.)
We recommend that customers set the salt container when the dishwasher is initially
installed by a technician.
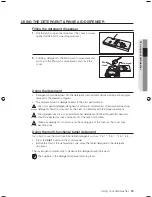
filling the salt container with special salt
•
Use only special salt for dishwashers. Do not fill the salt container with any another type of
salt or dishwasher detergent as this would irreparably damage the salt container.
•
If you are not going to wash your dishes immediately, you should run the Prewash program.
This will clean any salt that has run out of the container and any salt that has been spilt.
•
Depending on the size of the salt grains, it can take several hours for the salt to dissolve in
the water and the special salt indicator to turn off.
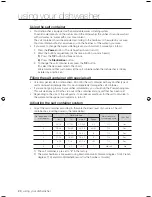
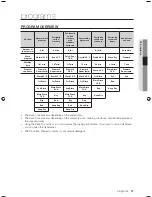
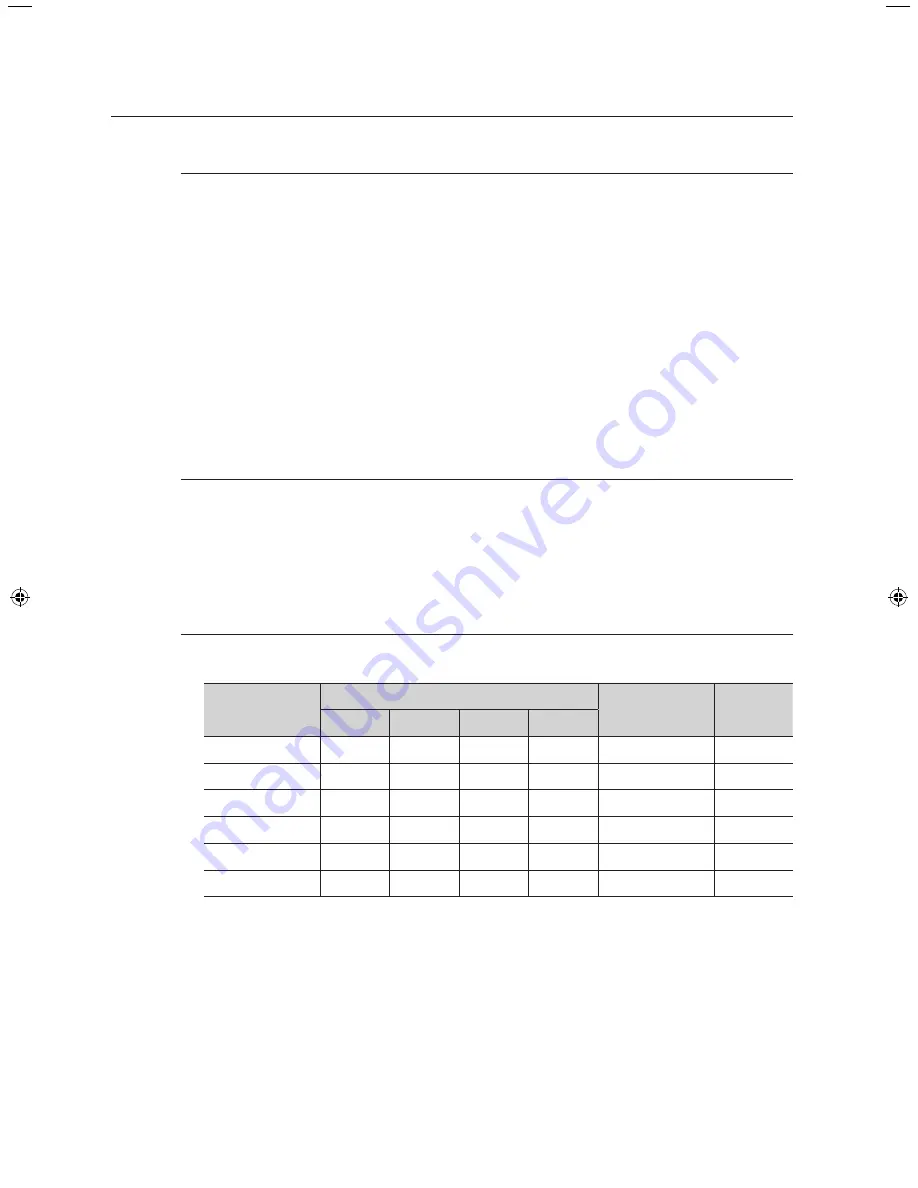
Adjusting the salt container system
•
Adjust the salt container according to the water hardness level of your area. The salt
container has 6 settings (refer to the table below).
No. indicated on the
multi-display
Water hardness
Water soft cycle /
Dishwashing cycle
Uses Salt
ºdH
ºTH
mmol/l
Range
1
29-70
51-125
5.1-12.5
VI
1/1
Yes
2
19-28
33-50
3.3-5.0
III / VI
1/2
Yes
3
15-18
26-32
2.6-3.2
III
1/3
Yes
4
11-14
19-25
1.9-2.5
II
1/4
Yes
5
4-10
7-18
0.7-1.8
I/II
1/5
Yes
0
< 4
< 7
< 0.7
I
No salt
No
1) The salt container is pre-set to “3” in the factory.
2) The water hardness is measured using international units, German degrees (°dH), French
degrees (°TH) and mmol/l(International unit for the hardness of water)
using your dishwasher
UserManual-DMS400TR_EN.indd 20
5/11/2010 2:40:19 PM