background image

30_


troubleshooting

troubleshooting

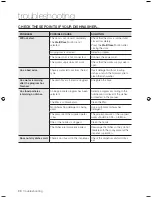
CheCk These PoInTs If your DIshWAsher…
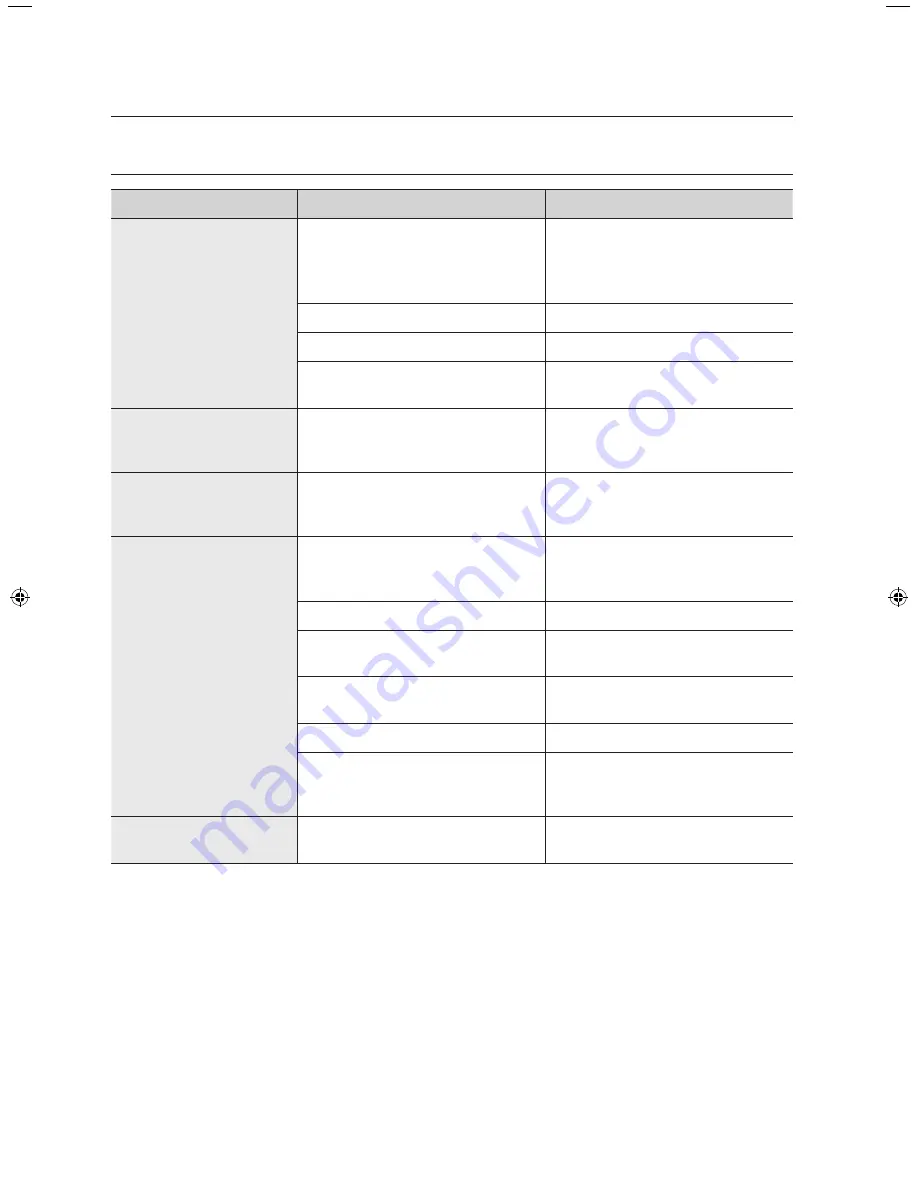
pROblem

pOSSIble CAUSe

SOlUTION

Will not start.

The door is not closed completely.
The 

start/reset

 button is not 

selected.

Check that the door is latched and 
closed completely.
Press the 

start/reset

 button after 

closing the door.

No program is selected.

Select a program.

The power cord is not connected.

Connect the power cord.

The water supply does not work.

Check that the water supply valve is 
open.

has a bad odor.

There is water left over from the last 
cycle.

Insert detergent without loading 
dishes, and run the Normal cycle to 
clean the dishwasher.
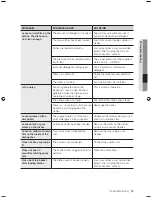
has water remaining 
after the program has 
finished.

The drain hose is folded or clogged.

Straighten the hose.

has food particles 
remaining on dishes.

An inappropriate program has been 
selected.

Select a program according to the 
number and soil level of the dishes, 
as directed in this manual.

The filter is contaminated.

Clean the filter.

No dishwashing detergent is being 
used.

Use a automatic dishwasher 
detergent.

The pressure of the supplied water 
is low.

The proper pressure of the supplied 
water should be 0.05 ~ 0.8 Mpa.

One of the nozzles is clogged.

Clean the nozzle.

The dishes are improperly loaded.

Rearrange the dishes so they do not 
interfere with the spray arm and the 
dispenser operation.

Does not dry dishes well.

There is no rinse aid in the dispenser. Check the dispenser and add rinse 

aid.

UserManual-DMS400TR_EN.indd   30

5/11/2010   2:40:30 PM

Summary of Contents for DMS300TR series

Page 1: ...l imagine the possibilities Thank you for purchasing this Samsung product To receive more complete service please register your product at www samsung com global register DMS300TR DMS301TR DMS400TR DM...

Page 2: ...use the dishwasher and tips for making the most of its state of the art features and technologies The cycle chart in the Program overview section offers an overview of the different cycles and the Tro...

Page 3: ...her follow these basic safety precautions Do NOT attempt Do NOT disassemble Do NOT touch Follow directions explicity Unplug the power plug from the wall socket Make sure the machine is grounded to pre...

Page 4: ...To reduce the risk of injury do not allow children to play in or on the dishwasher To reduce the risk of fire or explosion Under certain conditions hydrogen gas may be produced in a hot water system...

Page 5: ...aff kitchen areas in shops offices and other working environments farm houses by clients in hotels motels and other residential type environments bed and breakfast type environments The power plug mus...

Page 6: ...ppliance Never use an extension cord When preparing for installation ensure that your power supply offers An individual circuit serving only your dishwasher Your dishwasher must be grounded If your di...

Page 7: ...ollow these instructions can result in death fire or electric shock Electrically ground the dishwasher Do not use an extension cord Do not install the dishwasher in front of the power outlet When the...

Page 8: ...ight of the top basket 23 Handling the top and bottom basket 23 Loading the top and bottom baskets 24 Using the cutlery basket 25 Using the detergent rinse aid dispenser programs 27 27 Program overvie...

Page 9: ...ure to read through the installation guide and follow the directions inside After unpacking your dishwasher keep the packaging out of the reach of children to ensure their safety Checking parts Refer...

Page 10: ...ourself Disassembling repairing or modifying the product is only permitted by an authorized service technician 3 This dishwasher is intended for domestic use only 4 Turn off the water supply before in...

Page 11: ...ool Remove the four protective pieces of rubber CAUTION 1 C B A Aqua stop models DMS400TR DMS500TR D146 A B C 2 Make sure that the hoses are not bent when you insert the dishwasher into its location i...

Page 12: ...Freestanding built in type installation 1 589 mm Remove the four protective pieces of rubber Cut the plinthfacia lower rubber protective panel to a width of 589 mm Insert part a a Cut the rubber part...

Page 13: ...e top left and right at the back of the dishwasher and separate the Top Table 3 815 605 605 600 598 A MAXIMUM DRAIN CONNECTION LENGTH 2 9 M B MAXIMUM SUPPLY CONNECTION LENGTH 1 5 M C MAXIMUM POWER CON...

Page 14: ...mp Using the cable tie The power cord can be tied using the Cable Ties Power source This product operates on a AC 220 230 V 50 Hz power source c d e 0 35mm Gap 5mm Level Make sure that the dishwasher...

Page 15: ...und If the drain hose is installed higher than 80 cm dirty water may flow back or a significant amount of dirty water may remain inside the dishwasher 2 If you are sharing one drain pipe for the drain...

Page 16: ...ncreasing the heat by 80 degrees during the final rinse cycle This function is only available when selecting the Normal Pots Pans Eco or Rinse Dry courses or the 4 in 1 function CHILD LOCK The Child L...

Page 17: ...3 seconds POWER When pressed all indicator lights turn on and off and the most recently finished program light is lit When the dishwasher is running and a selected program has finished En is displaye...

Page 18: ...or Delay Start are selected the respective indicators are lit 2 When Rinse Refill remains lit there is no rinse aid in the dispenser and you should refill the rinse aid dispenser 3 When Salt Refill re...

Page 19: ...that may cause a water softening problem Using special salt Prior to using the dishwasher for the first time When the Salt Refill indicator on the control panel is lit Fill the container with special...

Page 20: ...salt for dishwashers Do not fill the salt container with any another type of salt or dishwasher detergent as this would irreparably damage the salt container If you are not going to wash your dishes...

Page 21: ...p to five different levels according to the size and shape of the dishes To adjust the angles see the illustrations below In the bottom basket the plate support can be folded to make room for large it...

Page 22: ...rack at the top and lift up vertically Hold the sides of the top rack at the top and push down vertically We recommend adjusting the height of the top rack before loading dishes into the basket as the...

Page 23: ...led for the dishwasher to operate properly If you attempt to operate the dishwasher without the basket installed noise will occur and the dishwasher will perform poorly Loading the top and bottom bask...

Page 24: ...The cutlery basket consists of three compartments Each knife spoon or fork can be placed separately into the spoon stand to prevent chipping and discoloration DO NOT let any item extend through the b...

Page 25: ...gent should not be used as the foam can interfere with the proper operation The detergent used is a special dishwasher detergent and like all household chemicals should be treated as toxic and kept ou...

Page 26: ...illing the dispenser 3 Adjust the amount of rinse aid released during the rinse operation You can adjust the amount over six levels 1 6 The greater the number the larger the amount of rinse aid releas...

Page 27: ...ewash 40 C Prewash Room temp Wash 40 C Main Rinse 70 C Prewash Room temp Wash 65 C Wash 45 C Wash 70 C Wash 40 C 1st Rinse Dry End 1st Rinse 1st Rinse 1st Rinse 1st Rinse Main Rinse 50 C End 2nd Rinse...

Page 28: ...with a wet dishcloth We recommend running the dishwasher periodically using a Quick or Rinse Dry program with the Sterilization option with an empty load after inserting dishwasher detergent This wil...

Page 29: ...ing water 5 Insert the filters into the tub and turn the filter cap clockwise to fix it Storing your dishwasher If you need to store your dishwasher for an extended period of time first drain and disc...

Page 30: ...he dishwasher Has water remaining after the program has finished The drain hose is folded or clogged Straighten the hose Has food particles remaining on dishes An inappropriate program has been select...

Page 31: ...ing at an early stage This is a normal operation The dishwasher is not level Ensure that the dishwasher is level There is a chopping sound because a nozzle is bumping against the dishes Rearrange the...

Page 32: ...too low Water drainng error Check the drain hose and the draining route Hot water supply Check the temperature of the water supply Function Error Except F2 Before requesting service unplug the power s...

Page 33: ...nd images 06 appendix Top basket Upper spray arm Top spray arm Invisible Lower spray arm Cutlery basket Salt container Bottom basket Filter Detergent rinse aid dispensers Vapor vent cover Latch Top Sh...

Page 34: ...ications Model DMS300TR DMS301TR DMS400TR DMS500TR D146 Type Dishwasher Wash capacity 12 place setting Power AC 220 230 V 50 Hz Wash temperature Eco 45 C Wash type Rotating nozzle spray Rinse temperat...

Page 35: ...ed of separately from your household waste Please dispose of this equipment at your local community waste collection recycling centre In the European Union there are separate collection systems for us...

Page 36: ...10 Min www samsung com NORWAY 815 56 480 www samsung com POLAND 0 801 1SAMSUNG 172678 022 607 93 33 www samsung com PORTUGAL 80820 SAMSUNG 726 7864 www samsung com SLOVAKIA 0800 SAMSUNG 726 7864 www s...

Reviews: