
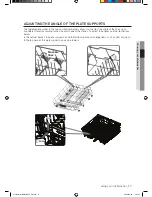


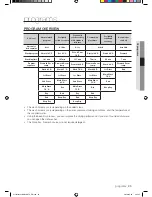

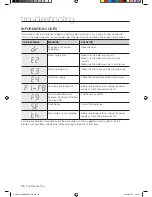
22_
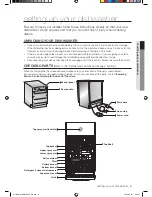
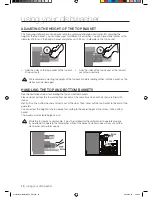
using your dishwasher
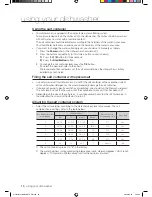
filling the rinse aid dispenser
Your dishwasher has been designed to use liquid rinse aid.
The use of a rinse aid greatly improves the drying performance during the drying cycle.
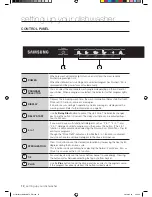
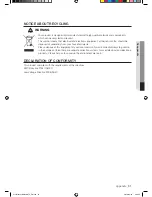
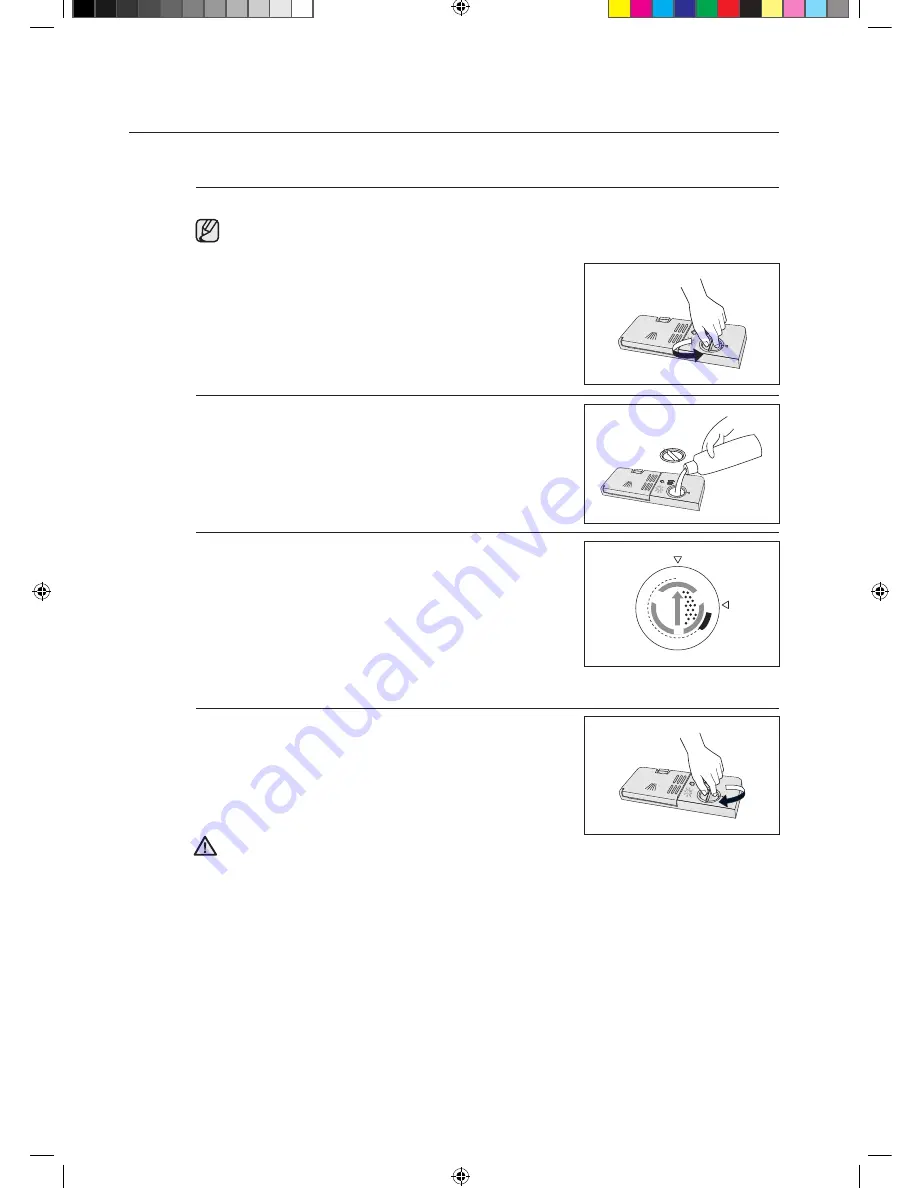
1.
Push and turn the dispenser knob counterclockwise to
open the cover.
2.
Pour rinse aid into the opening until the indicator points to
“max”. Avoid overfilling the dispenser.
3.
Adjust the amount of rinse aid released during the rinse
operation.
You can adjust the amount over six levels (1~6). The
greater the number, the larger the amount of rinse aid
released. The factory default is 6.
When the rinse dispenser is filled, it is good for about 40
washes.
If you feel uncomfortable adjusting the leveler, using a
couple of coins will make your adjustments easier.
4.
Close the cover.
Turn the dispenser knob clockwise.
We strongly recommended using only liquid rinse aid.
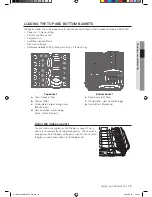
using your dishwasher
6
ma
x
5 4
3
2
1
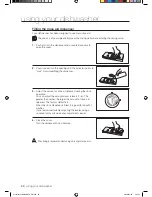
CAUTION
UserManual-DMS400TU_EN.indd 22
2010-05-10 4:44:41


