background image

12

13

Chapter 1 

Getting Started

Safety Precautions

Installation Related

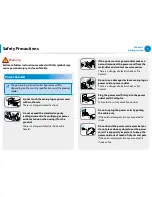
Do not block the ports (holes), vents, etc. of the product and 

do not insert objects.

Damage to a component within the computer may cause electric 

shock or fire.

When using the computer with it lying on its side, place it so 

that the vents face upwards.

Failure to do so, may cause the internal temperature of the 

computer to rise and the computer to malfunction or halt.

Do not place a heavy object over the product.

This may cause a problem with the computer. In addition, the 

object may fall and cause injury, or damage the computer.

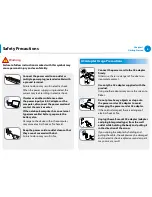
Battery Usage Related

Dispose of worn-out batteries properly.

There is a danger of fire or explosion.


The battery disposal method may differ depending on 


your country and region. Dispose of the used battery in an 

appropriate way.

Do not throw or disassemble the battery and do not put it 

into water.

This may cause an injury, fire or explosion.

Use only a battery authorized by Samsung Electronics.

Failure to do so may cause an explosion.

Avoid contact with metal objects such as car keys or clips 

when keeping or carrying a battery.

Contact with a metal may cause excessive current and a high 

temperature and may damage the battery or cause a fire.

Charge the battery according to the instructions in the manual.

Failure to do so, may cause an explosion or fire from damage to 

the product.

Do not heat the product(or battery) or expose it to heat (e.g. 

inside a vehicle during the summer).

There is a danger of explosion or fire.


Caution

Failure to follow instructions marked with this symbol may 

cause slight injury or damage to the product.

Summary of Contents for DP300A2A-A01US

Page 1: ...User Guide ...

Page 2: ...ing the Volume 56 LCD Brightness Control 57 Wired Network 60 Wireless Network Optional 62 Using the TV Optional 68 Using the Remote Control Optional 70 Using the Multimedia App Optional 74 Samsung Software Update 75 Diagnosing the Computer Status and Troubleshooting 76 Using the Security Slot Chapter 4 Settings and Upgrade 78 BIOS Setup 81 Setting a Boot Password 84 Changing the Boot Priority Chap...

Page 3: ...Before You Start 3 Safety Precautions 6 Proper Posture During Computer Use 18 Overview 21 Turning the Computer On and Off 27 Chapter 1 Getting Started ...

Page 4: ...epresentative model of each series and may differ from the actual appearance of the product This guide decribes procedures for using both the mouse and the touchpad This manual has been written for the Windows 8 operating system The descriptions and figures may differ depending on the installed operating system The User guide supplied with this computer may vary depending on your model Using the s...

Page 5: ...al may be reproduced or transmitted in any form or by any means electronic or mechanical without the consent of Samsung Electronics Co Ltd The information in this document is subject to change without notice due to improving the performance of the product Samsung Electronics shall not be liable for any data loss Please take care to avoid losing any important data and backup your data to prevent an...

Page 6: ...city due to the difference in capacity calculation E g For a 80GB HDD Windows represents the capacity as 74 5GB 80x1 000x1 000x1 000 byte 1 024x1 024x1 024 byte 74 505GB In addition the capacity representation in Windows may be even smaller because some programs such as Recovery may reside in a hidden area of the HDD About Memory Capacity Representation The memory capacity reported in Windows is l...

Page 7: ...g time This increases the risk that a malfunction or damage to the product will occur Be careful that people are not exposed to the computer s ventilator adapter etc as they generate heat over a long period of time when your PC is powered on Exposing a part of your body close to the heat from the vent or AC adapter for long periods of time may cause a burn Avoid blocking the vent at the bottom or ...

Page 8: ... bend the power cord excessively or do not place a heavy object over the power cord It is especially important to keep the power cord out of reach of infants and pets If the cord is damaged it may cause electric shock or fire Power Related The power plug and wall outlet figures may differ depending on the country specifications and the product model Do not touch the main plug or power cord with we...

Page 9: ...in fire AC Adapter Usage Precautions Connect the power cord to the AC adapter firmly Otherwise there is a danger of fire due to an incomplete contact Use only the AC adapter supplied with the product Using another adapter may cause the screen to flicker Do not place heavy objects or step onto the power cord or AC adapter to avoid damaging the power cord or AC adapter If the cord is damaged there i...

Page 10: ... Precautions Do not use the computer in a badly ventilated location such as on bedding on a pillow or cushion etc and do not use it in a location such as room with floor heating as it may cause the computer to overheat Take care that the computer vents on the side or the bottom are not blocked especially in these environments If the vents are blocked the computer may overheat and it may cause a co...

Page 11: ... computer may cause electric shock or fire hazard Never heat the product or battery or put the product or battery into a fire Do not put or use the product or battery in a hot location such as a sauna inside a vehicle exposed to the heat and so on There is a danger of an explosion or fire Take care not to allow metal objects such as a key or clip to touch the battery terminal metal parts If a meta...

Page 12: ...lectric shock When removing the RTC Real Time Clock battery keep it out of the reach of children as they could touch and or swallow it There is a danger of choking If a child has swallowed it contact a doctor immediately Avoid direct sunlight when the computer is in an air tight location such as inside a vehicle There is a danger of a fire hazard The computer may overheat and also present opportun...

Page 13: ...r items such as the adapter mouse books etc take care not to press anything against the notebook computer If a heavy object is pressed against the notebook computer a white spot or stain may appear on the LCD Therefore take care not to apply any pressure to the notebook In this case place the notebook computer in a separate compartment away from the other objects Before upgrading the computer be s...

Page 14: ...osal method may differ depending on your country and region Dispose of the used battery in an appropriate way Do not throw or disassemble the battery and do not put it into water This may cause an injury fire or explosion Use only a battery authorized by Samsung Electronics Failure to do so may cause an explosion Avoid contact with metal objects such as car keys or clips when keeping or carrying a...

Page 15: ...he computer temperature increases there is a danger of burning yourself Connect only permitted devices to the connectors or ports of the computer Failure to do so may cause electric shock and fire Close the LCD panel only after checking if the notebook computer is turned off The temperature may rise and cause overheating and deformation of the product Do not press the Eject Button while the CD ROM...

Page 16: ...perclip should not be used while the disk is in motion Make sure to use the emergency disk eject method only when the Optical Disk Drive has stopped There is a danger of injury Do not place your face close to the Optical Disk Drive tray when it is operating There is a danger of injury due to an abrupt ejection Check CDs for cracks and damage prior to use It may damage the disc and cause problems w...

Page 17: ...d or repaired by the user the warranty is expired a service fee will be charged and there is a danger of an accident Be sure to use an authorized Samsung Electronics service center Security and Movement Related When moving the product turn the power off and separate all connected cables first The product might be damaged or users may trip over the cables For long periods of not using the notebook ...

Page 18: ...elf The data may be lost when an external impact is applied to the disk while disassembling or assembling the computer The data may be lost when the computer is turned off or reset by a power failure while the hard disk drive is operating The data may be lost and irrecoverable due to a computer virus infection The data may be lost if the power is turned off while running a program Sudden impact or...

Page 19: ...er Posture Adjust the heights of desks and chairs appropriate to your height The heights are to be adjusted so that your arm forms a right angle when you place your hand over the keyboard while sitting down on a chair Adjust the height of chair so that your heel is comfortably placed on the floor Do not use the computer while you are lying down but only while you are sitting down Do not use the co...

Page 20: ...before using the computer When entering contents printed on a paper into the computer use a static paper holder so that the height of the paper is almost equal to that of the monitor Hand Position Keep your arm at a right angle as shown by the figure Keep the line from your elbow to your hand straight Do not place your palm over the keyboard while typing Do not hold the mouse with excessive force ...

Page 21: ...n Please check the equalizer default setting before first usage To prevent possible hearing damage do not listen at high volume levels for long periods Use Time Break Time Take a break for 10 minutes or more after a 50 minute period when working for more than one hour Illumination Do not use the computer in dark locations The illumination level for computer use must be as bright so for reading a b...

Page 22: ...e still pictures and record video You can take a picture or make a movie using the Charms Start Camera 3 LCD The screen images are displayed here 4 Speaker A device used to generate sound 5 Power Button Turns the computer on and off 6 Touch buttons for corresponding models only You can use the functions by lightly touching the sensor buttons with your fingers 7 Remote Control Sensor Optional If a ...

Page 23: ...gicBright You can choose the optimal screen settings for a movie or game The Custom Standard Screen Game Movie and Video Contrast Setting screen modes are supported MagicAngle You can choose the optimal screen settings for your viewing angle If you configure this setting when you watch the screen from above below or the side of the screen you can view the screen as if you were directly in front Ma...

Page 24: ...h buttons when the computer is turned on Touch the touch buttons with clean dry hands In a humid environment use the buttons after first removing moisture from your fingers or the touch buttons Since the touch buttons will work even if you do not press them hard do not press them excessively Since a serious impact may damage the sensor in the touch button take care when using the buttons Do not pr...

Page 25: ...24 Chapter 1 Getting Started Overview Right View 1 1 CD Drive ODD Optional Plays CD or DVD titles A CD Drive is optional The installed drive may di er depending on the model specifications ...

Page 26: ... microphone 4 Headphone Jack A jack used to connect the headphones What is a chargeable USB port USB device accessing and charging functions are supported The USB charging function is supported regardless of whether the power is turned on or off Charging a device through a chargeable USB port may take longer than general charging Using the Chargeable USB function when the computer is running on ba...

Page 27: ...m the device 3 USB Port You can connect USB devices to the USB port such as a keyboard mouse digital camera etc 4 Security Slot You can secure the computer by connecting a lock and cable to the Security Slot 5 TV Antenna Input Port Optional You can watch TV by connecting the antenna cable Only for models with a TV tuner card The shape of the port may differ depending on the country 6 Keyboard Port...

Page 28: ...on About Windows Activation When you turn the computer on for the first time the Windows activation screen appears Follow the activation procedures according to the instructions on the screen to use the computer If the screen is not displayed when you turn the computer on for corresponding models only Press the touch button to turn the LCD on If HDMI message is displayed on the screen press the to...

Page 29: ...to the procedures for the purchased operating system Save all your data before clicking on Shut down 1 The Charms menu appears when you place your mouse pointer at the edge of the top or bottom right of the screen 2 Click Settings áᔪ Ŗᮁ ᰆ ᖅᱶ Power Shut down If you want to power off your computer when you are logged out unlock the screen and click Power Shut down Turning the Computer On and Off ...

Page 30: ...Chapter 2 Using Windows 8 What is Microsoft Windows 8 30 Screen At a Glance 31 Using the Charms 33 Using Apps 35 Windows Hot Key Function 38 ...

Page 31: ...the version It may also be modified without prior notice Displaying Help Press the F1 Key on the keyboard to display the Help Alternatively place your mouse cursor over the end of the top or bottom right area on the screen to display the Charms menu Click Charms menu Settings Help If you are connected to the internet you can access the most recent online Help Searching for Help Get Started You can...

Page 32: ...2 1 1 Start Screen Refers to the default Start screen of Windows 8 2 App Refers to the apps that are currently installed 3 Displaying the Charms The Charms is hidden at the right of the screen Place your mouse pointer at the edge of the top or bottom right of the screen to display the Charms 4 User Account This refers to the currently used user account 5 Charms This refers to the menu that allows ...

Page 33: ...he screen Place your mouse pointer at the edge of the top or bottom right of the screen to display the Charms 3 Charms This refers to the menu that allows you to use functions such as Search Share Start Device and Settings 4 Switching to the Start Screen Click the corner of the bottom left of the screen to switch to the Start screen Displaying Documents and Files Click Windows Explorer in the task...

Page 34: ...rch within an App or on the Web Search Share Start Device Settings You can use this menu to transfer a picture or file to another user You can easily share pictures or files with other users simply by associating multiple Apps with the Share charm Search Share Start Device Settings You can move to the Start screen Search Share Start Device Settings As this allows you to move directly to a desired ...

Page 35: ...ireless Network You can connect to a wireless network Select a wireless network to connect to Adjusting the Volume You can adjust the volume or mute the sound Notice You can set the interval at which an App sends notices Power You can turn off your computer or select the Power Options ENG Language You can set the Language Change PC settings You can change more settings ...

Page 36: ...our mouse pointer changes to a hand shape 2 Click and hold your mouse button and then drag it to the bottom of the screen The App moves downward and disappears and exits 1 2 Using Apps Displaying Currently Running App s 1 Move your mouse pointer to the top left corner of the screen to display the last run App 2 Then move your mouse pointer down to display a list of the currently running Apps in or...

Page 37: ...ge the screen split ratio Supported screen split ratios are 3 7 or 7 3 Ex If you run the Weather App and Store App at the same time Screen Split Bar Weather App Store App Adding Removing an App to from the Start Screen Click Start screen right click your mouse button Click All Apps at the bottom of the screen to display all the Apps that are currently installed 1 If you right click over the App to...

Page 38: ... installed from the Windows Store Contact customer support for the app directly Configuring your Microsoft Account A Microsoft Account allows you to synchronize your settings with other device s running Windows 8 online allowing you to share file s or settings You should register a Microsoft Account to download or purchase App s from the Store 1 Run the Charms and click Settings Change PC Settings...

Page 39: ...y D Switches to Desktop mode Running the Charms Windows Key C Activates the Charms Locking the Screen Windows Key L Locks the screen Opening the Ease of Access Center Windows Key U Opens the Ease of Access Center configuration Opening the Second Screen Settings Windows Key P Opens the External Monitor Settings menu Opening the Advanced Management Tool Windows Key X Opens the Advanced Management To...

Page 40: ...ct as a monitor Optional 54 Adjusting the Volume 55 LCD Brightness Control 56 Wired Network 57 Wireless Network Optional 60 Using the TV Optional 62 Using the Remote Control Optional 68 Using the Multimedia App Optional 70 Samsung Software Update 74 Diagnosing the Computer Status and Troubleshooting 75 Using the Security Slot 76 Chapter 3 Using the computer ...

Page 41: ...Num Lock lamp is turned on and the numeric keys are enabled Utility keys Move the cursor to the previous or next page or to the beginning or end of a line to enable deleting inserting and modifying the letters Lamps Indicates that the Num Lock Caps Lock or Scroll Lock keys are set or not Function keys Execute various program functions The roles of the buttons differ depending on the application th...

Page 42: ...s the left mouse button once If you click this mouse button once the corresponding program is selected Double click function Quickly press the left mouse button twice The corresponding program is launched Right click function If you click this mouse button once the context sensitive menu of the current program appears Drag function Dragging refers to clicking an item and moving the item to another...

Page 43: ...hen not using the mouse you can save battery power Battery Cover CONNECT button wireless signal receiver 2 Insert the wireless signal receiver into the USB port at the back or side of the computer 3 Slide the power switch at the bottom of the mouse to the ON position Example Wireless mouse 4 You can use the wireless keyboard and the mouse without additional settings You can use the wireless keyboa...

Page 44: ...e z battery cover at the bottom of the keyboard from to the position and separate the x battery cover z z x 2 Insert the batteries and then close the battery cover z x c Be sure to confirm that the polarities of the batteries are correct Do not recharge the batteries AAA type supplied with the product ...

Page 45: ... cursor up down left or right Battery replacement LED This indicates when it is time to replace the battery If the LED blinks replace the batteries Caps Lock Indicator If the indicator is turned on letters are capitalized Windows Key In Windows 8 the Start screen appears Battery cover CONNECT button ...

Page 46: ... Runs the Share function in the Windows 8 menu áᔪ Ŗᮁ ᰆ ᖅᱶ Device Launches the Device function in the Windows 8 menu áᔪ Ŗᮁ ᰆ ᖅᱶ Settings Launches the Settings in the Windows 8 menu The wireless keyboard automatically enters power saving mode if there is no key input for a pre determined period of time Press any key to resume using the keyboard in power saving mode However a function to turn the key...

Page 47: ...he corresponding program is selected Double click function Quickly press the left mouse button twice The corresponding program is launched Right click function If you click this mouse button once the context sensitive menu of the current program appears Drag function Dragging refers to clicking an item and moving the item to another position while holding the mouse button down Click the left mouse...

Page 48: ...icator at the top right blinks If the indicator blinks you need to replace the battery Check the status of the wireless signal receiver 1 Disconnect the wireless receiver from the main body and then reconnect it 2 Within 30 seconds of reconnecting the receiver press and hold the CONNECT button for 1 seconds near the receiver CONNECT button 3 Check if the device works properly ...

Page 49: ...tteries Check the status of the wireless signal receiver 1 Set the power switch at the bottom of the mouse to the OFF position CONNECT button Power switch 2 Disconnect and then reconnect the wireless signal receiver to the main body 3 Set the power switch at the bottom of the mouse to the ON position 4 Within 30 seconds of reconnecting the receiver press and hold the CONNECT button for 1 seconds n...

Page 50: ...inside to outside Do not hold a CD by touching the bottom of the CD Hold a CD by touching the center and the outer rim of the CD A CD contaminated by a foreign substance may result in the CD not being recognized properly Using a CD that is not in the shape of a circle is not recommended A CD drive s reading and writing speed may differ depending on the condition and type of the media Inserting and...

Page 51: ...he center of the drive with the appropriate pressure If you insert a disc and apply excessive force to one side of the tray it may result in a problem If you eject the disk before the disk is completely recognized ejecting the disk may take longer 2 To eject a disc click Windows Explorer Computer and right click over the CD drive and select Eject Alternatively press the Eject button of the CD driv...

Page 52: ... from the picture in this manual Before using the slot remove the dummy card from inside the slot Only for models providing dummy cards Insert the memory card into the multi card slot in the direction printed on the slot For memory cards marked with you must insert them into a specified adapter and then insert the adapter into the multi card slot Inserting such memory cards directly into the multi...

Page 53: ...cro Secure Digital High Capacity SDXC Secure Digital eXtended Capacity micro SDXC micro Secure Digital eXtended Capacity 2 The following message appears on the top right Click to open the folder and click View Files If a message appears to notify you of any problem click the corresponding window Continue without Scanning You can perform the following process described in No 3 3 Windows Explorer ru...

Page 54: ...ting To share a memory card with a digital device such as digital camera it is recommended to format the memory card in the digital device before use If you format a memory card on the computer and then insert the memory into the digital device you may need to format the memory card again in the digital device If there is a write protection device in the memory card and the device is set to the lo...

Page 55: ...utput only As long as the power cord is connected you can use the LCD of the product as a monitor even when the product is off Even if the product is switched to monitor mode by pressing the button during an operation the operating system is not terminated Press the button again to return to PC mode If the product is switched to monitor mode the audio is also switched accordingly If no picture is ...

Page 56: ...e function enables you to experience more stereophonic sound using stereo speakers SoundAlive is only supported in Windows 8 The software programs provider may vary depending on your computer model In addition some pictures may differ from actual product depending on the computer model and software version 1 Right click over the Volume in the taskbar on the Desktop and click Play Device Alternativ...

Page 57: ... and confidence specifications for LCD manufacturing the company must inevitably allow a few defective cells in panels due to a technological limitation of the manufacturing process Therefore Samsung observes and manages the following dot principles Bright dot 2 or less Black dot 4 or less Combination of Bright and Dark 4 or less Instructions for Cleaning the LCD Clean the LCD panel with a soft cl...

Page 58: ... systems are similar use the computer referring to these descriptions The figures used for the description are of a representative model Therefore the figures may differ from the real ones Connecting to the Wired LAN 1 Connect the LAN cable to the wired LAN port 2 Click Charms menu on the Desktop Settings áᔪ Ŗᮁ ᰆ ᖅᱶ Control Panel Network and Internet Network and Sharing Center and click on Change ...

Page 59: ...stall in the screen shown in the figure above You can add clients services and protocols 5 Configure the IP settings When using DHCP select Obtain an IP address automatically To use a static IP address select Use the following IP address and set the IP address manually When not using DHCP ask your network administrator for the IP address 6 When you have completed the settings click the OK button T...

Page 60: ...eceived signal use the system after disabling the Wake On LAN function The LAN LED may not be turned off if System is shoutdown without disabling the WOL Wake on LAN option Connecting a wired LAN while using a wireless LAN may not activate the Wake On LAN function Set the Wireless LAN to Disable to use the Wake On LAN function Wake On LAN feature may not work while using Hybrid power saving featur...

Page 61: ...ions may not be provided or different functions may be provided The descriptions below are for computer models with a Wireless LAN card or device A Wireless LAN device is optional The pictures in this manual may differ from the actual product depending on your wireless LAN device model What is an Access Point AP An AP is a network device that bridges wired and wireless LANs and corresponds to a wi...

Page 62: ... menu Settings áᔪ Ŗᮁ ᰆ ᖅᱶ Network Connections icon a list of available APs appears If you select an AP to connect to the Connect button appears AP List 2 Click Connect If a network key is set for the AP enter the network key and then click OK For the network key please ask your network administrator 3 When the AP connection is completed Connected is displayed next to the corresponding AP You can n...

Page 63: ...ust connect the TV tuner card Optional to the TV antenna Connect the antenna cable to the TV antenna input port Configuring the TV The screenshots and terms used in the user manual may differ from the actual ones 1 Click Start Screen TV programs TV ArcSoft 2 The configuration screen appears Since the following procedures are displayed sequentially configure your TV using the following onscreen ins...

Page 64: ...the Channel menu to reset the channels Note on Configuration The setup procedures may differ depending on the current type of your TV service You should set the product to the region and postal code where your computer is currently installed If the TV signal provider setup screen appears select the correct provider If the configured provider is not correct not all of the channels will be received ...

Page 65: ... program Recorded TV You can watch a recorded TV program EPG Electronic Program Guide An electronic TV program guide which allows you to watch digital TV broadcasts However it may differ depending on the corresponding station and the reception Also some functions may not be provided Schedule You can reserve a TV recording and watch a recorded TV program Settings You can set the TV channels parent ...

Page 66: ... the menu The TV broadcast is displayed immediately Switch to the channel you want Move your mouse to display the control bar as follows Then select a function Select Digital TV or Analog TV Capture a Static Picture Channel Controls Display Favorites Favorites Pause Play Record Using the TV Optional ...

Page 67: ...rding begins 2 To stop recording or to configure the recording as a series recording click the Record button again Creating a recording schedule 1 Click Home Settings Schedule Add 2 Set your program and the reservation time Even when the computer is in power saving sleep mode if the recording reservation time is reached the TV automatically wakes up from power saving mode and performs the reserved...

Page 68: ...am Click Home Recorded TV The recorded programs are displayed Select a program to watch You can list the recorded programs by program channel or date Recorded files are saved in the Computer Local Disk C User User Folder My Video folder Using the TV Optional ...

Page 69: ...The appearance of the remote control may differ from the actual one Some functions may not be provided depending on the system Use your remote control by pointing it toward the remote control receiver Installing the batteries Open the cover at the bottom of the remote control and insert the batteries according to the correct polarities Using the Remote Control Optional ...

Page 70: ...ows Switch Application Windows Hot Key Share Play Pause Back Stop Volume Controls Launches Internet Explorer Channel Controls Mute Close Device ODD Eject Tab key Record Hulu Plus Windows Key Select Settings Search Play Controls Go Some buttons on the remote control may not work depending on the installed program ...

Page 71: ... be viewed with the S Camera app S Player You can view the photo video and music files saved on the computer Depending on the version of the program some functions may not be provided or different functions may be provided Third party software related services For descriptions about and service requests for third party software please contact the relevant manufacturer Some troubleshooting actions ...

Page 72: ...ra mode bar to the Video position 3 Tap on Take a picture Record a video to take a picture or record a video 4 You can view the picture or video using the Picture preview or S Gallery app The S Camera app is not available in Desktop mode Precautions while taking a picture or video Do not take a picture or video of others without their consent Do not take a picture or video in locations where this ...

Page 73: ...an view the pictures and videos taken by the S Camera In addition you can apply special effects to the pictures using the photo editing function You can take a picture in the S Gallery app by tapping the Camera icon Editing a photo 1 Select Picture preview Drag it upward slightly from the bottom center If the options menu appears select Edit ...

Page 74: ...ect Draw Close Undo Line preview Line thickness Save Color Erase Draw Frame Draw Stamp Using the S Player app 1 Tap Charm menu Start áᔪ Ŗᮁ ᰆ ᖅᱶ S Player My Photos My Music My Videos My photo list Music playlist Slideshow 2 Select a menu to enjoy photo video and music files Some files may not be played depending on their format ...

Page 75: ... connected to the internet SW Update does not provide any updates for device drivers or software programs installed separately by the user 1 From the Start Screen right click any area and select All apps in the bottom right corner Then click SW Update 2 If the program is running for the first time the User Agreement for personal information use appears Click Agree 3 The SW Update program runs Sele...

Page 76: ...ding on the model 1 From the Start Screen right click any area and select All apps in the bottom right corner Then click Support Center 2 Support Center is activated and starts diagnosing your computer After the diagnosing process is finished the System Status menu displays a list of the current problems to be solved as shown FAQ for computer s major problems Diagnosing Computer and Troubleshootin...

Page 77: ...er by connecting a lock and cable to the Security Slot To use this feature you have to purchase the lock and cable additionally To use the lock and cable refer to the product manual Tie the lock and cable to a fixed object and install the other end of the cable to the security slot ...

Page 78: ...BIOS Setup 78 Setting a Boot Password 81 Changing the Boot Priority 84 Chapter 4 Settings and Upgrade ...

Page 79: ...ay cause your system to malfunction or crash take care when configuring the BIOS The functions of the BIOS setup are subject to change for product function enhancement purposes The BIOS Setup menus and items may differ depending on your computer model Entering the BIOS Setup 1 Turn the computer on Immediately press the F2 key several times 2 After a moment the BIOS setup screen appears The items i...

Page 80: ...W WKH FXUUHQW GHIDXOW ODQJXDJH XVHG E 26 HOS 3UHY 9DOXHV 6HWXS HIDXOWV 6DYH LW KDQJH 9DOXHV 6HOHFW WHP 6HOHFW 0HQX QWHU 6HOHFW 6XE 0HQX 6 LW Setup Menu Description Main This is a description about the basic specifications of the computer Advanced Using this menu you can configure the major chipsets and additional functions Security Used to configure security functions including passwords Boot This...

Page 81: ...wn F5 F6 Press to change the item value F9 Press to load the default Setup settings ESC Press to return to a higher level menu or to move to the Exit menu Left Right Keys Press to move to another menu Enter Press to select an item or to enter a sub menu F10 Press to save the changes and exit Setup The keyboard image may differ from the actual keyboard BIOS Setup ...

Page 82: ...Password you need to enter the password when you turn the computer on or enter the BIOS Setup Setting only the Supervisor Password and User Password is not very secure You can use an HDD Password as well to increase the security level 1 Select the Security menu in the BIOS Setup 2 In the Set Supervisor Password item press Enter 6XSHUYLVRU 3DVVZRUG FRQWUROV DFFHVV WR WKH VHWXS XWLOLW HOS 3UHY 9DOXH...

Page 83: ...Enabled Once a boot password is set you have to enter a password to boot up the computer Be sure to remember the password for later use Setting up a Hard Disk Drive Password Optional If you set a password for a hard disk drive it cannot be accessed from another computer Press Enter in the Set HDD Password item and define a password as described in Step 3 of the Setting up the Supervisor Password T...

Page 84: ... To deactivate the hard disk drive password completely you must restart the system 2 In the Enter Current Password item enter the currently configured password and press Enter 3 Leave the Enter New Password item field empty and press Enter 4 Leave the Confirm New Password field empty and press Enter The password is deactivated For some models the password is only canceled if the Enter key is press...

Page 85: ...es Fast Boot Booting By LAN Secure Boot Set Boot Order Disabled Disabled Enabled ሪ 3 Press Enter on the Boot Option 1 item Select the drive to boot from BIOS Setup Boot Boot Option 1 Windows Boot Manager Boot Option 2 XXXX XXXX XXXX Keys used to view on configure devices and arrows select device F6 F5 move the device up or down Boot Option 1 Windows Boot Manager XXXX XXXX XXX Disabled 4 Press the ...

Page 86: ...Chapter 5 Troubleshooting Recovering Backing up the Computer Optional 86 Reinstalling Windows Optional 93 Q A 96 ...

Page 87: ...ack Up Function Description Recover Restores the entire Windows drive Back Up You can back up your entire Windows drive Recovery may not be provided or may be a different version depending on the model For models whose hard disk or SSD capacity is less than 64 GB the Recovery program is not provided The instructions are provided based on Recovery 1 0 version Some functions may differ slightly or b...

Page 88: ...l apps in the bottom right corner Then click Recovery 2 If the program is running for the first time you need to agree to the User Agreement 3 If the initial menu screen appears click Recover Select a recovery point and click Recover If you set the User Data Maintenance to ON the computer is restored while maintaining the current user data 4 Recover is performed based on the screen instructions If...

Page 89: ...ing up 1 To back up your computer to an external storage device connect the external storage device and select the relevant drive 2 Click Backup in the Recovery Home screen Select the drive to save and click Backup You cannot select a DVD drive Select the drive to save to 3 The backup process is performed based on the instructions Recovering Backing up the Computer Optional ...

Page 90: ...mage is saved to an external storage device connect the device 2 Start Recovery and click Recover 3 Select a Recover Option and click Recover Select a point to recover 4 The recover is performed based on the screen instructions You can use your computer after the recover is completed Recovering Backing up the Computer Optional ...

Page 91: ...nnect the hard disk and your computer 2 Start Recovery and click Disk copy 3 Select an option in Disk recovery Point and click Disk copy 4 The data on the current hard disk is saved to the new hard disk 5 If the data is completely saved open the hard disk cover at the bottom of your computer and replace the existing hard disk with the new one If you cannot open the cover at the bottom of the compu...

Page 92: ...llowing the instructions to completely save the default factory status disk image to the external storage device Now disconnect the saved external storage device and store it separately 4 If your computer needs to be restored to the default factory settings connect the external storage device with the saved image 5 Start Recovery and click Recover Select Factory Default Point and click Recover The...

Page 93: ...ur PC does not work properly you can restore your PC while keeping your media files such as your photo video and music files etc as well as your personal documents Remove You can remove all items in your PC and reinstall Windows again You should back up the files in the following folders before using the PC Recovery function since these files are not kept Windows Program files Program files x86 Pr...

Page 94: ...e data files and programs saved on the hard disk drive Make sure to backup all important data Samsung Electronics shall not be held liable for any loss of data Reinstalling in Windows 1 Insert the SYSTEM RECOVERY MEDIA into the DVD drive 2 If the Select Windows Installation window appears click Install Now When the Select Update window appears click on the relevant item If you select Go online to ...

Page 95: ...vers and programs some programs may not work properly after the upgrade 5 When a window appears asking for the location to install the operating system to select a disk drive partition and click the Next button Drive D includes an area to save the backup image used by Samsung Recovery Solution Installing Windows to drive C is recommended When previous Windows installation files are in the selected...

Page 96: ... appears select I accept the license terms and then click Next For Windows 7 8 this screen may not appear depending on the version 6 When the window asking for the installation type appears click Custom For Windows 7 8 this screen may not appear depending on the version 7 When a window appears asking for the location to install the operating system to select the partition of the disk drive and the...

Page 97: ...ity The capacity representation in Windows may be smaller than the actual capacity because some programs occupy a certain area of the HDD outside of Windows For models with Recovery the HDD capacity representation in Windows may be smaller than the actual capacity because Recovery uses a hidden area of about 5 20GB of the HDD to save the recovery image and that hidden area is not counted towards t...

Page 98: ...the Start Screen Q4 Since I m familiar with Windows 7 I would like the Desktop screen to appear as it does in Windows 7 A Currently there is no way to set the Desktop to appear by default Press the Windows key D key simultaneously to reveal the Desktop when the Start screen appears This is currently the only workaround Q5 How can I install a printer driver A Run your driver installation file and f...

Page 99: ...orer on the Start screen complies with the HTML5 web standards it does not support Active X However Internet Explorer on the Desktop supports Active X How to activate Active X If you right click over the Internet Explorer the following window appears Press the button and click View on the Desktop Active X is now enabled Q9 I want to remove the pre installed Windows 8 operating system and install a...

Page 100: ...portant Safety Information 100 Replacement Parts and Accessories 102 Regulatory Compliance Statements 104 WEEE Symbol Information 117 Samsung Packaging Take Back Program 118 Product Specifications 119 Glossary 121 Index 125 ...

Page 101: ...ing to power your equipment is easily accessible in case of fire or short circuit If your computer has a voltage selector switch make sure that the switch is in the proper position for your area Openings in the computer case are provided for ventilation Do not block or cover these openings Make sure you provide adequate space at least 6 inches 15 cm around the system for ventilation when you set u...

Page 102: ... personnel if The power cord or plug is damaged Liquid has been spilled into the system The system does not operate properly when the operating instructions are followed The system was dropped or the casing is damaged The system performance changes The Instruction On Safety Operation of NotePC 1 When installing and operating devices please refer to safety requirements in the user guide 2 Devices c...

Page 103: ...RISK OF EXPLOSION IF BATTERY IS REPLACED BY AN INCORRECT TYPE DISPOSE OF USED BATTERIES ACCORDING TO THE INSTRUCTIONS Laser Safety All systems equipped with CD or DVD drives comply with the appropriate safety standards including IEC 60825 1 The laser devices in these components are classified as Class 1 Laser Products under a US Department of Health and Human Services DHHS Radiation Performance St...

Page 104: ...try where you use the computer For more information on power cord set requirements contact your authorized dealer reseller or service provider General Requirements The requirements listed below are applicable to all countries All power cord sets must be approved by an acceptable accredited agency responsible for evaluation in the country where the power cord set will be used The power cord set mus...

Page 105: ...ntact during normal operation Some circumstances require restrictions on wireless devices Examples of common restrictions are listed on the next page Radio frequency wireless communication can interfere with equipment on commercial aircraft Current aviation regulations require wireless devices to be turned off while traveling in an airplane 802 11ABGN also known as wireless Ethernet or Wifi and Bl...

Page 106: ...h that the antenna is very close or touching any exposed parts of the body especially the face or eyes while transmitting Do not operate the radio or attempt to transmit data unless the antenna is connected if not the radio may be damaged Use in specific environments The use of wireless devices in hazardous locations is limited by the constraints posed by the safety directors of such environments ...

Page 107: ...st accept any interference received including interference that may cause undesired operation This equipment has been tested and found to comply with the limits for a Class B digital device pursuant to Part 15 of the FCC Rules These limits are designed to provide reasonable protection against harmful interference in a residential installation This equipment generates uses and can radiate radio fre...

Page 108: ...to the system label to verify the presence of wireless devices Wireless devices that may be in your system are only qualified for use in the United States of America if an FCC ID number is on the system label This device is restricted to indoor use due to its operation in the 5 15 to 5 25 GHz frequency range FCC requires this product to be used indoors for the frequency range 5 15 to 5 25 GHz to r...

Page 109: ... are conducted using standard operating positions accepted by the FCC with the wireless transmitting at its highest certified power level in all tested frequency bands Although the SAR is determined at the highest certified power level the actual SAR level of the device while operating can be well below the maximum value This is because the device is designed to operate at multiple power levels so...

Page 110: ... reduce potential radio interference to other users the antenna type and its gain should be so chosen that the equivalent isotropically radiated power EIRP is not more than that required for successful communication To prevent radio interference to the licensed service this device is intended to be operated indoors and away from windows to provide maximum shielding Equipment or its transmit antenn...

Page 111: ...orization to use it Contact manufacturer for service Si l appareil est équipé d une bande 2 4 G ou 5 G Des dispositifs de basse puissance de type radio LAN périphériques de communication sans fil par radiofréquence RF fonctionnant sur une bande de 2 4GHz 5GHz sont peut être intégrés dans votre appareil Cette section est applicable uniquement si ces dispositifs sont présents Consultez l étiquette d...

Page 112: ...arés par l utilisateur Ne les modifiez en aucune façon La modification d un dispositif sans fil annulera votre autorisation à son utilisation Contactez le fabricant pour la réparation Brazil Este produto esta homologado pela ANATEL de acordo com os procedimentos regulamentados pela Resolucao 242 2000 e atende aos requisitos tecnicos aplicados Este equipamento opera em caráter secundário isto é não...

Page 113: ...ce use This section is only applicable if these devices are present Refer to the system label to verify the presence of wireless devices Wireless devices that may be in your system are only qualified for use in the European Union or associated areas if a CE mark with a Notified Body Registration Number and the Alert Symbol is on the system label The power output of the wireless device or devices t...

Page 114: ...osiciones aplicables o exigibles de la Directiva 1999 5 CE Ελληνική Greek ΜΕ ΤΗΝ ΠΑΡΟΥΣΑ Samsung ΔΗΛΩΝΕΙ ΟΤΙ Notebook PC ΣΥΜΜΟΡΦΩΝΕΤΑΙ ΠΡΟΣ ΤΙΣ ΟΥΣΙΩΔΕΙΣ ΑΠΑΙΤΗΣΕΙΣ ΚΑΙ ΤΙΣ ΛΟΙΠΕΣ ΣΧΕΤΙΚΕΣ ΔΙΑΤΑΞΕΙΣ ΤΗΣ ΟΔΗΓΙΑΣ 1999 5 ΕΚ Français French Par la présente Samsung déclare que l appareil Notebook PC est conforme aux exigences essentielles et aux autres dispositions pertinentes de la directive 1999 5 CE...

Page 115: ...požiadavky a všetky príslušné ustanovenia Smernice 1999 5 ES Suomi Finnish Samsung vakuuttaa täten että Notebook PC tyyppinen laite on direktiivin 1999 5 EY oleellisten vaatimusten ja sitä koskevien direktiivin muiden ehtojen mukainen Svenska Swedish Härmed intygar Samsung att denna Notebook PC står I överensstämmelse med de väsentliga egenskapskrav och övriga relevanta bestämmelser som framgår av...

Page 116: ...where you purchased your product European Economic Area Restrictions Local Restriction of 802 11b 802 11g Radio Usage Note to integrator The following statements on local restrictions must be published in all end user documentation provided with the system or product incorporating the wireless product Due to the fact that the frequencies used by 802 11b 802 11g wireless LAN devices may not yet be ...

Page 117: ...ent au dessus d un espace public aucun enregistrement n est nécessaire pour une distance de moins de 300m Pour une distance supérieure à 300m un enregistrement auprès de l IBPT est requise Pour une utilisation publique à l extérieur de bâtiments une licence de l IBPT est requise Pour les enregistrements et licences veuillez contacter l IBPT France The low band 5 15 5 35 GHz is for indoor use only ...

Page 118: ...ycling visit our website www samsung com in or contact our Helpline numbers 18002668282 180030008282 Pb Correct disposal of batteries in this product Applicable in countries with separate collection systems This marking on the battery manual or packaging indicates that the batteries in this product should not be disposed of with other household waste at the end of their working life Where marked t...

Page 119: ...ll the following number for the locations nearest you CRT Processing LLC 877 278 0799 Kathy Severson Logistics contact Dispose unwanted electronics through an approved recycler To find the nearest recycling location go to our website www samsung com recyclingdirect Or call 877 278 0799 Samsung Packaging Take Back Program ...

Page 120: ...g Input 100 240VAC 50 60Hz Output 19VDC 4 74A PC Rating 19VDC 4 74A 90W Optional components may not be provided or different components may be provided depending on the computer model The system specifications are subject to change without notice The Storage device capacity of a computer in which Recovery is installed is represented as smaller than the product specification For the replacement or ...

Page 121: ...rosoft Corporation The terms HDMI and HDMI High Definition Multimedia Interface and the HDMI Logo are trademarks or registered trademarks of HDMI Licensing LLC in the United States and other countries All other product or company names mentioned herein are registered trademarks of their respective companies ENERGY STAR Partner As an ENERGY STAR Partner SAMSUNG has determined that this product meet...

Page 122: ... used nowadays This computer uses DDR SDRAM Device Manager An administrative tool used to manage computer devices You can add or remove hardware or update a device driver using the Device Manager DHCP Dynamic Host Configuration Protocol This refers to automatically allocating IP addresses to the users on the network by the network administrators Direct X An application interface developed to enabl...

Page 123: ...refers to a small image that represents a file that users can use IEEE802 XX This is a set fo specifications developed by the 802 committee of IEEE for the LAN connection method called XX LAN Local Area Network A communications network connecting computers printers and other devices within a local area such as within a building A LAN enables all connected devices to interact with other devices on ...

Page 124: ...the hard disk drive can be used as if there are 2 hard disk drives Protocol A protocol is a set of rules used by computers to communicate with each other across a network A protocol is a convention or standard that controls or enables the connection communication and data transfer between computing endpoints It defines the data transmission procedures and the transmission medium for more efficient...

Page 125: ...ach byte is represented as a decimal number USB Universal Serial Bus This refers to a serial interface standard developed to replace the conventional interface standards such as Serial and PS 2 The data transmission specifications are one of the interface standards used to connect a computer to peripheral devices These specifications include USB 1 0 1 1 2 0 and 3 0 It is appropriate to support per...

Page 126: ...k 41 46 Drag 41 46 L LCD Brightness 56 M Multi Card Slot 51 O Overview 21 P Password 81 Product Specifications 119 R Recovery 86 S Safety Precautions 6 Scroll 41 46 Supervisor Password 81 Support Center 75 SW Update 74 T Touch button 22 U User Password 82 V Volume Control 55 W Wired Network 57 Wireless Network 60 ...

Reviews: