background image

DSR 9500A FT

A, CI, EM VIA, VIA CI

DSR 9500A FT

A, CI, EM VIA, VIA CI

GB

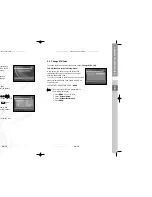
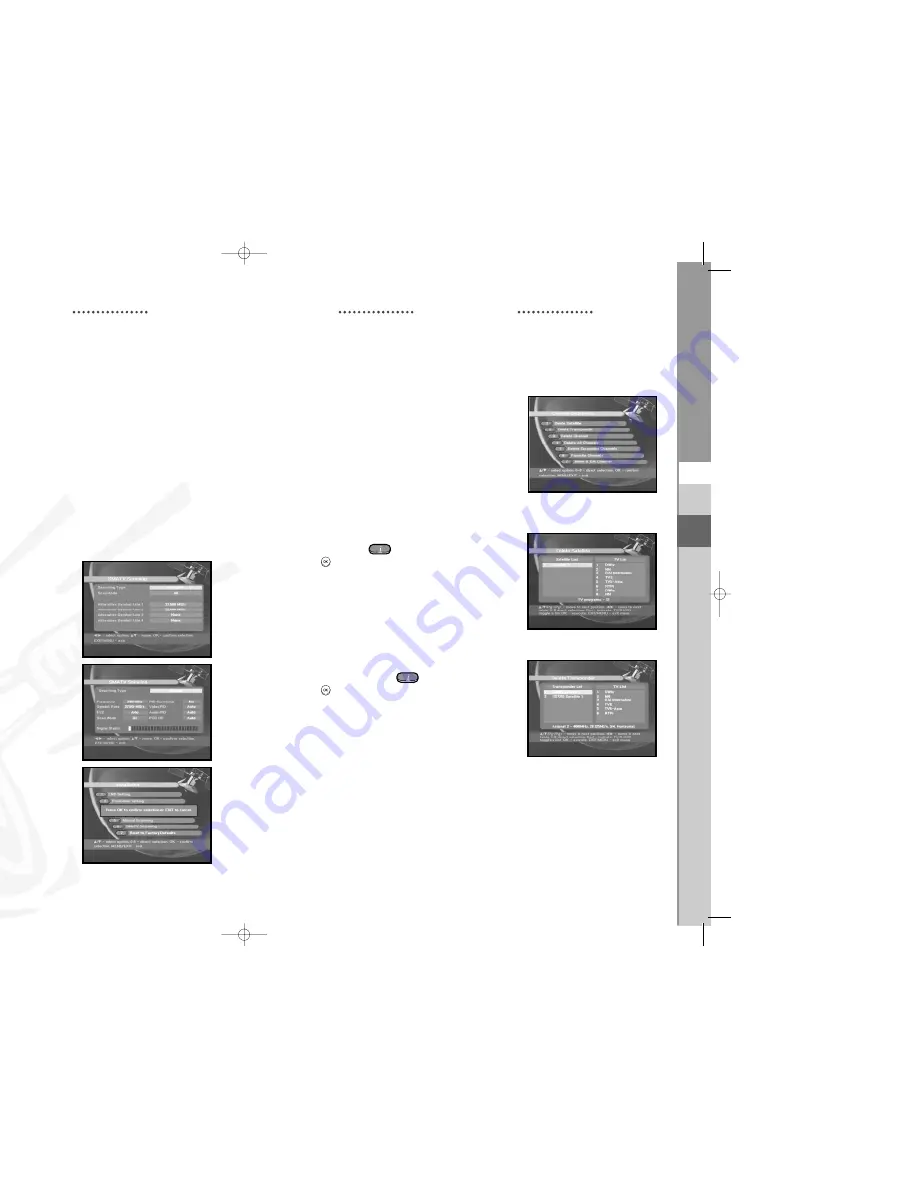
2. Channel Organising

The "

Channel Organising

" menu has seven 

functions:
The "

Channel Organising

" menu is used to delete 

the Satellites, Transponders and Channels or to make
Favorite channels or move channel as you want.

● 

Enter the 

PIN

code.

If you have not entered your own 

PIN

code 

PIN

code

0000

applies, which was set at the factory. 

2.1  Delete Satellite

● 

Select the desired satellite list you want to delete 
by pressing 

Red (

key.

● 

Press 

key for confirmation.

N

No

otte

e  

:

This feature doesn’t delete satellite itself 

but deletes the list of channels registered 
for satellite. 

2.2  Delete Transponder

● 

Select the desired transponder list you want to 
delete by pressing 

Red (

key.

● 

Press 

key for confirmation.

N

No

otte

e  

:

This feature doesn’t delete transponder itself            

but deletes the list of channels registered for 
transponder.

● 

Select the FEC(Forward Error Correction)of the transponder 
you want to find.
You can select the value of 1/2, 2/3, 3/4, 5/6, 7/8 or Auto.

● 

Select the polarization of the transponder you want to find. 

(Horizontal/Vertical/Circular Left/Circular Right)

In the case of horizontal, 18V and in the case of vertical, 
13V are output through LNB line. 

● 

Select Scan Mode “

All

” or “

Only Free

”.

● 

Select Network Search “

Yes

”.

You can find more transponders using the home network.

● 

Select PID searching “

Yes

”. You can manually search by entering individual     

PID(Packet Identifier)(Video/Audio/PCR) values.

● 

After select option, press 

key to start the scan process.
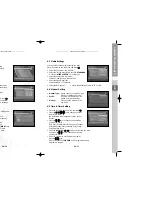
1.6 SMATV Scanning

In case that several generations use Antenna and LNB 
in common, search the service the from 950 to 2150MHz.

● 

Select Searching Type “

Automatic

” or  “

Manual

”.

● 

Select Scan Mode “

All

” or “

Only Free

”.

● 

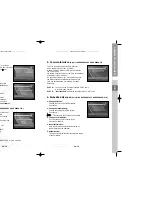
You can input alternative symbol rate from 1 to 4

N

No

otte

e  

:

1. When your searching type is set to Automatic 

during 

SMATV

scanning, you have only to enter         

the alternative symbol rate(1~4) you want. 

2. When your searching type is set to Manual  

during 

SMATV

scanning, you must enter both            

frequency and symbol rate. 

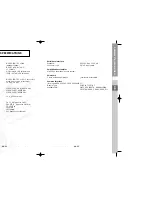
1.7  Reset to Factory Defaults

This to restore the factory set values in case the user 
has encountered some problems  after changing any 
values of channel data and others which may be in error.

The screen display will be as follows:

At the request window, 
if you press 

key, the receiver will be reset to factory 

default settings automatically.

N

No

otte

e  

:

This cause your previous settings to be deleted!

OPERATING THE  RECEIVER

OPERATING THE  RECEIVER

GB-20

D

I

G

I

T

A

L


S

A

T

E

L

L

I

T

E


R

E

C

E

I

V

E

R

GB-21

DSR 9500A_GB_10.10  10/12/02  9:15 AM  Page 20

Summary of Contents for DSR 9500A

Page 1: ...DIGITAL SATELLITE RECEIVER FTA CI EM VIA VIA CI GB DSR 9500A Instructions foruse REV 1 0 ...

Page 2: ... recommended by the manufacturer it may cause a hazard or damage the equipment CONNECTION TO THE SATELLITE DISH LNB The LNB connector cable has voltage in its center core It is therefore recommended that the STB be disconnected from the mains power before connecting or disconnecting this cable FAILURE TO DO SO COULD DAMAGE THE LNB SERVICING Do not attempt to service this product yourself Any attem...

Page 3: ...LED DISPLAY AUTO AND MANUAL SCAN FACILITY CHANNEL ORGANIZING PROGRAMMABLE SCARTS RCA OUTPUT LOW POWER CONSUMPTION 9 FAVORITE LISTS AUTO UPDATED EPG PASS LOOP FOR RGB SIGNAL 2 TUNER SECTION 950 2150 MHz WIDE BAND TUNER IF OUTPUT WITH DC PASS LOOP FOR ANALOG RECEIVER SUPPORTING DiSEqC 1 2 VERSION 13V 18V SWITCHING 22KHz CONTINUOUS TONE CONTROL 3 VIDEO SECTION DVB S COMPLIANT MPEG 2 VIDEO MP ML 2 45 ...

Page 4: ... e The following Common Interface CAMs are available now IRDETO CONAX CRYPTOWORKS VIACCESS NAGRAVISION SECA Etc ced under proper ventilation d cabinet that will restrict the flow of air ded from direct sunlight or household pets components on the top of the receiver cessible by the cable from your ITH DISH SYSTEM tem connect the coaxial cable from the erminal marked at the rear inger tightened do ...

Page 5: ...mplifier 7 AV SCARTS This is used to connect to your TV VCR or DVD player 8 0 12V This is used to connect to an external LNB switch 9 VIDEO AUDIO R L These RCA connectors are used to connect any external video and audio 10 ANT IN This is used to connect your local RF channels to your TV through Loop 11 TV This is used to connect to your TV via RF cable POWER Pmax 40W AC 100 240V 50 60Hz Fuse 250VT...

Page 6: ...s same as the BLUE button on the menu 12 INFORMATION This key is used to display the programe information box in the screen RED This button functions same as the RED button on the menu Press once and you can get simple information on the program Press twice and you can get detailed information on the channel in text box 13 MENU This key is used to open up the menu or return to the previous menu 14...

Page 7: ...s scrambled channel and the icon behind the channel name symbolises lock channel Select the channel by pressing Press key to watch that channel The colour key corresponds the following service list Green key Favorites Yellow key Alphabetical Blue key Provider Red key Transponder BASIC FUNCTION FUNCTIONS m you must perform the installation t first ogrammed you will see the following nels e cal keys...

Page 8: ...going forward per one day keys Use to display the program list by 30minutes per block With the TV RADIO or FAV key you can browse among the various programs lists Select the channel by pressing keys and press key to watch this channel 7 Subtitle When the current broadcasting program provides subtitle press the Green key to see the current subtitle language list To change the subtitle language Pres...

Page 9: ... menus 1 2 and 3 you need the PIN code You must follow the help message at the bottom of the screen Before you begin with the Installation menu you should check in the 4th menu System Setup whether all the information there is applicable for you 1 Installation The menu provides settings for customizing adding new services and displaying the status of the receiver Select Installation in the main me...

Page 10: ...h and key drives to south If you finished driving of motor select Store current Position and press key to reset new driving motor N No ot te e The level indicated in the Signal Status is only for reference The signal quality may be adequate even though the level indicated is not maximum Go to Stored Position When the stored position is reached then screen displays Stop you can now continue with th...

Page 11: ... channels and weak signals the DSR 9500A has been provided with the option Manual Scanning where the channel data can be entered by the user After selecting the 5 Manual Scanning from the Installation Menu the following screen will be displayed Select the target satellite for manual search Load a transponder This option will enable the user to load any transponder from the preprogrammed list avail...

Page 12: ...ut deletes the list of channels registered for satellite 2 2 Delete Transponder Select the desired transponder list you want to delete by pressing Red key Press key for confirmation N No ot te e This feature doesn t delete transponder itself but deletes the list of channels registered for transponder n of the transponder 4 5 6 7 8 or Auto er you want to find cular Right case of vertical he home ne...

Page 13: ... Press Red key again to return to previous state If you want to return the channel to the initial position do not press key but press blue key To edit channel name press Green key Font Table will be displayed Select desired character with and then press key to paste character to the string Press MENU key to save the set data delete by ete xit ete XIT to exit RADIO key enables you to keys list and ...

Page 14: ... second option Change PIN Code This will take you to the following menu In this option you need to enter the current PIN code at the first cursor and at the second cursor enter the desired PIN code To confirm you need to enter the new PIN code again Please remember the PIN code should be a 4 digit numerical value THE FACTORY PRESET PIN CODE 0 0 0 0 N No ot te e If you forget the PIN Code please re...

Page 15: ... please enter prefix number Dialing Please choose between Tone and Pulse 4 5 Time Timer Setting Place the cursor on this sub menu and press Press the keys to change the Local time in Time Zone The local time will be changed according to your location Press the keys to choose event repetition you want to reserve Daily Every Sunday Every Monday Every Tuesday Every Wednesday Every Thursday Every Frid...

Page 16: ...isplayed when there is no CAM in slot 6 Embedded Viaccess Only for DSR 9500A VIA CI DSR 9500A EM VIA 1 Change PIN code Change the PIN code of the Smartcard if necessary 2 Change Parental Rating Change the setting for the family filter if necessary N No ot te e This service is not offered by all channels 3 Change Lock indicator You can change the lock status of the Viaccess Smartcard 4 Issuer Infor...

Page 17: ...V 22 kHz tone DiSEqC 1 2 supported Demodulator Type QPSK DEMODULATION DVB S Symbol rate 2 45 Ms s Inner FEC Viterbi Convolutional Coding Rate 1 2 2 3 3 4 5 6 7 8 Outer FEC Reed Solomon Coding 204 188 t 8 4 Audio section MPEG 1 audio layer I II mono dual stereo and joint stereo audio mode 32 44 1 and 48 kHz sampling frequencies volume control and mute function through Remote Control Unit Solution o...

Page 18: ...O R L VIDEO CVBS AUDIO R L VIDEO CVBS AUDIO R L YC p_p 1Volt 10 CH 21_69 preset to CH 21 PAL B G K I preset to PAL B G 70 5 dBµV IEC male IEC female PLL frequency synthesizer Serial data interface Standard RS232C Max 115 2 kB Connector type 9 pin D type female Embedded descrambler VIACCESS conditional access system Smart card 2 slots embedded Viaccess interface descramble Common Interface For mode...

Reviews: