background image

Troubleshooting

Troubleshooting

English

46


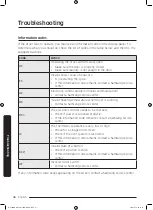
Information codes

If the dryer fails to operate, you may see an information code on the display panel. To 
determine what you should do, check the list of codes in the table below, and then try the 
suggested actions.

Code

Action

dC

Operating the dryer with the door open.

• 

Make sure the door is properly closed.

• 

Make sure laundry is not caught in the door.

FC

Invalid power source frequency

• 

Try restarting the cycle.

• 

If this information code remains, contact a Samsung service 
center.

AC

Electronic control problem (Invalid Communication).

• 

Contact a Samsung service center.

HC

Invalid heating temperature when dryer is running.

• 

Contact a Samsung service center.

9C1

The electronic control needs to be checked.

• 

Check if power is supplied properly.

• 

If the information code remains, contact a Samsung service 
center.

tC

The thermistor resistance is very low or high.

• 

Check for a clogged lint screen 

• 

Check if the vent system is restricted.

• 

If this information code remains, contact a Samsung service 
center.

bC2

Invalid state of a button.

• 

Check if a button is stuck.

• 

If this information code remains, contact a Samsung service 
center.

dF

Incorrect door switch.

• 

Contact a Samsung service center.

If any information code keeps appearing on the screen, contact a Samsung service center.

DV6800K_DC68-03650G-00_EN.indd   46

2019/6/18   10:52:25

Summary of Contents for DV11K6800 Series

Page 1: ...Dryer User manual DV11K6800 DV6800K_DC68 03650G 00_EN indd 1 2019 6 18 10 52 10 ...

Page 2: ...rements 13 Location considerations 13 Ducting requirements 16 Exhausting requirements 17 Electrical requirements 17 Installation 19 What s included 19 Step by step installation 21 Exhaust ducting guide 23 Changing the direction of the exhaust duct optional 24 Switching the door position 29 Before you start 34 Sort and load 34 Functional prerequisite 34 Operations 35 Feature panel 35 Simple steps t...

Page 3: ...e 42 Cleaning 42 Troubleshooting 43 Checkpoints 43 Information codes 46 Specifications 47 Fabric care chart 47 Protecting the environment 48 Specification sheet 49 Cycle chart 50 DV6800K_DC68 03650G 00_EN indd 3 2019 6 18 10 52 10 ...

Page 4: ...hat may result in severe personal injury death and or property damage CAUTION Hazards or unsafe practices that may result in personal injury and or property damage NOTE Indicates that a risk of personal injury or material damage exists Read the instructions These warning signs are here to prevent injury to yourself and others Please follow them explicitly After reading this manual store it in a sa...

Page 5: ...nsory or mental capabilities or lack of experience and knowledge if they have been given supervision or instruction concerning use of the appliance in a safe way and understand the hazards involved Children shall not play with the appliance Cleaning and user maintenance shall not be made by children without supervision 3 Children should be supervised to ensure that they do not play with the applia...

Page 6: ...iances intended to be vented to the exterior of the building 12 Adequate ventilation has to be provided to avoid the back flow of gases into the room from appliances burning other fuels including open fires 13 Do not dry unwashed items in the tumble dryer 14 Items that have been soiled with substances such as cooking oil acetone alcohol petrol kerosene spot removers turpentine waxes and wax remove...

Page 7: ...es burning gas or other fuels 21 The appliance must not be installed behind a lockable door a sliding door or a door with a hinge on the opposite side to that of the tumble dryer in such a way that a full opening of the tumble dryer door is restricted 22 WARNING The appliance must not be supplied through an external switching device such as a timer or connected to a circuit that is regularly switc...

Page 8: ...of the reach of children as packaging materials can be dangerous to children If a child places a bag over its head it may result in suffocation This appliance must be properly grounded Do not ground the appliance to a gas pipe plastic water pipe or telephone line This may result in electric shock fire an explosion or problems with the product Never plug the power cord into a socket that is not gro...

Page 9: ...nd the drain pipes are accessible Critical usage warnings WARNING Do not let children or pets on or into the product In addition when disposing of this product disassemble the door lock lever This may result in children falling and injuring themselves If children become locked in the product there is a danger of suffocation Do not try to access the inside of the product when the drum is rotating D...

Page 10: ...ch as cooper steel wire etc other than the standard fuse When repairing or reinstalling the appliance is required contact your nearest service center Failure to do so may result in electric shock fire problems with the product or injury The product you have purchased is designed for domestic use only The use for business purposes qualifies as product misuse In this case the product will not be cov...

Page 11: ...e oil will not be removed when washing the laundry In addition use the Cool Down cycle so that the laundry is not heated The oxidization heat of the oil may start a fire Make sure that the pockets of all clothing to be dried are empty Hard sharp objects such as coins safety pins nails screws or stones can cause extensive damage to the appliance Do not dry clothing with large buckles buttons or oth...

Page 12: ...ol to clean the appliance This may result in discoloration deformation damage electric shock or fire Before cleaning or performing maintenance unplug the appliance from the wall socket Failure to do so may result in electric shock or fire Clean the filter case before and after using the dryer Clean the inside of the product on a regular basis by asking an authorized service engineer Clean the Heat...

Page 13: ...suffocating Location considerations Adequate clearances between the dryer and adjacent walls or other surfaces Adequate air circulation for ventilation Away from water and weather WARNING Make sure to exhaust the dryer outdoors to reduce the risk of fire Keep the dryer area clear of combustible materials gasoline and other flammable vapors and liquids Do not install other fuel burning appliances a...

Page 14: ...e rear of the dryer the rear must have at least 5 5 inch 140 mm clearance Side by side installation A E A A C B B F D A 1 in 25 mm D 25 8 in 655 mm B 23 6 in 600 mm E 1 in 25 mm C 1 in 25 mm F 3 in 76 mm This Clearance is not applicable to standalone dryer DV6800K_DC68 03650G 00_EN indd 14 2019 6 18 10 52 11 ...

Page 15: ...10 mm H 23 6 in 600 mm C 24 in 155 mm I 1 in 25 mm D 3 in 76 mm J 27 1 in 688 mm E 6 in 152 mm K 3 in 76 mm F 67 in 1702 mm WARNING Samsung s washers and dryers can be stacked to maximize usable space You can purchase an optional stacking kit from your Samsung retailer DV6800K_DC68 03650G 00_EN indd 15 2019 6 18 10 52 11 ...

Page 16: ...aust system meets all applicable local state and national regulations Verify you are not using flexible plastic duct Make sure to check for and remove all lint buildup from inside the existing ducts Confirm the duct is not kinked or crushed Make sure the exhaust hood damper opens and closes freely Manometer measurements The static pressure in any exhaust system must not exceed 0 83 inches of water...

Page 17: ... located on the plate under the control panel or rear frame WARNING Improperly connecting the equipment grounding conductor can result in a risk of electric shock Check with a qualified electrician or serviceman if you are in doubt as to whether your dryer is properly grounded Do not modify the plug provided with your dryer if it doesn t fit the outlet have a proper outlet installed by a qualified...

Page 18: ...dinances Do not modify the plug provided with your dryer if it doesn t fit the outlet have a proper outlet installed by a qualified electrician If a power cord is not used and the electric dryer is to be permanently wired the dryer must be connected to a permanently grounded metal wiring system or an equipment grounding conductor must be run with the circuit conductors and connected to the equipme...

Page 19: ...the relevant safety regulations of your area What s included Make sure all the parts are included in the product package If you have a problem with the dryer or the accessories contact a local Samsung service center or the retailer Dryer at a glance 01 02 03 05 04 01 Top cover 02 Feature panel 03 Door 04 Filter 05 Exhaust duct DV6800K_DC68 03650G 00_EN indd 19 2019 6 18 10 52 12 ...

Page 20: ...anadian models only Cover Plate Required tools Pliers Cutting knife Nut driver Level Phillips screwdriver Duct tape Wrench WARNING Packing materials can be dangerous to children Keep all packing materials plastic bags polystyrene etc out of children s reach DV6800K_DC68 03650G 00_EN indd 20 2019 6 18 10 52 14 ...

Page 21: ...ion as your washer 2 To change the door direction see Switching the door position 3 Install the exhaust system as instructed in the Exhaust ducting guide section NOTE To move the dryer easily lay two of the carton cushions from the packaging on the floor Tip the dryer on its side so it lies across both cushion tops Push the dryer so that it is near its final location and then set the dryer upright...

Page 22: ...he dryer is level again A B NOTE To set the dryer to the same height as your washer fully retract A the leveling feet by turning them counterclockwise then loosen B the feet by turning them clockwise Once the dryer is the same height as the washer follow the directions above to level the dryer Adjust the leveling feet only as much as necessary to level the dryer Extending the leveling feet more th...

Page 23: ... freely 2 Use 4 inch rigid metal ducts Tape all joints including the dryer connection Never use lint trapping screws 3 To facilitate the exhaust keep the ducts as straight as possible Cleaning Clean all old ducts before installing the dryer and make sure the vent flap opens and closes freely We recommend that you to clean the exhaust system annually or on a regular basis WARNING To prevent fire do...

Page 24: ...protect your hands and arms from sharp edges when working inside the cabinet Side venting B A 1 Detach the right A or left B side knockout as desired C 2 Pull the duct out of the dryer and then remove the screw C from the duct Set screw C aside You will need it in a later step D 4 9 125 mm 3 Cut the duct as shown and keep the cut portion of the duct D DV6800K_DC68 03650G 00_EN indd 24 2019 6 18 10...

Page 25: ...e E 6 Insert the duct with elbow E through the rear opening and then connect it to the internal duct CAUTION Wire components in the dryer may interfere slightly with the duct Do not pull or damage the electrical wires inside the dryer when inserting the duct F 7 Apply duct tape F on all joints as shown CAUTION All joints must be secured with duct tape otherwise they may separate and cause a safety...

Page 26: ...ust be covered with a cover plate Bottom venting A 1 Detach the bottom knockout A B 2 Pull the duct out of the dryer and then remove the screw B from the duct Set screw B aside You will need it in a later step C 4 9 125 mm 3 Cut the duct as shown and keep the cut portion of the duct C DV6800K_DC68 03650G 00_EN indd 26 2019 6 18 10 52 17 ...

Page 27: ...D through the rear hole and connect it to the duct C 6 Rotate the elbow D through the bottom opening CAUTION Do not to pull or damage the electrical wires inside the dryer when inserting the duct E 7 Apply duct tape E on the joint as shown CAUTION All joints must be secured with duct tape otherwise they may separate and cause a safety hazard DV6800K_DC68 03650G 00_EN indd 27 2019 6 18 10 52 18 ...

Page 28: ...on Installation English 28 F 8 Cover the back opening with a cover plate F WARNING Never leave the back opening uncovered It must be covered with a cover plate DV6800K_DC68 03650G 00_EN indd 28 2019 6 18 10 52 18 ...

Page 29: ...commend that you contact a qualified technician 1 Unplug the power cord of the dryer 2 Remove the two hinge screws from the door and then remove the door by lifting it up slightly 3 Remove the two screws on the opposite side of the door hinge DV6800K_DC68 03650G 00_EN indd 29 2019 6 18 10 52 18 ...

Page 30: ...Installation Installation English 30 4 Locate and remove the 9 screws from the door as shown 5 Remove the door lever 6 Remove the door frame DV6800K_DC68 03650G 00_EN indd 30 2019 6 18 10 52 19 ...

Page 31: ...Installation English 31 7 Rotate the door glass 180 8 Reassemble the door frame and the door lever DV6800K_DC68 03650G 00_EN indd 31 2019 6 18 10 52 19 ...

Page 32: ...ish 32 9 Move the location of the screw used to fix the door hinge as shown 10 Remove the lever cover by pressing the hook on it 11 Put the lever holder on the other side as shown DV6800K_DC68 03650G 00_EN indd 32 2019 6 18 10 52 19 ...

Page 33: ...Installation English 33 12 Insert and tighten the two hinge screws 13 Insert and tighten the two screws on the opposite side of the door hinge DV6800K_DC68 03650G 00_EN indd 33 2019 6 18 10 52 20 ...

Page 34: ...label do not dry woolens or fiberglass items Avoid drying unwashed items Do not dry items soiled with oil alcohol gasoline etc Functional prerequisite Lint filter A To prevent a risk of fire make sure to clean the lint filter before or after every load 1 Turn off the dryer 2 Open the door and pull out the lint filter A from inside the tumbler 3 Remove the lint that has accumulated and then clean t...

Page 35: ...mation including the cycle time information code operating status and indicators 03 Dry Level Press to adjust the dryness in the Sensor Dry cycles The corresponding indicator turns on Larger or bulkier loads may require Very Dry or More Dry for complete dryness Less Dry is best suited for lightweight fabrics or for leaving some moisture in the clothing at the end of the cycle Damp Dry is designed ...

Page 36: ... feature The load is dry and can be removed at any time during the Wrinkle Prevent cycle 07 Mixed Load Bell The Mixed Load Bell notifies you when the average dry level in a load is damp dry 80 dried This lets you take items that you don t want fully dried or that dry quickly out of the dryer early while letting others continue to dry You can select this option in all Sensor Dry cycles except for S...

Page 37: ... Change the cycle settings Dry Level Temp and Time as necessary 4 Optionally you can activate options available by pressing the relevant button Adjust Time Wrinkle Prevent and or Mixed Load Bell 5 Press Start Pause The dryer indicator turns on with an estimated cycle time on the display To change the cycle during operation 1 Press Start Pause to stop operation 2 Select a different cycle 3 Press St...

Page 38: ...ning pants water repellent jackets and other performance clothing Thick fabrics like a zipper or velcro closure of a jacket or training socks may not be completely dried PERM PRESS Dry wrinkle free cottons synthetic fabrics knits and permanent press fabrics automatically TOWELS For bath towels and similar items Manual Dry You can change the drying settings manually to your preference Cycle Descrip...

Page 39: ...perature setting for soft fluffy diapers Down filled Items jackets sleeping bags comforters etc Use NORMAL and the Medium temperature setting Add a couple of dry towels to absorb moisture and shorten drying time Foam Rubber rug backs stuffed toys shoulder pads etc Do not dry on a heat setting Use AIR FLUFF WARNING Drying a rubber item with heat may damage it or cause a fire Pillows Use NORMAL Add ...

Page 40: ...l for 3 seconds NOTE After 2 minutes of inactivity the drum light automatically turns off Sound On Off To turn off the dryer s notification beeps and melodies press and hold Temp for 3 seconds To unmute the dryer press and hold Temp again for 3 seconds NOTE This function remains active even after you restart the dryer My Cycle You can create your own cycle that contains your preferred settings and...

Page 41: ... Smart Care app on your smartphone 3 Put the smartphone s camera close to the display of the dryer The app automatically recognizes the information code and displays suggestions on your smartphone 4 If the smartphone fails to recognize the information code more than twice type the information code manually into the Smart Care app CAUTION If light is reflected on the display of the dryer the smartp...

Page 42: ...n all purpose cleaner Tumble old towels or rags to remove any remaining stains or cleaning substances Stains may still be visible but will not affect subsequent loads Stainless steel tumbler To clean the stainless steel tumbler use a damp cloth with a mild non abrasive cleaner suitable for easily marred surfaces Remove cleaner residue and dry with a clean cloth Dryer exterior Clean with a soft dam...

Page 43: ...y have moved into the cool down phase of the cycle Does not dry Check all of the above plus Make sure the exhaust hood outside your home can open and close freely Check the exhaust system for lint buildup Ducting should be inspected and cleaned annually Use a 4 rigid metal exhaust duct Do not overload 1 wash load 1 dryer load Dry heavy items and light weight items separately Large bulky items such...

Page 44: ...ems and light weight items separately Has odors Household odors from paint varnish strong cleaners etc may enter the dryer with the surrounding room air This is normal as the dryer draws the air from the room heats it pulls it through the tumbler and exhausts it outside When these odors linger in the air completely ventilate the room before using the dryer If odors persist wash and dry the items a...

Page 45: ...re in the load and shuts the dryer off when the selected dryness level is reached The drying time can change according to the type and amount of laundry See the cycle chart for reference If a problem persists contact a local Samsung service center DV6800K_DC68 03650G 00_EN indd 45 2019 6 18 10 52 25 ...

Page 46: ...ntact a Samsung service center HC Invalid heating temperature when dryer is running Contact a Samsung service center 9C1 The electronic control needs to be checked Check if power is supplied properly If the information code remains contact a Samsung service center tC The thermistor resistance is very low or high Check for a clogged lint screen Check if the vent system is restricted If this informa...

Page 47: ...Hand wash Water temperature Hot Warm Cold NOTE The Water Temperature table lists appropriate wash water temperatures for various items The temperature range is 106 126 F 41 52 C for Hot 84 106 F 29 41 C for Warm and 61 84 F 16 29 C for Cold Wash water temperature must be a minimum of 61 F 16 C for detergent activation and effective cleaning Bleach Any bleach when needed Only non chlorine color saf...

Page 48: ...ean Line dry Hang to dry Drip dry Dry flat Protecting the environment This appliance is manufactured from recyclable materials If you decide to dispose of this appliance please observe local waste disposal regulations Cut off the power cord so that the appliance cannot be connected to a power source Remove the door so that animals and small children cannot get trapped inside the appliance DV6800K_...

Page 49: ...ING DRYER DIMENSIONS A Height 850 mm B Width 600 mm C Depth 655 mm D Depth with door open 90 1123 mm CAPACITY Wet kg 11 5 Dry kg 9 0 NET WEIGHT 40 4 kg HEATER RATING 220 240 V 2000 2450 W ALLO WABLE TEMPERATURE 5 35 C DV6800K_DC68 03650G 00_EN indd 49 2019 6 18 10 52 35 ...

Page 50: ...jean Corduroys Heavy work clothes Normal Dry Adjustable SANITIZE Bedding Curtains Children s clothing Very Dry No Change WOOL For machine washable and tumble dryable wool only Maximum amount 3lb Normal Dry No change DELICATES Underwear Blouses Lingerie Normal Dry Adjustable ACTIVE WEAR Water repellent wear performance clothes Sports wear Normal Dry No change TOWELS Bath towels and similar items No...

Page 51: ...Memo DV6800K_DC68 03650G 00_EN indd 51 2019 6 18 10 52 36 ...

Page 52: ... GUATEMALA 1 800 299 0033 HONDURAS 800 2791 9111 NICARAGUA 001 800 5077267 PANAMA 800 0101 PUERTO RICO 1 800 682 3180 TRINIDAD TOBAGO 1 800 SAMSUNG 726 7864 VENEZUELA 0 800 SAMSUNG 726 7864 COSTA RICA 00 800 1 SAMSUNG 726 7864 DOMINICAN REPUBLIC 1 809 200 7264 JAMAICA 1 800 SAMSUNG 726 7864 www samsung com latin_en support English DC68 03650G 00 DV6800K_DC68 03650G 00_EN indd 52 2019 6 18 10 52 36...

Page 53: ...Secadora Manual del usuario DV11K6800 DV6800K_DC68 03650G 00_MES indd 1 2019 6 18 11 05 03 ...

Page 54: ...lación importantes 13 Consideraciones acerca de la ubicación 13 Requisitos para el tendido de conductos 16 Requisitos de drenaje 17 Requisitos eléctricos 17 Instalación 19 Componentes 19 Instalación paso a paso 21 Guía de los conductos de drenaje 23 Cambio de dirección del conducto de drenaje opcional 24 Inversión de la puerta 29 Antes de comenzar 34 Clasificación y carga 34 Requisito de funcionam...

Page 55: ...ión de problemas 43 Verificaciones 43 Códigos de información 46 Especificaciones 47 Tabla de indicaciones sobre la tela 47 Protección del medio ambiente 48 Hoja de especificaciones 49 Tabla de ciclos 50 DV6800K_DC68 03650G 00_MES indd 3 2019 6 18 11 05 03 ...

Page 56: ... ADVERTENCIA Peligros o prácticas inseguras que podrían causar lesiones físicas graves o la muerte y o daños materiales PRECAUCIÓN Peligros o prácticas inseguras que podrían causar lesiones físicas y o daños materiales NOTA Indica que existe el riesgo de lesiones físicas o daños materiales Lea las instrucciones Estos signos de advertencia sirven para prevenir daño a usted y otros Siga las instrucc...

Page 57: ...capacidades físicas sensoriales o mentales reducidas o faltas de experiencia y conocimiento si están bajo supervisión o recibieron instrucciones relativas al uso seguro del aparato y comprenden los posibles riesgos Los niños no deben jugar con el aparato Los niños no deben hacer tareas de limpieza ni de mantenimiento sin supervisión 3 Los niños deben ser supervisados para asegurarse que no jueguen...

Page 58: ...le pelusa alrededor de la secadora no aplicable para dispositivos que se prevé que ventilen hacia el exterior del edificio 12 Se debe proporcionar ventilación adecuada para evitar el flujo reverso de gases en la habitación de dispositivos que queman otros combustibles incluso fuegos abiertos 13 No seque elementos no lavados en la secadora 14 Los elementos que hayan sido ensuciados con sustancias t...

Page 59: ... conducto que se usa para gases de escape de aparatos que queman gas u otros combustibles 21 El aparato no debe ser instalado detrás de una puerta que se pueda cerrar o una puerta con una bisagra en el lado opuesto a esa secadora de manera que se limite la apertura completa de la puerta de la secadora 22 ADVERTENCIA Este aparato no debe recibir suministro eléctrico a través de un interruptor exter...

Page 60: ... los materiales del embalaje fuera del alcance de los niños ya que son peligrosos para éstos Si un niño introduce la cabeza en una bolsa se puede asfixiar Este electrodoméstico debe conectarse a tierra correctamente La toma de tierra no se ha de conectar a una conducción de gas o de agua ni a la línea telefónica Puede provocar un incendio una descarga eléctrica un incendio o problemas con el produ...

Page 61: ...corriente las llaves de suministro de agua y los tubos de drenaje sean accesibles Advertencias fundamentales para el uso ADVERTENCIA No deje que los niños y los animales domésticos se suban encima del aparato o se introduzcan en él Cuando deseche este aparato desmonte el cierre de la puerta palanca Podría caerse un niño y lesionarse Si un niño se quedase encerrado dentro del aparato se podría asfi...

Page 62: ... cable de acero etc que no esté normalizado Para reparar o volver a instalar el electrodoméstico comuníquese con el centro de servicio más cercano Si no lo hace puede provocar una descarga eléctrica un incendio problemas con el producto o lesiones El producto adquirido está diseñado exclusivamente para uso doméstico Su utilización con fines comerciales se considera un uso incorrecto del producto E...

Page 63: ...e no se elimina durante el proceso de lavado Asimismo utilice el ciclo de enfriamiento para que las prendas no se calienten El calor por oxidación del aceite podría originar un incendio Compruebe que no haya nada en los bolsillos de las prendas que va a secar Los objetos duros o afilados como monedas imperdibles clavos tornillos o piedras pueden causar daños considerables en el aparato No seque pr...

Page 64: ...isolventes ni alcohol para limpiar el electrodoméstico Puede provocar decoloración deformación daños incendio o descarga eléctrica Antes de la limpieza o las tareas de mantenimiento desenchufe el electrodoméstico del tomacorriente de la pared Si no lo hace puede provocar un incendio o una descarga eléctrica Limpie la caja del filtro antes y después de usar la secadora Solicite a un técnico de serv...

Page 65: ...ubicación Espacios libres suficientes entre la secadora y las paredes adyacentes u otras superficies Circulación de aire adecuada para la ventilación Alejada del agua y los factores climáticos ADVERTENCIA Asegúrese de que la secadora drene afuera a fin de reducir el riesgo de incendio Mantenga el área de la secadora libre de materiales combustibles gasolina y otros vapores y líquidos inflamables N...

Page 66: ... de la secadora debe dejarse un espacio mínimo de 5 5 pulgadas 140 mm en la parte posterior Instalación lado a lado A E A A C B B F D A 1 pulg 25 mm D 25 8 pulg 655 mm B 23 6 pulg 600 mm E 1 pulg 25 mm C 1 pulg 25 mm F 3 pulg 76 mm Este espacio no es aplicable a Secadora independientes DV6800K_DC68 03650G 00_MES indd 14 2019 6 18 11 05 04 ...

Page 67: ...g 600 mm C 24 pulg 155 mm I 1 pulg 25 mm D 3 pulg 76 mm J 27 1 pulg 688 mm E 6 pulg 152 mm K 3 pulg 76 mm F 67 pulg 1702 mm ADVERTENCIA Las lavadoras y las secadoras Samsung pueden apilarse para maximizar el espacio aprovechable Puede comprar un kit de apilado opcional a su minorista de Samsung DV6800K_DC68 03650G 00_MES indd 15 2019 6 18 11 05 04 ...

Page 68: ...vas locales estatales y nacionales Verifique que no esté usando un conducto flexible de plástico Asegúrese de controlar y eliminar toda la pelusa acumulada del interior de los conductos existentes Confirme que el conducto no esté enroscado o aplastado Asegúrese de que el regulador de tiro de la tapa del drenaje se abra y se cierre sin inconvenientes Mediciones del manómetro La presión estática de ...

Page 69: ...eléctricos El diagrama del cableado se encuentra en la placa debajo del panel de control o en el armazón posterior ADVERTENCIA La conexión inadecuada del conductor de conexión a tierra del equipo puede generar el riesgo de descarga eléctrica Consulte a un electricista o técnico calificado si le surgen dudas acerca de si la conexión a tierra de su secadora es correcta No modifique el enchufe provis...

Page 70: ...l enchufe provisto con la secadora si no entra en el tomacorriente solicite a un electricista calificado que instale el tomacorriente adecuado Si no se utiliza un cable de alimentación y la secadora eléctrica debe estar permanentemente conectada se la debe conectar a un sistema de cableado de metal con conexión a tierra permanente o se debe conectar un conductor con conexión a tierra del equipo a ...

Page 71: ... normas de seguridad correspondientes de su zona Componentes Asegúrese de que todos los componentes estén incluidos en el paquete Si tiene algún problema con la secadora o los accesorios comuníquese con un centro de servicios Samsung o con el vendedor Vista rápida de la secadora 01 02 03 05 04 01 Cubierta superior 02 Panel de control 03 Puerta 04 Filtro 05 Conducto de drenaje DV6800K_DC68 03650G 0...

Page 72: ...a Herramientas necesarias Pinza Cúter Llave de tuercas Nivel Destornillador Phillips Cinta para conductos Llave inglesa ADVERTENCIA Los materiales de empaque pueden ser peligrosos para los niños Mantenga todos los materiales de empaque bolsas de plástico poliestireno etc lejos del alcance de los niños DV6800K_DC68 03650G 00_MES indd 20 2019 6 18 11 05 06 ...

Page 73: ...onsulte Inversión de la puerta 3 Instale el sistema de drenaje como se indica en la sección Guía de los conductos de drenaje NOTA Para mover la secadora con facilidad coloque dos de las protecciones de cartón del empaque en el piso Incline la secadora hacia uno de los laterales de modo tal que quede apoyada sobre ambas protecciones Empuje la secadora hasta que se encuentre cerca de su ubicación fi...

Page 74: ...da A B NOTA Para colocar la secadora a la misma altura que la lavadora retraiga A completamente las patas niveladoras girándolas en sentido contrario al de las agujas del reloj luego afloje B las patas girándolas en el sentido de las agujas del reloj Una vez que la secadora está a la misma altura que la lavadora siga las instrucciones precedentes para nivelar la secadora Ajuste las patas nivelador...

Page 75: ...ce conductos de metal rígido de 4 pulgadas Coloque cinta en todas las uniones incluso en la conexión de la secadora Nunca use tornillos que atrapen pelusa 3 Para facilitar el drenaje mantenga los conductos tan rectos como sea posible Limpieza Limpie los conductos viejos antes de instalar la secadora y asegúrese de que la ventilación se abra y se cierre sin inconvenientes Le recomendamos que limpie...

Page 76: ...manos y los brazos de los bordes afilados cuando trabaje dentro del gabinete Ventilación lateral B A 1 Retire la placa del lado derecho A o izquierdo B según corresponda C 2 Separe el conducto de la secadora y luego retire el tornillo C del conducto Reserve el tornillo C Lo necesitará más tarde D 4 9 125 mm 3 Corte el conducto como se muestra y conserve la parte cortada D DV6800K_DC68 03650G 00_ME...

Page 77: ...és de la abertura trasera y conéctelo al conducto interno PRECAUCIÓN Los cables de la secadora pueden interferir levemente con el conducto Tenga cuidado de no arrastrar o dañar los cables eléctricos internos de la secadora cuando inserte el conducto F 7 Aplique cinta para conductos F en todas las uniones como se muestra PRECAUCIÓN Todas las uniones deben asegurarse con cinta de lo contrario podría...

Page 78: ...brirse con una tapa Ventilación inferior A 1 Retire la placa inferior A B 2 Separe el conducto de la secadora y luego retire el tornillo B del conducto Reserve el tornillo B Lo necesitará más tarde C 4 9 125 mm 3 Corte el conducto como se muestra y conserve la parte cortada del conducto C DV6800K_DC68 03650G 00_MES indd 26 2019 6 18 11 05 09 ...

Page 79: ...telo al conducto C 6 Rote el codo D a través de la abertura inferior PRECAUCIÓN Tenga cuidado de no arrastrar o dañar los cables eléctricos internos de la secadora cuando inserte el conducto E 7 Aplique cinta para conductos E en todas las uniones como se muestra PRECAUCIÓN Todas las uniones deben asegurarse con cinta de lo contrario podrían separarse y ocasionar un peligro para la seguridad DV6800...

Page 80: ...ción Instalación Español 28 F 8 Cubra la abertura trasera con una tapa F ADVERTENCIA Nunca deje la abertura trasera descubierta Debe cubrirse con una tapa DV6800K_DC68 03650G 00_MES indd 28 2019 6 18 11 05 10 ...

Page 81: ...que llame a un técnico calificado 1 Desenchufe el cable de alimentación de la secadora 2 Retire los dos tornillos de la bisagra de la puerta y luego retire la puerta levantándola levemente 3 Retire los dos tornillos del lado opuesto de la bisagra de la puerta DV6800K_DC68 03650G 00_MES indd 29 2019 6 18 11 05 11 ...

Page 82: ...ación Instalación Español 30 4 Ubique y retire los 9 tornillos de la puerta como se muestra 5 Retire la manija de la puerta 6 Retire el marco de la puerta DV6800K_DC68 03650G 00_MES indd 30 2019 6 18 11 05 11 ...

Page 83: ...Instalación Español 31 7 Rote el vidrio de la puerta 180 8 Vuelva a colocar el marco y la manija de la puerta DV6800K_DC68 03650G 00_MES indd 31 2019 6 18 11 05 11 ...

Page 84: ...ubicación del tornillo usado para fijar la bisagra de la puerta como se muestra 10 Retire la cubierta de la manija presionando el gancho 11 Coloque la placa de apoyo del otro lado como se muestra DV6800K_DC68 03650G 00_MES indd 32 2019 6 18 11 05 12 ...

Page 85: ...ación Español 33 12 Inserte y apriete los dos tornillos de la bisagra 13 Inserte y apriete los dos tornillos en el lado opuesto de la bisagra de la puerta DV6800K_DC68 03650G 00_MES indd 33 2019 6 18 11 05 12 ...

Page 86: ... en la etiqueta no seque prendas de lana o fibra de vidrio Evite secar artículos sin lavar No seque artículos muy sucios con aceite alcohol gasolina etc Requisito de funcionamiento Filtro para pelusas A Para evitar el riesgo de incendios asegúrese de limpiar el filtro de pelusa antes o después de cada carga 1 Apague la secadora 2 Abra la puerta y retire el filtro de pelusa A del tambor 3 Retire la...

Page 87: ... el estado de funcionamiento y los indicadores 03 Nivel de Secado Presione para ajustar el nivel de secado de los ciclos Secado con sensor Se enciende el indicador correspondiente Las cargas más grandes o más voluminosas posiblemente requieran la opción Muy Seco o Mayor Secado para que el secado sea completo La configuración Menor Secado se adecua mejor a telas livianas o para dejar un poco de hum...

Page 88: ...evenir Arrugas para activar dicha función La carga está seca y puede retirarla en cualquier momento durante el ciclo Prevenir Arrugas 07 Alarma para Cargas Mixtas Es una alarma que le notifica cuando el nivel de secado promedio de una carga es centrifugado parcial 80 seco Esto le permite retirar las prendas que no desea que se sequen completamente o que se secan rápidamente fuera de la secadora mi...

Page 89: ... configuraciones de ciclo Nivel de Secado Temperatura y Tiempo según sea necesario 4 Como opción puede activar las opciones disponibles presionando el botón correspondiente Ajustar Tiempo Prevenir Arrugas y o Alarma para Cargas Mixtas 5 Presione Inicio Pausa La luz indicadora de la secadora se enciende y el tiempo estimado del ciclo aparece en la pantalla Para cambiar el ciclo durante el funcionam...

Page 90: ...s pantalones deportivos camisetas hidrófugas y otras prendas de entrenamiento Puede que las telas gruesas como los cierres o cierres velcro o medias de entrenamiento no se sequen completamente PLANCHADO PERMANENTE Seca automáticamente prendas de algodón sin arrugas también telas sintéticas tejidos y telas antiarrugas TOALLAS Para toallas de baño y prendas similares Secado Manual Puede cambiar los ...

Page 91: ...ullidos Prendas con relleno de plumas chaquetas bolsas de dormir edredones etc Utilice NORMAL y la opción de temperatura Medio Agregue un par de toallas secas para absorber la humedad y acortar el tiempo de secado Goma espuma reverso de alfombras muñecos de peluche hombreras etc No seque con el ciclo de secado con calor Utilice el ciclo SECADO SIN CALOR ADVERTENCIA Secar un artículo de goma con ca...

Page 92: ...aga la Luz Interior 2 minutos después de encenderla la Luz Interior se apaga automáticamente Sonido de Alarma Activado Desactivado Para apagar las señales sonoras de notificación y las melodías de la secadora mantenga presionado Temperatura durante 3 segundos Para cancelar el silencio de la secadora mantenga presionado nuevamente Temperatura durante 3 segundos NOTA Esta función se mantiene activa ...

Page 93: ...n su teléfono inteligente 3 Coloque la cámara de su teléfono inteligente cerca de la pantalla de la secadora La aplicación reconoce automáticamente el código de información y muestra sugerencias en su teléfono inteligente 4 Si el teléfono inteligente no reconoce el código de información más de dos veces ingrese en forma manual el código de información en la aplicación Smart Care PRECAUCIÓN Si la l...

Page 94: ...limpiador multiuso Posteriormente seque las toallas o prendas viejas para eliminar restos de manchas o solución de limpieza Las manchas pueden ser aún visibles pero no afectarán las cargas posteriores Tambor de acero inoxidable Para limpiar el tambor de acero inoxidable use un paño humedecido con un limpiador suave no abrasivo adecuado para superficies que se deterioran fácilmente Elimine los resi...

Page 95: ...eriores y además Asegúrese de que la tapa de drenaje hacia el exterior de su casa se pueda abrir y cerrar sin inconvenientes Verifique que el sistema de drenaje no presente obstrucciones Los conductos deben inspeccionarse y limpiarse todos los años Utilice un conducto de drenaje de metal rígido de 4 No la sobrecargue 1 carga de lavado 1 carga de secado Seque los artículos pesados y los livianos po...

Page 96: ...dos y los livianos por separado Tiene olor Los olores del hogar ya sea que provengan de la pintura el barniz los limpiadores potentes etc pueden ingresar en la secadora con el aire del ambiente Esto es normal puesto que la secadora extrae el aire de la habitación lo calienta y lo hace circular por el tambor y lo expulsa a través del drenaje hacia el exterior Si estos olores permanecen en el aire v...

Page 97: ...y apaga la secadora cuando alcanza el nivel de secado seleccionado El tiempo de secado puede variar de acuerdo con el tipo y la cantidad de prendas Consulte la tabla de ciclos para obtener referencias Si el problema persiste comuníquese con un centro de servicio local de Samsung DV6800K_DC68 03650G 00_MES indd 45 2019 6 18 11 05 16 ...

Page 98: ...ntamiento no válida cuando la secadora está en funcionamiento Comuníquese con un centro de servicio de Samsung 9C1 Hay que verificar el control electrónico Verifique si el suministro de energía funciona adecuadamente Si el código de información permanece comuníquese con un centro de servicio al cliente tC La resistencia térmica es muy baja o alta Revise si el filtro para pelusas está obstruido Rev...

Page 99: ...ente Tibia Fría NOTA La tabla de la temperatura del agua presenta las temperaturas del agua del lavado apropiadas para diversas prendas El rango de temperatura es de 106 126 F 41 52 C para Caliente 84 106 F 29 41 C para Tibia y 61 84 F 16 29 C para Fría La temperatura del agua del lavado debe alcanzar un mínimo de 61 F 16 C para que se active el detergente y se logre un lavado eficaz Blanqueador C...

Page 100: ...gar para que escurra Secar en posición horizontal Protección del medio ambiente Este electrodoméstico se fabrica con materiales reciclables Si decide desechar este electrodoméstico siga la normativa local relacionada con la eliminación de desechos Corte el cable de alimentación para que el electrodoméstico no pueda conectarse a una fuente de alimentación Quite la puerta para que los animales y los...

Page 101: ...MENSIONES A Altura 850 mm B Ancho 600 mm C Profundidad 655 mm D Profundidad con la puerta abierta 90 1123 mm CAPACIDAD Mojado kg 11 5 Seco kg 9 0 PESO NETO 40 4 kg POTENCIA DEL CALENTADOR 220 240 V 2000 2450 W TEMPERATURA PERMITIDA 5 35 C DV6800K_DC68 03650G 00_MES indd 49 2019 6 18 11 05 23 ...

Page 102: ...eans corderoy y ropa de trabajo pesado Secado Normal Ajustable ESTERILIZAR Ropa de cama cortinas prendas para niños Muy seco sin cambios LANA Solo para lana lavable y secada a máquina cantidad máxima 3lb Secado Normal Sin cambios DELICADOS Ropa interior blusas lencería Secado Normal Ajustable ROPA DEPORTIVA Prendas impermeables prendas de entrenamiento ropa deportiva Secado Normal Sin cambios TOAL...

Page 103: ...Notas DV6800K_DC68 03650G 00_MES indd 51 2019 6 18 11 05 23 ...

Page 104: ...26 7864 GUATEMALA 1 800 299 0033 HONDURAS 800 2791 9111 NICARAGUA 001 800 5077267 PANAMA 800 0101 PUERTO RICO 1 800 682 3180 TRINIDAD TOBAGO 1 800 SAMSUNG 726 7864 VENEZUELA 0 800 SAMSUNG 726 7864 COSTA RICA 00 800 1 SAMSUNG 726 7864 DOMINICAN REPUBLIC 1 809 200 7264 JAMAICA 1 800 SAMSUNG 726 7864 www samsung com latin_en support English DC68 03650G 00 DV6800K_DC68 03650G 00_MES indd 52 2019 6 18 ...

Reviews: