background image

English 

21

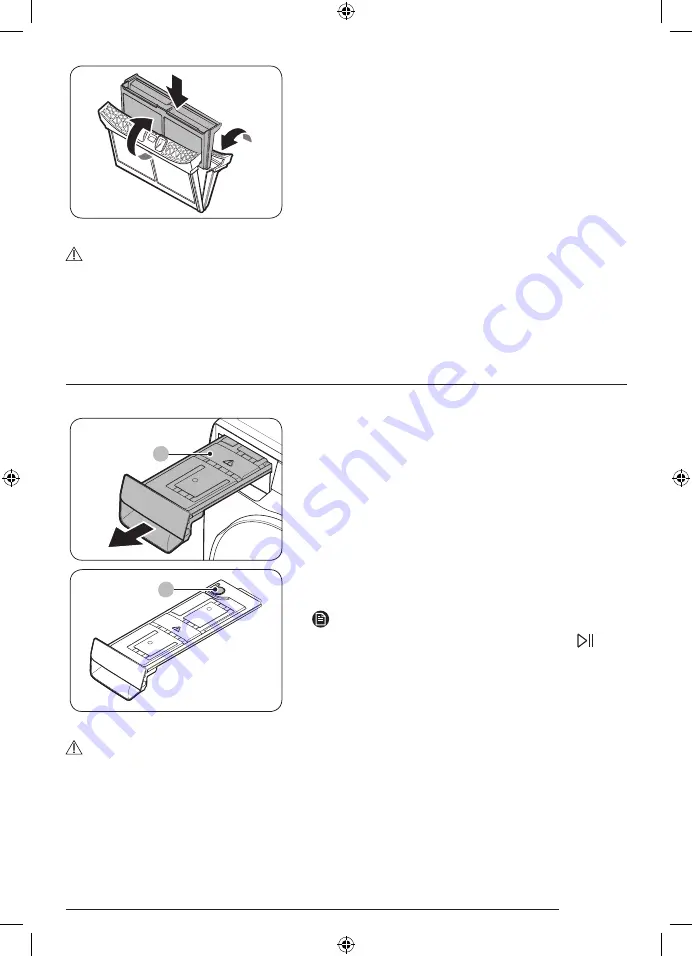
5. 

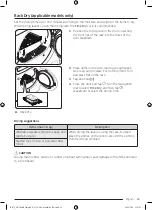
Put the inner filter into the outer filter, and then 

reinsert the lint filter into the original position.

CAUTION

•  Clean the lint filter after each load. Otherwise, the drying performance may decrease.
•  Do not operate the dryer without the inner filter inside the outer filter.
•  Using the dryer with a wet lint filter may cause mold, bad odors, or a decrease in drying 

performance.

Water tank

To avoid leaks, empty the water tank after every load.

A

1. 

Using both hands, pull the 

water tank (A)


forward to remove.

B

2. 

Empty the water through the 

drain hole (B)

 and 

place the water tank back into place.

NOTE

If you empty the water tank and tap and hold 

, the 

corresponding indicator turns off.

CAUTION

The water tank can be heavy. Pull out the water tank slowly and at level using both hands.

B-PJT_DV5000B_SimpleUX_SG_DC68-04400C-00_EN.indd   21

2022/5/18   15:57:53

Summary of Contents for DV9 BB Series

Page 1: ...e To check the product s model name see the label enclosed with the product or attached to the product What s included Carefully unpack the dryer Keep all packaging materials away from children The parts and location of parts shown below may differ from your dryer Before installation make sure the dryer has all the parts listed here If the dryer and or parts are damaged or missing contact the near...

Page 2: ... Stacking kit Part SK DH SK DA SKK DF NOTE For stacking instructions with the dryer see the installation manual included in the stacking kit For information on which stacking kit model you can use to stack your dryer on the washing machine see the user manual included in your Samsung washing machine B PJT_DV5000B_SimpleUX_SG_DC68 04400C 00_EN indd 2 2022 5 18 15 57 50 ...

Page 3: ...result in fire or poisoning Dispose of the appliance correctly and do not damage the pipes in the refrigerant circuit Read the instructions These warning signs are here to prevent injury to yourself and others Please follow them explicitly After reading this manual store it in a safe place for future reference Read all instructions before using the appliance As with any equipment that uses electri...

Page 4: ...h reduced physical sensory or mental capabilities or lack of experience and knowledge if they have been given supervision or instruction concerning use of the appliance in a safe way and understand the hazards involved Children shall not play with the appliance Cleaning and user maintenance shall not be made by children without supervision 3 Children should be supervised to ensure that they do not...

Page 5: ... dryer not applicable for appliances intended to be vented to the exterior of the building 11 Adequate ventilation has to be provided to avoid the back flow of gases into the room from appliances burning other fuels including open fires 12 Do not dry unwashed items in the tumble dryer 13 Items that have been soiled with substances such as cooking oil acetone alcohol petrol kerosene spot removers t...

Page 6: ...ls 19 The appliance must not be installed behind a lockable door a sliding door or a door with a hinge on the opposite side to that of the tumble dryer in such a way that a full opening of the tumble dryer door is restricted 20 WARNING The appliance must not be supplied through an external switching device such as a timer or connected to a circuit that is regularly switched on and off by a utility...

Page 7: ...ly used in domestic environments include acetone denatured alcohol petrol gasoline kerosene spot removers some brands turpentine waxes and wax removers Items containing foam rubber also known as latex foam or similarly textured rubber Like materials should not be dried in a tumble dryer on a heat setting Foam rubber materials can when heated produce fire by spontaneous combustion Fabric softeners ...

Page 8: ... socket and use the socket for this appliance only In addition do not use an extension cord Sharing a wall socket with other appliances using a power strip or extending the power cord may result in electric shock or fire Ensure that the power voltage frequency and current are the same as those of the product specifications Failure to do so may result in electric shock or fire Failure Plug the powe...

Page 9: ...he power plug the water supply taps and the drain pipes are accessible Critical usage warnings WARNING Do not let children or pets on or into the product In addition when disposing of this product disassemble the door lock lever This may result in children falling and injuring themselves If children become locked in the product there is a danger of suffocation Do not try to access the inside of th...

Page 10: ...Failure to do so may result in electric shock fire problems with the product or injury The product you have purchased is designed for domestic use only The use for business purposes qualifies as product misuse In this case the product will not be covered by the standard warranty provided by Samsung and no responsibility can be attributed to Samsung for malfunctions or damages resulting from such m...

Page 11: ...s skincare room massage parlor beauty salon or hospital This may result in electric shock fire malfunction and injury Make sure that the pockets of all clothing to be dried are empty Hard sharp objects such as coins safety pins nails screws or stones can cause extensive damage to the appliance Do not dry clothing with large buckles buttons or other heavy metal zippers hooks and eyelets button up c...

Page 12: ...r for approximately ten minutes to thaw it Instructions about the WEEE Correct Disposal of This Product Waste Electrical Electronic Equipment Applicable in countries with separate collection systems This marking on the product accessories or literature indicates that the product and its electronic accessories e g charger headset USB cable should not be disposed of with other household waste at the...

Page 13: ... GHz 2 472 GHz Turning on Wi Fi for network models only NOTE Turning on Wi Fi consumes more energy Under an environment where Wi Fi is frequently turned on actual energy consumption can be greater than the values in the specification sheet section 1 Tap and hold to turn on the dryer 2 Tap and hold 2 1 The dryer enters AP mode and connects to your smartphone 2 2 Tap to authenticate your dryer 2 3 O...

Page 14: ...garding the electrical or grounding requirements please contact Samsung or a qualified electrician WARNING Plug into a grounded 3 prong outlet Do not use a damaged power plug cord or loose or damaged wall outlet Do not use an adapter or an extension cord Improper connection of the equipment grounding conductor may result in electric shock If you are unsure if the dryer is properly grounded check w...

Page 15: ...ly slide the dryer into the desired location 2 Use a level A and check the levelness of the dryer from side to side and front to back 3 If the dryer is not level turn the levelling feet B left or right to adjust the height 4 Once the dryer is level make sure the dryer stands firmly on the floor 5 Plug in the dryer C D NOTE To set the dryer to the same height as the washing machine turn the levelli...

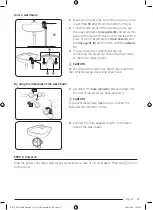
Page 16: ...y if you cannot connect the drain hose to a drainage system NOTE As a factory default this dryer is set to use the built in water tank to drain condensed water B A 1 Remove the drain hose from hole A and insert it into part B A 2 Insert one end of the accessory hose long drain hose into hole A 3 Insert the other end outlet of the accessory hose to the drainage system in one of the following ways B...

Page 17: ...ry hose long drain hose to the drain outlet directly CAUTION Do not extend the drain hose Water may leak from the connected area Use a long drain hose By using the drain pipe of the wash basin A 1 Assemble the hose connector A and attach it to the end of the accessory hose as shown CAUTION To prevent water leak make sure to connect the hose and the connector firmly 2 Connect the hose adapter direc...

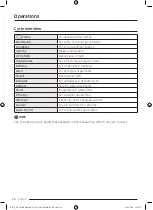
Page 18: ...ng Wool For drying wool garments Towels Keep towels fluffy Delicates For underwear delicate items Outdoor Care for waterproof items Shirts To quickly dry a few shirts Time Dry Set a custom drying time Warm Air Gentle dry before hanging outside Cool Air Dry at room temp for set time Quick Dry 35 For cotton other quick items NOTE The cycle and function names that appeared in this manual may differ f...

Page 19: ... fold and place flat on the rack 3 Tap and hold 4 Close the door and tap Turn the Navigation dial to select Time Dry and then tap repeatedly to select the drying time Drying suggestions Items max 1 5 kg Description Washable sweaters block to shape and lay flat on rack When drying the laundry using the rack fold and place the clothes on the rack to prevent the clothing from becoming wrinkled Stuffe...

Page 20: ...ower cord Lint filter Clean the lint filter after each load 1 Open the door and pull the lint filter upward to remove A 2 Open the outer filter and remove the inner filter A 3 Unfold both the inner filter and the outer filter 4 Remove the lint from both filters and then clean the filters with the cleaning brush NOTE To clean the filters thoroughly clean the filters in running water and then dry th...

Page 21: ...y cause mold bad odors or a decrease in drying performance Water tank To avoid leaks empty the water tank after every load A 1 Using both hands pull the water tank A forward to remove B 2 Empty the water through the drain hole B and place the water tank back into place NOTE If you empty the water tank and tap and hold the corresponding indicator turns off CAUTION The water tank can be heavy Pull o...

Page 22: ... inner cover C 4 Clean the heat exchanger with the provided cleaning brush or a vacuum cleaner with a brush attachment Take care not to bend or damage the heat exchanger fins when cleaning This may lead to a decrease in drying performance CAUTION To avoid physical injury and burns do not touch or clean the heat exchanger with bare hands Do not use water to clean the heat exchanger B PJT_DV5000B_Si...

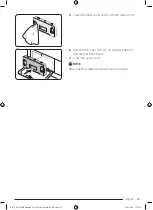
Page 23: ... smooth damp cloth 6 Reinsert the inner cover to its original position and then lock the fixers 7 Close the outer cover NOTE After cleaning make sure the fixers are locked B PJT_DV5000B_SimpleUX_SG_DC68 04400C 00_EN indd 23 2022 5 18 15 57 54 ...

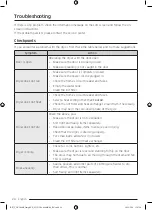
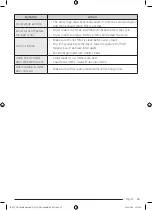
Page 24: ... s circuit breaker and fuses Select a heat setting other than Cool Air Check the lint filter and heat exchanger Clean them if necessary Dryer may be in the cool down phase of the cycle Dryer does not dry Check the above plus Make sure the dryer is not overloaded Sort light and heavy items separately Reposition large bulky items to ensure even drying Check that the dryer is draining properly For sm...

Page 25: ...art the cycle Lint on clothes Make sure the lint filter is clean before every load Dry lint producing items fuzzy towels separate from lint trappers such as black linen pants Divide larger loads into smaller loads Items still wrinkled after Wrinkle Prevent Small loads of 1 4 items work best Load fewer items Load similar type items Odors remain in items after Cool Air Make sure to thoroughly wash i...

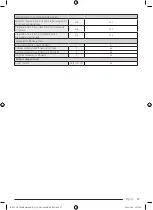
Page 26: ...er cycle will depend on how the appliance is used kWh yr 192 0 Automatic tumble drier Yes Energy consumption E_dry standard cotton programme at full load kWh 1 58 Energy consumption E_dry 1 2 standard cotton programme at partial load kWh 0 87 off mode and left on mode The power consumption off mode P_o at full load W 0 50 The power consumption in left on mode P_l at full load W 5 00 Duration of th...

Page 27: ...2 Programme Time T_dry 1 2 standard cotton programme at partial load min 128 condensation efficiency class A most efficient to G least efficient B Average condensation efficiency at full load 86 Average condensation efficiency at partial load 86 Weighted condensation efficiency 86 Airborne noise emissions Dry at full load dB A re 1 pW 64 B PJT_DV5000B_SimpleUX_SG_DC68 04400C 00_EN indd 27 2022 5 1...

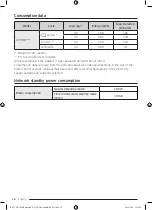
Page 28: ... it was calculated using EN 61121 2013 Consumption data can vary from the nominal values given above depending in the size of the load types of textiles residual moisture levels after spinning fluctuations in the electricity supply and any extra options selected Network standby power consumption Power consumption Network Standby mode 1 90 W Time in networked standby mode Wi Fi 10 min B PJT_DV5000B...

Page 29: ...Memo B PJT_DV5000B_SimpleUX_SG_DC68 04400C 00_EN indd 29 2022 5 18 15 57 54 ...

Page 30: ...Memo B PJT_DV5000B_SimpleUX_SG_DC68 04400C 00_EN indd 30 2022 5 18 15 57 54 ...

Page 31: ...Memo B PJT_DV5000B_SimpleUX_SG_DC68 04400C 00_EN indd 31 2022 5 18 15 57 54 ...

Page 32: ...DC68 04400C 00 B PJT_DV5000B_SimpleUX_SG_DC68 04400C 00_EN indd 32 2022 5 18 15 57 54 ...

Reviews: