background image

11

10

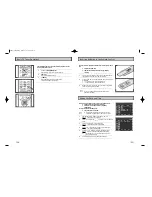
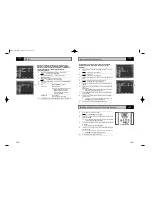
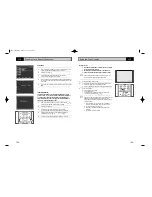
Connecting DVD-VCR to the TV using the Coaxial Cable

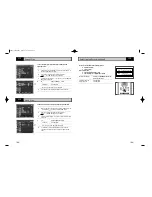
Connecting DVD-VCR to the TV using the RCA Cable

To receive television programmes a signal must be received from
one of the following sources:

An outdoor aerial

An indoor aerial

A cable television network

A satellite receiver

Make sure that both the television and the DVD-VCR are
switched off before connecting the cables.

1

Remove the aerial or network input cable from the television.

2

Connect this cable to the 75

 coaxial socket marked 

on the 

rear of your DVD-VCR.

3

Plug the coaxial cable supplied into the 

socket on your 

DVD-VCR.

4

Plug the other end of the coaxial cable into the connector
previously used for the aerial on the television.

5

To obtain better quality pictures and sound on your television, you
can also connect your DVD-VCR to the television via the RCA
cable (see section below) if your television is equipped with this
type of connection.

3

2

ou can connect your DVD-VCR to the television using the RCA cable if the appropriate input is available on
the television. You thus:

Obtain better quality sound and pictures

Simplify the setting up procedure of your DVD-VCR

Regardless of the type of connection chosen, you must always connect the coaxial cable supplied.
Otherwise, no picture will be visible on the screen when the DVD-VCR is switched off.

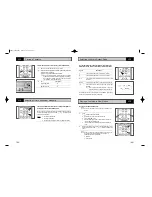
Make sure that both the television and the DVD-VCR are switched o f f before connecting the cables.

1

Connect the coaxial cable as indicated in the above section.

2

Connect one end of the RCA Audio/Video cable to the Video output and Audio L, R output socket on the rear of
the DVD-VCR.

3

Plug the other end into the appropriate connector on the television.

TV

4

Aerial

RF coaxial cable

2

3

TV

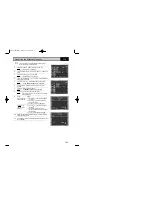
Deciding How to Connect DVD-VCR

You must take into account various factors when connecting audio or video systems:

Types of connectors available on your systems

Systems connected permanently to the DVD-VCR (satellite receiver for example) or temporarily
(camcorder for example)

Your DVD-VCR is equipped with the following connectors.

Connector

Location

Type

Direction

Recommended Use

MIC JACK

Front

MICJACK

In

MIC

Audio output

Rear

Audio RCA

Out

Audio out (DVD only)

LINE 

Rear

Audio/Video

In/Out

Television

RCA

Other VCR

COMPONENT  Rear

RCA

Out

COMPONENT out (DVD only)

output

S-VIDEO 

Rear

S-JACK

Out

S-Video out (DVD only)

output

Digital AUDIO  Rear

Optical 

Out

Digital Audio out (DVD only)

output

coaxial

OUT TO TV

Rear

75 

Out

Television 

coaxial

IN FROM ANT. Rear

75 

In

Aerial

coaxial

Cable television network

Satellite receiver

Whenever you connect an audio or video system to your DVD-VCR, ensure that all elements are
switched off.

Refer to the documentation supplied with your equipment for detailed connection instructions and
associated safety precautions.

 DVD-90K_CHN-GB1.q  2003.4.11 11:14 AM  页面10

Summary of Contents for DVD-V90K

Page 1: ...DVD VCR DVD V90K Instruction Manual www samsungvcr com PAL NTSC DVD 90K_CHN GB1 q 2003 4 11 11 14 AM 1...

Page 2: ...e Camera Angle 54 Selecting the Subtitle Language 54 Repeat Play 55 Selecting the Audio Language 56 Using the Mark Function 57 MP3 WMA Play 58 Program Play Random Play 60 Picture CD Playback 61 Conten...

Page 3: ...remove the batteries and store it in a cool dry place The following illustrations represent precautions This product incorporates copyright protection technology that is protected by method claims of...

Page 4: ...ECT EZ VIEW BUTTON RECORDBUTTON OPEN CLOSE BUTTON ECHO BUTTONS VOLUME BUTTON DVD DECK STANDBY ON BUTTON MIC JACK 12 Cm 8 Cm Single sided 240 min Double sided 480 min Single sided 80 min Double sided 1...

Page 5: ...A DVD CD VCD or SVCD is loaded 3 The time counter position time remaining or current deck status is displayed 4 VHS tape is inserted 5 The VCR Deck is active 6 A DVD with a DTS soundtrack is loaded 7...

Page 6: ...DVD VCR is switched off Make sure that both the television and the DVD VCR are switched off before connecting the cables 1 Connect the coaxial cable as indicated in the above section 2 Connect one end...

Page 7: ...ected highlight 5 Press the or buttons to increase or decrease the value Result The day of the week is displayed automatically You can hold the or buttons down to scroll more quickly through the value...

Page 8: ...ontrol to select and watch DVD 1 1 2 3 4 Tuning Your Television for the DVD VCR 2 4 You must tune your television for the DVD VCR only if you are not using a RCA cable To view pictures from your DVD V...

Page 9: ...date and time when You purchase the DVD VCR Do not forget to reset the time when you change clocks from winter to summer time and vice versa 1 After pressing the MENU press the OK or Result The Setup...

Page 10: ...t any channels already preset on your DVD VCR will be deleted 5 Press OK button Result A message appears indicating that any channels already preset on your VCR will be deleted 6 Press OK to start the...

Page 11: ...The MANUAL TUNING menu is displayed 8 Press the or buttons to start scanning channel Result The frequency band is scanned and the first station found is displayed 9 If you Then Wish to store the Press...

Page 12: ...amme 3 8 Press the or buttons to select required position And then press OK again to swap the position 9 On completion press the RETURN button four times to exit the menu Changing the Preset Station T...

Page 13: ...suffer from interference or if your TV cannot find the pictures Also you can change the DVD VCR output channel to adjust the frequency in which information is displayed on the screen 1 After pressing...

Page 14: ...e Control option ON and OFF When Intelligent Picture Control mode is ON the sharpness of the image is adjusted automatically 3 To adjust the sharpness manually select Intelligent Picture Control mode...

Page 15: ...ressing the MENU press the corresponding buttons to select the VCR option 2 Press the OK or buttons to select this option Result The VCR Setup menu is displayed 3 Press the corresponding or buttons un...

Page 16: ...the OK or buttons to select this option Result The VCR Setup menu is displayed 3 Press the corresponding or buttons until the Repeat Play option is selected 4 To Press OK or until Repeat play On is di...

Page 17: ...4 5 LENGTH 2 30 SET LENGTH PRESS VCR Protecting a Recorded Cassette Recording a Programme Immediately Video cassettes have a safety tab to prevent accidental erasure When this tab has been removed yo...

Page 18: ...e TIMER PROGRAMMING menu is displayed 2 Press to select the input source 3 Select the required station by pressing the buttons or INPUT SEL to select the LINE input sources 4 Press to select the recor...

Page 19: ...l button twice 2 When playing back in slow motion picture interference may occur Press the TRK or buttons to minimize this effect When you have been using the Slow Motion function for more than about...

Page 20: ...ing end search the tape will be ejected 1 After pressing the SEARCH press the corresponding or buttons until the EndSearch option is selected 2 Press the OK or 2 1 1 2 etc Prev Seq Seq being played Ne...

Page 21: ...our times to clear the display 0 00 00 2 VCR Searching for a Specific Sequence Intro Scan 1 After pressing the SEARCH press the corresponding or buttons until the Intro Scan option is selected 2 Press...

Page 22: ...pre recorded cassette in the other video source VCR or camcorder 4 Press the INPUT SEL button to select the appropriate input on your DVD VCR LINE IN for the RCA input 5 Start playing back the casset...

Page 23: ...on the remote control Press the or button to select KARAOKE mode ON 3 To adjust the Mic volume and ECHO level press the VOLUME and ECHO or keys front pannel 4 To sing with accompaniment 1 Press the O...

Page 24: ...e language selected as the audio preference Select Others if the language you want is not listed Some discs may not contain the language you select as your initial language in that case the disc will...

Page 25: ...then OK or button 3 Select Audio Setup using buttons then press the OK or button 4 Use the buttons to select the desired item Then press the OK or button Dolby Digital Out 1 PCM Converts to PCM 2CH au...

Page 26: ...your family watches There are up to 8 rating levels on a disc 1 With the unit in Stop mode press the MENU button 2 Select DVD using buttons then OK or button 3 Select Parental Setup using buttons the...

Page 27: ...ough disc chapters tracks Skip Forward will jump to the next chapter track Skip Back will jump to the beginning of the current chapter track Press Skip Back again to jump to the beginning of the previ...

Page 28: ...creen will disappear The picture will look vertically stretched Depending on the type of disc the black bars may not disappear completely Zoom Fit The top bottom left and right of the screen are cut o...

Page 29: ...divided into chapters similar to tracks on an audio CD What is a Title A DVD may contain several different titles For example if a disc contains four different movies each might be considered a title...

Page 30: ...D Selecting the Subtitle Language DVD You can select a desired subtitle quickly and easily with the subtitle button 1 Press the SUBTITLE button 2 Use the buttons to select the desired subtitle languag...

Page 31: ...delete a mark number Press the MARK button to turn off the display Up to three scenes may be marked at a time When in VCD 2 0 mode MENU ON mode this function does not work Depending on the disc the ma...

Page 32: ...crosoft Inc and SDMITM registered trade mark of The SDMI Foundation You cannot copy such files Important The above recommendations cannot be taken as a guarantee that the DVD player will play MP3 reco...

Page 33: ...ictures change automatically with about an 6 second interval The pictures change automatically with about an 12 second interval The pictures change automatically with about an 18 second interval Depen...

Page 34: ...er can be played Picture discs other than Kodak Picture CD may take longer to start playing or may not play at all If a number of files in 1 Disc is over 500 only 500 JPEG file can be played If a numb...

Page 35: ...unction to make the music only sound by cancelling vocal when playing a Karaoke disc VOCAL FADER Remark V1 CH1 Vocal Cancel V2 CH2 Vocal Cancel V1 V2 CH1 CH2 Vocal Cancel OFF Vocal Fader Off In VCD CV...

Page 36: ...ttern when found suffers 2 Carry out the instructions Tuning Your Television for the DVD from interference it may be due to the VCR see page 14 DVD VCR output channel clashing with 3 Carry out the ins...

Page 37: ...ture is not available at the moment 4 You ve requested a title or chapter number or search time that is out of range Some of the functions selected in the Setup Menu may not work properly if the disc...

Reviews: