English - 20
STEP3. Connecting the hoses and powering
Min.
30 cm
Max.
80 cm
Max. 80 cm
1.
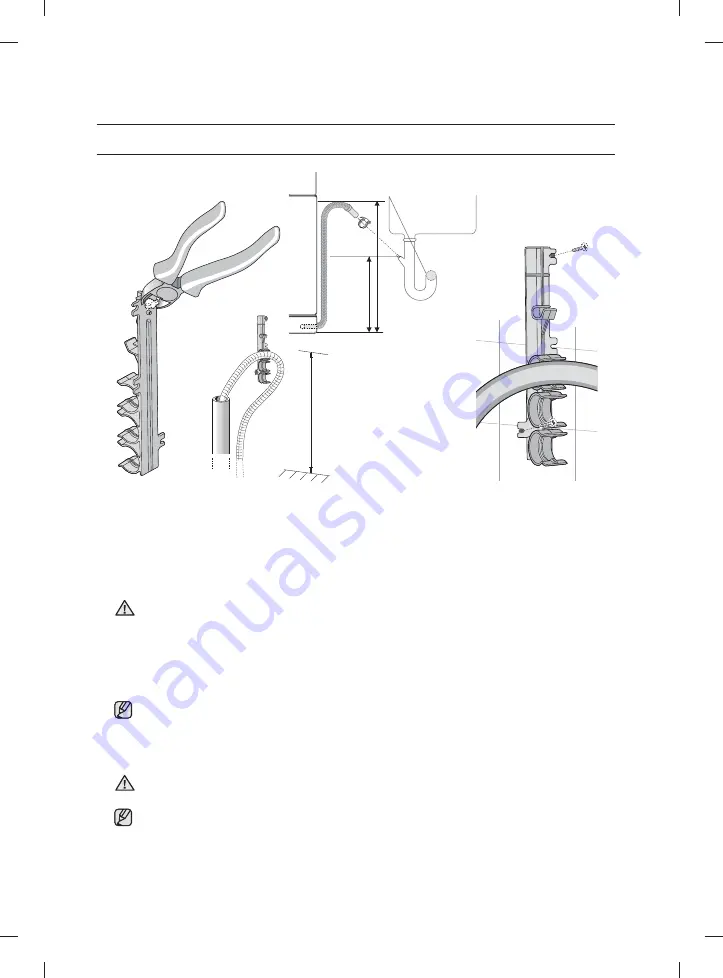
Remove the hose holder which is attached to the product and cut off part of the holder as shown in the
fi gure.
2.
Fix it to the wall by fastening the 2 screws.
3.
Insert the drain hose into the fi xed hose holder.
Install the drain hose so that it is placed within a range of 30 cm to 80 cm from the bottom.
4.
Connect the drain hose to the drain outlet.
• Take care when you connect the drain hose that it does not move during a draining cycle.
• Confi rm that no parts of the drain hose, supply hose or power cord are bent or folded.
5.
Open the door and remove all foam, paper packaging, and unnecessary parts.
6.
Turn on the circuit breaker you turned off before you began the installation.
7.
Open the water supply valve to supply water to the dishwasher.
8.
Turn on the dishwasher, and then select and run a cycle.
Check if the power turns on correctly and if there is any water leakage while the dishwasher is
operating. If no problems occur while it is operating, turn off the dishwasher, and then go to No.5
of above.
If an problem has occurred, turn off the dishwasher, close the water supply valve, and then refer to
the user manual or contact a service centre as referring to the contact list on the back cover.
Make sure to check for water leakage on both ends of the water supply line and drain hose
connector.
Test run
Make sure that you install your dishwasher correctly by running the
Quick
cycle after the
installation is complete.
CAUTION
CAUTION
Setting up your dishwasher
User Manual_DW9000H-FS_00158C-03_EN.indd 20
User Manual_DW9000H-FS_00158C-03_EN.indd 20
2015-03-24 5:30:16
2015-03-24 5:30:16


