background image

22

ENGLISH

23

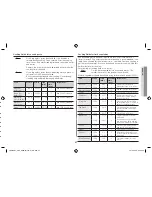
food

Serving size

preheating time power

cooking time (min.)

frozen 

mini-

pizza-

Snack

9x30 g (270 g)

3 min.

300 W + Grill

9-10

recommendations

Preheat crust plate. Distribute pizza snacks evenly on crust plate. Put the 

plate on the rack.

chilled 

pizza 

300-350 g

5 min.

450 W + Grill

6½-7½

recommendations

Preheat crust plate. Put the chilled pizza on the plate. 
Put crust plate on rack.

frozen
fish 

fingers

150 g (5 pcs)

300 g (10 pcs)

4 min.

600 W + Grill

7-8

9-10

recommendations

Preheat crust plate. Brush plate with 1 tbsp. oil. Put fish fingers in a circle 

on the plate. Turn over after 4 min (5pcs) or after 6 min. (10 pcs).

frozen 

chicken 

Nuggets

125 g

4 min.

600 W + Grill

5-6

250 g

7-8

recommendations

Preheat crust plate. Brush plate with 1 tbsp. oil. Put chicken nuggets on 

the plate. Put crust plate on rack. Turn over after 3 min (125g) or 5 min. 

(250g).

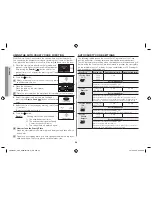
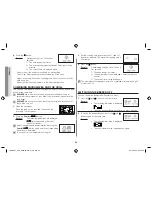
uSING tHE auto poWEr dEfroSt fEaturE

The Auto Power Defrost feature enables you to defrost meat, poultry, fish 

and bread/cake. The defrost time and power level are set automatically.

You simply select the programme and the weight.

Use only dishes that are microwave-safe.

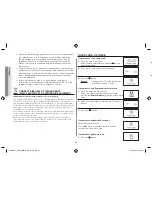
First, place the frozen food in the centre of the turntable and close the door.

1. 

Select the type of food that you are cooking by 

pressing the 

power defrost

 ( ) button one or more 

times. (Refer to the table on the side).

2. 

Select the food weight by pressing the ( ) and ( ) 

buttons.  

It is possible to set up to a maximum of 1500 g.

3. 

Press the   button.

result :


•  Defrosting begins.

•  The oven beeps half way through 

defrosting to remind you to turn the food over.

•  Press 

 button again to finish defrosting.

You can also defrost food manually. To do so, select the microwave 

cooking/reheating function with a power level of 180 W. Refer to the 

section entitled “Cooking/Reheating” on page 17 for further details.

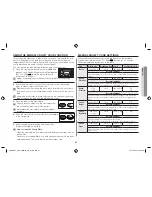
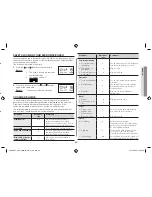
auto poWEr dEfroSt SEttINGS

The following table presents the various Auto Power Defrost programmes, 

quantities, standing times and appropriate recommendations.

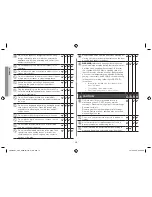
Remove all kinds of package material before defrosting. Place meat, 

poultry, fish and Bread Cake on a ceramic plate.

code/food

portion

Standing time

1. Meat 

200-1500 g

20-60 min.

recommendations

Shield the edges with aluminium foil.
Turn the meat over when the oven beeps.
This programme is suitable for beef, lamb, pork, steaks, chops 

and minced meat.

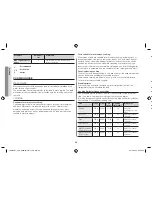
2. Poultry 

200-1500 g

20-60 min.

recommendations

Shield the leg and wing tips with aluminium foil. Turn the poultry 

over when the oven beeps.
This programme is suitable for whole chicken and chicken 

portions.

3. Fish 

200-1500 g

20-50 min.

recommendations

Shield the tail of the whole fish with aluminium foil. Turn the fish 

over when the oven beeps. This programme is suitable for whole 

fishes and fish fillets.

4. Bread/Cake 

125-625 g

5-20 min.

recommendations

Put bread on a piece of kitchen paper and turn over, as soon as 

the oven beeps. Place cake on a ceramic plate and if possible, 

turn over, as soon as the oven beeps. (Oven keeps operating and 

is stopped, when you open the door. This programme is suitable 

for all kinds of bread, sliced or whole, as well as for bread rolls 

and baguettes. Arrange bread rolls in a circle. This programme is 

suitable for all kinds of yeast cake, biscuit, cheese cake and puff 

pastry. It is not, suitable for short/crust pastry, fruit and cream 

cakes as well as for cake with chocolate topping.

Select the Manual Defrosting function with a power level of 180 W if you 

want to defrost food manually. For further details on manual defrosting 

and defrosting time, refer to the page 29-30.

FG87SUST_XEU_DE68-03132Y-01_EN.indd   22

2016-03-02   �� 5:28:39

Summary of Contents for FG87S

Page 1: ...es Thank you for purchasing this Samsung product 800W Please be advised that the Samsung warranty does NOT cover service calls to explain product operation correct improper installation or perform nor...

Page 2: ...k Call the service center for help Note Important CONTENT Safety instructions 2 Quick look up guide 14 Oven 15 Control panel 15 Accessories 16 Setting the time 16 Cooking Reheating 17 Power levels 17...

Page 3: ...sponges damp cloth and similar may lead to risk of injury ignition or fire If smoke is emitted switch off or unplug the appliance and keep the door closed in order to stifle any flames Important safet...

Page 4: ...control area Before using the your oven first time oven should be operated with the water during 10 minute and then used WARNING Microwave heating of beverages can result in delayed eruptive boiling t...

Page 5: ...or sharp metal scrapers to clean the oven door glass since they can scratch the surface which may result in shattering of the glass If the oven generates a strange noise a burning smell or smoke is em...

Page 6: ...must be of the same standard as the The temperature of accessible surfaces may be high when the appliance is operating The door or the outer surface may get hot when the appliance is operating Keep th...

Page 7: ...microwave oven must not be installed above a conventional oven otherwise the microwave oven s cooling system may be adversely affected by hot air produced by the conventional oven power cable supplie...

Page 8: ...ould comply with national and local regulations If you wish to make a fixed connection ensure that a multipolar switch with a minimum contact spacing of 3 mm is fitted in the supply line Building in d...

Page 9: ...template to place the BKT Base 71mm away from A side of the cabinet Fig3 4 Use the 3mm drill to make holes Fix screws into BKT Base Fig4 5 Attach the surround Fig5 6 Make the electrical connection Che...

Page 10: ...wave oven should be cleaned regularly to prevent grease and food particles from building up Inside and outside surfaces Door and door seals Turntable and Roller rings Turntable type model only ALWAYS...

Page 11: ...ange for a qualified engineer to replace the bulb WARNING Only qualified staff should be allowed to modify or repair the appliance Do not heat liquids and other food in sealed containers for microwave...

Page 12: ...n water and keep the power cable away from heat Do not insert fingers or foreign substances If any foreign substance such as water has entered the appliance unplug the power plug and contact your near...

Page 13: ...y a Under no circumstances should any attempt be made to operate the oven with the door open or to tamper with the safety interlocks door latches or to insert anything into the safety interlock holes...

Page 14: ...d with grains which could cause burns and fire The manufacturer cannot be held liable for damage caused by improper or incorrect use of the appliance Failure to maintain the oven in a clean condition...

Page 15: ...WAVE POWER LEVEL MODE SELECTION 9 COMBI MODE SELECTION 10 STEAM CLEAN BUTTON 11 START 30S BUTTON 2 Set the cooking time by pressing the and buttons 3 Press the button Oven 1 VENTILATION HOLES 2 GRILL...

Page 16: ...r ring and turntable Setting the time Your microwave oven has an inbuilt clock When power is supplied 0 88 88 or 12 00 is automatically displayed on the display Please set the current time The time ca...

Page 17: ...the oven unattended First place the food in the centre of the turntable Then close the door 1 Press the button Result The 800 W maximum cooking power indications are displayed Select the appropriate p...

Page 18: ...clean function you can easily clean the cavity of oven Use this function only after the oven has completely cooled Room temperature Use normal water only and no distilled water 1 Open the Door 2 Fill...

Page 19: ...Standing time 1 Ready meal chilled 300 350 g 400 450 g 3 min Recommendations Put on a ceramic plate and cover with microwave cling film This programme is suitable for meals consisting of 3 components...

Page 20: ...crusty plate is not dishwasher safe Auto crusty cook settings The following table presents the various Auto Programmes of the Crisp function quantities standing times and appropriate recommendations T...

Page 21: ...n the crusty plate with warm water and detergent and rinse off with clean water Do not use a scrubbing brush or a hard sponge otherwise the top layer will be damaged The crusty plate is not dishwasher...

Page 22: ...or 5 min 250g Using the auto power defrost feature The Auto Power Defrost feature enables you to defrost meat poultry fish and bread cake The defrost time and power level are set automatically You si...

Page 23: ...Shield the edges with aluminium foil Turn the meat over when the oven beeps This programme is suitable for beef lamb pork steaks chops and minced meat 2 Poultry 200 1500 g 20 60 min Recommendations S...

Page 24: ...ble Close the door 2 Press the Combi button Result The following indications are displayed microwave and grill mode 600 W out power Select the appropriate power level by pressing the Combi button agai...

Page 25: ...China and earthenware Porcelain pottery glazed earthenware and bone china are usually suitable unless decorated with a metal trim Disposable polyester cardboard dishes Some frozen foods are packaged...

Page 26: ...g Cover during standing time Food Portion Power Time min Standing time min Instructions Spinach 150 g 600 W 4 5 2 3 Add 15 ml 1 tablespoon cold water Broccoli 300 g 600 W 9 10 2 3 Add 30 ml 2 tbsp col...

Page 27: ...butter after cooking Cover during a standing time of 3 minutes Hint Cut the fresh vegetables into even sized pieces The smaller they are cut the quicker they will cook All fresh vegetables should be...

Page 28: ...stand for a short time after reheating to let the temperature even out The recommended standing time after reheating is 2 4 minutes unless another time is recommended in the chart Take particular car...

Page 29: ...rature carefully Food Portion Power Time Standing time min Baby milk 100 ml 300 W 30 40 sec 2 3 200 ml 300 W 50 sec to 1 min 2 3 Instructions Stir or shake well and pour into a sterilised glass bottle...

Page 30: ...mmon rashers thin fish portions sandwiches and all kinds of toast with toppings Important remark Whenever the grill only mode is used make sure that the grill heating element is under the ceiling in t...

Page 31: ...s Use the power levels and times in this table as guide lines for grilling Fresh food Portion Power 1st side time min 2nd side time min Toast Slices 4 pcs each 25 g Grill only 4 5 4 5 Instructions Put...

Page 32: ...0 g preserving sugar and stir well Cook covered for 10 12 minutes using 800 W Stir several times during cooking Empty directly into small jam glasses with twist off lids Stand on lid for 5 minutes COO...

Page 33: ...cooking instructions are based on a 650 W oven then you will need to reduce some cooking time for the FG87S FG88S 800 W Ready meals are now very convenient and popular These are meals which are alrea...

Page 34: ...you press the start button Is the door completely closed The food is not cooked at all Have you set the timer correctly Is the door closed Have you overloaded the electric circuit and caused a fuse to...

Page 35: ...er source 230V 50 Hz Power consumption Microwave Grill Combined mode 1200 W 1100 W 2300 W Output power 100 W 800 W IEC 705 240 V 800 W 230 V 750 W Operating frequency 2450 MHz Magnetron OM75P 31 Cooli...

Page 36: ...com it support CYPRUS 8009 4000 only from landline toll free www samsung com gr support GREECE 80111 SAMSUNG 80111 726 7864 only from land line 30 210 6897691 from mobile and land line LUXEMBURG 261...

Reviews: