background image

S e a r c h i n g   M e m o r i e s

This feature enables you to search
the telephone numbers or fax

numbers stored into the unit’s
memory. This feature allows your
unit to scan all memories (both

one-touch dial memory and speed
dial memory).

Scanning the Entire Memory

This feature allows you to scan the entire

memory.

To begin scanning the entire memory,

press 

[SEARCH]. 

Follow the steps at

right.

If the memory is empty, [NOT

ASSIGNED] 

will appear when you press

[SEARCH].

l  

l  

Empty memory location will be skipped

during the searching process.

l  

l  

To exit this mode in the middle of

searching memories, press [STOP].

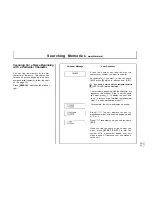
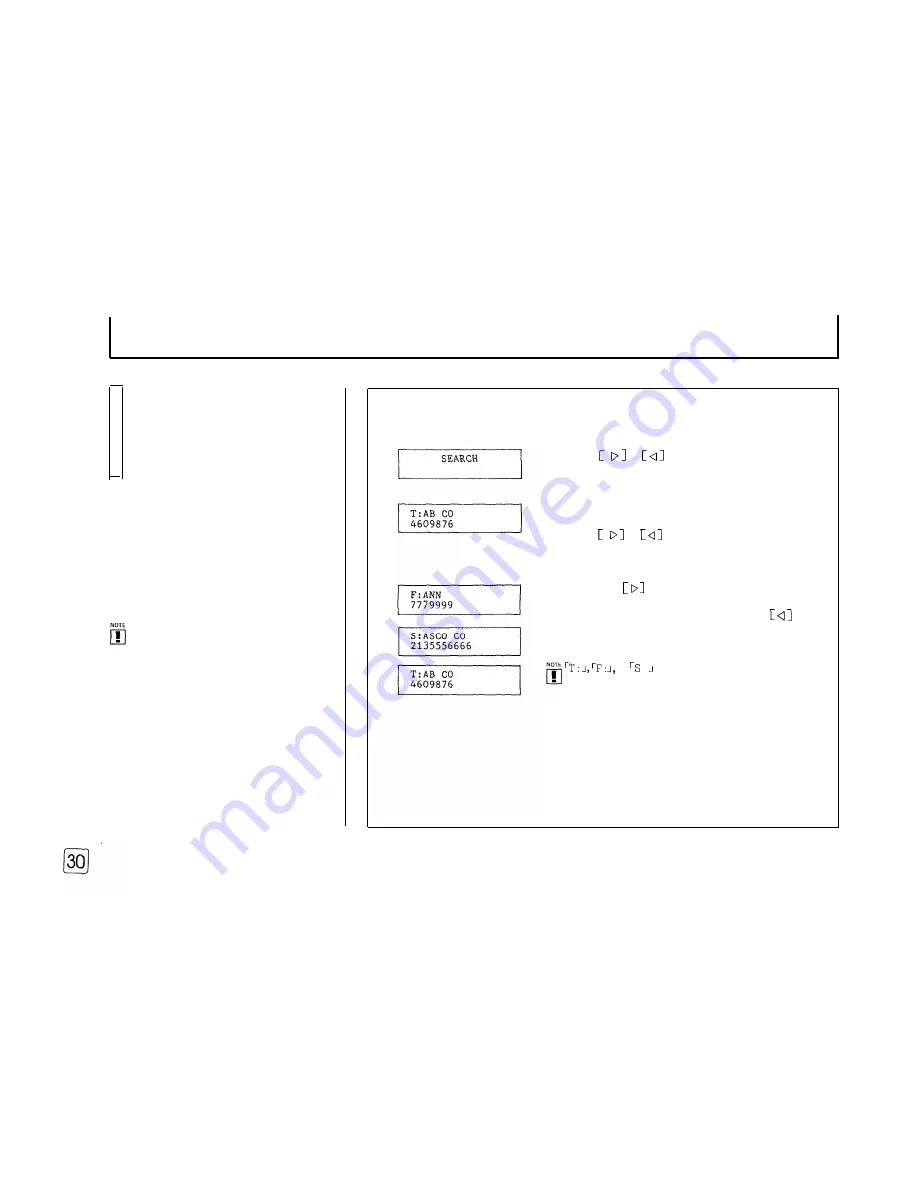
Window Message

Your Response

Press 


 or 

 to display the contents

of the first memory location in use.

The name and number are displayed on the
window. If this is not the number you want,

press 


 or   

 repeatedly until you find

the number you want.

P r e s s i n g    

 allows to scan forwards

through the entire memory in alphabetical
order (from A to Z); while, pressing   

allows to scan backwards (from Z to A).

Scanning is looped.


   or   :   before name in the display

indicates Telephone number stored into the
one-touch key ( 

), Fax number stored into the

one-touch key 

(F), 

or the number stored into

the Speed dial memory(S).

When 

you find the name or the number you

want, press 

[ S T A R T / C O P Y ]  

to dial the

number. With a document loaded, your unit

starts to send it. Otherwise, your unit makes
a phone call.

Summary of Contents for FX 505

Page 1: ...FX 505 INTEGRATED PERSONAL FACSIMILE Please read your Operator s Guide carefully before using your new FX 505 Facsimile machine This guide contains instructions for proper setup operation and maintenance of your FX 505 ...

Page 2: ......
Page 3: ...rning the equipment which you have connected to your telephone line Upon request of the telephone company provide the FCC registration number and the Ringer Equivalence Number REN of the equipment which is connected to your line both of these items are listed on the equipment label and in the Service Information chapter of this guide The sum of all of the RENs on your telephone line should be less...

Page 4: ...should ensure that it is permissible to be connected to the facilities of the local telecommunications company The equipment must also be installed using an acceptable method of connection In some cases the company s inside wiring associated with a single line individual service may be extended by means of a certified connector assembly telephone extension cord The customer should be aware that co...

Page 5: ...ute reparation d un appareil certifie devrait être effectuee dans un centre d entretien approuve par le fournisseur Toute reparation ou modification apportee par l utilisateur à son appareil ou tout problème de fonctionnement pourrait forcer votre compagnie téléphonique a debrancher votre appareil L utilisateur devrait s assurer que les raccordements de mise a la terre de I alimentation des lignes...

Page 6: ...ouch Telephone or Answering Machine the Power Speed Dial Numbers 28 Turning the Power ON Choosing Dial Mode Searching Memories 30 Setting Speaker Volume and Ringer Volume Other Ways to Send or Receive 32 Loading Fax Paper 12 Sending at a Later Time Canceling Delay Setting Up Basic Information 13 Transmission Polling Setting Date and Time and Your Terminal ID Using As a Telephone 35 How to Enter Na...

Page 7: ...tandard telephone jack to connect the VOLUME Switch unit to the telephone line Adjust the monitoring speaker volume see page 11 Check Your Equipment Main Body Handset Fax Paper Handset Cord Line Cord Unpack your unit and examine the drawing at right to familiarize yourself with its parts and to make sure none are missing Document Tray Document Guide Adjust to the width of document loaded Release B...

Page 8: ... light or faint print pencil The indicator lights Select PHOTO mode for SPEED Key Press before entering a 2 digit speed dial number FUNCTION Key Use with other keys when performing certain functions photographs or documents printed in color The indicator flickers V REQUEST Key and Indicator Press to make a voice request while you are sending or receiving documents The indicator lights when you ini...

Page 9: ...uble as YES key and NOI key when performing certain functions with FUNCTIONI key or key and CD1 key when searching memories see page 30 OHD HOLD Key and OHD Indicator Press to dial numbers without picking up the handset The indicator lights when speaker activates Or press the key to put a call on hold Tones and Alarms Your unit produces a variety of tones to assist you in its proper operation l A ...

Page 10: ... information such as your ID number and name date and time into unit s memory see page 13 l Load fax paper in your unit see page 12 Choosing a Proper Location A proper location for your fax machine helps ensure trouble free operation Select a location for the unit where n It is away from heating or air conditioning units n Its cords are not in the way of normal activities n It is at least 4 inches...

Page 11: ...g one end of the line cord into the TEL LINE jack on the machine and the other end into a jack on the multi line phone system l l If you install the unit in an electronic or digital telephone system or PBX it may not operate correctly To use the unit on such a system you may nave to contact your local telephone company and have them install a separate line that bypasses this equipment l l Many mod...

Page 12: ...f electricity such as an air conditioner or office copier Turning the Power On Press the Power switch to turn the unit on When you turn the power on SYSTEM INITIAL message appears briefly in the display window and all indicators light briefly After a moment all indicators are turned off and the date time and current mode are displayed If the displayed time and date are not correct don t worry you ...

Page 13: ...dial tone continues you have a pulse service 3 If you have a pulse service set the DIAL MODE switch to PULSE The VOLUME switch on the left side of the machine controls the loudness of the dialing tones you hear through the speaker when you dial with the handset down You can set the volume to low all the way to the right medium center or high all the way to the left Setting Ringer Volume The RINGER...

Page 14: ...n the cover is lifted Remove the empty paper roll core if any 2 Place a new paper roll in the compartment Be sure the paper exits from the top of the roll as shown 3 Pull the paper edge out about an inch from the edge of the fax machine 4 Close the cover by pressing down on the center of the cover until it is secure Tear off the excess paper The window display returns to the standby Hint For best ...

Page 15: ...ing sure to use four digits for 3 00 P M 1500 4 00 P M 1600 example enter 2 00 A M as 5 00 P M 1700 00 P M 1800 0200 enter 9 30 6 00 P M 1900 A M as 0930 7 8 00 P M 2000 9 00 P M 2100 For times from 1O 00 P M 2200 Noon through 11 00 P M 2300 Midnight use the Midnight 0000 entries shown in the table at right Window Message Your Response Press YES Using numeric keys enter the month MM day DD and yea...

Page 16: ...ive them the information they need to contact you or follow up in case of a faulty transmission unreadable fax or other problem Using one of the User Options you can prevent this information from printing on faxes see page 36 To begin setting your Terminal ID press FUNCTION then 2 Follow the steps at right Your Response Press YES Enter your fax number up to 20 digits To delimit the area and exchan...

Page 17: ...When the character you want appears on the display press to confirm it 3 Select further characters in the same way Press REDIAL PAUSE to enter a space l If you make a mistake while entering press NO to backspace and correct l To cancel entering number and name press STOP in the middle of entering Follow the chart to produce alphanumeric characters with the number keypad For example to enter MY CO ...

Page 18: ...ine as you would use any regular telephone Use this mode if you typically use the unit to receive both voice calls and faxes In AUTO RCV MODE your unit automatically picks up to receive a fax after several rings The number of rings can be set through the User Options see page 36 Use this mode if you typically leave your fax machine unattended In ANS FAX MODE the unit can share the same telephone l...

Page 19: ...or a certain time period of silence is detected on the line by your fax machine the call automatically switches over to the fax machine and reception begins overriding the answering machine s announcement If someone wants to speak with you your fax machine ignores the call The caller can leave a message on the answering machine l If you have troubles receiving faxes in the ANS FAX mode change the ...

Page 20: ...EL jack is switched off or the answering machine is not connected to your unit your FX505 goes to TEL FAX mode In TEL FAX mode your unit operates as follows 1 When a call is received if you do not pick up the handset within 6 rings your fax machine will switch to AUTO RCV mode 2 When a call is received if you pick up the handset and hear someone you can talk If someone wants to send a fax please i...

Page 21: ...your fax machine and reception begins Hang up the handset If your fax machine occasionally fails to detect the remote receive start code change the code for other number Cancelling a Reception You can stop a document that you are currently receiving if you do not want to receive the document Press STOP The unit continues receiving and the window displays as shown below to alert you that the unit i...

Page 22: ...back message which shows the telephone number of the remote unit Window Messages During receiving the window will display a message similar to the one below to inform you of its status or activity In this example the number in the top of the window is the telephone number of the sending fax REC means you are receiving G3 indicates the communications standard observed by both fax machine 9 6 indica...

Page 23: ... If the package has been opened store it away from direct light Heat and humidity darken the background of thermal paper l Avoid storing faxes in contact with blueprint diazo copies and plastic film or binders The chemicals in these materials may fade the image l Avoid storing faxes with the imaged side together The printed image may transfer from one copy to the other l Store your received faxes ...

Page 24: ...ding Be sure the bottom sheet enters first as shown below l If you want to add documents while sending insert it into the loading slot so it is placed on the top of the preceding one as shown at right 3 Pick up the handset and dial the number of the remote fax machine you want to send to You can also use one touch dialing or 2 digit speed dialing for this Step See Memory Dialing on page 23 4 When ...

Page 25: ...y either press START COPY and hang up or hang then press R E D I A L P A U S E to activate the automatic redialing If there is still no answer your unit hangs up If the receiving unit answers your document is sent automatically The OHD indicator flickers and BUSY REDIAL appears on the LCD window while the unit waits for the 3 minute interval time to indicate the auto redialing is being activated I...

Page 26: ...e document and for some reasons stops without reading all of it the document might be jammed The unit displays DOCUMENT JAM DO NOT pull it out of the loading slot To clear the jam open the control panel using hand as shown below It will release the grip on the document Wait until the white roller in the unit stops moving You can then remove the jammed document without damaging your unit Close the ...

Page 27: ...printed out after every send operation if you have selected this feature to be activated by answering YES to the prompt CONFIRMATION REPORT while setting User Options see page 36 Example is provided below 2 When sending is finished the call signal is sent to the remote party s unit The remote party may pick up the handset within 15 seconds if they wish to speak If you do not respond to the voice r...

Page 28: ...ations Your unit accepts original documents no smaller than 6 inches wide by 8 5 inches long and no larger than 8 5 inches wide by 59 inches long Do not attempt to load 2 or more documents into the unit when the documents are too thin or too thick These documents might fail in automatic feeding Feed one sheet at a time Refer to the chart below for acceptable thickness Make a standard copy by using...

Page 29: ...opy with whatever settings you like The copy will show you how your document would appear at the receiving fax machine if you send it with the current resolution and contrast settings l The PHOTO mode and the SUPER FINE resolution mode can not be set at the same time If you select the modes to be activated the window displays P H O T O S U P E R but the unit will actually send or copy the document...

Page 30: ...key under which you want to assign the number To store a telephone number press YES or To store a facsimile number press NO The unit displays XY FAX Y N where XY is the one touch key number 01 10 selected Press YES If the window then says CANCEL Y N a number is already assigned to the one touch key Press YES to replace that number and continue or NO to start over with a different one touch key Ent...

Page 31: ...NO to backspace and correct When the correct number appears on the window press YES If you want to identify the telephone number with a name enter the desired name as described in How to Enter Name on page 15 When the desired name appears on the window press YES If you do not want to enter a destination name just press YES without entering name To use the memory search function it is recommended t...

Page 32: ...indow Message Your Response Press C Dl or Cdl to display the contents of the first memory location in use The name and number are displayed on the window If this is not the number you want press Dl or Ul repeatedly until you find the number you want Pressing C Dl allows to scan forwards through the entire memory in alphabetical order from A to Z while pressing L 41 allows to scan backwards from Z ...

Page 33: ...ich is labelled with DEF If no name is stored with the assigned character NOT FOUND will be displayed The first name beginning with the character will appear on the window If this is not the name you want press to display the next and so on It lets you scan forwards in alphabetical order To scan backwards press Q For example the unit may display as shown Press Dl The unit displays the next in alph...

Page 34: ...unit displays the next available function menu each time you press NO When the function you want to use displays press YES You can enter the function mode Window Message Your Response Press YES Enter the telephone number using the dial keypad To insert a pause press REDIAL PAUSE When you see the number you want in the window press YES Using the dial keypad enter the time to send the document in 24...

Page 35: ...t the other party can poll 3 Press YES to cancel the programmed delay transmission The unit displays ENTER TEL NO 4 If you want to program the other delay transmission with the document enter the desired time to send it 1 Make a call to the remote fax machine you want to poll o r 2 Press POLL when the remote fax machine answers with a fax tone Your unit begins receiving the document Press STOP The...

Page 36: ...cator and the POLL indicator are lit and when a call comes in if the call is a remote unit attempting to poll your unit your unit will send the document l l You can not send other documents while your unit is set for polling transmission l l Because your unit is not featured with poll code which secures poll transmission any poll capable fax machine may retrieve your document To Cancel TX POLL bei...

Page 37: ...e standby mode Manual Redialing To save time retry a busy or unanswered number as many times as you wish by pressing REDIAL PAUSE 1 Press REDIAL PAUSE Your unit dials the last number you dialed and you can monitor the dialing process through the speaker 2 When the other party answers pick up the handset and speak If you get a busy signal or there is no answer press OHD HOLD to end the call The uni...

Page 38: ...ant to set your fax machine to have your terminal ID TTI printed on each page you send Press NO not to have your TTI printed Your unit is preset to YES at factory Press YES if you want to set your fax machine to automatically print out a confirmation report after each transmission Press NO if you do not want this report to be automatically printed Your unit is preset to NO at factory Enter the num...

Page 39: ... change the middle digit only l Your unit is preset to 9 at factory After a call is picked up by the answering machine in the ANS FAX mode your fax machine monitors the line When your fax machine detects a certain time period of silence or the line released by the answering machine the call will be treated as a fax message and your machine begins reception If you want to unlimit the silence detect...

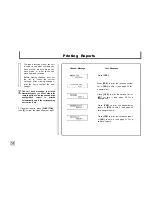
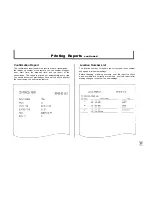
Page 40: ...st and the confirmation report is printed automatically only if the corresponding user option is set TO print out reports press FUNCTION then 3 Follow the steps shown at right Printing Reports Window Message Your Response Press YES Press YES to print the location number list or NO to skip it see page 39 for a sample list Press YES to print the options list or sample list NO to skip it see page 40 ...

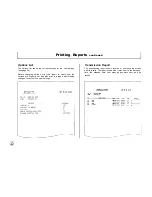
Page 41: ...on The report is printed out automatically every time you send a document provided you have set the unit to print out the report using the user option feature Location Number List The location number list shows the current one touch number and speed dial number settings Before changing or adding numbers print this report to check which numbers are currently stored And print this report after makin...

Page 42: ... changing options print this report to check how the options are currently set And also print this report after making changes to confirm the new settings The transmission report shows records of your sending activity and its results The report shows who it was sent to the date and time the elapsed time how many pages were sent and its results ...

Page 43: ...ontinued Reception Report The reception report shows records of your receiving activity and its results The report shows who it was received the date and time the elapsed time how many pages were received and its results ...

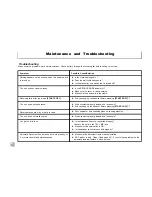
Page 44: ...se Solution l Is the machine plugged in l Does the wall outlet have power l Is the wall outlet on a switch that is turned off l Is the RECEIVE MODE indicator lit l Make sure the cover is closed securely l Make sure the handset is in the cradle l Are documents properly loaded and face down l Did you hang up the handset before pressing START COPY l Poor original or dirty scanning glass on sending ma...

Page 45: ...ain Your unit cannot connect with the remote machine Try again If failure persists wait an hour or so for or has lost contact because of a problem on the the line to clear then try again phone line Your unit is out of fax paper Load paper see page 12 Loaded document has jammed in the feeder Clear jam see page 24 The one touch or speed dial location you tried to use Dial the number manually with th...

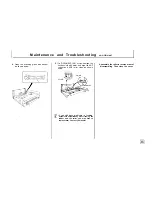
Page 46: ...nds of the roller are terminated with bushings which are snapped shut with small tabs Push the tabs slightly inwards in the direction of A then rotate it in the direction of B until it reaches the slot as shown in the figure below Then pull the roller upwards in the direction of C Be careful not to lose the bushing on one end of the roller when disassembling 3 Wipe the roller clean with a soft clo...

Page 47: ...dampen the lint free cloth with water and wipe the ADF rubber and ADF roller clean as shown below If you still have problems in feeding documents automatically after cleaning the rubber and the roller you may have to replace them Contact your dealer 6 Assemble the roller in reverse order of disassembling Then close the cover ...

Page 48: ... fax unit sends information in what form and at which speed 1 Reading and converting the document into electronic signals audio tones 2 Sending or transmitting the signals through a telephone system to another fax unit 3 Converting the received signals into a facsimile of the transmitted document To simplify you can think of fax units as being grouped by speed Group 1 includes 6 minute units Group...

Page 49: ...ing a problem in 2 1 6 m m 8 5 transmitting receiving or both Yes No Does the same problem occur when you call a different machine Yes No Communication Line Compatibility Compression Scheme Modem Speed Resolution Half Tone Contrast Scanning Method Flat Bed scanning using CIS Contact Image Sensor Print Method Input Document Size Effective Scanning Width 210mm 8 27 1 Effective Recording Width Paper ...

Page 50: ...f purchase It must be presented to the authorized service center at the time service is requested This warranty does not cover damage due to accident fire flood and or other acts of God misuse incorrect line voltage improper installation improper or unauthorized repairs commercial use or damage that occurs in shipping Exterior and interior finish lamps and glass are not covered under this warranty...

Page 51: ...26 Location for setting 29 Location number list 39 Manual fax machine 16 Manual faxing with handset up 23 Manual receive mode 16 Memory Storing 28 Searching 30 Mode receiving 16 Name entering 15 OHD key 6 One touch dials storing 28 Options List printing 38 Setting 36 Original preparing 26 Page and document size limitation 26 PAUSE key 28 Phone line connection 9 Photo 26 Polling 33 Power Connection...

Page 52: ...ELECTRONICS 105 Challenger Road Ridgefield Park NJ 07660 0511 FOR CUSTOMER SERVICE DIAL 1 800 SAMSUNG 139 900505EAA C Printed in Korea ...

Reviews: