background image

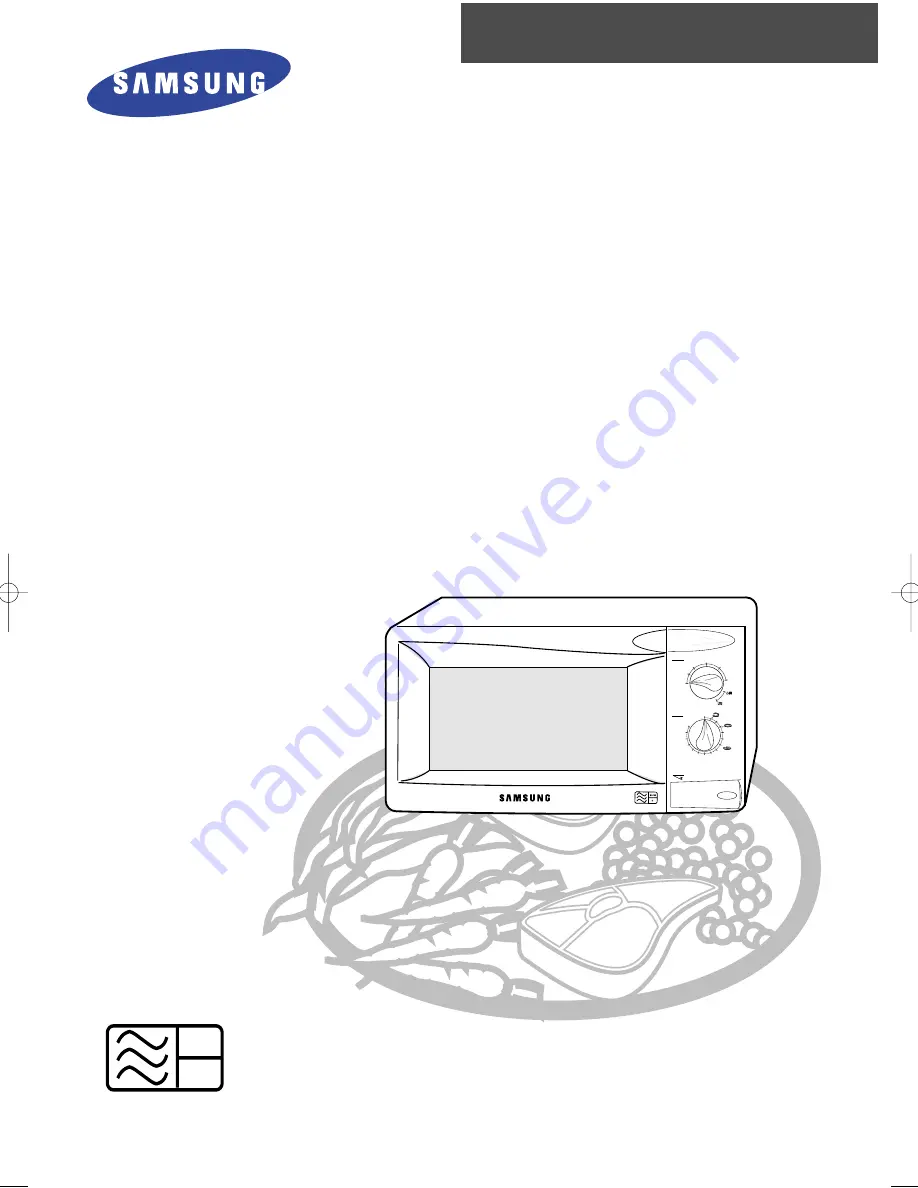
MICROWAVE OVEN

G2613C

Owner’s Instructions

and

Cooking Guide

0

1

2

3

4

5

6

7

8

9

10

20

30

40

50

60

120

400

560

800W

240

DEFROST

Power

Timer

800W

E

Code No. DE68-01224D

G2613C-1(GB)UK1  10/10/00 4:37 PM  Page i

Summary of Contents for G2613C

Page 1: ...MICROWAVE OVEN G2613C Owner s Instructions and Cooking Guide 0 1 2 3 4 5 6 7 8 9 10 20 30 40 50 60 120 400 560 800W 240 DEFROST Power Timer 800W E Code No DE68 01224D ...

Page 2: ...12 COOKING WITH YOUR MICROWAVE OVEN Cooking Reheating 13 Stopping the Cooking 14 Adjusting Extra Time 14 Manual Defrosting Food 15 Instant Reheat Guide 15 Power Level and Time Variations 16 TRADITIONAL COOKING METHODS Grilling 17 RECOMMENDATIONS FOR USE Cookware Guide 18 Cooking Guide 19 Cleaning Your Microwave Oven 25 Storing and Repairing Your Microwave Oven 25 Technical Specifications 26 You ha...

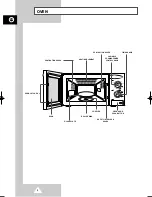
Page 3: ...E 0 1 2 3 4 5 6 7 8 9 10 20 30 40 50 60 120 400 560 800W 240 DEFROST Power Timer DOOR LATCHES VENTILATION HOLES HEATING ELEMENT TIMER KNOB VENTILATION HOLES OPEN DOOR PUSH BUTTON COUPLER ROLLER RING DOOR VARIABLE COOKING POWER CONTROL KNOB GB ...

Page 4: ...3 Control Panel 120 400 560 800W 240 0 1 2 3 4 5 6 7 8 9 10 20 30 40 50 60 DEFROST Power Timer INSTANT REHEAT OPEN DOOR PUSH BUTTON GB ...

Page 5: ...h the door open or to tamper with the safety interlocks door latches or to insert anything into the safety interlock holes b Do not place any object between the oven door and front face or allow food or cleaner residues to accumulate on sealing surfaces Ensure that the door and door sealing surfaces are kept clean by wiping after use first with a damp cloth and then with a soft dry cloth c Do not ...

Page 6: ...set the oven going when it is empty 4 DO NOT cover the rear ventilation slots with cloths or paper Reason The cloths or paper may catch fire as hot air is evacuated from the oven 5 ALWAYS use oven gloves when removing a dish from the oven Reason Some dishes absorb microwaves and heat is always transferred from the food to the dish The dishes are therefore hot 6 DO NOT touch heating elements or int...

Page 7: ...wer cable away from heated surfaces Do not operate this appliance if it has a damaged power cable or plug 10 Stand at arm s length from the oven when opening the door Reason The hot air or steam released may cause scalding 11 Keep the inside of the oven clean Reason Food particles or spattered oils stuck to oven walls or floor can cause damage to the paint finish reducing the efficiency of the ove...

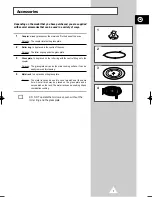
Page 8: ...s plate 3 Glass plate to be placed on the roller ring with the centre fitting on to the coupler Purpose The glass plate serves as the main cooking surface it can be easily removed for cleaning 4 Metal rack to be placed on the glass plate Purpose The metal rack can be used to cook two dishes at the same time A small dish may be placed on the glass plate and a second dish on the rack The metal rack ...

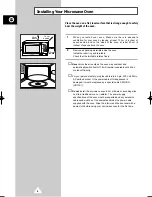
Page 9: ...rable until it has cooled sufficiently For your personal safety plug the cable into a 3 pin 230 Volt 50Hz AC earthed socket If the power cable of this appliance is damaged it must be replaced by a special cable PENCON UD13A1 Do not install the microwave oven in hot or damp surroundings like next to a traditional oven or radiator The power supply specifications of the oven must be respected and any...

Page 10: ...ains lead are coloured in accordance with the following code Green and yellow Earth Blue Neutral Brown Live As the colours of the wires in the mains lead of this appliance may not correspond with the coloured markings indentifying the terminals in your plug proceed as follows Connect the green and yellow wire to the terminal in the plug marked with the letter E or the earth symbol or coloured gree...

Page 11: ... oven For example If the cooking instructions are based on a 650W oven then you will need to reduce some cooking time for the G2613C 800W Ready meals are now very convenient and popular These are meals which are already prepared and cooked by the food manufacturer and then frozen chilled or vacuum sealed for long life Increasingly heating times for such ready meals are being based on the Heating C...

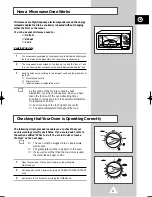
Page 12: ...ed in recipes and in this booklet must therefore be respected to ensure Even cooking of the food right to the centre The same temperature throughout the food 400 560 800W 240 0 1 2 3 4 5 6 7 8 9 10 20 30 40 50 60 DEFROST Power Timer 120 The following simple procedure enables you to check that your oven is working correctly at all times If you are in doubt refer to the section entitled What to Do i...

Page 13: ... is either overcooked or undercooked Was the appropriate cooking length set for the type of food Was an appropriate power level chosen Sparking and cracking occur inside the oven arcing Have you used a dish with metal trimmings Have you left a fork or other metal utensil inside the oven Is aluminium foil too close to the inside walls The oven causes interference with radios or televisions Slight i...

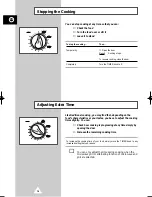
Page 14: ...entre of the glass plate Close the door 2 Set the power level to maximum by turning COOKING POWER CONTROL knob 3 Set the time by turning TIMER knob Result The oven light comes on and the glass plate starts rotating Cooking starts You can change the power level during cooking by turning the COOKING POWER CONTROL knob 400 560 800W 240 120 400 560 800W 240 DEFROST Power Timer 0 1 2 3 4 5 6 7 8 9 10 2...

Page 15: ... depending on the food s characteristics or your tastes you have to adjust the cooking times slightly You can Check how cooking is progressing at any time simply by opening the door Increase the remaining cooking time To increase the cooking time of your food simply move the TIMER knob to any increased setting that you require You can only adjust the time during cooking when the microwave grill or...

Page 16: ...ER CONTROL knob to Max Power 3 Turn the TIMER knob to select instant cook drinks soup sauce and fresh vegetables Refer to the table below about instant reheat Symbol Recipes Serving size Standing Time DRINKS Drinks 150 ml 1 2 mins Reheating SOUP Soup 200 300 ml 2 mins SAUCE Sauce Reheating FRESH Fresh 200 300 g 2 mins VEGETABLES Vegetables Cooking Manual Defrosting Food Instant Reheat Guide 120 40...

Page 17: ...The cooking times given in recipes and in this booklet correspond to the specific power level indicated If you select a Then the cooking time must be Higher power level Decreased Lower power level Increased 16 GB Power Levels and Time Variations 800W 560W 400W 240W 160W 120W 800W 18 1000W 1000W 82 G2613C 100 70 50 30 20 15 100 MWO GRILL POWER LEVEL HIGH MEDIUM HIGH MEDIUM MEDIUM LOW DEFROST LOW GR...

Page 18: ...ning the COOKING POWER CONTROL knob to GRILL symbol and turning the TIMER knob to the appropriate time 2 Open the door and place the food on the rack 3 Turn the COOKING POWER CONTROL knob to GRILL symbol 4 Turn the TIMER knob to the appropriate time Result Grilling starts Please don t mind if heater turns off and on while grilling This system is originally designed to prevent overheating of the ov...

Page 19: ...ne cups and Can be used to warm food Overheating may cause the containers polystyrene to melt Paper bags or newspaper May catch fire Recycled paper or metal trims May cause arcing Glassware Oven to table ware Can be used unless decorated with a metal trim Fine glassware Can be used to warm foods or liquids Delicate glass may break or crack if heated suddenly Glass jars Must remove the lid Suitable...

Page 20: ...flower pieces tomatoes To prevent the thinnest parts of some food from becoming overcooked cover the tips with small pieces of aluminium foil keep away from the oven walls Examples Heads and tails of whole fish wings on a whole chicken Food with skins must be pricked with a fork to allow the steam to escape and to prevent the skin from breaking Examples Potatoes tomatoes sausages egg yolks whole f...

Page 21: ... individual pies mince pies 1individual pie 4 individual pie Pizza 1wholeindividualpizza 1 slice of pizza Rice 1 serving cooked 4 servings cooked Individual curry with rice Pasta 1 serving 4 servings 7 10 2 31 2 4 1 4 1 2 3 4 21 2 3 4 11 2 2 2 3 8 10 3 5 3 4 10 12 MED HIGH 70 HIGH 100 HIGH 100 HIGH 100 HIGH 100 MED HIGH 70 HIGH 100 MED HIGH 70 MED HIGH 70 If necessary remove from foil tray Stand o...

Page 22: ...wberries Loose hard fruit apples peaches rhubarb Purees fruit dessert Fruit pie trifles cheesecakes with fruit toppings 4 5 3 5 4 5 5 6 per 8oz 225g 3 5 5 10 10 15 10 15 5 10 5 Shield thin ends with foil if necessary Arrange in a single layer Turn once during defrosting Stir half way through defrosting Pierce the bag and place in an oven proof dish Turn half way through defrosting 6 8 7 8 7 10 3 4...

Page 23: ...one Chops cutlets Well done 10 12 12 14 15 8 10 HIGH 100 for first 5 min then MEDIUM 50 MED HIGH 70 Turn over half way through cooking Stand for 15 25 minutes Arrangethethinendstowardsthecentreofthedish Stand for 5 minutes Leg shoulder Well done Chops Well done 10 12 8 10 HIGH 100 for first 5 min then MEDIUM 50 MED HIGH 70 Turn over half way through cooking Stand for 15 25 minutes Arrangethethinen...

Page 24: ...owards the centre of the dish Cook tender leaves only with very little water Cover lightly Carrots thinly sliced Beetroot unpeeled Swede and turnip Parsnips quartered 1lb 450g 8oz 225g 4 medium 1lb 450g 1lb 450g 10 6 7 12 15 10 12 Add 4 fl oz 60ml of water Add 4 fl oz 60ml of water Cover tightly Stir half way through cooking Wrap in cling film or cook in a covered dish OTHER VEGETABLES Mushrooms O...

Page 25: ... 2 fl oz 30ml of water Place in a shallow oven proof dish and cover Add 2 fl oz 30ml of water Cabbage Brussel sprouts Cauliflower Broccoli Spinach 8oz 225g 8oz 225g 8oz 225g 8oz 225g 8oz 225g 3 4 4 5 5 6 5 4 5 Add 3 fl oz 45ml of water Add 2 fl oz 30ml of water Taste after the minimum cooking time to avoid overcooking Add 2 fl oz 30ml of water Rearrange half way through cooking Leavetostandfor1 2m...

Page 26: ... let the microwave oven cool down before cleaning in order to avoid injury Storing and Repairing Your Microwave Oven A few simple precautions should be taken when storing or having your microwave oven serviced The oven must not be used if the door or door seals are damaged Broken hinge Deteriorated seals Distorted or bent oven casing Only a qualified microwave service technician should perform rep...

Page 27: ...ce Model G2613C Power source 230 V 50 Hz Power consumption Microwave 1200 W Grill 1000 W Combined mode 1350 W Output power 230 V 100 W 750 W 6 levels IEC 705 240 V 100 W 800 W Operating frequency 2 450 MHz Magnetron OM75SH 31 Cooling method Cooling fan motor Dimensions W x H x D Outside 489 x 275 x 364 mm Oven cavity 306 x 181 x 322 mm Volume 0 6 cubic feet Weight Net 16 kg approx ...

Page 28: ...THIS APPLIANCE IS MANUFACTURED BY Printed in UK ELECTRONICS ...

Reviews: