background image

™jô°ùdG ∞°ûµdG π«dO

............................................................

2

¿ôØdG

..........................................................................

2

ºµëàdG áMƒd

..................................................................

3

á«aÉ°VE’G äGhOC’G

..............................................................

3

äGOÉ°TQE’G Ö«àc ΩGóîà°SG

......................................................

4

áeÓ°ùdG äÉWÉ«àMG

..............................................................

4

∞jhhôµ«ŸG ¿ôa Ö«côJ

........................................................

6

âbƒdG §Ñ°V

..................................................................

6

á∏µ°ûe áaOÉ°üe ádÉM ‘ hCG ¿ôØdG πªY ‘ ∂°ûdG ádÉM ‘ π©ØJ GPÉe

..................

7

Úî°ùàdG/»¡£dG

................................................................

7

ábÉ£dG äÉjƒà°ùe

................................................................

8

»¡£dG ±É≤jEG

..................................................................

8

»¡£dG âbh §Ñ°V

..............................................................

8

 …QƒØdG »¡£dG/Úî°ùàdG Iõ«e ΩGóîà°SG

..........................................

8

 êhOõŸG »¡£dG Iõ«e ΩGóîà°SG

....................................................

9

 …QƒØdG »¡£dG/Úî°ùàdG äGOGóYEG

..............................................

9

 è∏ã∏d ᫵«JÉeƒJhC’G ádGRE’G Iõ«e ΩGóîà°SG

........................................

10

 è∏ã∏d ᵫJÉeƒJhC’G ádGRE’G äGOGóYEG

............................................

10

 Úî°ùàdG AõL ™°Vh QÉ«àNG

....................................................

11

 á«aÉ°VE’G äGhOC’G QÉ«àNG

......................................................

11

 »°ûdG

......................................................................

11

 kÉ©e ájGƒ°ûdGh ∞jhhôµ«ŸG á©°TCG ΩGóîà°SÉH »¡£dG

................................

12

 ¬«ÑæàdG äGƒ°UCG QGó°UEG Iõ«e 𫨰ûJ ±É≤jEG

........................................

12

 ∞jhhôµ«ŸG ¿ôa ÚeCÉJ

........................................................

12

 »¡£dG äGhOCG π«dO

..........................................................

13

 »¡£dG π«dO

..................................................................

14

 ∞jhhôµ«ŸG ¿ôa ∞«¶æJ

....................................................

 200

 ¬MÓ°UEGh ∞jhhôµ«ŸG ¿ôa øjõîJ

............................................

21

á«æØdG äÉØ°UGƒŸG

..............................................................

21

∞jhhôµ«e ¿ôa

 ∂dɪ∏d »¡£dG π«dOh äGOÉ°TQEG

GE614ST/GE614W

GE614ST  1/5/07  2:45 AM  Page 1

.% 100 ةبسنب هريودت داعم قرو مادختساب ليلدلا اذه جاتنإ مت

ُ

DE68-03330A-04

Summary of Contents for GE614ST

Page 1: ...î ùàdG äGOGóYEG 9 è ã d á µ JÉeƒJhC G ádGRE G Iõ e ΩGóîà SG 10 è ã d áµ JÉeƒJhC G ádGRE G äGOGóYEG 10 Úî ùàdG AõL Vh QÉ àNG 11 á aÉ VE G äGhOC G QÉ àNG 11 ûdG 11 kÉ e ájGƒ ûdGh jhhôµ ŸG á TCG ΩGóîà SÉH dG 12 ÑæàdG äGƒ UCG QGó UEG Iõ e π ûJ É jEG 12 jhhôµ ŸG ôa ÚeCÉJ 12 dG äGhOCG π dO 13 dG π dO 14 jhhôµ ŸG ôa æJ 200 MÓ UEGh jhhôµ ŸG ôa øjõîJ 21 á æØdG äÉØ UGƒŸG 21 jhhôµ e ôa dɪ d dG π dOh äGOÉ TQ...

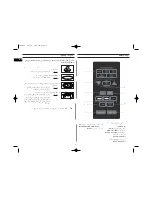
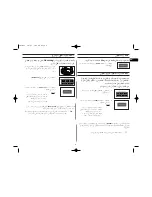
Page 2: ...ûdG Úî ùàH ºb QõdG Y dG á SGƒH ájGƒ ûdG Grill QGQRC G Y dG ºK FÉbO 10 10min h IóMGh á bO 1min h GƒK 10 10s 2 QõdG Y VG ôØdÉH UÉÿG πeÉ G Y ΩÉ dG V ájGƒ ûdG Grill QõdG Y dÉH dG âbh OóM FÉbO 10 10min h IóMGh á bO 1min h GƒK 10 10s 3 QõdG Y VG π ûJ Start 1 ôØdG óªÛG ΩÉ dG V QõdG Y dÉH W OGôŸG ΩÉ dG ƒf OóM è ã d á µ JÉeƒJhCG ádGREG Auto Defrost äGôe IóY hCG IóMGh Iôe 2 øjQõdG Y dG á SGƒH ΩÉ dG Rh OóM π...

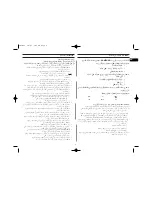
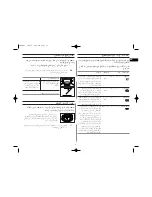
Page 3: ...óàdG IGOCG Vô dG d SÉ SC G í ùdG QGhódG Uô dG Èà j æà d ádƒ ùH LGôNEG øµÁh 4 Êó ŸG πeÉ G QGhódG Uô dG Y Vh ºàj Vô dG ùØf Ú ÑW d Êó ŸG πeÉ G ΩGóîà SG øµÁ QGhódG Uô dG Y Ò U ÑW Vh øµÁ âbƒdG πeÉ G ΩGóîà SG øµÁ πeÉ G Y ôNB G Ñ dGh jhhôµ ŸG ΩGóîà SÉH dG h ûdG Êó ŸG ájGƒ ûdGh 8 ª G Vh QÉ àNG COMBI 9 ábÉ dG iƒà ùe jhhôµ ŸG Vh QÉ àNG MICROWAVE POWER LEVEL 10 π ûJ QõdG START 1 dG QƒØdG Úî ùàdG Iõ e ójó 2 R...

Page 4: ... çóëj ób ɪàM ôØdG áÑbGôe Y UôMG á bQh hCG á µ à SÓH ÊGhCG ᪠WC G Úî ùJ óæY ɪ dÉ à TG ùHÓŸG hCG ë üdG Øéàd jhhôµ ŸG ôa Ωóîà ùJ h QÉ àdG øY UƒJ π üa hCG ôØdG π ûJ É jEÉH ºb ÉNO óYÉ üJ á MÓe ádÉM É à TG CG OɪNE Ék e ôØdG ÜÉÑH ßØàMGh FÉHô µdG óæY ójó T GQƒa çhóM EG jhhôµ ŸG ôa ΩGóîà SÉH äÉHhô ûŸG Úî ùJ øY èàæj ób bƒŸG Gòg πãe çhóM æŸ ÊGhC G e πeÉ àdG óæY Qò G NƒJ Öéj Gòd É fÉ Z ôJG kÉehO ádOÉ Ã ìÉ...

Page 5: ...dÉH ΩÉ d πgDƒŸG üî ûdG ÒZ üî T CG ô î d ùØf Vô j jhhôµ ŸG á TC Vô àdG ôjò QÉéØfÓd Vô àJ ób å M á e äÉjhÉM πFGƒ ùdG hCG ᪠WC G Úî ùJ Öéj ôjò øµªàj å ëH áÑ SÉæŸG äɪ àdG AÉ YEG ó H EG áÑbGôe hO ôØdG ΩGóîà SÉH ÉØWCÓd ìɪ ùdG Öéj ÒZ ΩGóîà S G áé àf É d Vô àj ób àdG ôWÉıG kGó L º Øàjh áæeBG á jô H ôØdG ΩGóîà SG øe πØ dG í ë üdG ôjò UÉî TCG Gô TEG â EG ôØdG ÉØWC G Ωóîà ùj CG Öéj ª G Vh RÉ G π ûJ óæY áŒ...

Page 6: ... πg ƒjõØ àdGh ƒjOGôdG Iõ LCG Y ûjƒ ûJ çhóM ôØdG ÖÑ ùàj kGôeCG dP ó j ôØdG π ûJ óæY ƒjOGôdGh ƒjõØ àdG Iõ LCG Y ùH ûjƒ ûJ ßMÓj ób äÉ FGƒ dGh ƒjOGôdGh ƒjõØ àdG Iõ LCG øY kGó H ôØdG V á µ ûŸG òg π kÉjOÉY á TÉ T Ú J IOÉYEG ºàj ób ôØ d ô üŸG èdÉ ŸG ÖfÉL øe πNGóJ øY ûµdG ádÉM Ñ V óYCG iôNCG Iôe UƒJ IOÉYEGh QÉ àdG ùHÉb π üØH ºb á µ ûŸG òg π Vô dG âbƒdG hCG ÙG FÉÑdÉH π üJG á µ ûŸG òg πM ÓYCG IOƒLƒŸG äGOÉ T...

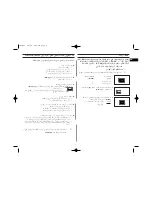
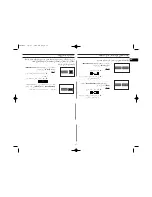
Page 7: ... OóM ábÉ dG iƒà ùe Power Level iôNCG Iôe Qó ŸGh áHƒ ŸG ábÉ dG iƒà ùe VôY ºàj CG EG ábÉ dG äÉjƒà ùe hóL LGQ äGƒdÉH 2 QõdG Y dÉH dG âbh OóM FÉbO 10 10min h IóMGh á bO 1min h GƒK 10 10s 3 QõdG Y VG π ûJ Start áé àædG QGhódG Uô dG CGóÑjh ôØdG ìÉÑ üe Å j GQhódG Qó üoj É FÉ àfG óæYh dG á ªY CGóÑJ 1 äGôe HQCG ÑæJ äƒ U ôØdG dG AÉ àfÉH ÒcòJ IQÉ TEG ôØdG Qó üj 2 á bO πc Iôe äGôe çÓK iôNCG Iôe É G âbƒdG VôY ...

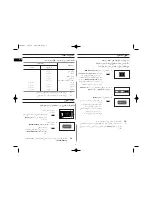
Page 8: ...ìhGÎj ΩÉ W d ÉfOCG OƒLƒŸG hó G LGQ IõgÉ G äÉÑLƒdG øe ΩGôL 450 ÉkªFGO Ωóîà SG ÊÉãdG iƒà ùŸÉH ΩÉ dG Úî ùJ êhOõŸG dG Iõ e ΩGóîà SG óæY QGhódG Uô dG Y Vh Öéj òdG Êó ŸG πeÉ G ÉkªFGO ΩGóîà SG πeÉ G 8 AR QõdG VG á fÉK 30 30s ÖZôJ á fÉK 30 πµd IóMGh Iôe É àaÉ VEG 1 QR Y VG QƒØdG dGh Úî ùàdG OóY ójôJ òdG ºFÓŸG äGôŸG 2 QõdG VG á fÉK 30 30s á fÉK 30 πµd IóMGh Iôe É àaÉ VEG ÖZôJ áé àædG äGôe HQCG ÑæJ äƒ U ôØd...

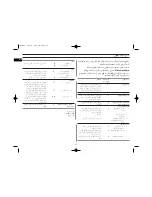
Page 9: ...450 400 ΩGôL 550 500 äÉÑLƒdG 2 IõgÉ G áé ãe øe á Ñ H É à àH ºbh õN ÑW É V Gòg Ö SÉæj QGô G jhhôµ ŸG Qh äÉfƒµe 3 øe áfƒµŸG äÉÑLƒdG èeÉfÈdG óMCGh äGhGô ÿGh á ü üdÉH ºë dG Éãe hCG RQC G hCG ùWÉ ÑdG πãe á ÑfÉ G ÉÑWC G Uô dG Y Ú Ñ dG ióMEG V äÉæé ŸG πeÉ G Y ôNB Gh QGhódG á bO 2 300 2 ΩGôL 350 400 2 ΩGôL 450 êhOõŸG dG 3 É Jh É Ø æJh É ùZ ó H äGhGô ÿG R d LÉLR AÉfEG É V ájhÉ ùàe ΩÉéMCG EG YÓe 3 AÉŸG øe e...

Page 10: ...G Ωƒ fƒŸC G Qh ΩGóîà SÉH Gòg Ö SÉæàj ÑæJ äƒ U ôØdG Qó üoj ÉeóæY êÉLódG bh á eÉc áLÉLO e èeÉfÈdG 60 20 á bO ΩGôL 2000 200 øLGhódG 2 ΩGóîà SÉH á eɵdG ɪ SC G ƒjP ájɪëH ºb Qó üoj ÉeóæY ɪ SC G Ö bG Ωƒ fƒŸC G Qh e èeÉfÈdG Gòg Ö SÉæàj ÑæJ äƒ U ôØdG ØdG ª ùdG bh á eɵdG ɪ SC G 50 20 á bO ΩGôL 2000 200 3 ɪ SC G ºbh ïÑ ŸG Qh øe á b Y õÑÿG V V ÑæJ äƒ U ôØdG Qó üoj ÉeóæY Ñ H EG Ñ H ºbh õN ÑW Y µdG π j Ñ...

Page 11: ...h GƒK 10 10s 2 ÜÉÑdG ZCG πeÉ G Y ΩÉ dG Vh ÜÉÑdG íàaG 3 QõdG Y VG ájGƒ ûdG Grill áé àædG á dÉàdG äGOÉ TQE G ô J 4 Úî ùàdG âbh Ñ Vh QõdG Y dÉH ûdG âbh OóM QGQRC G Y dÉH Ñ ùŸG FÉbO 10 10min h á bO IóMGh 1min h GƒK 10 10s á bO 60 ƒg ûdG IóŸ übC G ó G 5 QõdG Y VG π ûJ Start áé àædG ûdG øe AÉ àf G óæY ΩÉ dG T CGóÑj 1 äGôe HQCG ÑæJ äƒ U ôØdG Qó üoj 2 kÉJƒ U AÉ àf G ÒcòJ ô TDƒe Qó üj á bO πc Iôe äGôe çÓK ...

Page 12: ...ŸG ô j Iôe πc e ÑæJ äƒ U ôØdG Qó üj ød CG Y dÉH Ωƒ J QR 2 Y VG iôNCG Iôe ÑæàdG äGƒ UCG QGó UEG Iõ e π ûàd øjQõdG AÉ dEG âbDƒe É jEG Pause Cancel h π ûJ Start iôNCG Iôe kÉ e áé àædG ÉàdG ô TDƒŸG VôY ô j QGó UEG Iõ e π ûJ e πª d ôØdG Oƒ j iôNCG Iôe ÑæàdG äGƒ UCG 1 øjQõdG Y VG AÉ dEG âbDƒe É jEG Pause Cancel h áYÉ ùdG Clock óMGh âbh áé àædG øe CG ójó øµÁ ôØdG ÚeÉJ ºàj FÉXƒdG ô G ô j L Vô dG á TÉ T Y ...

Page 13: ... ᪠WC G J øe áYƒæ üŸG ÜGƒcC G ΩƒØdG hCG á bQƒdG SÉ cC G ë üdG hCG æ üJ OÉ ŸG QƒdG áæjõŸG á LÉLõdG äGhOC G ó à áaôNõe øµJ Ée É eGóîà SG øµÁ á fó e QÉNõH πFGƒ ùdGh ᪠WC G áÄaóJ É eGóîà SG øµÁ bôdG êÉLõ d ÅLÉØŸG Úî ùàdG ÖÑ ùàj ób Nô T hCG ô ùc áÄaóàdG Ö SÉæe ƒµjh AÉ dG ádGREG Öéj a á LÉLõdG äGhOC G àdG ôØdG äGhOCG IóFÉŸG Y Ωóîà ùJ á bôdG á LÉLõdG äGhOC G á LÉLõdG äÉfɪWÈdG jôM hCG Hô c SÉe çhóM ÖÑ ...

Page 14: ...b dG Ióe AÉ àfG ó H AÉfE G á àH ºb dG AÉæKCG YÉ àj QÉ àf G Ióe πÑb óHõdGh πHGƒàdGh í ŸG VCGh dG Ióe AÉ àfG ó H πeɵdÉH AÉŸG üàeG ób RQC G ƒµj ób á MÓe äÉæé ŸG øe kÓ Ä V kGQGó eh ŸG AÉŸG VCG ùcÒÑdG øe kÉYƒæ üe kGÒÑc kAÉfEG Ωóîà SG FÉ àfG ó Hh dG AÉæKCG ôNB ÚM øe Ö b AÉ Z J kGó L Ö b ºK í ŸG ó H ɪ a kGó L à Ø üJh QÉ àf G Ióe AÉæKCG ΩÉ dG àH ºb dG π dO äGOÉ TQE G QÉ àf G Ióe á bO á bO âbƒdG ábÉ dG Q...

Page 15: ...Ñb É Ñ Jh äÉHhô ûŸG êÉLõdG øe áYƒæ üe É üY HÉJ dG π dO E E q E q E q E q E E q E E q E E E q E q E E E q GE614ST 1 5 07 2 45 AM Page 15 الطازجة الخضراوات طهي دليل مالعق 3 إلى ملعقتين البارد الماء من مللي 45 إلى 30 أضف غطاء لها البايركس من مصنوعة مناسبة أوعية استخدم الحد مدة الغطاء وضع مع الطعام بطهي قم الجدول راجع الماء من أخرى بكمية يوصى لم ما جرام 250 لكل كبيرة الطهي بعد ومرة الطهي أثناء مرة الط...

Page 16: ...ŸG ºb Úë ùe Ú aõN Ú ÑW Qh øe á Ñ H á àdÉH kÉ ÑW V QGô G jhhôµ ŸG QGhódG Uô dG Y Iô TÉÑe kGóMGh πeÉ G Y ôNB G Ñ dGh 3 5 5 5 6 äGh 900 ΩGôL 350 2 äÉÑLƒdG áØ ŸG áé ãe äGOÉ TQE G QÉ àf GIóe á bO á bO âbƒdG ábÉ dG QGó ŸG ΩÉ dG Y Iƒ ûÙG äÉæé ŸG V æ JQƒJ ƒ aGQ ÉãŸG π Ñ S á àdÉH ºb ªY õN ÑW ºb à SÓÑdG øe ƒæ üe AÉ H AÉæKCG ôNB ÚM øe Ö àdÉH Ióe πÑb iôNCG Iôeh Úî ùàdG Ëó àdGh QÉ àf G 3 6 5 äGh 600 ΩGôL 350 ä...

Page 17: ...ôJG OƒLƒŸG hóé d ƒLôdG AÉLôdG É æY è ãdG ádGREG ܃ ŸG á ªµdG Ö ùM áeÉàdG è ãdG ádGREG á ª d ÉfOCG í ª J áµ ª ùdG ᪠WC G øY π aCG πµ ûH áµ ª ùdG ÒZ ᪠WC G ó ªŒ a á ªY ºàJ Gòg ôcòJ ÈcC G äÉ ªµdG øe πbCG âbh EG ô UC G äÉ ªµdG êÉà ɪc æY è ãdG ádGREGh ΩÉ dG ó ªŒ AÉæKCG í ª àdG Ωóîà SG ájƒÄe áLQO 20 EG 18 ÚH Ée ìhGÎJ IQGôM áLQóH IóªÛG ᪠WC G øY è ãdG ádGRE π dóc ÉàdG hó G HÉJ dG π dO äGOÉ TQE G QÉ à...

Page 18: ...G πªà ûJ á Ñ dG Òªëàd kGÒ üb kÉàbh Ö àJ àdG ᪠WC G Y IhÓY IRƒÑıG äÉæé ŸG πãe Òª h Úî ùJ á Ñ dG Òªëàd ª ùdG ºé G äGP ΩÉ dG b e ܃ SC G Gòg ΩGóîà SG kÉ jCG øµÁ É æe É dG ûdG hóL á LGôe AÉLôdG dG âbh üàæe É Ñ b e êÉLódG b πãe É æe É dG π UÉØàdG øe ójõŸG Y ƒ üë d á MÓe áeÉg UÉÿG Úî ùàdG AõL CG øe ócCÉJ kÉ e ájGƒ ûdG jhhôµ ŸG ΩGóîà SG ܃ SCG ΩGóîà SG óæY SCGôdG VƒdG Ø ÿG QGó G óæY OƒLƒe ÒZh aC G VƒdG ...

Page 19: ...ÑÿG íFGô T ü ªëàH ºb ŸG â SƒàdG V k hCG øe Úà b V πeÉ G Y ɪ H ùµY â SƒàdG πeÉ G Y Iô TÉÑe ÑdG FÉbO 3 2 IóŸ Îj 7 6 äGh 300 ájGƒ ûdG b 2 ΩGôL 300 â SƒJ GhÉg SÉfÉfC ÉH ôjõæÿG º íFGô T Í G EG ùWÉ ÑdG àH ºb IôFGO πµ T Y É V É üfCG Aõ G Vh e πeÉ G Y ájGƒ ûdG Y Iô û dG hõæe 5 5 4 5 5 5 6 7 äGh 600 ájGƒ ûdG ΩGôL 250 ΩGôL 500 ùWÉ ÑdG á üªÙG äGOÉ TQE G âbƒdG 2 É VE G á bO âbƒdG 1 É VE G á bO ábÉ dG QGó ŸG ...

Page 20: ...ŸG äÉcô ûdG äɪ J ÉÑJG e e 500 Í dGh ôµ ùdG e OƒÑdG ƒë ùe Ö j 6 5 IóŸ á àdG AÉæKCG dÉH ºbh AÉ Z d Ö SÉæe ºéëH ùcÒÑdG øe ƒæ üe AÉfEG Ωóîà SG ó G äGh 900 ÑJ ábÉW ΩGóîà SÉH á bO 7 5 EG dG AÉæKCG äGôe IóY Ö àdÉH ºb Rƒ dG b ü ª Sƒàe ºéM hP õN ÑW Rƒ dG b øe ΩGôL 30 V ábÉW ΩGóîà SÉH á bO 4 5 EG 3 5 ô à ùJ àdG ü ªëàdG á ªY AÉæKCG äGôe IóY Rƒ dG b Ö b äGh 600 ÑJ É LGôNEG AÉæKCG ôØdG äGRÉØb Ωóîà SG FÉbO 3 2...

Page 21: ...ƒe πµ ûH H UÉÿG ôØdG øjõîJ äOQCG GPEG áHôJC G ÖÑ ùdG ôØdG AGõLCG Y Ñ S πµ ûH áHƒWôdGh áHôJC G ôKDƒJ ób QÉéàdG ΩGóîà SÓd jhhôµ ŸG ôa æ üoj á æØdG äÉØ UGƒŸG ácô T ùJ SAMSUNG ÖÑ ùdG Gò dh QGôªà SÉH É JÉéàæe IOƒL Ú ù EG IógÉL ΩÓYEG HÉ S hO Ò à d Ωóîà ùŸG äGOÉ TQEGh º ª üàdG äÉØ UGƒe îJ GE614ST GE614W RGô dG âdƒa 230 õJôg 50 ábÉ dG Qó üe äGh 1500 äGh 1300 äGh 2800 ábÉ dG Ó à SG jhôµ ŸG ájGƒ ûdG ªÛG dG ...

Page 22: ...22 AR á MÓe GE614ST 1 5 07 2 45 AM Page 22 ...

Page 23: ...23 AR á MÓe GE614ST 1 5 07 2 45 AM Page 23 ...

Page 24: ...45 545 KENYA 0800 300 300 UGANDA 0685 88 99 00 TANZANIA 9999 RWANDA 200 BURUNDI 499999 DRC 1969 SUDAN 0860 SAMSUNG 726 7864 SOUTH AFRICA 8007260000 BOTSWANA 08 197 267 864 NAMIBIA 0211 350370 ZAMBIA 847267864 827267864 MOZAMBIQUE www samsung com eg support www samsung com tr support www samsung com support www samsung com africa_en support www samsung com africa_fr support www samsung com pk suppo...

Page 25: ...Cook Double cuisson 9 Réglages de la fonction Instant Reheat Cook Réchauffage cuisson immédiats 9 Utilisation de la fonction Auto Defrost Décongélation automatique 10 Réglages de la fonction Auto Power Defrost Décongélation automatique 10 Choix de la position de l élément chauffant 11 Choix des accessoires 11 Faire griller 11 Combinaison micro ondes et gril 12 Arrêt du signal sonore 12 Sécurité en...

Page 26: ...on Auto Defrost Décongélation automatique 2 Sélectionnez le poids de l aliment en appuyant sur le bouton Up Down Haut Bas 3 Appuyez sur le bouton Start Départ Laissez les aliments dans le four Appuyez sur le bouton 30s autant de fois que vous souhaitez ajouter de tranches de 30 secondes 1 Préchauffez le gril à la température appropriée en appuyant sur le bouton Grill Gril réglez le temps de cuisso...

Page 27: ... 3 2 6 7 8 5 4 9 10 1 Coupleur situé sur l axe moteur au centre du plancher du four Purpose Le coupleur permet de faire tourner le plateau 2 Anneau de guidage à placer au centre du four Purpose L anneau de guidage sert de support au plateau 3 Plateau tournant à placer sur l anneau de guidage en emboîtant la partie centrale sur le coupleur Purpose Ce plateau constitue la principale surface de cuiss...

Page 28: ...aisselle comportant des ornements dorés ou argentés de pics à brochette de fourchettes etc Retirez les attaches métalliques des sacs en papier ou en plastique Raison Des arcs électriques ou des étincelles risqueraient de se former et d endommager les parois du four Lorsque vous faites réchauffer des aliments dans des récipients en plastique ou en papier veillez à ce que ces derniers ne s enflammen...

Page 29: ...cacher tout objet suscitant l intérêt des enfants au dessus du four Cet appareil n est pas conçu pour être utilisé par des personnes y compris les enfants inexpérimentées ou dont les capacités physiques sensorielles ou mentales sont réduites sauf si celles ci sont sous la surveillance ou ont reçu les instructions d utilisation appropriées de la personne responsable de leur sécurité Les enfants ne ...

Page 30: ...vez Lorsque l alimentation est fournie 0 88 88 ou 12 00 s affiche automatiquement à l écran Réglez l heure actuelle afficher l heure sur 24 heures ou sur 12 heures Vous devez régler l horloge à l installation initiale après une coupure de courant N oubliez pas de changer l heure lors du passage de l heure d hiver à celle d été et inversement 1 Lorsque vous installez votre four assurez une ventilat...

Page 31: ... ou antennes Si le microprocesseur du four détecte des interférences l affichage peut être réinitialisé Pour résoudre ce problème débranchez la prise du four et rebranchez la Réglez de nouveau l horloge Si le problème ne peut être résolu à l aide des consignes ci dessus contactez votre revendeur ou le service après vente SAMSUNG le plus proche Cuisson Réchauffage Suivez les instructions ci dessous...

Page 32: ...rtez vous au tableau de la page opposée N utilisez que des plats transparents aux micro ondes N utilisez que des plats transparents aux micro ondes Niveau Puissance Micro ondes GRIL ELEVE MOYENNEMENT ELEVE MOYEN MOYENNEMENT BAS DECONGELATION BAS MAINTIEN AU CHAUD GRIL COMBI I COMBI II COMBI III 900 W 600 W 450 W 300 W 180 W 100 W 600 W 450 W 300 W 1300 W 1300 W 1300 W 1300 W 1 Pour interrompre pro...

Page 33: ...la boisson avant et après le temps de repos Soyez prudent lorsque vous retirez les tasses du four reportez vous aux consignes de sécurité relatives aux liquides 2 Plat préparé réfrigéré 300 à 350 g 400 à 450 g 500 à 550 g 3 min Placez les aliments dans une assiette en céramique et recouvrez cette dernière d un film plastique résistant aux micro ondes Ce programme concerne des plats composés de tro...

Page 34: ...nal sonore vous rappelant de retourner l aliment retentit à la moitié du temps de décongélation Appuyez de nouveau sur le bouton Start Départ pour poursuivre la décongélation Code Aliment Quantité Temps de repos Instructions 1 Viande 200 à 2000 g 20 à 60 min Protégez les extrémités avec du papier d aluminium Retournez la viande lorsque le signal sonore retentit Ce programme convient au bœuf à l ag...

Page 35: ...ifiez que l élément chauffant est en position horizontale Si vous souhaitez sélectionner le mode de cuisson combinée micro ondes et gril utilisez uniquement des plats adaptés à la cuisson aux micro ondes et au four traditionnel Les ustensiles métalliques peuvent endommager votre four Pour placer l élément chauffant en Vous devez Position horizontale cuisson au gril ou cuisson combinée micro ondes ...

Page 36: ...ndes et gril 600 W puissance de sortie Réglez la puissance appropriée en appuyant de nouveau sur le bouton Combi Cuisson combinée jusqu à ce que la puissance souhaitée s affiche Vous ne pouvez pas régler la température du gril 4 Réglez le temps de cuisson en appuyant sur les boutons 10 min 1 min et 10 s selon les besoins Le temps de cuisson maximal est de 60 minutes 5 Appuyez sur le bouton Start D...

Page 37: ...sive peut faire fondre le polystyrène Peuvent prendre feu Peuvent provoquer des étincelles Plats en verre Plats de service adaptés à la cuisson au four Plats en verre fin Pots en verre Peuvent être utilisés sauf s ils sont ornés de décorations métalliques Peuvent être utilisés pour faire réchauffer des aliments ou des liquides Les objets fragiles peuvent se briser ou se fendre s ils sont brusqueme...

Page 38: ...es ou du beurre après la cuisson Laissez reposer à couvert Guide de cuisson pour le riz et les pâtes Riz utilisez une grande cocotte en Pyrex avec couvercle car le riz double de volume pendant la cuisson Couvrez pendant la cuisson Une fois le temps de cuisson écoulé remuez avant de laisser reposer puis salez ou ajoutez des herbes et du beurre Remarque il est possible que le riz n ait pas absorbé t...

Page 39: ...voir vous y référer ultérieurement Vérifiez toujours que les aliments réchauffés sont uniformément chauds Laissez les aliments reposer pendant un court lapse de temps après le réchauffage pour que la température s homogénéise Le temps de repos recommandé après le réchauffage est généralement compris entre 2 et 4 minutes à moins qu un autre temps ne soit indiqué dans le tableau Soyez particulièreme...

Page 40: ...sez les en cercle Laissez les reposer dans le four à micro ondes le temps nécessaire et remuez bien Soupe réfrigérée 350 g 450 g 550 g 900 W 3 3 3 4 4 5 2 3 Versez la soupe dans une assiette creuse ou un bol en céramique Recouvrez le tout d un couvercle en plastique Remuez bien après le réchauffage Remuez de nouveau avant de servir Ragoût réfrigéré 350 g 600 W 5 6 2 3 Placez le ragoût dans une ass...

Page 41: ...rminer la décongélation Le temps de repos pour une décongélation complète dépend de la quantité décongelée Reportez vous au tableau ci dessous Astuce les aliments fins se décongèlent mieux que les aliments plus épais et de petites quantités se décongèlent plus rapidement que des grandes Tenez en compte lors de la congélation et la décongélation des aliments Pour décongeler des aliments à une tempé...

Page 42: ...pour dorer en surface Ce mode peut également être utilisé pour des aliments plus épais qui gagnent en saveur lorsque leur surface est croustillante et dorée ex morceaux de poulet à retourner à mi cuisson Reportez vous au tableau relatif au gril pour de plus amples détails REMARQUE IMPORTANTE lorsque le mode combiné micro ondes gril est utilisé veillez à ce que l élément chauffant du gril se situe ...

Page 43: ...ï jambon ananas tranches de fromage 2 tartines 300 g 300 W Gril 6 7 Faites d abord griller les tranches de pain Placez les tartines garnies sur la grille Placez 2 tartines face à face directement sur la grille Laissez reposer 2 à 3 minutes Pommes de terre au four 250 g 500 g 600 W Gril 4 5 6 7 Coupez les pommes de terre en deux Disposez les en cercle sur la grille côté coupé tourné vers le gril Gr...

Page 44: ...tte en Pyrex de taille appropriée avec couvercle Couvrez et faites cuire pendant 6 à 7 minutes à 900 W Remuez plusieurs fois en cours de cuisson FAIRE DORER DES AMANDES EFFILEES Disposez uniformément 30 g d amandes effilées sur une assiette de taille moyenne en céramique Remuez les plusieurs fois pendant 3 à 4 minutes à 600 W Laissez les reposer pendant 2 à 3 minutes dans le four Utilisez des mani...

Page 45: ... un endroit sec et non poussiéreux Pourquoi La poussière et l humidité risquent de détériorer certains éléments du four Ce four à micro ondes n est pas conçu pour une utilisation commerciale Caractéristiques techniques SAMSUNG s efforce sans cesse d optimiser ses produits Les caractéristiques et ce mode d emploi peuvent être modifiés sans préavis Modèle GE614ST GE614W Source d alimentation 230 V 5...

Page 46: ...22 FR Remarque nl X z ln TWZZZWhTWX myU GGw GYYGG SGh GYYSGYWXWGGXa Gwt ...

Page 47: ...23 FR Remarque nl X z ln TWZZZWhTWX myU GGw GYZGG SGh GYYSGYWXWGGXa Gwt ...

Page 48: ...g com ae_ar support Arabic U A E 800 SAMSUNG 726 7864 OMAN 800 SAMSUNG 726 7864 KUWAIT 183 2255 183 CALL BAHRAIN 8000 4726 QATAR 800 2255 800 CALL EGYPT 08000 726786 16580 ALGERIA 021 36 11 00 PAKISTAN 0800 Samsung 72678 TUNISIA 80 1000 12 JORDAN 0800 22273 06 5777444 SYRIA 18252273 IRAN 021 8255 MOROCCO 080 100 2255 SAUDI ARABIA 920021230 TURKEY 444 77 11 NIGERIA 0800 726 7864 GHANA 0800 10077 03...

Page 49: ...djusting the Cooking Time 8 Using the Instant Reheat Cook Feature 8 Using the Dual Cook Feature 8 Instant Reheat Cook Settings 9 Using the Auto Defrost Feature 9 Auto Power Defrost Settings 10 Choosing the Heating Element Position 10 Choosing the Accessories 10 Grilling 11 Combining Microwave and the Grill 11 Switching the Beeper Off 12 Safety Locking Your Microwave Oven 12 Cookware Guide 13 Cooki...

Page 50: ...cooking by pressing the Auto Defrost button one or more times 2 Select the food weight by pressing the Up Down button 3 Press the Start button Leave the food in the oven Press 30s one or more times for each extra 30 seconds that you wish to add 1 Preheat the grill to the required temperature by pressing the Grill button time settng 10min 1min and 10s button and Start button 2 Place the food on the...

Page 51: ... Coupler already placed over the motor shaft in the base of the oven Purpose The coupler rotates the turntable 2 Roller ring to be placed in the centre of the oven Purpose The roller ring supports the turntable 3 Turntable to be placed on the roller ring with the centre fitting to the coupler Purpose The turntable serves as the main cooking surface it can be easily removed for cleaning 4 Metal rac...

Page 52: ...s from paper or plastic bags Reason Electric arcing or sparking may occur and may damage the oven When heating food in plastic or paper containers keep an eye on the oven due to the possibility of ignition Do not use your microwave oven to dry newspapers or clothes If smoke is observed switch off or unplug the appliance and keep the door closed in order to stifle any flames Microwave heating of be...

Page 53: ... out any service or repair operation which involves the removal of a cover which gives protection against exposure to microwave energy WARNING Liquids and other foods must not be heated in sealed containers since they are liable to explode WARNING Only allow children to use the oven without supervision when adequate instructions have been given so that the child is able to use the oven in a safe w...

Page 54: ...vercooked or undercooked Was the appropriate cooking length set for the type of food Was an appropriate power level chosen Sparking and cracking occur inside the oven arcing Have you used a dish with metal trimmings Have you left a fork or other metal utensil inside the oven Is aluminium foil too close to the inside walls The oven causes interference with radios or televisions Slight interference ...

Page 55: ...maximum cooking power indications are displayed Select the appropriate power level by pressing the Power Level button again until the corresponding wattage is displayed Refer to the power level table 2 Set the cooking time by pressing the 10 min 1 min and 10 s button 3 Press the Start button Result The oven light comes on and the turntable starts rotating 1 Cooking starts and when it has finished ...

Page 56: ...k Feature Example Press the Dual Cook button two times to reheat cook 2x400 450g of READYMEAL Refer to the table below When using Dual Cook heating 2 levels of food always use the rack Always use the metal rack which should be put on the turntable Press the 30s button once for each 30 seconds to be added Press the Instant Reheat and Cook button which you want the required number of times Press the...

Page 57: ...g meat with sauce vegetables andside dishes like potatoes rice or pasta 3 Dual Cook 2 x 300 350 g 2 x 400 450 g 2 mins Put each meal on a ceramic plate and cover it with microwave cling film This programme is suitable for the meals consisting of 3 compo nents e g meat with sauce vegetables and side dishes like potatoes rice or pasta Place one plate on the turntable and the other one the rack 4 Fre...

Page 58: ...ver when the oven beeps This programme is suitable for whole chicken and chicken portions 3 Fish 200 2000 g 20 50 min Shield the tail of the whole fish with aluminium foil Turn the fish over when the oven beeps This programme is suitable for whole fishes and fish fillets 4 Bread Cake 125 1000 g 5 20 min Put bread on a piece of kitchen paper and turn over as soon as the oven beeps Place cake on a c...

Page 59: ...k Close the door 3 Press the Grill button Result The follwing indications are displayed 4 Set the Grilling time by pressing the 10 min 1 min and 10 s button The maximum grilling time is 60 minutes 5 Press the Start button Result Grill cooking start When it has finished 1 The oven beeps four times 2 The end reminder signal will beep 3 times once every minute 3 The current time is displayed again 1 ...

Page 60: ...Result The following indication is displayed The oven does not beep each time you press a button 2 To switch the beeper back on press the Pause Cancel and Start buttons again at the same time Result The following indication is displayed The oven operates with the beeper on again 1 Press the Pause Cancel and Clock buttons at the same time Result The oven is locked no funtions can be selected The di...

Page 61: ...tyrene cups containers Paper bags or newspaper Recycled paper or metal trims Can be used to warm food Overheating may cause the polystyrene to melt May catch fire May cause arcing Glassware Oven to table ware Fine glassware Glass jars Can be used unless decorated with a metal trim Can be used to warm foods or liquids Delicate glass may break or crack if heated suddenly Must remove the lid Suitable...

Page 62: ...s steel aluminium and copper but they can penetrate through ceramic glass porcelain and plastic as well as paper and wood So food must never be cooked in metal containers Food suitable for microwave cooking Many kinds of food are suitable for microwave cooking including fresh or frozen vegetables fruit pasta rice grains beans fish and meat Sauces custard soups steamed puddings preserves and chutne...

Page 63: ...tanding times When reheating food for the first time it is helpful to make a note of the time taken for future reference Always make sure that the reheated food is piping hot throughout Allow food to stand for a short time after reheating to let the temperature even out The recommended standing time after reheating is 2 4 minutes unless another time is recommended in the chart Take particular care...

Page 64: ...e oven during standing time and stir well Soup chilled 350g 450g 550g 900W 3 3 3 4 4 5 2 3 Pour into a deep ceramic plate or deep ceramis bowl Cover with plastic lid Stir well after reheating Stir again before serving Stew chilled 350g 600W 5 6 2 3 Put stew in a deep ceramic plate Cover with plastic lid Stir occasionally during reheating and again before standing and serving Pasta with sauce chill...

Page 65: ...tand in order to complete defrosting The standing time for complete defrosting will vary depending on the quantity defrosted Please refer to the table below Hint Flat food defrosts better than thick and smaller quantities need less time than bigger ones Remember this hint while freezing and defrosting food For defrosting of frozen food with a temperature of about 18 to 20 C use the following table...

Page 66: ...g e g baked pasta as well as foods which require a short cooking time to brown the top of the food Also this mode can be used for thick food portions that benefit from a browned and crispy top e g chicken pieces turning them over half way through cooking Please refer to the grill table for further details IMPORTANT REMARK Whenever the combination mode microwave grill is used make sure that the gri...

Page 67: ...pineapple ham cheese slices 2 pcs 300g 300 W Grill 6 7 Toast the bread slices first Put the toast with topping on the rack Put 2 toasts opposite directly on the rack Stand for 2 3 minutes Baked Potatoes 250g 500g 600 W Grill 4 5 6 7 Cut potatoes into halves Put them in a circle on the rack with the cut side to the grill Gratin Potatoes vegetables chilled 400g 450 W Grill 13 15 Put the fresh gratin...

Page 68: ...well during cooking BROWNING ALMOND SLICES Spread 30 g sliced almonds evenly on a medium sized ceramic plate Stir several times during browning for 3 to 4 minutes using 600 W Let it stand for 2 3 minutes in the oven Use oven gloves while taking out Cleaning Your Microwave Oven The following parts of your microwave oven should be cleaned regularly to prevent grease and food particles from building ...

Page 69: ...ven away temporarily choose a dry dust free place Reason Dust and damp may adversely affect the working parts in the oven This microwave oven is not intended for commercial use Technical Specifications SAMSUNG strives to improve its products at all times Both the design specifications and these user instructions are thus subject to change without notice Model GE614ST GE614W Power source 230V 50 Hz...

Page 70: ...22 EN Note nl X z ln TWZZZWhTWX luU GGw GYYGG SGh GYYSGYWXWGGXa Gwt ...

Page 71: ...23 EN Note nl X z ln TWZZZWhTWX luU GGw GYZGG SGh GYYSGYWXWGGXa Gwt ...

Page 72: ...g com ae_ar support Arabic U A E 800 SAMSUNG 726 7864 OMAN 800 SAMSUNG 726 7864 KUWAIT 183 2255 183 CALL BAHRAIN 8000 4726 QATAR 800 2255 800 CALL EGYPT 08000 726786 16580 ALGERIA 021 36 11 00 PAKISTAN 0800 Samsung 72678 TUNISIA 80 1000 12 JORDAN 0800 22273 06 5777444 SYRIA 18252273 IRAN 021 8255 MOROCCO 080 100 2255 SAUDI ARABIA 920021230 TURKEY 444 77 11 NIGERIA 0800 726 7864 GHANA 0800 10077 03...

Reviews: