Alignment and Adjustments
3-8
Samsung Electronics
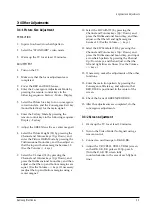
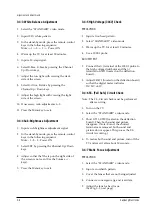
3-4-3 White Balance Adjustment
1. Select the ÒSTANDARDÓ video mode.
2. Input 100% white pattern.
3. In the stand-by mode, press the remote-control
keys in the following sequence:
Mute
®
1
®
8
®
2
®
Power ON
4. Warm up the TV for at least 30 minutes.
5. Input a 10-step signal.
6. Select B-bias, G-bias by pressing the Channel
Up/Down keys.
7. Adjust the low light with viewing the dark
side of the screen.
8. Select G-drive, B-drive by pressing the
Channel Up/Down keys.
9. Adjust the high light with viewing the light
side of the screen.
10. If necessary, redo adjustments 6~9.
11. Press the Menu key to exit.
3-4-4 Sub-Brightness Adjustment
1. Input a sub-brightness adjustment signal.
2. In the stand-by mode, press the remote-control
keys in the following sequence :
Mute - 1 - 8 - 2 - Power ON
3. Select SBT by pressing the Channel Up/Down
keys.
4. Adjust so that the 7th step on the right side of
the screen is not seen (Use the /-
keys).
5. Press the Menu key to exit.
3-4-5 High Voltage (31KV) Check
PRECAUTION
1. Input a lion head pattern.
2. Select ÒSTANDARDÓ video mode.
3. Warm up the TV for at least 10 minutes.
4. Use a 1000:1 probe.
ADJUSTMENT
1. Connect the (+) terminal of the 1000:1 probe to
the high voltage distributor and the (-)
terminal to GND (located on the deflection
board).
2. Adjust VR471 (located on the deflection board)
so that the digital meter indicates
DC 31V ²0.1V.
3-4-6 F.S. (Fall Safe) Circuit Check
Note : The F.S. Circuit check must be performed
after servicing.
1. Turn on the TV.
2. Select the ÒSTANDARDÓ video mode.
3. Short GT19,GT20 (located on the deflection
board). Then, both sound and picture
disappear. (Note: Even if the shorted
terminals are removed, both sound and
picture do not appear. This proves the F.S.
circuit is working. )
4. To restore both sound and picture, turn off the
TV and reset it after about 30 seconds.
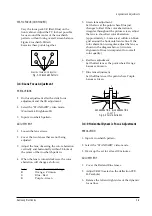
3-4-7 Static Focus Adjustment
PRECAUTION
1. Select the ÒSTANDARDÓ video mode.
2. Input a crosshatch pattern.
3. Cover the lenses that are not being adjusted.
4. Connect a convergence jig and read data.
5. Adjust the lens for best focus.
(See Fig, 3-1, next page)
Summary of Contents for HCH551WX
Page 2: ...ELECTRONICS Samsung Electronics Co Ltd NOV 1998 Printed in Korea 3APT52A 5501 ...
Page 23: ...MEMO 3 16 Samsung Electronics ...
Page 62: ...8 2 Samsung Electronics MEMO ...
Page 67: ...Schematic Diagrams Samsung Electronics 9 5 9 5 3DCOMB1 Power Line Signal Line ...
Page 68: ...Schematic Diagrams 9 6 Samsung Electronics 9 6 IF_MODULE Power Line Signal Line ...
Page 73: ...Schematic Diagrams Samsung Electronics 9 11 9 11 CONTROL SUB Power Line ...


