English - 8
03 Initial Setup
When you turn on your TV for the first time, it immediately starts the
Initial Setup. Follow the instructions displayed on the screen and
configure the TV's basic settings to suit your viewing environment.
If you already completed the Initial Setup, run the Initial Setup again
using the following menu.
•
Hotel Option
menu >
System
>
TV Reset
If you select
TV Reset
, the TV resets all values to their factory defaults.
When the TV turns off, press the
Power
button on the remote control
to turn on the TV. The TV starts the Initial Setup.
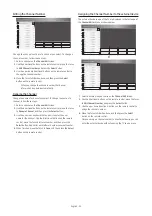
1
Select the region settings
•
Before select region, refer to the country list information on
the right.
•
If you select the incorrect region, execute
TV Reset
again after
the Initial Setup is completed.
•
If the region is changed, the TV automatically turns off and on.
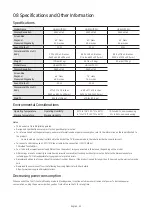
2
Selecting your TV installation type
•
TV Basic Setup
: Select to proceed to the next step to set the
basic options for using your TV.
•
Cloning Mode
: Copy the system settings from the USB or server
to the TV.
•
Zero Touch Configuration
: Before starting Zero Touch
Configuration, connect to the network and agree to the Terms
& Conditions.
•
Factory Menu
: End Initial Setup and go to
Hotel Option
menu
directly.
•
Follow the instructions on the screen to configure the settings for
your own viewing environment.
Using the TV Controller
You can turn on the TV with the
TV Controller
button at the bottom
of the TV, and then use the
Control menu
. The
Control menu
appears
when the
TV Controller
button is pressed while the TV is On. For more
information about its usage, refer to the figure below.
•
The screen may dim if the protective film on the SAMSUNG
logo or the bottom of the TV is not removed. Please remove the
protective film.
Control menu
:Power On/Off
:Channel Up
:Channel Down
:Volume Up
:Volume Down
:Source
TV Controller
button /
Remote control sensor
Short Press: Move
Long Press & Hold: Select
The
TV Controller
button is located on the bottom of the TV.
04 The Connection Panel
①
②
⑥
⑦
④
③
⑤
BACK OF TELEVISION
*
EX-LINK
: Dedicated to service technicians.
•
When connecting an external device, match the color of the
connection port to the cable.
•
Whenever you connect an external device to your TV, make sure
that power on the TV and the device is turned off.
①
USB (5V 0.5A), USB (HDD 5V 1A)
– Connector for software upgrades and Media Play, etc.
– Service connection.
②
HDMI IN 1, 2, 3 (eARC)
Connects to the HDMI jack of a device with an HDMI output.
– No separate sound connection is needed for an HDMI to HDMI
connection. HDMI connections carry both audio and video.
– It is recommended that the external device of the HDMI
1.3 or 1.4 version will be used with this TV. If you meet the
compatible problem like no sound or the abnormal screen
or etc with the device of the HDMI 1.2 version, contact to the
Samsung customer care center.
③
DATA
– Used to support data communication between the TV and the
SBB or STB.
– Connects using RJ-12 TV type plugs.
④
ANT IN
To view television channels correctly, the TV must receive a signal
from one of the following sources:
– An outdoor antenna / A cable television system
⑤
DIGITAL AUDIO OUT (OPTICAL)
Connects to a Digital Audio component.
⑥
LAN
To connect a LAN cable, use a CAT 7 (*STP type) cable for the
connection. (100/10 Mbps)
* Shielded Twisted Pair
⑦
PILLOW SPEAKER
Connect the pillow speaker. Refer to page 10 for more information.


