background image

SAMSUNG

LIMITED WARRANTY

SAMSUNG Electronics America Inc. (SEA), warrants that this product is free from defective 
material and workmanship.
SEA further warrants that if product fails to operate properly within the specified warranty period 
and the failure is due to improper workmanship or defective material, SEA will repair or replace 
the product at it’s option.
All warranty repairs must be performed by a SEA authorized service center. The name and 
address of the location nearest you can be obtained by calling toll free: 1-800 SAMSUNG 
(1-800-726-7864).
Labor
90 days carry-in
Parts
1 year

On carry-in models, transportation to and from the service center is the customer’s 
responsibility.

The original dated sales receipt must be retained by the customer and is the only acceptable 
proof of purchase.
It must be presented to the authorized service center.

EXCLUSIONS (WHAT IS NOT COVERED)

This warranty does not cover damage due to accident, fire, flood and/or other acts of 
God; misuse, incorrect line voltage, improper installation, improper or unauthorized repairs, 
commercial use, or damage that occurs in shipping.
Exterior and interior finish, lamps, and glass are not covered under this warranty.
Customer adjustments which are explained in the instruction manual are not covered under the 
terms of this warranty.
This warranty will automatically be voided for any unit found with a missing or altered serial 
number. This warranty is valid only on products purchased in the United States and Puerto 
Rico.
Some States do not allow the exclusions or limitations of incidental or consequential damages, 
or allow limitations on how long an implied warranty lasts, so the above limitations or exclusions 
may not apply to you.
This warranty gives you specific legal rights, and you may also have other rights which vary from 
State to State.

warranty

Summary of Contents for HMX-E10

Page 1: ...User Manual HMX E10WN HMX E10BN HMX E10ON High Definition Digital Camcorder www samsung com register ...

Page 2: ...uired before using a function These warning signs are here to prevent injury to you and others Please follow them explicitly After reading this section keep it in a safe place for future reference PRECAUTIONS Warning When using the AC power adapter with your camcorder connect the adapter to an outlet with protective grounding Do not expose the camcorder battery to direct sunlight heaters radiators...

Page 3: ...ouch the Recording stop tab to pause the recording The terms photo and still image are used interchangeably and have the same meaning IMPORTANT INFORMATION ON USE Before using this camcorder This camcorder records video in H 264 MPEG4 AVC format Please note that this camcorder is not compatible with other digital video formats Before recording important video make a trial recording Play back your ...

Page 4: ...dows Vista Windows 7 and DirectX are either registered trademarks or trademarks of the Microsoft Corporation in the United States and or other countries Intel Core and Pentium are the registered trademarks or trademarks of the Intel Corporation in the United States and other countries Macintosh Mac OS are either registered trademarks or trademarks of Apple Inc in the United States and or other cou...

Page 5: ...ent of the obsolete outlet 10 Protect the power cord from being walked on or pinched particularly at plugs convenience receptacles and the point where they exit from the apparatus 11 Only use attachment accessories specified by the manufacturer 12 Use only with the cart stand tripod bracket or table specified by the manufacturer or sold with the apparatus When a cart is used use caution when moving ...

Page 6: ... items placed upon or against them paying particular attention to cords or plugs convenient receptacles and the point where they exit from the unit 20 OUTDOOR ANTENNA GROUNDING CAMCORDER be sure the antenna or cable system is grounded to provide some protection against voltage surges and built up static charges Section 810 of the National Electrical Code ANSI NFPA No 70 1984 provides information w...

Page 7: ...n or water d If the CAMCORDER does not operate normally by following the operating instructions adjust only those controls that are covered by the operating instructions Improper adjustment of other controls may result in damage and will often require extensive work by a qualified technician to restore the CAMCORDER to its normal operation e If the CAMCORDER has been dropped or the cabinet has been...

Page 8: ...erference by one or more of the following measures Reorient or relocate the receiving antenna Increase the separation between the equipment and receiver Connect the equipment into an outlet on a circuit different from that to which the receiver is connected Consult the dealer or an experienced radio TV technician for help and for additional suggestions The user may find the following booklet prepar...

Page 9: ...e camcorder at temperatures over 60 140 ٺ may result in fire Keeping the battery at a high temperature may cause an explosion Do not allow water or metal and inflammable matter to enter the camcorder Doing so may pose a fire hazard No sand or dust Fine sand or dust entering the camcorder could cause malfunctions or defects Do not aim the camcorder directly into the sun Doing so could cause eye injuri...

Page 10: ...corder away from water when using it near the beach or pool or when it rains There is a risk of malfunction or electric shock Connect the USB plug to a USB jack on a PC or an adaptor Do not insert the plug forcibly if it does not match the jack You can break the plug Do not touch the USB cable or plug with wet hands There is a risk of electric shock If the USB cable gets hot or the camcorder emits...

Page 11: ...r near a corrosive gas such as hydrogen sulphide Doing so may corrode the external or internal terminals disabling normal operation Do not expose the camcorder to insecticide Insecticide entering the camcorder could cause the product to operate abnormally Turn the camcorder off and cover it with vinyl sheet etc before using insecticide Do not press the surface of the LCD with force or hit it with ...

Page 12: ...motors Noise from these sources could distort the video or audio you are recording Do not wipe the camcorder body with benzene or thinner The exterior coating could peel off or the case surface could deteriorate Do not use the camcorder near a TV or radio It can cause distortion on the TV screen or interference on the radio xii Manufacturers of unauthorized accessories compatible with this camcord...

Page 13: ... 10 What s included with your camcorder 11 Location of controls 13 Identifying the screen displays 17 Using the battery 19 Checking the battery state 22 Turning your camcorder on off 23 Setting the operating modes 24 Using the touch panel 25 Turning the power on for the first time and setting the date and time 26 Selecting the OSD language 3 ...

Page 14: ... in and out 37 Changing the playback mode 38 Playing videos 41 Viewing photos 43 Using the menu tab in the record mode 43 Recording menu items 44 Video Resolution 45 Photo Resolution 46 Smart Filter 48 Panorama 49 Quick View 50 Using the menu tab in the play mode 50 Playback menu items 51 Deleting files 52 Protection from accidental erasure 53 Share Mark contents GETTING READY TO START RECORDING 27...

Page 15: ...guage 64 Demo 65 What you can do with a windows computer 66 Using the intelli studio program 72 Using as a removable storage device 74 Connecting to a TV 75 TV image displays 76 Warning indicators and messages 78 Symptoms and solutions 84 Maintenance 85 Using your camcorder abroad 86 Specifications SYSTEM SETTING 54 USING WITH A WINDOWS COMPUTER 65 CONNECTING TO OTHER DEVICES 74 TROUBLESHOOTING MAI...

Page 16: ...ll to open the battery cover in the direction of the arrow as shown in the figure page 17 2 Insert a memory card You can use commercially available micro SDHC SD High Capacity or micro SD memory cards with this camcorder page 28 3 Insert the battery into the battery slot 4 Charge the battery fully by using the built in USB plug of the camcorder page 18 The battery is fully charged when the CHG char...

Page 17: ...6 9 aspect ratio 1 Press the Power button 2 Frame the subject to be recorded and touch the Photo tab on the LCD screen 3 When you release the Photo tab a photo is recorded Recording videos Recording photos Your camcorder is compatible with the H 264 recording format which achieves efficient coding of high quality video using less memory capacity The default setting is 720 30p You can select the res...

Page 18: ...d file is highlighted Viewing on a high definition TV You can enjoy HD High Definition videos on a connected HDTV page 74 Simple and fun Enjoy the various features of the built in Intelli studio program on your Windows computer Using the Intelli studio program built into your camcorder you can import videos photos into your computer and edit or share the videos photos with your friends pages 66 71 Yo...

Page 19: ...ook Share your contents with the world by uploading videos and photos directly to a web site with a single click Click Share Upload on the browser page 69 If the camcorder s storage media is full you cannot record new videos or photos Delete videos or photos you ve saved to your computer from the camcorder s storage media Then you can record new videos or photos in the newly freed up space Press t...

Page 20: ... CD and printed quick start guide WHAT S INCLUDED WITH YOUR CAMCORDER Your new camcorder comes with the following accessories If any of these items are missing from your box call Samsung s Customer Care Center Model name Color Memory card slot LCD screen Lens HMX E10WN White Yes Color Digital zoom x2 HMX E10BN Black HMX E10ON Orange The shape is the same for all models Only the color is different ...

Page 21: ...Rear Right side LOCATION OF CONTROLS 11 MENU Lens Mode button LCD screen MENU button Power button ...

Page 22: ...ns during recording getting to know the camcorder Built in speaker Battery cover open hole Internal microphone CHG Charging indicator Battery cover Built in USB plug Jack cover Tripod receptacle Built in USB eject button HDMI jack Battery slot Memory card slot Hand strap hook 12 ...

Page 23: ...is On Screen Display OSD is shown only when the camcorder is in Video Record mode Select the Record mode by pressing the Mode button page 23 Video Record mode The on screen indicators are based on an 8GB micro SDHC memory card The screen above is an example and may differ from the actual display For enhanced performance the display indications and order are subject to change without a prior notice...

Page 24: ...button page 23 getting to know the camcorder 1 Photo resolution 2 Smart Filter 3 Half shutter 4 Storage media Memory card 5 Battery info remaining charge level 6 Auto focus frame 7 Quick view shutter display 8 Photo tab 9 Photo counter total number of recordable photos 10 Date Time display Photo Record mode 9999 99Min 1 2 3 5 4 6 7 8 9 7 0 ...

Page 25: ...ack progress bar 8 Recorded date time display Volume control tabs _ 9 Playback control tabs ᐓ Reverse skip ᐔ Reverse search ᐕ Play Pause ᐖ Forward search ᐗ Forward skip 10 Return tab 11 Volume tab 12 Erase protection 13 Share mark 15 PRECHECK This On Screen Display OSD is shown only when the camcorder is in Video Play mode Select the Play mode by pressing the Mode button and then touch the Video t...

Page 26: ...er of recorded images 4 File name file number 5 Photo Resolution 6 Battery info remaining charge level 7 Recorded date time display 8 ᐓ Previous image tab ᐔ Slide show start tab ᐕ Next image tab 9 Return tab 10 Erase protection getting to know the camcorder 16 PRECHECK This On Screen Display OSD is shown only when the camcorder is in Photo Play mode Select the Play mode by pressing the Mode button ...

Page 27: ... Ejecting the battery 1 Pull the battery cover in the direction of the arrow as shown in the figure to open 2 Pull out the battery in the direction of the arrow as shown in the figure 3 Close the battery cover USING THE BATTERY Purchase extra batteries to allow continuous use of your camcorder Use only Samsung approved batteries If you use batteries from other manufacturers there is a danger of over...

Page 28: ...er s USB plug and your computer s USB port to charge the camcorder The camcorder will be charging if its built in USB plug is connected to a PC even when it is turned on getting started 1 Press the Power button to turn off the camcorder 2 Open the Jack cover and press the USB eject button to pop out the built in USB plug 3 Connect the built in USB plug of the camcorder to the USB port of a PC The ...

Page 29: ...attery CHECKING THE BATTERY STATE You can check the charging state and remaining battery capacity The color of the LED indicates the power or charging state Charging CHG indicator The color of the charging indicator shows the charging state Charging state Charging Fully charged Error LED color Orange Green Orange Blink To check the charging state Battery level display The figures above are based on...

Page 30: ...out zoom The continuous recording time above shows the available recording time when you record without using any other function after recording starts The battery pack may discharge 2 3 times faster than this reference if you use the record start stop frequently and the zoom functions and then playback your recordings Prepare additional charged battery pack s to cover the time you are planning to...

Page 31: ...nt of battery power is consumed when the battery is stored in the camcorder even if the camcorder power is off If the battery is installed and left in the camcorder for a long time the battery discharges If this occurs you may not be able to use the battery even if you charge it fully Keep the battery out of reach of children To store the battery for a long time we recommend you keep the battery c...

Page 32: ... on pages 76 77 and take corrective action basic operation of the camcorder This chapter introduces you to the basic operation procedures of this camcorder such as turning the power on off and switching modes TURNING YOUR CAMCORDER ON OFF You can turn the power on or off by pressing the Power button When using this camcorder for the first time When you use your camcorder for the first time or reset ...

Page 33: ...ose the video or photo thumbnail view display options by touching the Video or Photo tab on the LCD screen When switching to play mode you can enjoy landscape playback by rotating the camcorder from a vertical to a horizontal position 23 Easy one handed recording and button operations When switching to the play mode you can enjoy a landscape playback by rotating the camcorder Record mode Playback ...

Page 34: ...e LCD screen for a long time strong adhesion between the film and the surface of the screen may cause the touch panel to malfunction Be careful not to accidentally press the buttons near the LCD panel while using the touch panel The tabs and indicators that appear on the LCD screen depend on the current recording playback status of your camcorder The camcorder does not recognize touches if you touc...

Page 35: ...r using its USB plug or inserted the removable battery the built in battery fully discharges If this occurs charge the built in battery by connecting the built in USB plug to a computer for 24 hours TURNING THE POWER ON FOR THE FIRST TIME AND SETTING THE DATE AND TIME Set the date and time of your local area when you turn on the camcorder for the first time 1 Press the Power button to turn on the c...

Page 36: ...ayed 3 Touch Language and then touch the desired OSD language The menu screen and messages are displayed in the language you selected 4 To exit the menu touch the Return tab Language options may be changed without a prior notice The camcorder retains the language you select even when the removable battery is not inserted The date and time format may change depending on the language you selected fir...

Page 37: ...figure to open 2 Gently push the memory card to eject it 3 Close the battery cover INSERTING EJECTING A MEMORY CARD NOT SUPPLIED To avoid the data loss turn off the camcorder by pressing the Power button before inserting or ejecting the memory card Be careful not to push the memory card too hard The memory card may suddenly pop out Your camcorder supports only micro SD micro Secure Digital and micr...

Page 38: ...igh Capacity memory cards A micro SDHC card is a higher version Ver 2 00 of the micro SD card and supports capacities above 4GB Use micro SD cards only with micro SD enabled host devices Common cautions for memory cards Damaged data may not be recovered We recommend you make a back up of important data separately on the hard disk of your PC Turning the power off or removing a memory card during an...

Page 39: ...g on the manufacturer and production system SLC Single Level Cell system faster write speed enabled MLC Multi Level Cell system only lower write speed is supported For best results we recommend using a memory card that supports a faster write speed Using a lower write speed memory card for recording video may cause difficulties when storing You may even lose your video data during the recording In ...

Page 40: ... 9999 Unit Approximate number of images Actual recording times may differ depending on the recording conditions and the subject The higher the resolution settings the more memory is used High resolution images occupy more memory space than low resolution images If you select higher resolutions there is less space to record videos in the memory When recording complex videos with a lot of action and...

Page 41: ... 1 Align your subject in the frame 2 By turning the lens the 270 rotating lens adjusts freely to your desired recording angle Excessive rotation may damage the connective hinge between the lens and the camcorder Do not wipe the lens with your fingers during operation Use a soft dry cloth to clean the lens if required You can easily attach the strap through the loop when holding the very end of the ...

Page 42: ...rd Adjust the 270 rotating lens to the best angle for recording Touch the Zoom lever on the LCD screen to adjust the size of the subject page 36 2 Touch the Recording start tab on the LCD screen The recording z indicator appears and recording starts The number of recordable photos appears next to the Photo 6 tab on the LCD screen page 35 3 To stop recording touch the Recording stop tab The Quick V...

Page 43: ...on display see page 13 For approximate recording time see page 20 Sound is recorded by the internal stereo microphone above the lens Make sure that the microphone is not blocked Before recording an important video make sure to test the recording function to see if there are any problems with audio or video recording You can adjust the brightness of the LCD screen in the menu options Adjusting the ...

Page 44: ...indicator appears on the screen and the camcorder records the photo image To continue taking photos wait until the camcorder saves the current photo completely on the storage media When the photo is recorded on the storage media the Quick View icon appears on the screen 4 Touch the Quick View icon to view the most recently recorded photo To return to the STBY mode touch the Return tab The recordab...

Page 45: ...r video recording is six The photo capture icon appears on the LCD screen As you capture photos the number of recordable photos is reduced When you have reached the six photo limit the Photo tab is grayed out The camcorder continues to record video even while you are taking photos To stop recording touch the Recording stop tab y A preview is available for recorded videos only even if you have capt...

Page 46: ...he Zoom lever you can record with digital zoom To zoom in Slide the Zoom lever towards T telephoto The distant subject is gradually magnified This camcorder provides the zoom magnification as follows Digital zoom x2 To zoom out Slide the Zoom lever towards W wide angle The subject appears smaller and further away The smallest zoom ratio is the subject s original size in the zoom out basic recording ...

Page 47: ...TBY mode you used the last time However you can choose the video or photo thumbnail view display options by touching the Video or Photo tab on the LCD screen Understanding how to change the operation modes You can easily change the operation modes by touching the LCD screen or using the buttons as shown in the following figure When switching to the play mode you can enjoy landscape playback by rota...

Page 48: ... up down or touch the Previous or Next tab 2 Touch the thumbnail of the video you want to play The camcorder plays the selected video and playback control tabs appear briefly They reappear when you touch anywhere on the screen To stop playback and return to the thumbnails touch the Return tab basic playback JAN 01 2010 12 00 AM 0 00 05 0 00 50 100 0001 Drag the thumbnail index view up or down on th...

Page 49: ...menu items pages 50 53 Loading time may vary depending on the resolution of the selected video Do not power off or eject the memory card during video playback Doing so may damage the recorded data To adjust the volume during video playback You can hear the sound through the built in speaker of the camcorder while the video is playing back on the LCD screen 1 Touch the Volume tab on the LCD screen ...

Page 50: ... tab during playback Touching the Forward skip tab plays the next video Touching the Reverse skip plays the beginning of the scene If reverse skip is touched within 3 seconds from the start of the file the previous video is played Place and hold your finger on the Reverse skip Forward skip tab to search for a video quickly When you lift off your finger the camcorder plays the selected video y y y y y...

Page 51: ...trol tabs appear briefly They reappear when you touch anywhere on the screen Touch Previous image Next image tab to view the previous and next photo Place and hold your finger on the Previous Image Next Image tab to search for a photo quickly When you lift off your finger the camcorder displays the selected photo 3 To return to the thumbnails touch the Return tab 41 Using the Touch Screen Drag the im...

Page 52: ...following photo files normally A photo with a file format not supported by this camcorder it does not conform to DCF standards Loading time may vary depending on the resolution of the photo you selected This camcorder can support the JPEG file format However note that all JPEG files are not always played back Do not power off or eject the memory card during photo playback Doing so may damage the recor...

Page 53: ...y be changed without notice z available X not available Operation mode Items Video Photo Default value Page Video Resolution z X 720x30p 44 Photo Resolution X z 8M 3264x2448 4 3 45 Smart Filter z z Normal 46 Panorama X z Off 48 Quick View z z On 49 The camcorder applies the menu item you selected and displays the appropriate indicator There are some functions you cannot activate simultaneously in ...

Page 54: ...usts the bit rate according to the recording image High resolution images occupy more memory space than low resolution images If you select the higher resolution there is less space to record videos in the memory The recording time available depends on the resolution you selected page 30 advanced recording Submenu items 1080 30p Records in the HD 1920x1080 30p format 720 30p Records in the HD 1280...

Page 55: ...2x1944 Records in 2592x1944 resolution with 4 3 aspect ratio 1920X1080 Records in 1920X1080 resolution with 16 9 aspect ratio For photo development the higher the resolution the finer the image quality The number of recordable images varies depending on the recording environment High resolution images occupy more memory space than low resolution images If you select a higher resolution there is les...

Page 56: ...asize blue tones for the sky and reflective objects such as show windows advanced recording Smart Filter By applying special effects you can add fun and character to an image You can apply various filter effects to create unique images PRECHECK Select the Record mode by pressing the Mode button page 23 1 Press the MENU button 2 Touch the Smart Filter You can move to the desired item by touching the ...

Page 57: ... not record sound If you apply the Smart Filter effect when recording a video the camcorder automatically records the video in a resolution of 640x480 15P regardless of the resolution setting The following functions cannot be used when the camcorder is in the Smart filter mode Digital zoom Video Resolution Photo Resolution If you set the Smart Filter to any setting but Normal the camcorder sets the...

Page 58: ...enu items Off Disables the function On Move your camcorder in one direction while touching the Photo tab to take a panorama image This function is available only in the photo record mode When you take a picture of yourself in the Panorama mode an error can occurs If recording a panorama has failed due to improper moving speed or moving in the wrong direction the recorded image is saved in the aspe...

Page 59: ... Touch the Quick View icon to view the most recent video or photo you have recorded After the Quick View is completed your camcorder switches back to the STBY mode If you touch the delete tab during Quick View the file is deleted The Quick View function is not available under the following conditions If the mode has been changed after the recording If you have connected the built in USB plug of the...

Page 60: ... are some functions you cannot activate simultaneously in the menu Also you cannot select grayed out menu items Refer to Toubleshooting for examples of unworkable combinations of functions and menu items page 83 USING THE MENU TAB IN THE PLAY MODE You can change the menu settings to customize your camcorder Access the desired menu screen by following the steps below and then change the various set...

Page 61: ...at are protected If you selected Select Files the camcorder deletes the files you selected You can also operate this function in the full and single image display mode page 50 To protect important images from accidental erasure activate the image protection function in advance page 52 You can not delete protected files Cancel the protect function first page 52 The delete function does not work if the...

Page 62: ...rotect After you have selected all the files you want to protect touch the tab See Submenu items below for additional details 4 Touch Yes If you selected All On the indicator appears on all files If you selected All Off the indicator disappears from all protected files If you selected Select Files the indicator appears on the files you selected for protection and disappears from the files you removed p...

Page 63: ... Files the indicator appears on the files you selected for share marking and disappears from the files you removed the share mark from The share mark indicator is displayed on the videos you selected You can also operate this function in the full and single image display mode By using the Intelli studio software embedded in the camcorder you can easily upload videos marked with share marks page 70 T...

Page 64: ... To exit the menu touch the Return tab USING THE SETTING MENU TAB You can change the menu settings to customize your camcorder Access the desired menu screen by following the steps below and then change the various settings MENU MENU Using the Menu Tab An Example PRECHECK Insert a memory card page 27 Using the setting menu Setting in the play mode Setting in the record mode MENU Settings Date Time...

Page 65: ...you cannot select grayed out menu items Refer to Troubleshooting for examples of unworkable combinations of functions and menu items page 83 Settings File No Date Time Set Date Time Display Storage Info Storage Info This function displays the storage information for the memory card in your camcorder such as the used or the available memory space etc PRECHECK Insert a memory card page 27 1 Press th...

Page 66: ...er is reset only when a new folder is created Reset Resets the file number to 0001 after you format the memory card delete all files or insert a new memory card When you set File No to Series each file is assigned a different number to avoid duplicating file names This numbering scheme is very useful when you want to manage your files on a computer Date Time Set By setting the date and time you can dis...

Page 67: ...on you must set the date and time page 25 1 Press the MENU button 2 Touch the Settings Date Time Display Touch the desired submenu item 3 To exit the menu touch the Return tab The date time is displayed on the LCD screen according to the selected option Submenu items Off Current date time information is not displayed Date Displays the current date Time Displays the current time Date Time Displays ...

Page 68: ...ing mode starts by dimming the LCD screen If the Auto LCD Off function is enabled and the LCD screen dims you can press any button or touch the LCD screen on the camcorder to return the LCD screen s brightness to normal Auto LCD Off is temporarily disabled in the following cases If you have connected the built in USB plug of the camcorder to a PC While the Demo function is in operation For example...

Page 69: ... the menu touch the Return tab Submenu items Off The beep sound is off On You will hear a beep sound when operating buttons or tabs on the LCD screen The Beep Sound function is temporarily disabled in the following cases During recording and playing When the camcorder has a cable connection Mini HDMI cable Submenu items Off The shutter sound is off On The shutter sounds each time you touch the Pho...

Page 70: ...does not turn off automatically 5 Min The camcorder automatically turns off if there is no operation for 5 minutes in STBY mode or in thumbnail index view Auto Power Off is temporarily disabled in the following cases When the camcorder is connected using its built in USB plug While the Demo function is in operation While the camcorder is recording playing except when in pause or running a photo sl...

Page 71: ...rder to your PC s hard disk and edit the video and photo files on your PC s screen 1 Press the MENU button 2 Touch the Settings PC Software Touch the desired submenu item 3 To exit the menu touch the Return tab Submenu items Off Disables the function On You can use the PC software by connecting the built in USB plug of the camcorder to your PC The PC software is compatible with Windows operating sy...

Page 72: ...ng off the power during formatting Also be sure the battery is sufficiently charged The storage media can be corrupted if the battery becomes exhausted during formatting If the storage media becomes corrupted format it again Format The format function deletes all files including protected files and options on the storage media You can also use this function if you want to correct problems with the st...

Page 73: ... not turn off the power while initializing the settings The Default Set function does not affect the files recorded on the storage media Language You can select a language in which to display the menu and messages page 26 Language options may be changed without a prior notice The camcorder retains the language you select even when turn off the power The date and time format may change depending on ...

Page 74: ... Off function turns the camcorder off before Demo can run page 60 The Demo mode is canceled in the following cases If you touch the LCD screen If you press any button MENU button Mode button etc However the camcorder enters the Demo mode automatically after 5 minutes in STBY mode if it is idle for 5 minutes without an operation If you don t want the Demo function to start set Demo to Off In STBY m...

Page 75: ...ecommended Notebook Intel Core2 Duo 2 2GHz or AMD Athlon X2 Dual Core 2 6GHz or higher is recommended RAM 1GB or higher is recommended Video Card NVIDIA GeForce 8500 or higher ATI Radeon HD 2600 series or higher Display 1024 x 768 16 bit color or higher 1280 x 1024 32 bit color recommended USB USB 2 0 Direct X DirectX 9 0c or higher Memory Card A micro SDHC card of Class 6 or above System requirem...

Page 76: ...puter USING THE Intelli studio PROGRAM Using the Intelli studio program built into your camcorder you can transfer video and photo files to your PC and edit them on your PC screen Intelli studio offers the most convenient way for you to manage your video and photo files Step 1 Connecting the USB plug 1 Set PC Software On page 61 This is the default setting 2 Connect the built in USB plug of the camc...

Page 77: ...ects the connected device 10 Shows Contents Manager and My Computer directories Contents Manager You can classify and manage videos and photos on your computer My Computer You can view videos and photos saved in selected directories of your computer 11 Shortcut icons Navigates files previous and next Prints selected photo s Using GPS information displays location where selected photo s were taken R...

Page 78: ... you select the desired video or photo double click to play back Playback starts and playback controls appear Step 4 Editing videos or photos With Intelli studio you can edit videos or photos in various ways For example Change Size Fine Tune apply Image Effect Insert Frame etc Before editing a video or photo in Intelli studio make a backup copy of the file by copying the video or photo file to your ...

Page 79: ... access environment Flickr is an image hosting website web services suite and online community platform In addition to being a popular website for users to share personal photographs the service is widely used by bloggers as a photo repository http www flickr com Facebook is a global social networking website that is operated and privately owned by Facebook Inc Users can add friends and send them m...

Page 80: ...h Share tab lets you directly upload and share your videos on YouTube Just touch the Share tab while your camcorder is connected to a Windows computer using the built in USB plug As part of the uploading process the videos you marked are converted into a format playable by YouTube before actually uploading Time spent uploading may vary depending on such conditions as file size computer performance ...

Page 81: ...f you install it on your Windows computer Also if you install it on your computer it can be updated automatically Follow these directions to install Intelli studio onto your Windows computer Click Tool t Install Intelli studio on PC on the Intelli studio screen and then follow the steps below 1 2 3 4 ...

Page 82: ...es are stored in different folders 5 Select the desired folder or files to copy then drag and drop them into the destination folder The folder or files are copied from the storage media to the PC If the Removable Disk window does not appear confirm the connection page 66 or perform Steps 1 through 4 again If the removable disk does not appear automatically open the removable disk folder in My Compute...

Page 83: ...order 100PHOTO 101PHOTO etc Up to 9 999 files can be stored in one folder The camcorder creates a new folder when the number of files in a folder exceeds 9 999 Image format Video files Videos are compressed in H 264 format The file extension is MP4 Refer to page 44 for video resolution Photo files Photos are compressed in JPEG Joint Photographic Experts Group format The file extension is JPG Refer to pa...

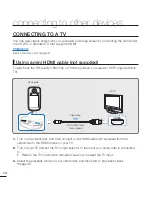
Page 84: ...0 30p or 720 30p videos you need an HDTV high definition TV 1 Turn on the camcorder and then connect a mini HDMI cable not supplied from the camcorder to the HDMI In jack on your TV 2 Turn on your TV and set the TV s input selector to the Input your camcorder is connected to Refer to the TV s instruction manual to see how to select the TV input 3 Select the playback mode on your camcorder and then ...

Page 85: ...t work Do not use excessive force when connecting the cables When the camcorder is connected to a TV you cannot control the volume of the TV from the camcorder TV IMAGE DISPLAYS HDMI High Definition Multimedia Interface is a compact audio video interface for transmitting uncompressed digital data Image appearance depends on the TV screen aspect ratio 16 9 or 4 3 Recording ratio Wide 16 9 TV 4 3 TV ...

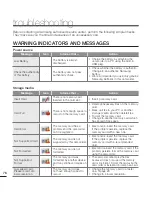
Page 86: ...ge media and then delete files Format the memory card Change to another memory card which has enough free space Card Error The memory card has a problem and the camcorder can t recognize it Eject and re insert the memory card If the problem persists replace the memory card with a new one Not Supported Card The memory card is not supported by this camcorder Eject and re insert the memory card If the...

Page 87: ...d You need to move the camcorder in one direction only when taking a panorama Sweep the camcorder in one direction The number of video files is full Cannot record video Folder and files have reached their maximum capacity and you can not record Back up important files on the storage media to your PC and then format the storage media using the camcorder Set File No to Reset The number of photo files is...

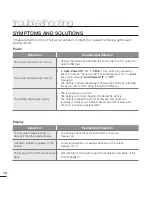
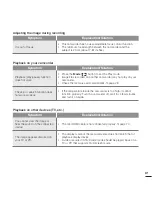
Page 88: ...ged Charge the battery by attaching the camcorder to a PC using the built in USB plug The battery discharges quickly The temperature is too low The battery is not fully charged Recharge the battery The battery reached the end of its lifespan and cannot be recharged Contact your nearest Samsung authorized service center to purchase a replacement Display Symptom Explanation Solution The recorded ima...

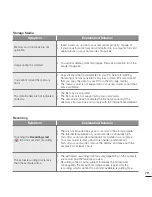
Page 89: ...not supported by your camcorder The camcorder does not display the file name correctly if the directory structure does not comply with the international standard Recording Symptom Explanation Solution Touching the Recording start tab does not start recording There is not enough free space to record on the storage media The internal temperature of your camcorder is unusually high Turn off your camco...

Page 90: ...is exposed to direct sunlight during recording the screen turns red or black for an instant This is not a malfunction Do not expose the camcorder to direct sunlight You don t hear the beep sound Set the Beep Sound to On page 59 The beep sound is temporally off while recording videos There is a time difference between the point where you touch Recording start stop tab and the point where the record...

Page 91: ...eck the memory card compatibility page 28 The skip or search function does not work properly If the temperature inside the camcorder is too high it cannot function properly Turn the camcorder off wait for a few minutes and turn it on again Playback on other devices TV etc Symptom Explanation Solution You cannot view the image or hear the sound on the connected device The mini HDMI cable is not con...

Page 92: ...start the Windows computer Intelli studio is not Macintosh compliant Set PC Software to On in the Settings menu page 61 The Intelli studio program may not run automatically If this occurs access My Computer or Windows Explorer open the drive that corresponds to your camcorder find Intelli studio and then run IStudio exe The image or sound on your camcorder is not played on your computer properly Vi...

Page 93: ... You cannot select grayed items in the current recording playback mode If you have not inserted a memory card into the camcorder all functions that require a memory card Storage Info Format etc are dimmed in the menu and you will not be able to select them The following functions cannot be used when the camcorder is in the Smart filter mode Digital zoom Video Resolution Photo Resolution The followi...

Page 94: ...erature of the lens is similar to the ambient temperature the frost will disappear When there is dew condensation put the camcorder aside for a while before using What is dew condensation Dew condensation happens when a camcorder is moved to a location where there is a significant temperature difference from the previous location The dew condenses on the external or internal parts of the camcorder ...

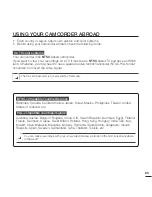
Page 95: ...o signal NTSC compatible countries regions Bahamas Canada Central America Japan Korea Mexico Philippines Taiwan United States of America etc PAL compatible countries regions Australia Austria Belgium Bulgaria China CIS Czech Republic Denmark Egypt Finland France Germany Greece Great Britain Holland Hong Kong Hungary India Iran Iraq Kuwait Libya Malaysia Mauritius Norway Romania Saudi Arabia Singap...

Page 96: ...t C type connector Built in USB General Power source Power source type Power consumption Recording Operating temperature Operating humidity Storage temperature Dimensions WxHxD Weight Internal MIC Storage media 3 7V Using Lithium Ion battery Lithium Ion battery 2 1W 720 30P 32 F 104 F 0 40 C Below 60 4 F 140 F 20 C 60 C 2 26 x 4 27 x 0 66 57 5 mm x 108 5 mm x 16 8 mm 0 19 lb 88g 3 10 oz Except for...

Page 97: ...sented to the authorized service center EXCLUSIONS WHAT IS NOT COVERED This warranty does not cover damage due to accident fire flood and or other acts of God misuse incorrect line voltage improper installation improper or unauthorized repairs commercial use or damage that occurs in shipping Exterior and interior finish lamps and glass are not covered under this warranty Customer adjustments which ar...

Page 98: ...r Road Ridgefield Park NJ 07660 2112 RoHS compliant Our product complies with The Restriction Of the use of certain Hazardous Substances in electrical and electronic equipment and we do not use the 6 hazardous materials Cadmium Cd Lead Pb Mercury Hg Hexavalent Chromium Cr 6 Poly Brominated Biphenyls PBBs Poly Brominated Diphenyl Ethers PBDEs in our products ...

Reviews: