64
SETUP
•
If the system is installed at a location where sound cannot
be reflected (e.g., an open space without walls), the speaker
distance, channel level, and rear sound reflection effect may
be set incorrectly during the RRSS setup.
Caution
DIRECT PLAY
1
2
3
4
5
*
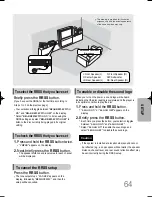
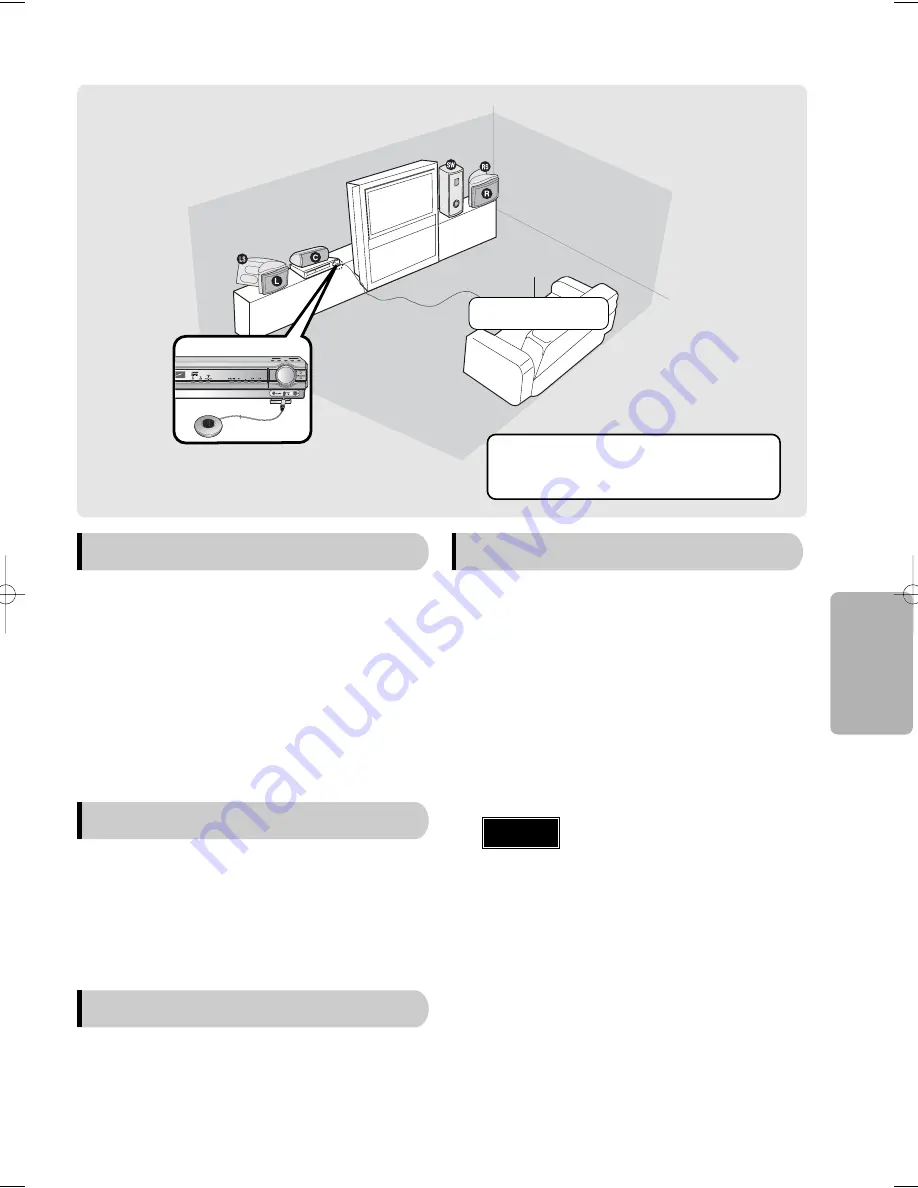
This drawing is provided for illustration
purposes only and the actual appearance
of the items depicted may vary.
L: Front Speaker (L)
R: Front Speaker (R)
C: Center Speaker
SW: Subwoofer
LS: Rear Speaker (L)
RS: Rear Speaker (R)
Auto Sound Calibration
Microphone
To select the RRSS that you have set
Briefly press the
RRSS
button.
(If you have set the RRSS for the first time according to
Steps 1 to 3 on the previous page)
•
Your selection will toggle between "
REAR REFLECTING
ON
" and "
REAR REFLECTING OFF
" on the display.
•
Select "
REAR REFLECTING ON
" to listen using the
RRSS setting and select "
REAR REFLECTING OFF
" to
listen to the disc currently being played in its original
setting.
To enable or disable the sound logo
When you turn on the power, a sound logo will be heard,
indicating that the disc reading is completed and the player is
in its optimal condition to play the disc.
1.
Press and hold the
RRSS
button.
•
"
S.LOGO ON
" or "
S.LOGO OFF
" appears on the
display.
2.
Briefly press the
RRSS
button.
•
Each time you press the button, your selection toggles
between "
S.LOGO ON
" and "
S.LOGO OFF
".
•
Select "
S.LOGO ON
" to enable the sound logo and
select "
S.LOGO OFF
" to disable the sound logo.
To check the RRSS that you have set
1.
Press and hold the
RRSS
button twice.
•
"
CHECK
" appears on the display.
2.
Next,briefly press the
RRSS
button.
•
The speaker distance and level value for each channel
will be displayed.
To cancel the RRSS setup
Press the
RRSS
button.
•
The tone output stops, "
CANCEL
" appears on the
display, followed by "
REMOVE MIC
", and then the
setup will be cancelled.
41P~80P(DS660)-SECA GB 11/10/04 1:30 PM Page 65

