background image

GB

SETUP

47

46

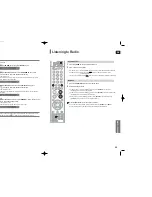
• Depending on PRO LOGIC and STEREO settings, the speaker mode may vary 

(see page 53).

Signal outputs and frequency responses from the speakers will automatically be adjusted according to your speaker 
configuration and whether certain speakers are used or not.

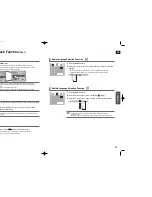
1

In Stop mode, press the 

MENU 

button.

2

Press the Cursor

button to move to 

<Audio>

and then press the 

ENTER 

button.

3

In the 

<SPEAKER SETUP>

, press the 

ENTER

button again.

4

Press the Cursor

,

,

,

button to move to the desired speaker and then

press the 

ENTER

button.

For C, SL, and SR, each time the button is pressed, the mode switches alternately as follows :
SMALL

➝ 

NONE.

For L and R, the mode is set to SMALL.

• 

SMALL : Select this when using the speakers.

• 

NONE : Select this when no speaker is connected.

Press the 

RETURN

button to return to the previous level.

Press the 

EXIT

button to exit the setup screen.

Setting the Speaker Mode

Settings

(Con’t)

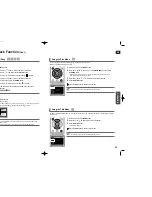
If the speakers cannot be placed at equal distances from the listening position, you can adjust the delay time of the audio
signals from the center and rear speakers.

1

In Stop mode, press the

MENU

button.

2

Press the Cursor

button to move to 

<Audio>

and then press the 

ENTER 

button.

3

Press the Cursor

button to move to 

<DELAY TIME>

and then press 

the 

ENTER

button.

4

Press the Cursor

,

,

,

button to move to the desired speaker and then

press the

ENTER 

button.

5

Press the Cursor

,

to set the Delay time.

You can set the delay time for C between 00 and 05mSEC and for SL and SR between 00 and
15mSEC.

Press the 

RETURN

button to return to the previous level.

Press the 

EXIT

button to exit the setup screen.

Setting the Delay Time

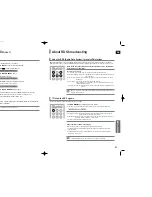
When 5.1CH Surround Sound is played, you can enjoy the best sound if the distance between you and each speaker is the same. 
Since the sounds arrive at the listening position at different times depending on the placement of speakers, you can adjust this difference by
adding a delay effect to the sound of the Center and Surround Speakers.

Setting CENTER SPEAKER

If the distance of Dc is equal to or longer than the distance of Df in the figure,
set the mode as 0ms. Otherwise, change the setting according to the table.

Setting REAR (SURROUND) SPEAKERS

If the distance of Df is equal to the distance of Ds in the figure, set the mode
as 0ms. Otherwise, change the setting according to the table.

Setting up the Speaker Delay Time

Df: The distance from FRONT SPEAKER
Dc: The distance from CENTER SPEAKER
Ds: The distance from SURROUND SPEAKER

Ideal CENTER SPEAKER
placement

It is desirable to place all speakers within this circle.

Ideal 
SURROUND
SPEAKER
placement

Distance between Df and Dc 

Delay Time

0.00 m

0.34 m

0.68 m

1.02 m 1.36 m 1.70 m 

0 ms

1 ms

2 ms

3 ms

4 ms

5 ms

Distance between Df and Dc 

Delay Time

0.00 m 

1.02 m

2.04 m

3.06 m 4.08 m 5.10 m

0 ms

3 ms

6 ms

9 ms

12 ms

15 ms

• With 

(Dolby Pro Logic II), the delay time may be different for each mode.

• With AC-3 and DTS, the delay time can be set between 00 and 15mSEC.
• The Center channel is only adjustable on 5.1 channel discs.

MOVE

ENTER

EXIT

RETURN

MOVE

CHANGE

EXIT

RETURN

MOVE

ENTER

EXIT

RETURN

MOVE

CHANGE

EXIT

RETURN

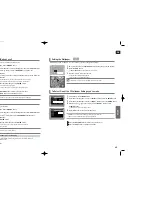
Please use the Registration code to register this player with the DivX (R) video on demand format. 
To learn more, go to www.divx.com/vod.

DivX (R) Registration

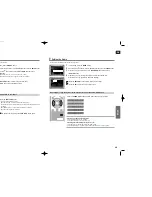
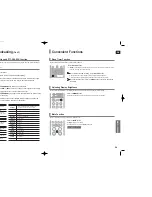
Some DVD-Audio discs contain DVD-Video as well as DVD-Audio. 
To play back the DVD-Video portion of the DVD-Audio disc, set the unit to DVD-Video mode.

1

Press the 

MENU

button while the disc tray is open.

2

Press the Cursor

button to move to 

<Setup>

and then press the 

ENTER 

button.

3

Press the Cursor

button to move to 

<DVD TYPE>

and then press 

the 

ENTER

button.

4

Press the Cursor

,

button to move to 

<DVD VIDEO>

and then press 

the

ENTER 

button.

Set steps 1 ~ 4 again if you want to switch to DVD AUDIO Play mode. 

When Selecting DVD Play Mode:

• 

DVD VIDEO : set to play the DVD video contents contained on a DVD audio disc.

• 

DVD AUDIO : set to play the default DVD audio.

DVD Playback Mode

• DVD Play mode is set to DVD Audio as factory default setting.
• Powering off the main unit will automatically switch to the DVD Audio mode.

MOVE

ENTER

EXIT

RETURN

MOVE

ENTER

EXIT

RETURN

  X30_TX35(40~63P) GB  2007.3.8  1:08 PM  Page 46

Summary of Contents for HT-TX35

Page 1: ...DIGITAL HOME CINEMA SYSTEM HT X30 HT TX35 COMPACT DIGITAL AUDIO GB Instruction Manual AH68 01937B ge 2 ...

Page 2: ... Do not dispose of batteries in the general household trash PREPARATION s Plug UK Only ded plug incorporating a fuse The value of the fuse is indicated on the pin face of the plug the same rating must be used over is detachable and a replacement is required it must be of the same colour as the fuse your dealer r house or the cable is not long enough to reach a power point you should obtain dealer ...

Page 3: ...llpaper 45 To Select One of the 3 Wallpaper Settings you ve made 45 DVD Playback Mode 46 DivX R Registration 46 Setting the Speaker Mode 46 Setting the Delay Time 47 Setting the Test Tone 48 Setting the Audio 49 Setting the DRC Dynamic Range Compression 50 Setting the AV SYNC 50 Setting the HDMI Audio 51 Sound Field DSP EQ Function 52 Dolby Pro Logic II Mode 53 Dolby Pro Logic II Effect 54 MISCELL...

Page 4: ...to begin playback and not all of the recorded files may be played For files encoded in Variable Bit Rate VBR format i e files encoded in both low bit rate and high bit rate e g 32Kbps 320Kbps the sound may skip during playback A maximum of 500 tracks can be played per CD A maximum of 300 folders can be played per CD DVD R RW CD R RW DivX Discs Since this product only provides encoding formats auth...

Page 5: ...tors 6 Cooling Fan 7 TX Card Connection WIRELESS 8 AUX IN 2 Jacks 9 HDMI Output Jack 10 SCART Jack Connect to a TV with scart input jack 9 10 6 5 1 7 8 3 4 2 PREPARATION Play Pause button Volume Control Power button Standby indicator 9 AUX IN 1 Connector 10 USB Connector 11 Tuning Up Skip button Tuning Down Skip button PROGRAM indicator REPEAT indicator TUNER indicator STEREO indicator RTA indicat...

Page 6: ... sensor 1 DVD RECEIVER button 2 TV button 3 TV VIDEO button 4 POWER button 5 Number 0 9 buttons 6 REMAIN button 7 STEP button 8 Tuning Preset CD Skip buttons 9 VOLUME button 10 MENU button 11 AUDIO button 12 PL II EFFECT button 13 PL II MODE button 14 TUNER MEMORY SD Standard Definition HD High Definition button 15 ZOOM button 16 SLEEP button 17 SLOW MO ST button 18 EZ VIEW NT PAL button 19 DVD bu...

Page 7: ...oofer speaker Do not hang the subwoofer on the wall through the duct hole 1 2 Connecting the Speakers Black Red HT TX35 Front Speaker R Rear Speaker R Subwoofer Center Speaker Front Speaker L Rear Speaker L Speakers Rear Speakers Place these speakers behind your listening position If there isn t enough room place these speakers so they face each other Place them about 60 to 90cm 2 to 3feet above y...

Page 8: ...sing a screwdriver as shown in the illustration 3 This is the successfully assembled SPEAKER r and the Stand Half Tallboy Type ation 1 Turn the STAND upside down and connect it to the STAND BASE 2 Turning the screw A clockwise connect it to two holes marked with the arrow using a screwdriver as shown in the illustration 3 Turning the supplied screw B clockwise connect it to a hole on the rear of t...

Page 9: ...splay Reset the system while the main unit and the wireless receiver module SWA 3000 are in Power Standby mode 1 With the main unit turned off press and hold the remote control s REMAIN button for 5 seconds The STANDBY LED on the front panel of the wireless receiver module blinks 2 With the wireless receiver module turned on use a ball point pen or a pair of toothpick to press the RESET button on ...

Page 10: ... Off You can listen to audio through the TV Using Anynet HDMI CEC Anynet is a function that enables you to control other Samsung Devices with your Samsung TV s remote control Anynet can be used by connecting this Home Theater to a SAMSUNG TV using an HDMI Cable This is only available with SAMSUNG TVs that support Anynet The Theater function is available only when you listen to the audio through th...

Page 11: ...D CD DIGITAL IN AUX 1 AUX 2 USB FM OPTICAL Rear Panel Optical Cable not supplied ernal Analog Component ernal Analog Component yer e Theater to the Audio Out of the external analog component ntrol to select AUX2 input main unit GITAL IN AUX 1 AUX 2 USB FM e Theater to the Audio Out of the external analog component ntrol to select AUX1 input main unit GITAL IN AUX 1 AUX 2 USB FM io from External Co...

Page 12: ...cancelled This involves tips or instructions on the page that help each function operate In this manual the instructions marked with DVD are applicable to DVD VIDEO DVD AUDIO and DVD R RW discs that have been recorded in Video Mode and then finalized Where a particular DVD type is mentioned it is indicated separately If a DVD R RW disc has not been recorded properly in DVD Video format it will not...

Page 13: ...y pause playback press the PLAY PAUSE button during playback To resume playback press the PLAY PAUSE button again DVD CD our Home Theater the Home Theater with the HT X30 HT TX35 s Remote Control main unit s power cord into the AC power supply gging your system into a main socket you must check the voltage setting age of the socket does not correspond to the setting on the rear of the unit you usl...

Page 14: ...he selected image is played for 5 seconds before moving to the next image To view the previous or next 9 images press the button Digest Function You can view 9 JPEG images on the TV screen at once Press the Cursor button during playback Rotate Flip Function button Flip Vertically button Flip Horizontally button Rotate 90 Counterclockwise button Rotate 90 Clockwise Original Image JPEG layback MP3 W...

Page 15: ...can only support up to 6Mbps Aspect Ratio Although the default DivX resolution is 640x480 pixels 4 3 this product supports up to 800x600 pixels 16 9 TV screen resolutions higher than 800 will not be supported When you play a disc whose sampling frequency is higher than 48khz or 320kbps you may experience shaking on the screen during playback Supported Audio Formats Press the SUBTITLE button Each t...

Page 16: ... MP3 DivX DVD DivX DVD DivX DVD VIDEO DVD AUDIO CD MP3 TITLE ELAPSED TITLE REMAIN CHAPTER ELAPSED CHAPTER REMAIN TRACK ELAPSED TRACK REMAIN TOTAL ELAPSED TOTAL REMAIN TRACK REMAIN TRACK ELAPSED GROUP ELAPSED GROUP REMAIN TRACK ELAPSED TRACK REMAIN ack Function FO button button is pressed the display changes as follows The information Display disappears from the screen The information Display disap...

Page 17: ...or button to select the desired Repeat Playback mode To select another album and track repeat Steps 2 and 3 above 4 Press the ENTER button For DivX MP3 and JPEG discs you cannot select Repeat Play from the information dis play screen To Select a Repeat Playback Mode in the Disc Information Screen Repeat playback allows you to repeatedly play a chapter title track song or directory MP3 file Repeat ...

Page 18: ...OFF This function allows you to enlarge a particular area of the displayed image Zoom Screen Enlarge Function When a DivX disc is being played the screen is enlarged up to twice the normal size DVD DVD DivX SELECT ZOOM POSITION ack Function Con t B Repeat function does not operate with DivX MP3 or JPEG discs nd is heard during step motion playback INFO button twice Cursor button to move to REPEAT ...

Page 19: ...P 02 03 FR 03 03 OFF 03 DVD DVD ack Function Con t ction will not work if the DVD is recorded with multi camera angle format ars may not disappear because some DVD discs have a built in horizontal to ratio ture is not supported for DivX discs he EZ View operation some of the left and right sides may be cut slightly VIEW button e button is pressed the zoom function will switch between On and Off e ...

Page 20: ... to exit the setup screen Press the EXIT button to exit the setup screen For DVDs containing multiple titles you can view the title of each movie Depending on the disc the availability of this fea ture may vary DVD DVD ENTER MOVE EXIT ENTER MOVE EXIT ack Function Con t e Song INFO button Cursor button or numeric buttons to select the le track and then press the ENTER button Cursor button to move t...

Page 21: ...n 4 USB HDD and USB Flash Drive Devices that support USB2 0 or USB1 1 You may experience a difference in playback quality when you connect a USB1 1 device For a USB HDD make sure to connect an auxiliary power cord to the USB HDD for proper operation 5 USB card Reader One slot USB card reader and Multi slot USB card reader Depending on the manufacturer the USB card reader may not be supported If yo...

Page 22: ... monitor For a standard TV select either 4 3PS or 4 3LB option according to personal preference Select WIDE HDTV if you have a widescreen TV 1 In Stop mode press the MENU button 2 Press the Cursor button to move to Setup and then press the ENTER button 3 Press the Cursor button to move to TV DISPLAY and then press the ENTER button 4 Press the Cursor button to select the desired item and then press...

Page 23: ...G CD you can set the image you like as background wallpaper 1 During playback press the PLAY PAUSE button when an image you like appears 2 Press the LOGO button COPY LOGO DATA will be displayed on the TV screen 3 The power will turn off and then back on The selected wallpaper will be displayed You can select up to 3 wallpaper settings Setting the Wallpaper To Select One of the 3 Wallpaper Settings...

Page 24: ...fference by adding a delay effect to the sound of the Center and Surround Speakers Setting CENTER SPEAKER If the distance of Dc is equal to or longer than the distance of Df in the figure set the mode as 0ms Otherwise change the setting according to the table Setting REAR SURROUND SPEAKERS If the distance of Df is equal to the distance of Ds in the figure set the mode as 0ms Otherwise change the s...

Page 25: ... 6dB The sound gets louder as you move closer to 6dB and quieter as you get closer to 6dB Manually Adjusting the Speaker Volume and Balance with the SOUND EDIT Button connections ode press the MENU button Cursor button to move to Audio and then press the ENTER button Cursor button to move to TEST TONE and then press R button one will be sent to L C R SR SL SW in order TER button is pressed again a...

Page 26: ...effect is smaller RETURN button to return to the previous level EXIT button to exit the setup screen Range Compression The audio signals transmitted over the HDMI Cable can be toggled ON OFF 1 In Stop mode press the MENU button 2 Press the Cursor button to move to Audio and then press the ENTER button 3 Press the Cursor button to move to HDMI AUDIO and then press the ENTER button 4 Press the Curso...

Page 27: ...a concert hall des the feeling of a movie theater es the feel of being in a grand church this for normal listening You can select the desired Dolby Pro Logic II audio mode Press the PL II MODE button Each time the button is pressed the mode changes as follows Dolby Pro Logic II Mode PRO LOGIC II MUSIC When listening to music you can experience sound effects as if you are listening to the actual pe...

Page 28: ... the TUNER button to select the FM band 2 Tune in to the desired station Automatic Tuning 1 When the button is pressed a preset broadcast station is selected Automatic Tuning 2 Press and hold the button to automatically search for active broadcasting stations Manual Tuning Briefly press the button to increase or decrease the frequency incrementally 1 Press the FUNCTION button to select the FM band...

Page 29: ...er case letters The display window cannot show accented letters A for instance may stands for accented A s like À Â Ä Á Å and à Using the RDS Radio Data System to receive FM stations TO show the RDS signals RDS may not operate correctly if the station tuned is not transmitting RDS signal properly or if the signal strength is weak If searching finishes at once PS and RT will not appear on the displ...

Page 30: ...dcasting Con t hat you can locate a particular kind of program from the preset channels by ation and PTY SEARCH function des set stations ocess press PTY SEARCH while searching teps If the setting is cancelled before you finish start from step 1 again y remote control make sure that you have selected the FM on and incident sis measures sting the cus uding the nguage quiz game etc ered to be sic an...

Page 31: ...shi MGA No Brand Code 56 57 58 01 15 01 02 03 04 05 06 07 08 09 10 11 12 13 14 01 18 40 48 57 58 81 59 60 18 03 03 18 25 97 03 18 46 15 03 05 61 82 83 84 62 03 59 61 63 03 02 03 04 15 16 17 18 19 20 21 22 23 24 25 26 27 28 29 30 32 34 35 36 48 59 90 40 03 03 15 40 46 59 61 64 82 83 84 85 19 65 03 03 06 40 56 59 66 67 68 40 15 18 50 59 69 45 56 59 67 86 70 59 61 87 88 03 15 40 15 01 15 16 17 37 38 ...

Page 32: ...d then select the appro priate function Aspect ratio cannot be changed MISCELLANEOUS function properly If the problem you are experiencing is not listed below the unit disconnect the power cord and contact the nearest authorized g Is the power cord plugged securely into the outlet Turn off the power and then turn it back on Check the region number of the DVD DVD discs purchased from abroad may not...

Page 33: ...9 Hausa 1353 Moldavian 1513 Siswati 1052 Azerbaijani 1217 Hindi 1356 Marathi 1514 Sesotho 1053 Bashkir 1226 Croatian 1357 Malay 1515 Sundanese 1057 Byelorussian 1229 Hungarian 1358 Maltese 1516 Swedish 1059 Bulgarian 1233 Armenian 1363 Burmese 1517 Swahili 1060 Bihari 1235 Interlingua 1365 Nauru 1521 Tamil 1069 Bislama 1239 Interlingue 1369 Nepali 1525 Tegulu 1066 Bengali Bangla 1245 Inupiak 1376 ...

Page 34: ...ung MP3 Player YP 55 Samsung MP3 Player iAUDIO U2 Cowon MP3 Player iAUDIO G3 Cowon MP3 Player iAudio M3 Cowon HDD MP3 Player SI M500L Sharp 256MB MP3 Player H10 Iriver MP3 Player YP T5 VB Samsung MP3 Player YP 53 Samsung 256MB MP3 Player Product Company Type MP3 Player MOMOBAY UX 2 Dvico USB 2 0 Product Company Type USB External HDD Specifications MISCELLANEOUS Power Consumption Weight Dimensions ...

Page 35: ...oofer speaker 3Ω 35Hz 160Hz 85dB W M 135W 270W 180 x 320 x 390 mm 5 1Kg Front Rear Center 90 x 1045 x 90 mm 90 x 1045 x 90 mm 250 x 90 x 95 mm 3 5Kg 3 2Kg 0 5Kg Front Rear Center Front Center Rear speaker 3Ω x 5 140Hz 20KHz 82dB W M 133W 266W 5 1ch speaker system Contact SAMSUNG WORLD WIDE If you have any questions or comments relating to Samsung products please contact the SAMSUNG customer care c...

Reviews: