background image

ENG

OPERA

TION

37

36

Using the Playback Function

(Con’t)

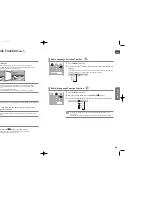
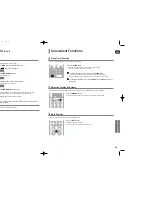
A-B Repeat Playback

• The A-B Repeat function does not operate with DivX, MP3 or JPEG discs.

• No sound is heard during step motion playback.

1

Press the

INFO

button twice.

For a VCD, press the INFO button once.

2

Press the Cursor

button to move to the REPEAT PLAYBACK (

) display.

3

Press the Cursor

,

button to select <A-> and then press the

ENTER

but-

ton at the beginning of the desired segment.

When the 

ENTER

button is pressed, the selected position will be stored in memory.

4

Press the

ENTER

button at the end of the desired segment.

The specified segment will be played repeatedly.

To return to normal playback, press the Cursor

,

button to select 

OFF.

You can repeatedly play back a designated section of a DVD.

Press the

STEP

button.

The picture moves forward one frame each time the button is pressed during playback.

DVD

VCD

Step Function

37

1

Press the

INFO

button.

2

Press the Cursor

button to move to ANGLE (

) display.

3

Press the Cursor

,

or numeric buttons to select the desired angle.

Each time the button is pressed, the angle changes as follows:

This function allows you to view the same scene in different angles.

Angle Function

2/3

3/3

1/3

• The Angle function works only with discs on which multiple angles have been recorded.

1

Press the 

ZOOM

button.

2

Press the Cursor 

,

,

,

button to move to the area you want to

enlarge.

3

Press the 

ENTER

button.

Each time the button is pressed, the zoom level changes as follows:

ZOOM X 1.5 

ZOOM X 2 

ZOOM X 3 

ZOOM OFF

This function allows you to enlarge a particular area of the displayed image.

Zoom (Screen Enlarge) Function

• When a DivX disc is being played, the screen is enlarged up to twice the normal size.

DVD

DVD

VCD

DivX

SELECT ZOOM POSITION

DVD

VCD

DivX

A - B

REPEAT : A-B

HT-X250-TX250(1~41P)-NO EUR  2007.3.19  5:50 PM  Page 36

Summary of Contents for HT-X250

Page 1: ...250 HT TX250 EJECT COMPACT DIGITAL VIDEO ENG Instruction Manual AH68 01660E REV 01 or comments relating to Samsung products e SAMSUNG customer care center g Electronics America Inc SAMSUNG 7267864 www samsung com AH68 01943K PM Page 2 ...

Page 2: ... cold temperatures If transporting the player during the winter wait approximately 2 hours until the unit has reached room temperature before using 7cm 10cm 10cm 10cm Phones During thunderstorms disconnect the AC main plug from the wall outlet Voltage peaks due to lightning could damage the unit The Mains plug is used as a disconnect device and shall stay readily operable at any time Do not expose...

Page 3: ... Checking the Remaining Time 33 Fast Playback 33 Slow Playback 33 Skipping Scenes Songs 34 Repeat Playback 35 To Select a Repeat Playback Mode in the Disc Information Screen 35 A B Repeat Playback 36 Step Function 36 Angle Function 37 Zoom Screen Enlarge Function 37 EZ VIEW Function 38 Bonus Group 38 Navigating Pages 38 Audio Language Selection Function 39 Subtitle Language Selection Function 39 M...

Page 4: ...he picture folder can be played Picture discs other than Kodak Fuji Picture CDs may take longer to start playing or may not play at all CD R MP3 Discs Only CD R discs with MP3 files in ISO 9660 or Joliet format can be played MP3 file names should be 8 characters or less in length and contain no blank spaces or special characters Use discs recorded with a compression decompression data rate greater...

Page 5: ...8 Play Pause button 9 Tuning Up Skip button 10 Volume Control button 1 Headphone Jack 2 AUX IN 1 Jack 3 USB Port onnectors o inputs to these jacks ack VIDEO IN to it ck t capable of digital output 5 HDMI OUT Jack 6 TX Card Connection WIRELESS 7 AUX IN 2 Jacks 8 FM 75Ω COAXIAL Jack 9 Stand 10 Cable Tie 11 Stand Fix Hole 12 Cooling Fan PREPARATION HDMI Cable 1 2 3 4 5 7 6 8 7 8 9 10 1 2 3 PM Page 8 ...
Page 6: ...tton 33 SOUND EDIT button 34 DIGEST button 35 TEST TONE button 36 SLIDE MODE button 37 LOGO button 1 Remove the battery cover in the direction of the arrow 2 Insert two 1 5V AAA batteries paying attention to the correct polarities and 3 Replace the battery cover Follow these precautions to avoid leaking or cracking cells Place batteries in the remote control so they match the polarity to and to Us...

Page 7: ...or may be distorted because of the magnetic field generated by the speaker If this occurs place the speaker away from your TV set 1 Press down the terminal tab on the back of the speaker 2 Insert the black wire into the black terminal and the red wire into the red terminal and then release the tab 3 Connect the connecting plugs to the back of the Home Theater Make sure the colors of the speaker te...

Page 8: ...essfully assembled speaker and the Stand Make sure that the speaker is installed on a flat and stable area Otherwise it may be easily knocked over SPEAKER STAND STAND BASE Screw B Screw A Component 15 To connect the rear speakers wirelessly you have to purchase the wireless receiving module and TX card from your Samsung retailer Connecting the Optional Wireless Receiving Amplifier Front Speaker R ...

Page 9: ...0m but may vary depending on your operating environment If a steel concrete wall or metallic wall is between the main unit and the wireless receiver module the system may not operate at all because the radio wave cannot penetrate metal When the wireless receiving module setting is complete no sound is output from the Rear Speaker Output Connectors on the back of the main unit The wireless receivin...

Page 10: ...The DVD Player and stand are separated 2 Hold the DVD Player and stand as shown by the figure and turn the right side of the stand upward so that it is slightly slanted 3 Insert the 2 stand anchors into the holes on the back of the DVD Player 4 Turn the right side of the stand clockwise to fix it to the back of the DVD Player 1 Turn the stand in the direction of the arrow and pull it apart The DVD...

Page 11: ... 480p and HD High Definition resolution is 720p 1080i Resolution Selection If the TV does not support the configured resolution you will not be able to see the picture prop erly When an HDMI cable is connected composite and component video signals are not output See your TV owner s manual for more information on how to select the TV s Video Input source This function allows the user to select the ...

Page 12: ...ne Audio Out connect either left or right your VCR to the TV and connect the Audio Output jacks of the VCR AUX2 Rear Panel OPTICAL Connecting an External Digital Component Digital signal components such as a Cable Box Satellite receiver Set Top Box 1 Connect the Digital Input OPTICAL on the Home Theater to the Digital Output of the external digital com ponent 2 Press the AUX button on the remote c...

Page 13: ...particular DVD type is mentioned it is indicated separately If a DVD R RW disc has not been recorded properly in DVD Video format it will not be playable Depending on the content of the disc the initial screen may appear different DVD Icon Term Definition DVD VCD CD MP3 JPEG DivX CAUTION NOTE DVD VCD CD MP3 JPEG DivX This involves a function available with DVD or DVD R DVD RW discs that have been ...

Page 14: ...en may appear different Pirated discs will not run in this player because it violates the CSS Content Scrambling System a copy protection system recommendations To stop playback press the STOP button during playback If pressed once PRESS PLAY is displayed and the stop position will be stored in memory If the PLAY PAUSE button or ENTER button is pressed playback resumes from the stop position This ...

Page 15: ...G ayback P3 disc MA menu screen will appear and playback will start ance of the menu depends on the MP3 WMA disc files cannot be played de use the Cursor button to select the album ess the ENTER button ursor button to select the track the album use the Cursor button to select another op mode and then press the ENTER button nother album and track repeat Steps 2 and 3 above STOP button to stop playb...

Page 16: ...used for video encoding and MP3 for audio encoding so that the users can watch a movie at near DVD quality video and audio DivX Digital internet video eXpress 1 Supported Formats This product only supports the following media formats If both video and audio formats are not supported the user may experience problems such as broken images or no sound 2 Caption Function You must have some experience ...

Page 17: ...played Each time the Remain button is pressed Checking the Remaining Time Press the button Each time the button is pressed during playback the playback speed changes as follows Fast Playback 2X 4X 8X 32X PLAY 2X 4X 8X 32X PLAY Press the SLOW button Each time the button is pressed during playback the playback speed changes as follows Slow Playback No sound is heard during slow playback Reverse slow...

Page 18: ... display 3 Press the Cursor button to select the desired Repeat Playback mode To select another album and track repeat Steps 2 and 3 above 4 Press the ENTER button For DivX MP3 and JPEG discs you cannot select Repeat Play from the information dis play screen To Select a Repeat Playback Mode in the Disc Information Screen Repeat playback allows you to repeatedly play a chapter title track song or d...

Page 19: ...e INFO button 2 Press the Cursor button to move to ANGLE display 3 Press the Cursor or numeric buttons to select the desired angle Each time the button is pressed the angle changes as follows This function allows you to view the same scene in different angles Angle Function 2 3 3 3 1 3 The Angle function works only with discs on which multiple angles have been recorded 1 Press the ZOOM button 2 Pr...

Page 20: ...e the disc packaging ck press the button on the remote control he desired image from a DVD Audio disc containing still images s you may not be able to select images To operate this function you can also press the AUDIO or SUBTITLE buttons on the remote control Depending on the disc the Subtitle and Audio Language functions may not be available 1 Press the INFO button twice 2 Press the Cursor butto...

Page 21: ... Menu and it is not supported by the disc the This menu is not supported message appears on the screen 3 Press the Cursor button to select the desired item 4 Press the ENTER button You can use the menus for the audio language subtitle language profile etc DVD menu contents differ from disc to disc The Title menu display may be different depending on the disc 1 In Stop mode press the MENU button 2 ...

Page 22: ...he button more than one file and you press the button the next file is selected more than one file and you press the button the previous file is selected e disc at a faster speed press the button during playback press either button the playback speed will change as follows 32x Normal Compatible Devices 1 USB devices that support USB Mass Storage v1 0 USB devices that operate as a removable disc in...

Page 23: ...For a standard TV select either 4 3PS or 4 3LB option according to personal preference Select WIDE HDTV if you have a widescreen TV 1 In Stop mode press the MENU button 2 Press the Cursor button to move to Setup and then press the ENTER button 3 Press the Cursor button to move to TV DISPLAY and then press the ENTER button 4 Press the Cursor button to select the desired item and then press the ENTE...

Page 24: ... set the image you like as background wallpaper 1 During playback press the PLAY PAUSE button when an image you like appears 2 Press the LOGO button COPY LOGO DATA will be displayed on the TV screen 3 The power will turn off and then back on The selected wallpaper will be displayed You can select up to 3 wallpaper settings Setting the Wallpaper To Select One of the 3 Wallpaper Settings you ve made...

Page 25: ...u can adjust this difference by adding a delay effect to the sound of the Center and Surround Speakers Setting CENTER SPEAKER If the distance of Dc is equal to or longer than the distance of Df in the figure set the mode as 0ms Otherwise change the setting according to the table Setting REAR SURROUND SPEAKERS If the distance of Df is equal to the distance of Ds in the figure set the mode as 0ms Ot...

Page 26: ... 6dB The sound gets louder as you move closer to 6dB and quieter as you get closer to 6dB Manually Adjusting the Speaker Volume and Balance with the SOUND EDIT Button onnections de press the MENU button ursor button to move to Audio and then press the ENTER button Cursor button to move to TEST TONE and then press the ton ne will be sent to L C R SR SL SW in order ER button is pressed again at this...

Page 27: ...is smaller RETURN button to return to the previous level EXIT button to exit the setup screen Range Compression The audio signals transmitted over the HDMI Cable can be toggled ON OFF 1 In Stop mode press the MENU button 2 Press the Cursor button to move to Audio and then press the ENTER button 3 Press the Cursor button to move to HDMI AUDIO and then press the ENTER button 4 Press the Cursor butto...

Page 28: ...l listening You can select the desired Dolby Pro Logic II audio mode Press the PL II MODE button Each time the button is pressed the mode changes as follows Dolby Pro Logic II Mode PRO LOGIC II MUSIC When listening to music you can experience sound effects as if you are listening to the actual performance CINEMA Adds realism to the movie soundtrack PRO LOGIC You will experience a realistic multi c...

Page 29: ... 1 Press the TUNER button to select the FM band 2 Tune in to the desired station Automatic Tuning 1 When the button is pressed a preset broadcast station is select ed Automatic Tuning 2 Press and hold the button to automatically search for active broadcasting stations Manual Tuning Briefly press the button to increase or decrease the frequency incrementally 1 Press the FUNCTION button to select th...

Page 30: ... the button is pressed the preset time changes as follows 10 20 30 60 90 120 150 OFF To confirm the sleep timer setting press the SLEEP button The remaining time before the Home Theater will shut itself off is displayed Pressing the button again changes the sleep time from what you have set earlier To cancel the sleep timer press the SLEEP button until OFF appears on the display Sleep Timer Functi...

Page 31: ...Brand Code 56 57 58 01 15 01 02 03 04 05 06 07 08 09 10 11 12 13 14 01 18 40 48 57 58 81 59 60 18 03 03 18 25 97 03 18 46 15 03 05 61 82 83 84 62 03 59 61 63 03 02 03 04 15 16 17 18 19 20 21 22 23 24 25 26 27 28 29 30 32 34 35 36 48 59 90 40 03 03 15 40 46 59 61 64 82 83 84 85 19 65 03 03 06 40 56 59 66 67 68 40 15 18 50 59 69 45 56 59 67 86 70 59 61 87 88 03 15 40 15 01 15 16 17 37 38 39 40 41 42...

Page 32: ...DVDs in 16 9 WIDE mode 4 3 LETTER BOX mode or 4 3 PAN SCAN mode but 4 3 DVDs can be seen in 4 3 ratio only Refer to the DVD disc jacket and then select the appro priate function Aspect ratio cannot be changed nction properly If the problem you are experiencing is not listed below he unit disconnect the power cord and contact the nearest authorized s the power cord plugged securely into the outlet ...

Page 33: ...oldavian 1513 Siswati 1052 Azerbaijani 1217 Hindi 1356 Marathi 1514 Sesotho 1053 Bashkir 1226 Croatian 1357 Malay 1515 Sundanese 1057 Byelorussian 1229 Hungarian 1358 Maltese 1516 Swedish 1059 Bulgarian 1233 Armenian 1363 Burmese 1517 Swahili 1060 Bihari 1235 Interlingua 1365 Nauru 1521 Tamil 1069 Bislama 1239 Interlingue 1369 Nepali 1525 Tegulu 1066 Bengali Bangla 1245 Inupiak 1376 Dutch 1527 Taj...

Page 34: ...amsung MP3 Player YP 55 Samsung MP3 Player iAUDIO U2 Cowon MP3 Player iAUDIO G3 Cowon MP3 Player iAudio M3 Cowon HDD MP3 Player SI M500L Sharp 256MB MP3 Player H10 Iriver MP3 Player YP T5 VB Samsung MP3 Player YP 53 Samsung 256MB MP3 Player Product Company Type MP3 Player MOMOBAY UX 2 Dvico USB 2 0 Product Company Type USB External HDD Specifications Power Consumption Weight Dimensions W x H x D O...

Page 35: ...ter 91 x 276 x 160 mm 364 x 78 x 173 mm 1 2Kg 1Kg 160 x 388 x 396 mm 6 8Kg Front Rear Center Front Center Rear speaker 3Ω DCR 3 4Ω 150Hz 20kHz 86dB W M 100W 200W 5 1ch speaker system on t evel D Subwoofer speaker 3Ω DCR 3 4Ω 40Hz 200Hz 86dB W M 100W 200W Front Rear Center 89 x 1200 x 146 mm 365 x 83 x 173 mm 5 4Kg 1 4Kg 176 x 388 8 x 396 3 mm 6 6Kg Front Rear Center Front Center Rear speaker 3Ω DC...

Reviews: