Samsung Electronics
3-2
Selecting Audio/Subtitle Language
2. Main Functions
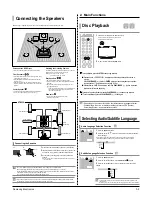
Connecting the Speakers
Rear Speakers
•
Place these speakers behind your listening position.
•
If there isn't enough room, place these speakers so they face
each other.
•
Place them about 60 to 90cm (2 to 3feet) above your ear,
facing slightly downward.
*
Unlike the front and center speakers, the rear speakers are
used to handle mainly sound effects and sound will not
come from them all the time.
Front Speakers
•
Place these speakers in front of your listening position, facing
inwards (about 45°) toward you.
•
Place the speakers so that their tweeters will be at the same
height as your ear.
•
Align the front face of the front speakers with the front face of
the center speaker or place them slightly in front of the center
speakers.
Center Speaker
•
It is best to install it at the same height as the front speakers.
•
You can also install it directly over or under the TV.
Position of the DVD Player
•
Place it on a stand or cabinet shelf, or under the TV stand.
Selecting the Listening Position
The listening position should be located about 2.5 to 3 times the
distance of the TV's screen size away from the TV.
Example : For 32" TVs 2~2.4m (6~8feet)
For 55" TVs 3.5~4m (11~13feet)
Before moving or installing the product, be sure to turn off the power and disconnect the power cord.
R
L
C
SR
SL
Subwoofer
•
The position of the subwoofer is not so critical.
Place it anywhere you like.
SW
SR
SL
C
L
SW
R
• If you place a speaker near your TV set, screen color may be distorted because of the magnetic field generated
by the speaker. If this occurs, place the speaker away from your TV set.
1
Press down the terminal tab on the back of the speaker.
2
Insert the black wire into the black terminal (–) and the red
wire into the red (+) terminal, and then release the tab.
3
Connect the connecting plugs to the back of the Home
Theater.
■
Make sure the colors of the speaker terminals match the colors of the
connecting plugs.
• Do not let children play with or near the speakers. They could get hurt if a speaker falls.
• When connecting the speaker wires to the speakers, make sure that the polarity (+/–) is correct.
• Keep the subwoofer speaker out of reach of children so as to prevent children from inserting their hands or alien
substances into the duct (hole) of the subwoofer speaker.
• Do not hang the subwoofer on the wall through the duct (hole).
1
2
Connecting the Speakers
Black
Red
Front Speaker (R)
Rear Speaker (R)
SUB
Subwoofer
Center Speaker
Front Speaker (L)
Rear Speaker (L)
HT-X250
Disc Playback
1
Load a disc vertically into the Disc Insert Hole.
■
Insert a disc so that the label side faces forward.
■
Playback starts automatically.
2
To eject the disc, press the EJECT button.
• Depending on the content of the disc, the initial screen may appear different.
• Pirated discs will not run in this player as they violate the CSS (Content
Scrambling System : a copy protection system).
To stop playback, press the STOP button during playback.
■
If pressed once, <PRESS PLAY> is displayed and the stop position will be stored in
memory.
If the PLAY/PAUSE (
) button or ENTER button is pressed, playback resumes from
the stop position. (This function works only with DVDs.)
■
If pressed twice, <STOP> is displayed, and if the PLAY/PAUSE (
) button is pressed,
playback starts from the beginning.
To temporarily pause playback, press the PLAY/PAUSE (
) button during playback.
■
To resume playback, press the PLAY/PAUSE (
) button again.
DVD
CD
ALL
• To operate this function, you can also press the AUDIO or SUBTITLE buttons on the
remote control.
• Depending on the disc, the Subtitle and Audio Language functions may not be available.
1
Press the INFO button twice.
2
Press the Cursor
,
button or numeric buttons to select the desired
audio language.
■
Depending on the number of languages on a DVD disc, a different audio language
(ENGLISH, SPANISH, FRENCH, etc.) is selected each time the button is pressed.
Audio Language Selection Function
SP 2/3
FR 3/3
1
Press the INFO button twice.
2
Press the Cursor
button to move to SUBTITLE (
) display.
3
Press the Cursor
button or numeric buttons to select the desired
subtitle.
Subtitle Language Selection Function
EN 1/3
EN 01/ 03
OFF
SP 02/ 03
FR 03/ 03
OFF / 03
DVD
DVD
Summary of Contents for HT-X250
Page 2: ... Samsung Electronics Co Ltd JAN 2007 Printed in Korea Code no AH68 000000 ELECTRONICS ...
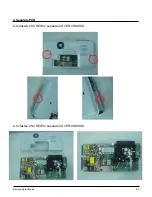
Page 20: ...5 4 Samsung Electronics D Separate MAIN SET ...
Page 22: ...6 1 Samsung Electronics 6 TroubleShooting 1 Main ...
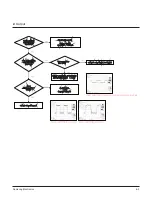
Page 23: ...Samsung Electronics 6 2 2 Output ...
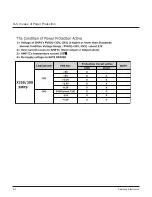
Page 24: ...6 3 Samsung Electronics 3 1 In case of Power Protection ...
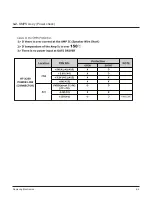
Page 25: ...Samsung Electronics 6 4 3 2 SMPS Ass y Power check ...
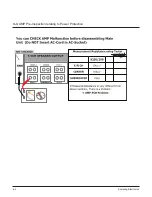
Page 26: ...6 5 Samsung Electronics 3 3 AMP Pre Inspection relating to Power Protection ...
Page 27: ...Samsung Electronics 6 6 4 FAN Error Check ...
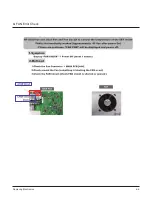
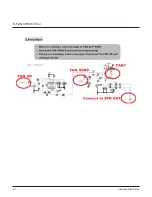
Page 28: ...6 7 Samsung Electronics 5 FAN CHECK Error ...
Page 29: ...Samsung Electronics 6 8 6 1 Communication Failure ...
Page 30: ...6 9 Samsung Electronics 6 2 Voltage Failure ...
Page 31: ...Samsung Electronics 6 10 ...
Page 32: ...6 11 Samsung Electronics 6 3 Communication Failure ...
Page 33: ...Samsung Electronics 6 12 7 Checking out AMP PCB ...
Page 34: ...6 13 Samsung Electronics 8 AMP PCB Short Check flow ...
Page 47: ...9 1 Samsung Electronics 9 Block Diagram 1 Block ...
Page 48: ...Samsung Electronics 10 1 10 Wiring Diagram 1 Wire Sheet ...
Page 49: ...10 2 Samsung Electronics 2 GND ...
Page 50: ...Samsung Electronics 10 3 3 VDD ...
Page 51: ...10 4 Samsung Electronics 4 SMPS ...
Page 52: ...11 1 Samsung Electronics 11 PCB Diagram 1 MAIN PCB ...
Page 53: ...Samsung Electronics 11 2 2 MAIN PCB Description ...
Page 54: ...11 3 Samsung Electronics 2 MAIN PCB Description ...
Page 55: ...Samsung Electronics 11 4 3 SMPS PCB ...
Page 64: ...Samsung Electronics 12 9 This Document can not be used without Samsung s authorization 2 KEY ...
Page 66: ...13 1 Samsung Electronics 13 Circuit Board Description 1 PCB Assy Layout 1 HT X250 X200 ...
Page 67: ...Samsung Electronics 13 2 2 Functional Description SMPS Main Front ...
Page 68: ...13 3 Samsung Electronics 3 Functional Description Amp HDMI Video ...
Page 69: ...Samsung Electronics 13 4 4 1 MAIN PCB Block 4 2 MAIN PCB Connectors ...
Page 70: ...13 5 Samsung Electronics 5 MAIN PCB HDMI VIDEO OUT ...
Page 71: ...Samsung Electronics 13 6 6 1 SUB PCB Block 6 2 SUB PCB Connectors ...
Page 72: ...13 7 Samsung Electronics 7 AMP PCB Block ...


