background image

ENG

3

GETTING STARTED

PRECAUTIONS

99.1mm

99.1mm

68.6 mm

99.1mm

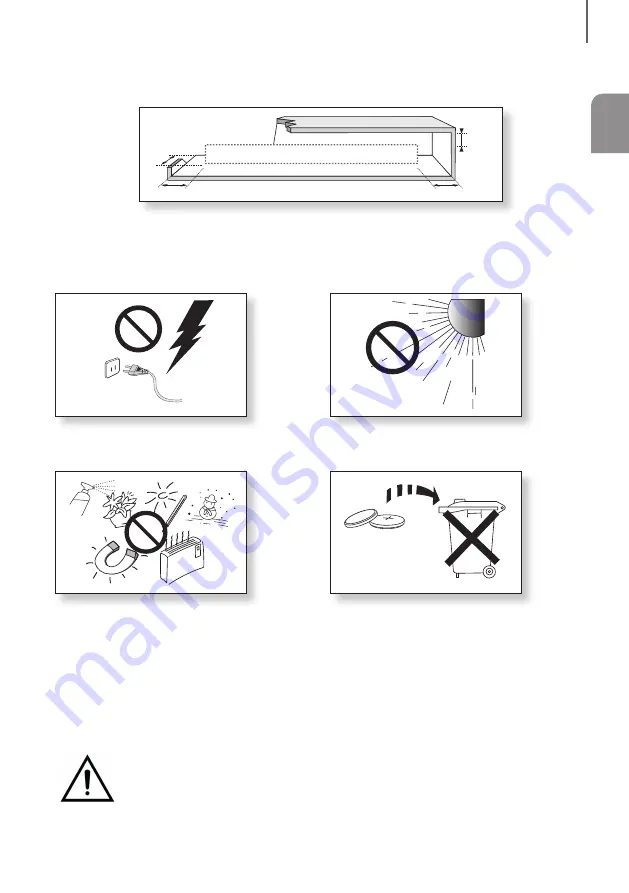
Ensure that the AC power supply in your house complies with the power requirements listed on the identification sticker 

located on the back of your product. Install your product horizontally, on a suitable base (furniture), with enough space 

around it for ventilation (7~10 cm). Make sure the ventilation slots are not covered. Do not place the unit on amplifiers or 

other equipment which may become hot. This unit is designed for continuous use. To fully turn off the unit, disconnect 

the AC plug from the wall outlet. Unplug the unit if you intend to leave it unused for a long period of time.

During thunderstorms, disconnect the AC plug from the 

wall outlet. Voltage peaks due to lightning could damage 

the unit.

Protect the product from moisture (i.e. vases), and 

excess heat (e.g. a fireplace) or equipment creating 

strong magnetic or electric fields. Disconnect the power 

cable from the AC supply if the unit malfunctions. Your 

product is not intended for industrial use. It is for 

personal use only. Condensation may occur if your 

product has been stored in cold temperatures. If 

transporting the unit during the winter, wait approximately 

2 hours until the unit has reached room temperature 

before using.

Do not expose the unit to direct sunlight or other heat 

sources. This could lead to overheating and cause the 

unit to malfunction.

The batteries used with this product contain chemicals 

that are harmful to the environment. Do not dispose of 

batteries in the general household trash. Do not dispose 

of batteries in a fire. Do not short circuit, disassemble, or 

overheat the batteries. There is a danger of explosion if 

the battery is incorrectly replaced. Replace only with the 

same or equivalent type.

WARNING: DO NOT INGEST BATTERY. CHEMICAL BURN HAZARD. The remote control supplied 

withthis product contains a coin/button cell battery. If the coin/button cell battery is swallowed, it can 

cause severe internal burns in just 2 hours and can lead to death. Keep new and used batteries away 

from children. If the battery compartment does not close securely, stop using the product and keep it 

away from children. If you think batteries might have been swallowed or placed inside any part of the body, seek 

immediate medical attention.

Summary of Contents for HW-K350

Page 1: ...Imagine the possibilities Thank you for purchasing this Samsung product To receive more complete service please register your product at www samsung com register HW K350 HW K355 User manual ...

Page 2: ...s that the rated voltage marked with the symbol is DC voltage Caution Consult instructions for use This symbol instructs the user to consult the user manual for further safety related information WARNING To reduce the risk of fire or electric shock do not expose this appliance to rain or moisture CAUTION TO PREVENT ELECTRIC SHOCK MATCH WIDE BLADE OF PLUG TO WIDE SLOT FULLY INSERT This apparatus sh...

Page 3: ...onal use only Condensation may occur if your product has been stored in cold temperatures If transporting the unit during the winter wait approximately 2 hours until the unit has reached room temperature before using Do not expose the unit to direct sunlight or other heat sources This could lead to overheating and cause the unit to malfunction The batteries used with this product contain chemicals...

Page 4: ...anel 7 Bottom Panel 8 Remote Control 11 INSTALLATION 11 Installing the Soundbar 11 Installing the Wall Mount 15 Detaching the Soundbar from the Wall 16 Connecting to a TV 16 Connecting to a TV Using a Digital Optical Cable 17 TV SoundConnect 18 Connecting to External Devices 18 Optical or Analogue Audio Cable 19 USB 21 FUNCTIONS 21 Input Mode 22 Bluetooth 26 Software Update 28 TROUBLESHOOTING 28 T...

Page 5: ... or settings may be cancelled Note Indicates tips or instructions on the page that help you operate a function Check for the supplied accessories shown below Remote Control Lithium Battery 3V CR2032 Power Cord AC DC Adapter Optical Cable Wall Mount Guide Micro USB to USB adapter Cable Holder Screw 2 EA Screw 2 EA Bracket Wall Mount L Bracket Wall Mount R The appearance of the accessories may diffe...

Page 6: ...button setup press the button for more than 3 seconds again 3 Power Button Turns the power on and off 2 3 Right Side of the Soundbar 1 Display Displays the current mode Remote Control Sensor When you plug in the AC cord the power button will begin working in 4 to 6 seconds When you turn on this unit there will be a 4 to 5 second delay before it produces sound If you want to enjoy sound only from t...

Page 7: ...Micro USB to USB adapter cable Refer to Micro USB to USB adapter cable specification on page 19 DIGITAL AUDIO IN OPTICAL Connect to the digital optical output of an external device AUX IN Connect to the Analogue output of an external device LABEL When disconnecting the power cable of the AC power adaptor from a wall outlet pull the plug Do not pull the cable Do not connect this unit or other compo...

Page 8: ...23 for details SOUND Surround Sound adds depth and spaciousness to the sound Pressing the SOUND button repeatedly cycles through the Surround Sound settings ON SURROUND SOUND OFF SURROUND SOUND SOUND EFFECT You can select from 6 sound modes STANDARD Original Sound MUSIC CLEAR VOICE SPORTS MOVIE and NIGHT depending on the content you want to listen to Select the STANDARD mode if you want to enjoy t...

Page 9: ...electable and each can be adjusted to a setting between 6 6 If the Soundbar is connected to a digital TV and the video appears out of sync with the audio press the SOUND CONTROL button to sync the audio with the video Use the buttons to set the audio delay between 0 ms 300 ms In USB mode TV mode and BT mode the Audio Sync function may not available Play Pause Press the p button to pause a file tem...

Page 10: ...his function VIZIO LG Sony Sharp PHILIPS PANASONIC TOSHIBA GRUNDIG Hisense RCA This function may not be compatible with your TV s remote depending on the remote control s manufacturer To turn off this function press the SOUND button for 5 seconds OFF TV REMOTE appears on the Soundbar s display INSTALLING THE BATTERY IN THE REMOTE CONTROL 1 Use a suitable coin to turn the remote control s battery c...

Page 11: ...rs appropriate for the kind of wall you have plaster board iron board wood etc If possible fix the support screws into wall studs Purchase wall mounting screws according to the type and thickness of the wall you will mount the Soundbar on Diameter M5 Length 35 mm or longer recommended Connect cables from the unit to external devices before you install it on the wall Make sure the unit is turned of...

Page 12: ...rpened pencil tip through the centre of the B TYPE images on each end of the Guide to mark the holes for the supporting screws and then remove the Wall Mount Guide 4 Using an appropriately sized drill bit drill a hole in the wall at each marking If the markings do not correspond to the positions of studs make sure you insert appropriate anchors or mollies into the holes before you insert the suppo...

Page 13: ... Bracket Wall Mount L and R to the Soundbar s bottom For a proper fit make sure to align the bumps on the Soundbar to the holes on the brackets Rear side of Soundbar Right end of Soundbar When assembling make sure the hanger part of Bracket Wall Mounts faces backwards Wall Mount L Wall Mount R The left and right mounts are different shapes Make sure to position them correctly ...

Page 14: ...ket Wall Mounts by hanging the Bracket Wall Mounts on the Holder Screws on the wall Slightly tilt the Soundbar to insert both Holder Screw heads into Bracket Wall Mount holes Push the Soundbar in the direction of the arrow to make sure both sides are firmly fixed ...

Page 15: ...so that it does not fall off If the unit falls off it may cause an injury or damage the product When the unit is installed on a wall please make sure that children do not pull any of the connecting cables as this may cause it to fall For the optimal performance of a wall mount installation install the speaker system at least 5 cm below the TV if the TV is mounted on the wall For your safety if you...

Page 16: ...AL jack on the Soundbar to the OPTICAL OUT jack of the TV with a digital optical cable 2 Press the button on the right side of the Soundbar or the SOURCE button on the remote control to select the D IN mode Auto Power Link If you have connected the main unit to a TV with a digital optical cable you can set the Auto Power function ON to have the Soundbar turn on automatically when you turn the TV o...

Page 17: ...tion must be terminated To terminate the existing connection press and hold the p button on the remote for 5 seconds or switch to another mode To connect to the other TV follow Steps 1 through 4 above The TV SoundConnect SoundShare function is supported by some Samsung TVs released from 2012 on Check whether your TV supports the TV SoundConnect SoundShare function before you begin For further info...

Page 18: ...VICES OPTICAL OR ANALOGUE AUDIO CABLE This unit comes equipped with one digital optical in jack and one analogue audio AUX in jack giving you two ways to connect it to external devices DIGITAL AUDIO IN OPTICAL USB 5V 0 5A AUX IN SUBWOOFER DC 24V DIGITAL AUDIO IN OPTICAL USB 5V 0 5A AUX IN DIGITAL AUDIO IN OPTICAL USB 5V 0 5A AUX IN DIGITALAUDIO IN OPTICAL OPTICAL OUT AUX IN AUX OUT BD DVD player S...

Page 19: ...wer Off if no storage device has been connected for more than 5 minutes Before you connect a storage device Be aware of the following If the file name of a file on a storage device exceeds 10 characters it is not displayed on the Soundbar s display This product may not be compatible with certain types of storage media The Soundbar supports the FAT16 and FAT32 file systems The NTFS file system is n...

Page 20: ...mat_MSAudio1 16KHz 48KHz 56kbps 128kbps Wave_Format_MSAudio2 16KHz 48KHz 56kbps 128kbps aac AAC 16KHz 96KHz 48kbps 320kbps AAC LC 16KHz 96KHz 128kbps 192kbps 5 1ch 320kbps HE AAC 24KHz 96KHz 48kbps 64kbps 5 1ch 160kbps wav 16KHz 48KHz up to 3000kbps ogg OGG 1 1 0 16KHz 48KHz 50kbps 500kbps flac FLAC 1 1 0 FLAC 1 2 1 16KHz 96KHz up to 3000kbps If there are too many folders and files stored on the s...

Page 21: ...R DOWN FUNCTION The unit turns off automatically in the following situations D IN BT TV USB Mode If there is no audio signal for 5 minutes AUX Mode If the AUX cable is disconnected for 5 minutes If there is no KEY input for 8 hours when the AUX cable is connected Auto Power Down function can be turned off only in that case To turn off Auto Power Down function while in AUX mode press and hold the p...

Page 22: ...vice s user manual 3 Select AV Samsung Soundbar Kxxx K Series from the list When the Soundbar is connected to the Bluetooth device it will display Bluetooth device name BT on the front display The device name can only be displayed in English An underline _ will be displayed if the name is not in English If the Bluetooth device has failed to pair with the Soundbar delete the previous AV Samsung Sou...

Page 23: ...ce s paired devices The Bluetooth device and the Soundbar must have been previously paired at least once Soundbar will appear in the Bluetooth device s searched devices list only when the Soundbar is displaying BT READY In the TV SoundConnect mode the Soundbar cannot be paired to another Bluetooth device BLUETOOTH POWER ON BLUETOOTH POWER If a previously paired Bluetooth device tries to pair with ...

Page 24: ... obstructions caused by a wall corner or office partition It is exposed to electrical interference from same frequency band devices including medical equipment microwave ovens and wireless LANs Pair the Soundbar with the Bluetooth device while they are close together The further the distance between the Soundbar and Bluetooth device the worse the quality is If the distance exceeds the Bluetooth op...

Page 25: ...sung Audio Remote app from the Google Play store Market search Samsung Audio Remote Launching the Samsung Audio Remote App To launch and use the Samsung Audio Remote app touch the Audio Remote icon on your smart device and then follow the directions on the screen The Samsung Audio Remote app is only compatible with Android mobile phones and mobile devices running Android OS 3 0 or later ...

Page 26: ...dapter cable with a male USB 2 0 Micro USB plug Type B on one end and a standard female 2 0 USB jack Type A on the other end to the micro USB jack on your Soundbar 2 Follow the steps below to download the product software Go to the Samsung website at samsung com sec search for the model name select the customer support option the option name is subject to change 3 Save the downloaded software to a...

Page 27: ...y the Soundbar are stored in the storage device Do not disconnect the power or remove the storage device while updates are being applied The main unit will turn off automatically after completing the firmware update After update is completed the user setup in Soundbar is initialised We recommend you write down your settings so that you can easily reset them after the update If the software update ...

Page 28: ... the volume The remote control does not work Is the battery drained Is the distance between the remote control and main unit too far Replace with new battery Move closer to the unit The TV SoundConnect TV pairing failed Does your TV support TV SoundConnect Is your TV firmware the latest version Does an error occur when connecting TV SoundConnect is supported by some Samsung TVs released from 2012 ...

Page 29: ...to change the specifications without notice Weight and dimensions are approximate For more information about the power supply and power consumption refer to the label attached to the product For India Only This product is RoHS compliant a a Open Source Licence Notice To send inquiries and requests regarding open sources contact Samsung via Email oss request samsung com LICENCES Manufactured under ...

Page 30: ... www samsung com vn support THAILAND 0 2689 3232 1800 29 3232 Toll free www samsung com th support MYANMAR 95 1 2399 888 www samsung com mm support CAMBODIA 855 23 993232 1800 20 3232 Toll free www samsung com th support LAOS 856 214 17333 MALAYSIA 1800 88 9999 603 7713 7420 Overseas contact www samsung com my support INDONESIA 021 5699 7777 0800 112 8888 All Product Toll Free www samsung com id s...

Reviews: