background image

WIRELESS 
LCD TV

LW15B13C

Owner’s Instructions

Before operating the unit,

please read this manual thoroughly,

and retain it for future reference.

WIRELESS LAN 

POWER SAVING

TELETEXT

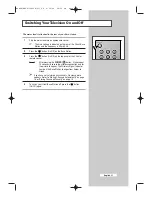
MONTE(BN68-00625A-01)_UK  4/20/04  08:23 PM  Page 1

Summary of Contents for LW15B13C

Page 1: ... TV LW15B13C Owner s Instructions Before operating the unit please read this manual thoroughly and retain it for future reference WIRELESS LAN POWER SAVING TELETEXT MONTE BN68 00625A 01 _UK 4 20 04 08 23 PM Page 1 ...

Page 2: ...MONTE BN68 00625A 01 _UK 4 20 04 08 23 PM Page 2 ...

Page 3: ...guage 15 SETTING THE CHANNELS Storing Channels Automatically 16 Sorting the Stored Channels 17 Storing Channels Manually 18 Skipping Unwanted Channels 20 Assigning Names to Channels 21 Fine Tuning Channel Reception 22 USING YOUR TELEVISION Changing the Picture Standard 23 Adjusting the Picture Settings 24 Changing the Colour Tone 24 Selecting the Picture Size 25 Setting the Blue Screen 25 Freezing...

Page 4: ...rce 37 Connecting to the External Input Outputs 38 DC Input Jack Power Cable 38 Connecting to the RCA Input 39 Connecting to the S Video Input 39 Connecting Headphones 40 Connecting to the IR Relay 40 Connecting the Power Adapter and Recharging the Battery Pack 41 Using the Battery Pack 42 Cautions on Storing and Using the Battery Pack 42 RECOMMENDATIONS FOR USE SCART Connector Wiring EXT1 EXT2 or...

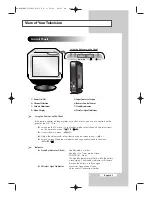
Page 5: ... the TV when it is in Standby mode select channels and select items on the on screen menu C P Access the main menu MENU Adjust the volume and select items on the on screen menu Switch among Video input modes and change confirmation in the menu SOURCE Indicator Standby Indicator Client Standby mode Amber Standby On Timer mode Green POWER ON None The Standby Indicator will flash while the battery is...

Page 6: ...t connection refer to pages 38 41 Whenever you connect an audio or video system to your television ensure that all elements are switched off Refer to the documentation supplied with your equipment for detailed connection instructions and associated safety precautions Headphone connector Owner s Instructions Base Station Client Remote Control AAA Batteries Battery Power Cord 2EA IR Relay Adapter 2E...

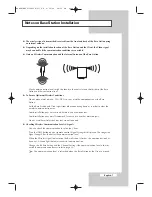
Page 7: ... in order to clear the wireless communication area Avoid installation near a water tank bathtub and crowded areas Avoid installation near metal framework furniture or any other metal objects Do not use other wireless devices that are not required Checking Wireless Communication Levels Signals You can check the communication level on the Client Press the INFO button on your remote control Signal St...

Page 8: ...provided Save the screws for future use if you remove Do not place the Base Station on top of other devices Do not stack other devices on top of the Base Station Keep the ventilation holes open Adjusting the Client Angle The Client angle can be adjusted back 15 While adjusting the client angle hold on to the stand so that it does not move or lift up Tilting more than 15 degrees might cause a fall ...

Page 9: ...STANDARD EXIT FROM ANY DISPLAY PREVIOUS CHANNEL TELETEXT PREVIOUS PAGE CHANGE CONFIRMATION INFORMATION DISPLAY TELETEXT REVEAL PICTURE SIZE TELETEXT SIZE SELECTION PICTURE STANDARD ONE TWO DIGIT CHANNEL SELECTION TELETEXT PAGE HOLD SWITCH REPEATEDLY BETWEEN THE LAST TWO CHANNELS DISPLAYED AUTOMATIC SWITCH OFF TELETEXT STORE VOLUME DECREASE NEXT CHANNEL TELETEXT NEXT PAGE TELETEXT DISPLAY MIX BOTH ...

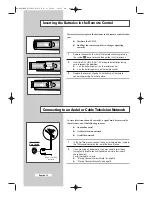
Page 10: ...nto place To view television channels correctly a signal must be received by the set from one of the following sources An outdoor aerial A cable television network A satellite network 1 In the first three cases connect the aerial or network input cable to the 75Ω coaxial socket on the rear of the Base Station 2 If you are using an indoor aerial you may need to turn it when tuning your Base Station...

Page 11: ...the top panel of the Client or remote control Result After pressing the POWER button it takes about 15 seconds to secure the wireless connection and for the picture to appear The Wireless Signal Indicator Lamp on the Base Station changes from Amber to Green If you have not yet stored any channels No clear picture appears Refer to Storing Channels Automatically on page 16 or Storing Channels Manual...

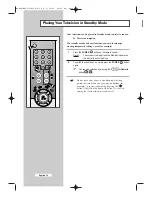
Page 12: ...creen is turned off and the Standby indicator on the front of the client lights up 2 To switch the client back on simply press the POWER button again You can also switch on by pressing the P or Numeric button Do not leave your client in Standby mode for long periods of time when you are away on holiday for example Turn your client off by pressing the button On Off on the front of the client It is ...

Page 13: ...t channel viewed To quickly switch between two channels that are far apart tune to one channel then use the number button to select second channel Then use the PRE CH button to quickly alternate between them Used to increase the volume Used to decrease the volume MUTE Used to switch the sound off temporarily To turn the sound back on press this button again or press the or button MENU Used to disp...

Page 14: ...ange Finally the search will end automatically and the Clock menu will be displayed Refer to Storing Channels Automatically on page 16 5 Press the œ or button to move to the hour or minute Set the hour or minute by pressing the or button Refer to Setting and Displaying the Current Time on page 29 6 When you have finished press the MENU button Result The message Enjoy your watching is displayed and...

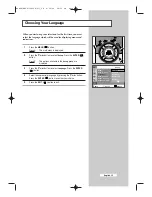
Page 15: ... The options available in the Setup group are displayed 3 Press the or button to select Language Press the ENTER button 4 Select the appropriate language by pressing the or button Press the ENTER button to confirm your choice 5 Press the EXIT button to exit Choosing Your Language TV Setup Move Enter Return Time Plug Play Language English Blue Screen Off Power Saving Off Wireless LAN English Deutsc...

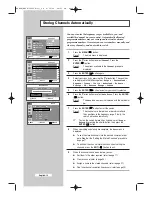
Page 16: ...ch reflects their positions in the frequency range Finally the search will end automatically To stop the search before it has finished select Stop or Return by pressing the œ or button then press the ENTER button 8 When searching and storing are complete the Sort menu is displayed To sort the stored channels into the desired numerical order go to Step 4 of the Sorting the Stored Channels procedure...

Page 17: ... displayed 4 Select the channel that you wish to move by pressing the or button Press the ENTER button 5 Select the number of the programme to which the channel is to be moved by pressing the or button Press the ENTER button Result The channel is moved to its new position and all other channels are shifted accordingly 6 Press the EXIT button to exit Sorting the Stored Channels TV Channel Move Ente...

Page 18: ...lect the broadcasting standard Press the ENTER button Result The colour standards are displayed in the following order AUTO PAL SECAM NT4 43 8 Press the or button to select Sound System Press the ENTER button 9 Press the or button to select the sound standards Press the ENTER button Result The sound standards are displayed in the following order BG DK I L Storing Channels Manually TV Channel Move ...

Page 19: ...hannel mode P Programme mode When completing tuning the broadcasting stations in your area have been assigned to position numbers from P00 to max P99 You can select a channel by entering the position number in this mode C Real channel mode You can select a channel by entering the assigned number to each air broadcasting station in this mode S Cable channel mode You can select a channel by entering...

Page 20: ...nel group are displayed 3 Press the or button to select Add Delete Press the ENTER button Result The Add Delete menu is displayed 4 Press the P or button to select the channel to add or erase If necessary select Add or Delete by pressing the ENTER button 5 Repeat Step 4 for each channel to be added or erased 6 Press the EXIT button to exit Skipping Unwanted Channels TV Channel Move Enter Return Co...

Page 21: ...ary select the channel to be assigned to a new name by pressing the or button Press the ENTER button 5 Press the or button to select a letter A Z a number 0 9 or a symbol space Move on the previous or next letter by pressing the œ or button 6 Repeat Steps 4 to 5 for each channel to be assigned to a new name 7 Press the EXIT button to exit Assigning Names to Channels TV Channel Move Enter Return Co...

Page 22: ...To obtain a sharp and clear picture and good sound quality press the œ or button Result Move the horizontal bar s cursor left or right by pressing theœ or button 5 To memorise adjusted picture or sound press the ENTER button To reset adjusted picture or sound select Reset by pressing the button Press the ENTER button 6 Press the EXIT button to exit Fine Tuning Channel Reception TV Channel Move Ent...

Page 23: ...ayed 3 Press the ENTER button again 4 Press the or button to select picture mode Press the ENTER button Result The following picture modes are available Dynamic Standard Movie Custom Auto 5 Press the EXIT button to exit You can also set these options simply by pressing the P MODE button Changing the Picture Standard TV Picture Move Enter Return Mode Auto Custom Colour Tone Normal Size Normal Dynam...

Page 24: ...the EXIT button to exit If you make any changes to these settings the picture standard is automatically switched to Custom Adjusting the Picture Settings TV Picture Move Enter Return Mode Auto Custom Colour Tone Normal Size Normal TV Custom Move Enter Return Contrast 100 Brightness 50 Sharpness 75 Colour 55 Contrast 100 1 Press the MENU button Result The main menu is displayed 2 Press the or butto...

Page 25: ...ue Screen TV Setup Move Enter Return Time Plug Play Language English Blue Screen Off Power Saving Off Wireless LAN Off On You can select the picture size which best corresponds to your viewing requirements 1 Press the MENU button Result The main menu is displayed 2 Press the or button to select Picture Press the ENTER button Result The options available in the Picture group are displayed 3 Press t...

Page 26: ...layed 2 Press the or button to select Sound Press the ENTER button Result The options available in the Sound group are displayed 3 Press the ENTER button again 4 Press the or button to select sound mode Press the ENTER button Result The following sound modes are available Standard Speech 5 Press the EXIT button to exit You can also set these options simply by pressing the S MODE button Changing th...

Page 27: ...he modulation signal is low 1 Press the MENU button Result The main menu is displayed 2 Press the or button to select Sound Press the ENTER button Result The options available in the Sound group are displayed 3 Press the or button to select Auto Volume Press the ENTER button 4 To activate this feature select On by pressing the or button Press the ENTER button 5 Press the EXIT button to exit Select...

Page 28: ...eceiving a mono sound in the AV mode connect to the AUDIO L input connector on the panel rear If the mono sound comes out only from left speaker press the DUAL I II button Selecting the Sound Mode Type of broadcast Regular broadcast Standard audio Regular NICAM Mono NICAM Stereo NICAM Dual I II Regular broadcast Standard audio Bilingual or Dual I II Stereo On screen indication MONO Normal use MONO...

Page 29: ...options available in the Time group are displayed with Clock is selected 4 Press the ENTER button again Result The Hour is selected 5 Press the œ or button to move to the hour or Minute Set the hour or minute by pressing the or button 6 When you have finished press the EXIT button to exit 7 To Press the INFO button display the channel information Once remove the display Twice Setting and Displayin...

Page 30: ...ess the button to move to the Setup Set the On or Off by pressing the or button 7 Press the EXIT button to exit You can also set these options simply by pressing the SLEEP button Press the SLEEP button repeatedly and cycle throngh the preset time interals 30 60 90 120 150 180 or Off The Television automatically switches to standby mode when the timer reaches 0 To cancel the sleep timer feature pre...

Page 31: ... Timer Press the ENTER button Set the time at which you wish the television to be switched on automatically Press the œ or button to move to the Hour Minute Prog Volume or Setup Set these by pressing the or button 5 When you have finished press the MENU button to exit 6 Press the or button to select Off Timer In the same above set the time at which you wish the television to be switched off automa...

Page 32: ...his feature select On by pressing the or button Press the ENTER button 5 Press the EXIT button to exit You can also set these options simply by pressing the PWR SAVE button Selecting the Power Saving You can view the channel information wireless signal strength charge of battery and setting status you select by pressing the INFO button on the remote control is displayed when power is supplied by u...

Page 33: ...e Intermittent Video Audio Signal or Communication Interference Channel Setting 6 Press the or button to select Channel Press the ENTER button 7 Press the or button to select the option Auto 1 2 3 or 4 Press the ENTER button Auto Prior to purchase the product is setup to find the best channel for Wireless Communication When you move the Client or the Base Station be sure to set the channel to Auto...

Page 34: ...g the page number Selecting a title in a list Selecting a coloured heading FASTEXT system Teletext Feature You can display Teletext information at any time on your television For Teletext information to be displayed correctly channel reception must be stable otherwise Information may be missing Some pages may not be displayed 1 Select the channel providing the Teletext service using the or button ...

Page 35: ...e To freeze the display on a given page press the hold Press the hold again to resume Using the various display options To display Press the Both teletext information and TTX MIX the normal broadcast twice Hidden text reveal answers to quiz games for example The normal screen reveal again A secondary page sub page by entering its 4 digit number The next page page up The previous page page down Dou...

Page 36: ... topics included in the teletext pages are color coded and can be selected by pressing the colored buttons on the remote control 1 Display the teletext contents page by pressing the TTX MIX button 2 Press the coloured button corresponding to the topic that you wish to select the available topics are given on the status line Result The page is displayed with other coloured information that can be s...

Page 37: ...R button Result The options available in the Edit Name group are displayed 7 Press the or button to select the edited external source Press the ENTER button Result The device names available are listed VCR DVD Cable STB HD STB Satellite STB AV Receiver DVD Receiver Game Camcorder DVD Combo DHR DVD HDD Recorder PC 8 Select the required device by pressing the or button Press the ENTER button 9 Set o...

Page 38: ...ors Video Audio L and R If you have a second VCR and wish to copy cassettes tape connect the source VCR to and the target VCR to so that you can redirect the signal from to If you have a decoder connect the decoder to the VCR and the VCR to the television When you wish to record a programme connect the receiver to and the VCR to so that you can redirect the signal from to 2 1 2 1 2 1 2 1 or DVD DC...

Page 39: ...eo output such as a camcorder or VCR Camcorder VCR To play pictures and sound both the S VIDEO and RCA connectors must be used and When both the side AV and rear connectors are connected to external equipments the side AV receives priority Whenever you connect an audio or video system to your television ensure that all elements are switched off Refer to the documentation supplied with your equipme...

Page 40: ...connected device aiming it toward the client s receiver IR Receiver You can connect a set of headphones to your television if you wish to watch a television programme without disturbing the other people in the room 1 Plug a set of headphones into the 3 5 mm mini jack socket of the television Result The sound is heard through the headphones 2 When you wish to hear the sound through the speakers aga...

Page 41: ...he DC cord from the Adapter into the DC power jack on the LCD TV While the battery recharges the Standby Indicator will flash Standby Amber Standby On Timer Green When the recharging has finished the Standby Indicator is continuously lit You can check the Battery Power remaining using the Battery Indicators Full Power 20 40 less than full 40 80 less than full Over 95 less than full When Low Batter...

Page 42: ...e recharging to prolong the lifetime of the Battery Pack The Battery Pack might be hot during use or recharging This is normal not a defect of the Battery Pack Properly mount the Battery Pack to avoid any problems Charging the battery in a cold environment may require more time Playback duration is affected by the ambient temperature the battery s condition and the speaker volume level Battery pow...

Page 43: ...ideo chassis return RGB blue 6 Audio input L 7 RGB blue input 8 Switching voltage 9 Video chassis return RGB green 10 AV Link Ext 1 11 RGB green input Pin Signal 12 13 Video chassis return RGB red 14 15 RGB red input 16 Blanking signal RGB switching 17 Video chassis return 18 Blanking signal ground 19 Video output 20 Video input 21 Screening chassis return Pins 5 7 9 11 13 15 and 16 are used for R...

Page 44: ... has been pressed Adjust the colour settings Check that the broadcast system selected is correct Try to identify the electrical appliance that is affecting the television then move it further away Plug your television into a different mains socket Check the direction location and connections of your aerial This interference often occurs due to the use of an indoor aerial Replace the remote control...

Page 45: ... 60Hz Output DC 14V 4 5A Power Consumption On Mode Client 45 W Base Station 12 W Stand By Client 2 W Base Station 2 W Dimensions W x D x H Weight Client 386 x 427 x 187 mm 3 93 kg Base Station 218 x 223 3 x 81 9 mm 1 65 kg Environmental Considerations Operating Temperature 50 F to 104 F 10 C to 40 C Operating Humidity 10 to 80 Storage Temperature 13 F to 113 F 20 C to 45 C Storage Humidity 5 to 95...

Page 46: ...Memo English 46 MONTE BN68 00625A 01 _UK 4 20 04 08 27 PM Page 46 ...

Page 47: ...Memo English 47 MONTE BN68 00625A 01 _UK 4 20 04 08 27 PM Page 47 ...

Page 48: ...01 AFTER SALES SERVICE Do not hesitate to contact your retailer or service agent if a change in the performance of your product indicates that a faulty condition may be present MONTE BN68 00625A 01 _UK 4 20 04 08 27 PM Page 48 ...

Reviews: