background image

ENG

7

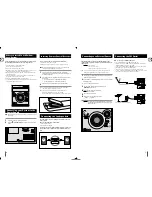
To take full advantage of your new mini-compact system, follow
these installation instructions before connecting the unit.

Install the system on a flat, stable surface.

Never place this unit on carpeting.

Never place this unit in an outdoor area.

Maintain an open space of approximately 6 inches (15 cm) on the
sides and rear of the system, for ventilation purposes.

Make sure that you have enough room to open the compact disc
compartment easily.

Place the loudspeakers at a reasonable distance on either side of
the system to ensure good stereo sound.

Direct the loudspeakers towards the listening area.

For optimum performance, make sure that both speakers are placed
at an equal distance above the floor.

Where to Install Your Mini-Com-
pact System

Connecting your System to the
Power Supply

ENG

6

Insert or replace remote control batteries when you:

Purchase the mini-compact system

Find that the remote control is no longer operating correctly

When replacing the batteries, use a new set of batteries and
never mix alkaline and manganese batteries.

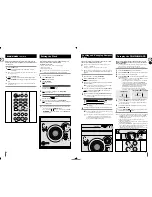
Place your thumb on the position marked        on the battery 
compartment cover (rear of the remote control) and pull the cover in
the direction of the arrow.

Insert two AAA, LR03 or equivalent batteries, taking care to respect
the polarities:

+ on the battery a in the battery compartment

– 

on the battery against – in the battery compartment

Replace the cover by sliding it back until it clicks into position.

If you will not be using the remote control for a long time,
remove the batteries to prevent corrosion.

The remote control can be used up to approximately 7 

meters in a straight line. It can also be operated 

at a horizontal angle of up to 45° from the remote control  sensor.

Inserting Remote Control Batteries

1

2

3

Before plugging your system into a main socket, you must check
the voltage.

Plug the main lead into an appropriate socket.

Press the 

(STANDBY/ON) button to switch your mini-compact

system .

1
2

The loudspeaker connector terminals are located on the rear
of the system.

There are two terminals on the system:

left speaker (marked L)

right speaker (marked R)

To achieve the correct sound quality,insert those speaker con-
nector cables to the speaker connector terminals of the sys-
tem.

Connecting the Loudspeakers

How to connect a COAXIAL TYPE aerial.

Connect a 75

antenna to the 

FM

antenna terminal. 

Plug the connector on the 

FM

aerial supplied into the coaxial socket

(75

) marked 

FM

on the rear of the system.

Follow the instructions given on 

Page 17

to tune into a radio station,

and determine the best position for the aerial.

If reception is poor, you may need to install an outdoor aerial.
To do so, connect an outdoor 

FM

aerial to the 

FM

socket on the rear of

the system using a 75

coaxial cable (not supplied).

Connecting the FM Aerial

R

L

   RADIO

ANTENNA

FM (75   )

R

L

   RADIO

ANTENNA

FM (75   )

R

L

L

R

The auxiliary input can be used to take advantage of the
sound quality of your mini-compact system when listening to
other sources.

Examples: A 

television

A video disc player

A Hi-Fi stereo video cassette recorder

To connect to the external source, the source must have an
audio output. In addition, you need an connection cable.

Set the system to standby mode and disconnect it and the external
source from the main socket.

Connect AUX In on the MINI-COMPACT to Audio Out on the external   

analog component.

Be sure to match connector colors.

Plug the system back into the main socket and press 
STANDBY/ON to switch it on.

Select the AUX source by pressing AUX.
Result: 

AUX

is displayed.

Switch the external source on.

Adjust the volume and balance as required:

Volume

Equalizer

Example: You can watch a film and take advantage of stereo sound

provided that the original sound track is in stereo (as if you
were in a cinema).

Connecting to an External Source

1

2

3

4

3

4

5
6

Summary of Contents for MAX-A54U

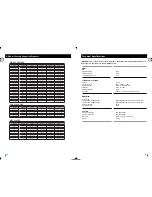
Page 1: ...stem MP3 CD WMA CD CD R RW Playback user manual MAX A54U MAX A55U imagine the possibilities Thank you for purchasing a Samsung product To receive a more complete service please register your product at www samsung com global register ...

Page 2: ...s 21 RECOMMENDATIONS FOR USE Safety Precautions 22 Cleaning Your Mini Compact System 22 Precautions When Using Compact Discs 22 Before Contacting the After Sales Service 23 USB Host Feature Supported Products 24 Technical Specifications 25 RISK OF ELECTRIC SHOCK DO NOT OPEN TO REDUCE THE RISK OF ELECTRIC SHOCK DO NOT REMOVE REAR COVER or BACK NO USER SERVICEABLE PARTS INSIDE REFER SERVICING TO QUA...

Page 3: ... SLEEP MO ST MEMORY ON OFF TIMER CLOCK PROGRAM SET OPEN CLOSE DISC SKIP AUX USB TUNER 1 14 15 16 17 18 19 20 21 22 23 24 25 25 13 12 11 10 8 7 6 5 4 3 2 1 CD 2 TUNER 3 POWER 4 TIMER CLOCK 5 TIMER ON OFF 6 SLEEP 7 DEMO 8 10 9 SHUFFLE 10 Fast Rewind 11 POWER SOUND 12 STOP 13 VOLUME 14 TREB BASS 15 SOUND MODE 16 TUNING MODE 17 MUTE 18 TUNING ALBUM 19 Play Pause 20 Skip and Search 21 POWER BASS 22 Fas...

Page 4: ...n socket you must check the voltage Plug the main lead into an appropriate socket Press the STANDBY ON button to switch your mini compact system 1 2 The loudspeaker connector terminals are located on the rear of the system There are two terminals on the system left speaker marked L right speaker marked R To achieve the correct sound quality insert those speaker con nector cables to the speaker con...

Page 5: ...ghtness can be switched between on and off Press the DEMO button Result All functions available on the system appear on the front panel display Each of these are explained in detail in this guide Please refer to the relevant section Press the DIMMER button Result The Dimmer function is selected and the display darkens Press the DIMMER button once again to brighten the front panel dis play A displa...

Page 6: ... DIMMER SHUFFLE REP A B P SOUND P BASS USB MP3 CD CD REPEAT 1 3 3 2 2 The title and track of the MP3 WMA CD desired to listen may be selected on stopping or during playbacks To select the MP3 WMA CD title and track Press the TUNING ALBUM or button the title moves Press the or buttons the track moves USB MP3 CD CD MUTE VOLUME TREB BASS SOUND MODE TUNING MODE TUNING ALBUM To move the track press the...

Page 7: ... the carrousel To repeat Press REPEAT on the Remote control once or more times until The current track indefinitely REPEAT 1 is displayed and the 1 always flashes The selected disc REPEAT 1 is displayed All discs loaded REPEAT ALL is displayed When you wish to stop the Repeat function press REPEAT until ALL or 1 is displayed or press Repeating One or All Tracks on the Compact Discs 1 2 10 DEMO DIM...

Page 8: ...al USB storage device is segmented into several parts MP3 files of only the first hard disk drive can be played Up to four directories can be played DRM applied files are not played Digital Rights Management Technology and service that protect the prof it and rights of copyright owners by disallowing unauthorized use of digi tal contents Even if the file name ends with mp3 the file does not play i...

Page 9: ... VOLUME TREB BASS SOUND MODE TUNING MODE TUNING ALBUM 5 4 7 3 4 7 1 4 4 7 7 3 5 2 To use high speed search Before you begin Connect the external USB storage device to your player Select the USB function by using the USB button You can search the desired section quickly during the play Press the button Whenever you press the button you can search backward or for ward quickly When you use the high s...

Page 10: ... flash c Set the minutes by tuning the MULTI JOG knob to the right or to the left d Press ENTER PRGM Result VOL XX is displayed where XX corresponds to the volume already set Press TUNING Down and Up to adjust the volume level and press ENTER PRGM Result The source to be selected is displayed Turn the MULTI JOG knob to select the source to be played when the system switches on If you select You mu...

Page 11: ...maining time by pressing SLEEP Change the remaining time by repeating Steps 1 and 2 To cancel SLEEP function press SLEEP once or more times until OFF is display Setting the System to Switch off Automatically 1 2 3 90 MIN Power Sound Function 10 DEMO DIMMER SHUFFLE REP A B P SOUND P BASS REPEAT SLEEP MO ST MEMORY ON OFF P SOUND P BASS Power Bass Function Your mini compact system has a bass amplific...

Page 12: ...supply and contact the after sales service Cleaning Your Mini Compact System 1 2 Handle your compact discs with care Always hold them by the edges to avoid leaving fingerprints on the shiny surface When you have finished playing a compact disc always put it back in its case Do not fix paper or adhesive tape to the discs and do not write on the label Clean them with a special purpose cloth Store yo...

Page 13: ...ISC Product Company Type Product Company Type Cruzer Micro Sandisk USB 2 0 USB Flash Drive 128M XTICK LG USB 2 0 128M Cruzer Mini Sandisk USB 2 0 128M Micro Mini Iomega USB 2 0 128M Cruzer Mini Sandisk USB 2 0 256M iFlash Imation USB 2 0 64M SONY Micro Vault Sony USB 2 0 64MB LG XTICK M USB 2 0 64M FLEX DRIVE Serotech USB 2 0 32MB RiDATA EZDrive USB 2 0 64M AnyDrive A L tech USB 2 0 128MB MP3 PLAY...

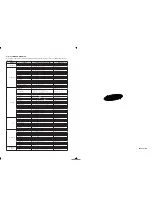
Page 14: ...com ITALIA 800 SAMSUNG 726 7864 www samsung com LUXEMBURG 0035 0 2 261 03 710 www samsung com be NETHERLANDS 0900 SAMSUNG 726 7864 0 10 Min www samsung com nl NORWAY 815 56 480 www samsung com no POLAND 0 801 801 881 022 607 93 33 www samsung com pl PORTUGAL 80820 SAMSUNG 726 7864 www samsung com pt SLOVAKIA 0800 SAMSUNG 726 7864 www samsung com sk SPAIN 902 10 11 30 www samsung com SWEDEN 0771 40...

Reviews: