background image

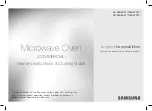
Microwave Oven

(COMMERCIAL)

Owner’s Instructions & Cooking Guide

MJ26A6091 (1850 WATT)
MJ26A6051 (1500 WATT)

imagine 

the possibilities

Thank you for purchasing this Samsung product. 

Please be advised that the Samsung warranty does NOT cover service 
calls to explain product operation, correct improper installation, or 
perform normal cleaning or maintenance.

Summary of Contents for MJ26A6091

Page 1: ...50 WATT MJ26A6051 1500 WATT imagine the possibilities Thank you for purchasing this Samsung product Please be advised that the Samsung warranty does NOT cover service calls to explain product operatio...

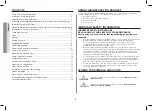
Page 2: ...me use only Do not heat any type of textiles or cushions filled with grains which could cause burns and fire The manufacturer cannot be held liable for damage caused by improper or incorrect use of th...

Page 3: ...ent of material and EDM and arc welding equipment For Class B equipment is equipment suitable for use in domestic establishments and in establishments directly connected to a low voltage power supply...

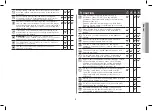
Page 4: ...the appliance Cleaning and user maintenance shall not be made by children without supervision WARNING If the door or door seals are damaged the oven must not be operated until it has been repaired by...

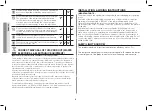
Page 5: ...ties from paper or plastic bags Reason Electric arcing or sparking may occur and may damage the oven When heating food in plastic or paper containers keep an eye on the oven due to the possibility of...

Page 6: ...de the oven at all times to absorb microwave energy in case the microwave oven is started accidentally Do not use harsh abrasive cleaners or sharp metal scrapers to clean the oven door glass since the...

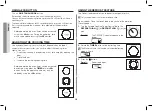
Page 7: ...be turned off after 5 minutes with door open condition 1 To display the time in the Then press 20s 24 hour notation 12 hour notation Once Twice 2 Turn the TIMER DIAL to set the hour 3 Press the START...

Page 8: ...ime is elapsed the end of cycle Beep Tone will sound 4 times and all heating will stop The oven lamp will go off For 1 min the cooling fan will keep working in order to cool down the interior parts Du...

Page 9: ...ower level and heating time Changed values are promptly shown in the display The oven is designed not to work when power level is set to 0 mode between the heating mode and the defrosting mode When yo...

Page 10: ...y You can increase the cooking time by pressing the 20s button when in a heating cycle The cooking time increases by 20 seconds at each press on 20s button But it can not exceed the maximum time allow...

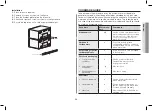
Page 11: ...peration with no load or small load or due to some blocking materials around the Air Filter or Air Exhaust at the back of the oven Open the oven door and check if 1 the oven has been operating with no...

Page 12: ...se harsh detergents or abrasives If food remnant or spilled liquids stick to the oven walls or between door seal and door surface they will absorb microwaves possibly resulting in arcing or sparks 3 C...

Page 13: ...microwave oven Cookware Microwave Safe Comments Aluminum foil Can be used in small quantities to protect areas against overcooking Arcing can occur if the foil is too close to the oven wall or if too...

Page 14: ...e proof paper Can be used to retain moisture and prevent spattering Recommended Use Caution Unsafe Cooking Guide F Frozen C Chilled Recipe Method Power Level Timing Stand Time 1850W 1500W BREAD PASTRI...

Page 15: ...0 2 15 1 min Baked Beans 500g Cover and Stir half way HIGH 2 00 2 10 2 mins Baked Beans 250g Cover and Stir half way HIGH 1 00 1 05 2 mins Recipe Method Power Level Timing Stand Time 1850W 1500W DESSE...

Page 16: ...C Covered HIGH 3 00 3 15 1 min Recipe Method Power Level Timing Stand Time 1850W 1500W FRESH VEGETABLES To cook 500g Beans green sliced 60ml 4tbsps water cover HIGH 3 00 3 15 2 mins Brocolli florets...

Page 17: ...azardous situation 1 Clean the outside surfaces with a soft cloth and warm soapy water Rinse and dry 2 Remove any splashes or stains on the inside surfaces or on the roller ring with a soapy cloth Rin...

Page 18: ...e Model MJ26A6091 MJ26A6051 Power source 230 240 V 50 Hz Power consumption Microwave 13 A 12 7 A Output power 1850 W IEC 705 240 V 1850 W 230 V 1780 W 1500W IEC 705 240 V 1500 W 230 V 1450 W Operating...

Page 19: ...19 ENGLISH MEMO MEMO...

Page 20: ...sung com nl support NORWAY 21629099 www samsung com no support PORTUGAL 808 207 267 www samsung com pt support SPAIN 91 175 00 15 www samsung com es support SWEDEN 0771 726 786 www samsung com se supp...

Page 21: ...ies Vielen Dank dass Sie sich f r dieses Ger t von Samsung entschieden haben Bitte beachten Sie dass die Garantie von Samsung keine Inanspruchnahme des Kundendienstes f r Erl uterungen zum Ger tebetri...

Page 22: ...Speisen vorgesehen Das Ger t ist ausschlie lich f r die Verwendung in Privathaushalten geeignet Erw rmen Sie keine Textilien oder mit K rnern gef llte Kissen Dies k nnte zu Verbrennungen oder einem B...

Page 23: ...er in Form elektromagnetischer Strahlung zur Bearbeitung von Werkstoffen f r Funkenerosions und Elektroschwei ger te verwendet wird Ger te der Klasse B sind zum Einsatz in Wohnbereichen und in Anlagen...

Page 24: ...Reinigung und Wartung nur dann helfen wenn sie dabei beaufsichtigt werden WARNUNG Wenn die Ger tet r oder die T rscharniere besch digt sind darf das Ger t bis zur Reparatur durch sachkundiges Fachpers...

Page 25: ...ch digen Lassen Sie das Ger t nicht unbeaufsichtigt wenn Sie Speisen in Kunststoff oder Papierbeh ltern erhitzen da die Gefahr besteht dass sich die Beh lter entz nden Verwenden Sie das Ger t nicht zu...

Page 26: ...stets ein Glas Wasser in das Ger t zu stellen damit die Mikrowellen absorbiert werden falls das Ger t versehentlich eingeschaltet wird Benutzen Sie keine scharfen Scheuermittel oder Metallschaber um...

Page 27: ...Dr cken Sie 20 Sek 24 Stunden Notierung 12 Stunden Notierung Einmal Zweimal 2 Drehen Sie den TIMER DREHREGLER um die Stunden einzustellen 3 Dr cken Sie die START Taste 4 Drehen Sie den TIMER DREHREGLE...

Page 28: ...ird angehalten Die Innenleuchte wird abgeschaltet Der K hlungsventilator l uft noch 1 Minute weiter um die Teile im Inneren abzuk hlen W hrend dieser Zeit h lt der Ventilator auch dann nicht an wenn S...

Page 29: ...Garzeit ndern Die ge nderten Werte werden sofort auf dem Display angezeigt Das Ger t ist so ausgelegt dass es nicht funktioniert wenn die Leistungsstufe auf 0 zwischen dem Aufw rmmodus und dem Auftau...

Page 30: ...Garzeit erh hen indem Sie w hrend des Erhitzens die 20s Taste dr cken Die Garzeit wird durch jedes Dr cken auf die 20s Taste um 20 Sekunden erh ht Die maximal erlaubte Zeit f r die ausgew hlte Leistun...

Page 31: ...r weil der Luftfilter oder der Luftauslass an der R ckseite des Mikrowellenger ts verstopft ist zu hei ffnen Sie die T r des Mikrowellenger ts und pr fen Sie ob 1 das Mikrowellenger t ohne Bef llung o...

Page 32: ...von Fl ssigkeiten an den Innenw nden des Mikrowellenger ts oder zwischen der T rdichtung und der T rfl che kleben k nnen Sie Mikrowellen absorbieren was m glicherweise zu Lichtbogen oder Funkenbildung...

Page 33: ...rwendet werden k nnen Geschirr Mikrowellengeeignet Kommentare Alufolie Kann in kleineren Mengen verwendet werden um bestimmte Bereiche vor berhitzung zu sch tzen Wenn sich die Folie zu dicht an den In...

Page 34: ...zu verhindern Empfohlen Mit Vorsicht Nicht sicher Zubereitungshinweise F Tiefgek hlt C Gek hlt Rezept Methode Leistungsstufe Zeit Ruhezeit 1850W 1500W BROT BACKWAREN Zum Auftauen Baguettebr tchen 23 c...

Page 35: ...500 g Abdecken und nach der H lfte der Zeit umr hren HOCH 2 Min 00 Sek 2 Min 10 Sek 2 Min Gebackene Bohnen 250 g Abdecken und nach der H lfte der Zeit umr hren HOCH 1 Min 00 Sek 1 Min 05 Sek 2 Min Re...

Page 36: ...ezeit 1850W 1500W FRISCHES GEM SE Zum Garen 500 g Gr ne Bohnen geschnitten 60 ml 4 EL Wasser hinzugeben abdecken HOCH 3 Min 00 Sek 3 Min 15 Sek 2 Min Brokkolir schen 60 ml 4 EL Wasser hinzugeben abdec...

Page 37: ...en mit einem weichen Tuch und warmem Seifenwasser Wischen Sie sie erst mit klarem Wasser und dann trocken nach 2 Entfernen Sie Spritzer oder Flecken an den Innenfl chen oder am Drehring mit einem in S...

Page 38: ...A6051 Eingangsspannung und Frequenz 230 240 V 50 Hz Leistungsaufnahme Microwave Mikrowelle 13 A 12 7 A Ausgangsleistung 1850 W IEC 705 240 V 1850 W 230 V 1780 W 1500W IEC 705 240 V 1500 W 230 V 1450 W...

Page 39: ...19 DEUTSCH NOTIZEN NOTIZEN...

Page 40: ...ung com nl support NORWAY 21629099 www samsung com no support PORTUGAL 808 207 267 www samsung com pt support SPAIN 91 175 00 15 www samsung com es support SWEDEN 0771 726 786 www samsung com se suppo...

Page 41: ...VATIOS imagine las posibilidades Gracias por adquirir este producto Samsung Debe tener en cuenta que la garant a de Samsung NO cubre las llamadas al servicio t cnico para pedir informaci n sobre el fu...

Page 42: ...liente ning n tipo de textil ni cojines rellenos de granos ya que podr an provocar quemaduras e incendios El fabricante no se hace responsable de los da os derivados de un uso inadecuado o incorrecto...

Page 43: ...aci n electromagn tica para el tratamiento del material as como equipos EDM y de soldadura por arco Los equipos de la Clase B son apropiados para su uso en establecimientos dom sticos y en establecimi...

Page 44: ...no deben hacer la limpieza y el mantenimiento sin vigilancia ADVERTENCIA Si la puerta o los cierres de la puerta est n da ados no se debe usar el horno hasta que no lo haya reparado una persona cuali...

Page 45: ...lambre de las bolsas de papel o pl stico Motivo Pueden ocurrir arcos el ctricos o chispas que pueden da ar el horno Cuando caliente alimentos en recipientes de papel o pl stico vigile el horno ya que...

Page 46: ...gua en el interior del horno para absorber la energ a microondas si el horno microondas se pone en marcha accidentalmente No use limpiadores abrasivos ni tiles met licos afilados para limpiar la puert...

Page 47: ...a la hora en A continuaci n pulse 20s Formato de 24 horas Formato de 12 horas Una vez Dos veces 2 Gire el DIAL DEL TEMPORIZADOR para ajustar la hora 3 Pulse el bot n START INICIO 4 Gire el DIAL DEL TE...

Page 48: ...rido todo el tiempo el tono de fin de ciclo sonar 4 veces y todo el calentamiento se detendr La luz del horno se apagar Durante 1 minuto el ventilador seguir funcionando para enfriar las partes interi...

Page 49: ...empo de calentamiento Los valores modificados se muestran r pidamente en la pantalla El horno se ha dise ado para que no funcione cuando el nivel de potencia se ajusta al modo 0 mientras se encuentra...

Page 50: ...Puede aumentar el tiempo de cocci n al pulsar el bot n 20s cuando est en un ciclo de calentamiento El tiempo de cocci n aumenta de a 20 segundos cada vez que se pulsa el bot n 20s Pero no puede super...

Page 51: ...un funcionamiento excesivo sin carga o con poca carga o debido a algunos materiales de bloqueo situados en torno al filtro de aire o a la salida de aire en la parte posterior del horno Abra la puerta...

Page 52: ...rramados se adhieren a las paredes del horno o entre la junta de la puerta y la superficie de la misma absorber n las microondas pudiendo provocar arcos o chispas 3 Limpie el exterior del horno con ag...

Page 53: ...cantidades para evitar que determinadas reas se cuezan demasiado Si el papel de aluminio est demasiado cerca de las paredes del horno o si se utiliza en grandes cantidades pueden producirse arcos el...

Page 54: ...cerado o a prueba de grasa Se puede utilizar para retener la humedad y evitar salpicaduras Recomendaciones Usar con precauci n Inseguro Gu a de cocci n F Congelados C Comida preparada Receta M todo Ni...

Page 55: ...00 2 15 1 min Alubias al horno 500g Tapar y revolver a medio tiempo ALTO 2 00 2 10 2 min Alubias al horno 250g Tapar y revolver a medio tiempo ALTO 1 00 1 05 2 min Receta M todo Nivel de potencia Tiem...

Page 56: ...ta M todo Nivel de potencia Tiempo Tiempo de parada 1850W 1500W VERDURAS FRESCAS Para cocinar 500g Jud as verdes en rodajas 60 ml 4 cucharadas de agua cubierta ALTO 3 00 3 15 2 min Br coli en floretes...

Page 57: ...y agua tibia y jabonosa Enjuague y seque 2 Elimine cualquier salpicadura o mancha en las superficies interiores o en el aro del plato con un pa o jabonoso Enjuague y seque 3 Para aflojar las part cul...

Page 58: ...elo MJ26A6091 MJ26A6051 Fuente de alimentaci n 230 240 V 50 Hz Consumo de energ a Microondas 13 A 12 7 A Potencia de salida 1850 W IEC 705 240 V 1850 W 230 V 1780 W 1500W IEC 705 240 V 1500 W 230 V 14...

Page 59: ...19 ESPA OL NOTAS NOTAS...

Page 60: ...msung com nl support NORWAY 21629099 www samsung com no support PORTUGAL 808 207 267 www samsung com pt support SPAIN 91 175 00 15 www samsung com es support SWEDEN 0771 726 786 www samsung com se sup...

Page 61: ...T immagina le possibilit Grazie per aver acquistato questo prodotto Samsung Si prega di notare che la garanzia Samsung NON copre le richieste di assistenza per ottenere spiegazioni sul funzionamento d...

Page 62: ...onde inteso per il riscaldamento dei cibi stato progettato solo per un uso domestico Non riscaldare tessuti o cuscini riempiti con chicchi poich ci potrebbe provocare scottature o un incendio Il costr...

Page 63: ...iazioni elettromagnetiche per il trattamento di materiali apparecchi a elettro erosione EDM e apparecchi per saldatura ad arco Gli apparecchi di Classe B sono idonei per un uso domestico o direttament...

Page 64: ...anutenzione dell apparecchio non devono essere eseguite da bambini senza la supervisione di un adulto AVVERTENZA Se lo sportello o le sue guarnizioni sono danneggiate il forno non deve essere utilizza...

Page 65: ...c Rimuovere i lacci in carta o plastica dalle buste Motivo Potrebbero generare scintille o archi elettrici in grado di danneggiare il forno Qualora si cuociano cibi in contenitori di plastica o carta...

Page 66: ...recipiente con acqua all interno del forno per assorbire l energia proveniente dal forno a microonde qualora venga azionato accidentalmente Per pulire lo sportello del forno non utilizzare prodotti a...

Page 67: ...ortello aperto 1 Per visualizzare l ora in Quindi premere 20s Formato 24 ore Formato 12 ore Una volta Due volte 2 Ruotare la MANOPOLA TIMER per impostare l ora 3 Premere il tasto START AVVIO 4 Ruotare...

Page 68: ...o 4 volte il segnale acustico di fine ciclo e il riscaldamento si interrompe La luce del forno si spegne Per 1 minuto la ventola di raffreddamento continua a funzionare per raffreddare le parti intern...

Page 69: ...ti vengono visualizzati immediatamente sul display Il forno progettato per non funzionare quando il livello di potenza impostato sulla modalit 0 tra la modalit di riscaldamento e la modalit di scongel...

Page 70: ...are immediatamente il riscaldamento possibile aumentare il tempo di cottura premendo il tasto 20s durante un ciclo di riscaldamento Il tempo di cottura aumenta di 20 secondi ad ogni pressione del tast...

Page 71: ...ssivo senza carico o di un carico ridotto oppure a causa di alcuni materiali di blocco attorno al filtro dell aria o allo scarico dell aria sul retro del forno Aprire lo sportello del forno e verifica...

Page 72: ...accano alle pareti del forno o tra la guarnizione e la superficie dello sportello assorbiranno le microonde con il rischio di formazione di archi elettrici o scintille 3 Pulire l esterno del forno con...

Page 73: ...r impedire che determinate aree vengano cotte eccessivamente Se il foglio di alluminio troppo vicino alla parete del forno o se la quantit usata troppo elevata pu innescare un arco elettrico Porcellan...

Page 74: ...cessario Carta oleata o resistente ai grassi Pu essere utilizzata per trattenere l umidit ed evitare gli schizzi Uso consigliato Usare con attenzione Non sicura Guida alla cottura F Congelato C Surgel...

Page 75: ...2 15 1 min Fagioli cotti 500 g Coprire e mescolare a met cottura ALTO 2 00 2 10 2 min Fagioli cotti 250 g Coprire e mescolare a met cottura ALTO 1 00 1 05 2 min Ricetta Metodo Livelli di potenza Tempo...

Page 76: ...HE Per cucinare 500 g Fagioli freschi affettati Aggiungere 60 ml 4 cucchiai da tavola di acqua e coprire ALTO 3 00 3 15 2 min Broccoli divisi in fiori Aggiungere 60 ml 4 cucchiai da tavola di acqua e...

Page 77: ...le superfici esterne con un panno soffice e con una soluzione di acqua calda e sapone Sciacquare e asciugare 2 Rimuovere schizzi o macchie dalle superfici interne o dall anello girevole con un panno i...

Page 78: ...J26A6091 MJ26A6051 Sorgente di alimentazione 230 240 V 50 Hz Consumo elettrico Microwave Microonde 13 A 12 7 A Potenza emessa 1850 W IEC 705 240 V 1850 W 230 V 1780 W 1500W IEC 705 240 V 1500 W 230 V...

Page 79: ...19 ITALIANO PROMEMORIA PROMEMORIA...

Page 80: ...ng com nl support NORWAY 21629099 www samsung com no support PORTUGAL 808 207 267 www samsung com pt support SPAIN 91 175 00 15 www samsung com es support SWEDEN 0771 726 786 www samsung com se suppor...

Page 81: ...de de possibilit s Nous vous remercions d avoir choisi ce produit Samsung Veuillez noter que la garantie Samsung n inclut pas les d placements du service apr s vente pour expliquer le fonctionnement d...

Page 82: ...st uniquement destin un usage domestique Ne faites jamais chauffer de textiles ou de coussins remplis de grains car cela pourrait entra ner des d parts de feu Le fabricant ne peut tre tenu responsable...

Page 83: ...s d usinage par lectro rosion et de soudure l arc Les quipements de classe B sont des quipements adapt s l usage dans les tablissements domestiques et ceux directement reli s un r seau d alimentation...

Page 84: ...vec l appareil Le nettoyage et l entretien de l appareil ne doivent pas tre effectu s par un enfant sans surveillance AVERTISSEMENT si la porte ou les joints de la porte sont endommag s le four ne doi...

Page 85: ...ou en plastique Raison il peut y avoir des arcs lectriques ou des tincelles ce qui pourrait endommager votre four Lorsque vous faites r chauffer des aliments dans des r cipients en plastique ou en pap...

Page 86: ...ons de s curit Nous vous recommandons de laisser en permanence un verre d eau l int rieur du four ainsi si vous mettez le four micro ondes en marche par inadvertance alors qu il est vide l eau absorbe...

Page 87: ...heures Une fois Deux fois 2 Tournez le BOUTON DE R GLAGE DE LA MINUTERIE pour r gler l heure 3 Appuyez sur le bouton START 4 Tournez le BOUTON DE R GLAGE DE LA MINUTERIE pour r gler les minutes 5 Qua...

Page 88: ...s et le r chauffage s arr te La lumi re du four s teint Le ventilateur continue de fonctionner pendant 1 minute afin de refroidir les pi ces int rieures Pendant ce temps le ventilateur ne s arr te pas...

Page 89: ...le temps de r chauffage Les valeurs modifi es s affichent rapidement l cran Le four est con u pour ne pas fonctionner lorsque le niveau de puissance est r gl sur le mode 0 entre le mode de r chauffag...

Page 90: ...nger le temps de cuisson en ayant sur le bouton 20s au cours du cycle de r chauffage Le temps de cuisson s allonge de 20 secondes en 20 secondes chaque fois que vous appuyez sur le bouton 20s Mais il...

Page 91: ...ur est trop chaud cause d un fonctionnement excessif vide ou presque ou cause de mat riaux bloquants autour du filtre air ou de l vacuation d air l arri re du four Ouvrez la porte du four et v rifiez...

Page 92: ...la surface de la porte ils absorberont des micro ondes ce qui peut engendrer des arcs lectriques ou des tincelles 3 Nettoyez l ext rieur du four avec de l eau et du savon puis essuyez le l aide d un...

Page 93: ...petite quantit afin d emp cher toute surcuisson de certaines zones peu charnues Des arcs lectriques peuvent se former si l aluminium est plac trop pr s des parois du four ou si vous en avez utilis en...

Page 94: ...tiquement Perforez en la surface avec une fourchette si n cessaire Papier paraffin ou sulfuris Peut tre utilis afin de retenir l humidit et d emp cher les projections Recommand utiliser avec pr cautio...

Page 95: ...2 00 2 15 1 min Haricots blancs la sauce tomate 500 g Couvrez et remuez la moiti du temps LEV 2 00 2 10 2 min Haricots blancs la sauce tomate 250 g Couvrez et remuez la moiti du temps LEV 1 00 1 05 2...

Page 96: ...3 00 3 15 1 min Recette M thode Niveau de puissance Temps Temps de repos 1850W 1500W L GUMES FRAIS cuire 500 g Haricots verts coup s 60 ml 4 cuill res caf d eau au dessus LEV 3 00 3 15 2 min Brocolis...

Page 97: ...vez toutes les claboussures ou taches sur les surfaces int rieures ou sur l anneau du plateau tournant l aide d un chiffon imbib de savon Rincez et s chez 3 Pour ramollir les particules alimentaires d...

Page 98: ...91 MJ26A6051 Alimentation 230 240 V 50 Hz Consommation d nergie Micro ondes 13 A 12 7 A Puissance de sortie 1850 W IEC 705 240 V 1850 W 230 V 1780 W 1500W IEC 705 240 V 1500 W 230 V 1450 W Fr quence d...

Page 99: ...19 FRAN AIS NOTES NOTES...

Page 100: ...samsung com nl support NORWAY 21629099 www samsung com no support PORTUGAL 808 207 267 www samsung com pt support SPAIN 91 175 00 15 www samsung com es support SWEDEN 0771 726 786 www samsung com se...

Page 101: ...51 1500 WATT imagine the possibilities Bedankt voor de aankoop van dit Samsung product Houd er rekening mee dat servicebezoeken voor uitleg over het product herstel van onjuiste installatie of het uit...

Page 102: ...en van voedsel De oven is alleen bedoeld voor huishoudelijk gebruik Verhit geen textiel of kussens die met korrels zijn gevuld en brandwonden en brand kunnen veroorzaken De fabrikant is niet verantwoo...

Page 103: ...apparatuur die geschikt is voor gebruik in huishoudelijke omgevingen en in omgevingen die rechtstreeks zijn aangesloten op het stroomnet met laag voltage dat geleverd wordt aan gebouwen die voor huis...

Page 104: ...erhoudswerkzaamheden uitvoeren WAARSCHUWING Als de deur of de afsluitstrippen zijn beschadigd mag u de oven niet gebruiken voordat deze is gerepareerd door een gekwalificeerde monteur WAARSCHUWING Ond...

Page 105: ...rische vonken ontstaan waardoor de magnetron beschadigd kan worden Vanwege het risico op ontbranding raden wij u aan de oven in het oog te houden wanneer u voedsel verwarmt dat in plastic of papier is...

Page 106: ...in de magnetron te laten staan om de microgolven te absorberen als deze per ongeluk wordt ingeschakeld Gebruik geen grove schuurmiddelen of scherpe metalen schrapers om het glas van de deur te reinig...

Page 107: ...geopend 1 Voor weergave van het display in de Druk dan op 20s 24 uurs notatie 12 uurs notatie Eenmaal Tweemaal 2 Draai de DRAAIKNOP TIMER om het uur in te stellen 3 Druk op de toets START 4 Draai de D...

Page 108: ...ind van de cyclus 4 maal en alle verwarming zal stoppen De magnetronlamp gaat uit De koelventilator blijft 1 min lang werken om de binnenste delen af te koelen In deze tijd zal de ventilator niet stop...

Page 109: ...erwarmingstijd wel wijzigen Gewijzigde waarden worden direct op het display aangegeven De magnetron is zo ontworpen dat hij niet werkt als het vermogen op de stand 0 tussen de verwarmingsstand en de o...

Page 110: ...de kooktijd verlengen door op de 20s toets te drukken terwijl u met een verwarmingscyclus bezig bent De kooktijd wordt bij elke keer drukken op de 20s toets met 20 seconden verlengd De maximaal toeges...

Page 111: ...k zonder of met een kleine hoeveelheid of doordat materialen het luchtfilter of de luchtuitlaat aan de achterkant van de magnetron blokkeren Open de deur en controleer of 1 de magnetron zonder of met...

Page 112: ...sten of geknoeide vloeistof tegen de wanden van de magnetron of tussen de deurafdichting en het deuroppervlak kleven zullen deze microgolven absorberen wat tot vonkoverslag kan leiden 3 Reinig de buit...

Page 113: ...okmateriaal Magnetronbestendig Opmerkingen Aluminiumfolie Kan worden gebruikt in kleine hoeveelheden om te voorkomen dat bepaalde delen van het voedsel te gaar worden Als te veel folie wordt gebruikt...

Page 114: ...k gaatjes aanbrengen Vetvrij papier Kan worden gebruikt om vocht vast te houden en spatten te voorkomen Aanbevolen Wees voorzichtig Onveilig Richtlijnen voor bereiding B Bevroren G Gekoeld Gerecht Met...

Page 115: ...1 min Witte bonen 500 g Afdekken en halverwege omroeren HOOG 2 00 2 10 2 min Witte bonen 250 g Afdekken en halverwege omroeren HOOG 1 00 1 05 2 min Gerecht Methode Vermogensniveau Tijd Nagaartijd 1850...

Page 116: ...Afgedekt HOOG 3 00 3 15 1 min Gerecht Methode Vermogensniveau Tijd Nagaartijd 1850W 1500W VERSE GROENTEN Koken van 500 g Bonen groen gesneden Bedek met 60 ml 4 eetl water HOOG 3 00 3 15 2 min Broccoli...

Page 117: ...te doek en warm water met zeep Afspoelen en afdrogen 2 Verwijder alle spetters of vlekken op de binnenoppervlakken of de loopring met een doek met zeep Afspoelen en afdrogen 3 Plaats een kop met verdu...

Page 118: ...eving worden gewijzigd Model MJ26A6091 MJ26A6051 Stroombron 230 240 V 50 Hz Energieverbruik Magnetron 13 A 12 7 A Uitgangsvermogen 1850 W IEC 705 240 V 1850 W 230 V 1780 W 1500 W IEC 705 240 V 1500 W...

Page 119: ...19 NEDERLANDS MEMO MEMO...

Page 120: ...sung com nl support NORWAY 21629099 www samsung com no support PORTUGAL 808 207 267 www samsung com pt support SPAIN 91 175 00 15 www samsung com es support SWEDEN 0771 726 786 www samsung com se supp...

Page 121: ...zygotowywania potraw MJ26A6091 1850 W MJ26A6051 1500 W wyobra sobie mo liwo ci Dzi kujemy za zakup produktu firmy Samsung Gwarancja oferowana przez firm Samsung NIE obejmuje wezwa serwisowych dotycz c...

Page 122: ...czone wy cznie do u ytku domowego Nie nale y podgrzewa adnego rodzaju tkaniny ani poduszek wype nionych ziarnem poniewa mo e to spowodowa poparzenia i po ar Producent nie ponosi odpowiedzialno ci za s...

Page 123: ...romagnetycznego do obr bki materia u obr bki typu EDM i spawania ukowego Jako urz dzenie klasy B kuchenka nadaje si do u ytku w gospodarstwach domowych i lokalach pod czonych bezpo rednio do sieci nis...

Page 124: ...ni naprawia urz dzenia OSTRZE ENIE Nie nale y u ywa kuchenki je li drzwiczki lub ich uszczelnienie s uszkodzone usterki musz najpierw zosta naprawione przez wykwalifikowan osob OSTRZE ENIE Wykonywanie...

Page 125: ...go i uszkodzenia kuchenki Podgrzewanie ywno ci w plastikowych lub papierowych pojemnikach powinno odbywa si pod cis ym nadzorem u ytkownika ze wzgl du na ryzyko zap onu Nie nale y u ywa kuchenki mikro...

Page 126: ...oda poch onie mikrofale w razie przypadkowego w czenia kuchenki Do czyszczenia szklanych drzwiczek kuchenki nie wolno u ywa rodk w zawieraj cych sk adniki cierne lub ostrych szczotek metalowych poniew...

Page 127: ...minutach 1 Aby wy wietli godzin w Nast pnie naci nij przycisk 20s 24 godzinnym 12 godzinnym Jednokrotnie Dwukrotnie 2 Aby ustawi godzin obracaj POKR T O ZEGARA 3 Naci nij przycisk START 4 Aby ustawi...

Page 128: ...cyklu i podgrzewanie zatrzymuje si Lampka w kuchence ga nie Aby sch odzi elementy wewn trzne wentylator ch odz cy dzia a jeszcze przez 1 min W tym czasie wentylator nie wy czy si nawet po otwarciu dr...

Page 129: ...podgrzewania mo na zmienia Zmienione warto ci pojawiaj si niezw ocznie na wy wietlaczu Kuchenka nie mo e dzia a przy poziomie mocy ustawionym na 0 pomi dzy trybem podgrzewania a trybem rozmra ania Po...

Page 130: ...liwia natychmiastowe rozpocz cie podgrzewania Podczas cyklu podgrzewania czas mo na zwi ksza naciskaj c przycisk 20s Ka de naci ni cie przycisku 20s wyd u a czas gotowania o 20 sekund Czas jednak nie...

Page 131: ...u ytkowania bez obci enia lub z ma ym obci eniem albo z powodu obecno ci materia w blokuj cych otoczenie filtra powietrza lub wylot powietrza z ty u kuchenki Otw rz drzwiczki kuchenki i sprawd czy 1 k...

Page 132: ...resztki potraw lub rozlanych p yn w przylegaj do cianek kuchenki lub mi dzy uszczelkami a powierzchni drzwiczek b d one poch ania promieniowanie mikrofalowe i mog powodowa uki lub iskry elektryczne 3...

Page 133: ...e by u ywana w niewielkich ilo ciach w celu zabezpieczenia jedzenia przed przypaleniem Je li folia znajduje si zbyt blisko cianki kuchenki lub jest jej zbyt du o mo e wyst pi zjawisko uku elektryczne...

Page 134: ...zamkni te W razie potrzeby nale y je przedziurawi widelcem Papier woskowany lub t uszczoodporny Mo e by u ywany do zatrzymywania wilgoci i zapobiegania rozpryskiwaniu si t uszczu Zalecane U ywa ostro...

Page 135: ...omieszaj WYSOKI 2 00 2 10 2 min Pieczona fasola 250 g Przykryj i po po owie czasu pomieszaj WYSOKI 1 00 1 05 2 min Przepis Metoda Poziom mocy Czas Czas oczekiwania po ugotowaniu 1850W 1500W DESERY Pod...

Page 136: ...yj WYSOKI 3 00 3 15 1 min Przepis Metoda Poziom mocy Czas Czas oczekiwania po ugotowaniu 1850W 1500W WIE E WARZYWA Gotowanie 500 g Zielona fasolka krojona Zalej 60 ml 4 y kami wody WYSOKI 3 00 3 15 2...

Page 137: ...hnie zewn trzne nale y czy ci mi kk ciereczk i ciep wod z myd em Wyp ucz i osusz 2 Usu wszelkie rozpryski i plamy z powierzchni wewn trznych i z pier cienia obrotowego za pomoc namydlonej ciereczki Wy...

Page 138: ...Model MJ26A6091 MJ26A6051 r d o zasilania 230 240 V 50 Hz Zu ycie energii Microwave Mikrofale 13 A 12 7 A Moc wyj ciowa 1850 W IEC 705 240 V 1850 W 230 V 1780 W 1500W IEC 705 240 V 1500 W 230 V 1450...

Page 139: ...19 POLSKI NOTATKI NOTATKI...

Page 140: ...ng com nl support NORWAY 21629099 www samsung com no support PORTUGAL 808 207 267 www samsung com pt support SPAIN 91 175 00 15 www samsung com es support SWEDEN 0771 726 786 www samsung com se suppor...

Reviews: